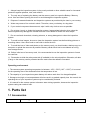
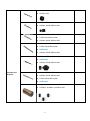
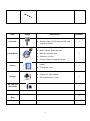
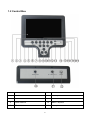
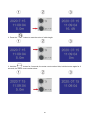
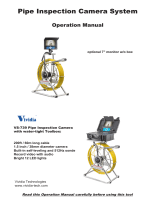
VIVaDIa vs-34080 is a versatile tool for visual inspection of hard-to-reach areas with its durable camera head, long cable, and bright LED lights. It's equipped with a 7-inch screen for real-time monitoring and recording, and allows you to capture both photos and videos to an SD card (up to 256 GB). The camera system is waterproof and comes with various accessories for different pipe diameters, making it suitable for a wide range of inspection tasks.
VIVaDIa vs-34080 is a versatile tool for visual inspection of hard-to-reach areas with its durable camera head, long cable, and bright LED lights. It's equipped with a 7-inch screen for real-time monitoring and recording, and allows you to capture both photos and videos to an SD card (up to 256 GB). The camera system is waterproof and comes with various accessories for different pipe diameters, making it suitable for a wide range of inspection tasks.


-
 1
1
-
 2
2
-
 3
3
-
 4
4
-
 5
5
-
 6
6
-
 7
7
-
 8
8
-
 9
9
-
 10
10
-
 11
11
-
 12
12
-
 13
13
-
 14
14
-
 15
15
-
 16
16
-
 17
17
-
 18
18
-
 19
19
-
 20
20
-
 21
21
-
 22
22
-
 23
23
-
 24
24
-
 25
25
-
 26
26
-
 27
27
-
 28
28
-
 29
29
-
 30
30


VIVaDIa vs-34080 is a versatile tool for visual inspection of hard-to-reach areas with its durable camera head, long cable, and bright LED lights. It's equipped with a 7-inch screen for real-time monitoring and recording, and allows you to capture both photos and videos to an SD card (up to 256 GB). The camera system is waterproof and comes with various accessories for different pipe diameters, making it suitable for a wide range of inspection tasks.
Ask a question and I''ll find the answer in the document
Finding information in a document is now easier with AI
Other documents
-
 Vividia VS-739 User manual
-
Omega HHB1900 Owner's manual
-
MAOTEWANG F9117WF User guide
-
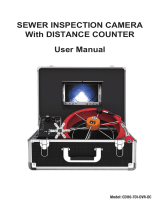 ANYSUN CD110-7D1-DVR-DC User manual
-
REED R9000-BALL User guide
-
General Gen-Eye Micro-Scope3 User manual
-
RIDGID micro CA-300 User manual
-
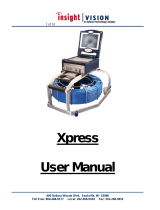 Insight Vision DVDXPRESS User manual
-
General Pipe Cleaners Gen-Eye Micro-Scope2 Operating Instructions Manual
-
 Sanyipace 41110000 User manual


