La Crosse Technology 616-1410 User guide
- Category
- Alarm clocks
- Type
- User guide
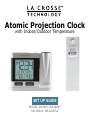
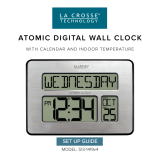
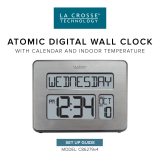
La Crosse Technology 616-1410 is a versatile device that combines accurate atomic timekeeping with comprehensive weather monitoring capabilities. Its atomic clock automatically synchronizes with the WWVB signal, ensuring precise timekeeping, while its outdoor sensor provides real-time temperature readings for both indoor and outdoor environments. The device features a clear and easy-to-read display, customizable settings, and a customizable display that allows you to choose between different information, including the time, date, and temperature.
La Crosse Technology 616-1410 is a versatile device that combines accurate atomic timekeeping with comprehensive weather monitoring capabilities. Its atomic clock automatically synchronizes with the WWVB signal, ensuring precise timekeeping, while its outdoor sensor provides real-time temperature readings for both indoor and outdoor environments. The device features a clear and easy-to-read display, customizable settings, and a customizable display that allows you to choose between different information, including the time, date, and temperature.


-
 1
1
-
 2
2
-
 3
3
-
 4
4
-
 5
5
-
 6
6
-
 7
7
-
 8
8
-
 9
9
-
 10
10


La Crosse Technology 616-1410 User guide
- Category
- Alarm clocks
- Type
- User guide
La Crosse Technology 616-1410 is a versatile device that combines accurate atomic timekeeping with comprehensive weather monitoring capabilities. Its atomic clock automatically synchronizes with the WWVB signal, ensuring precise timekeeping, while its outdoor sensor provides real-time temperature readings for both indoor and outdoor environments. The device features a clear and easy-to-read display, customizable settings, and a customizable display that allows you to choose between different information, including the time, date, and temperature.
Ask a question and I''ll find the answer in the document
Finding information in a document is now easier with AI
Related papers
-
 La Crosse Technology 513-1419V4 User manual
-
La Crosse Technology 616-12667 Installation guide
-
La Crosse Technology 513-1416 User manual
-
 La Crosse Technology C86279v4 User guide
-
 La Crosse Technology 616-41667 Installation guide
-
La Crosse Technology WS-9160UV3 User guide
-
La Crosse Technology C75709 User guide
-
La Crosse 616-146 User manual
-
-
La Crosse Technology 616-143 User manual


