BA
[02]
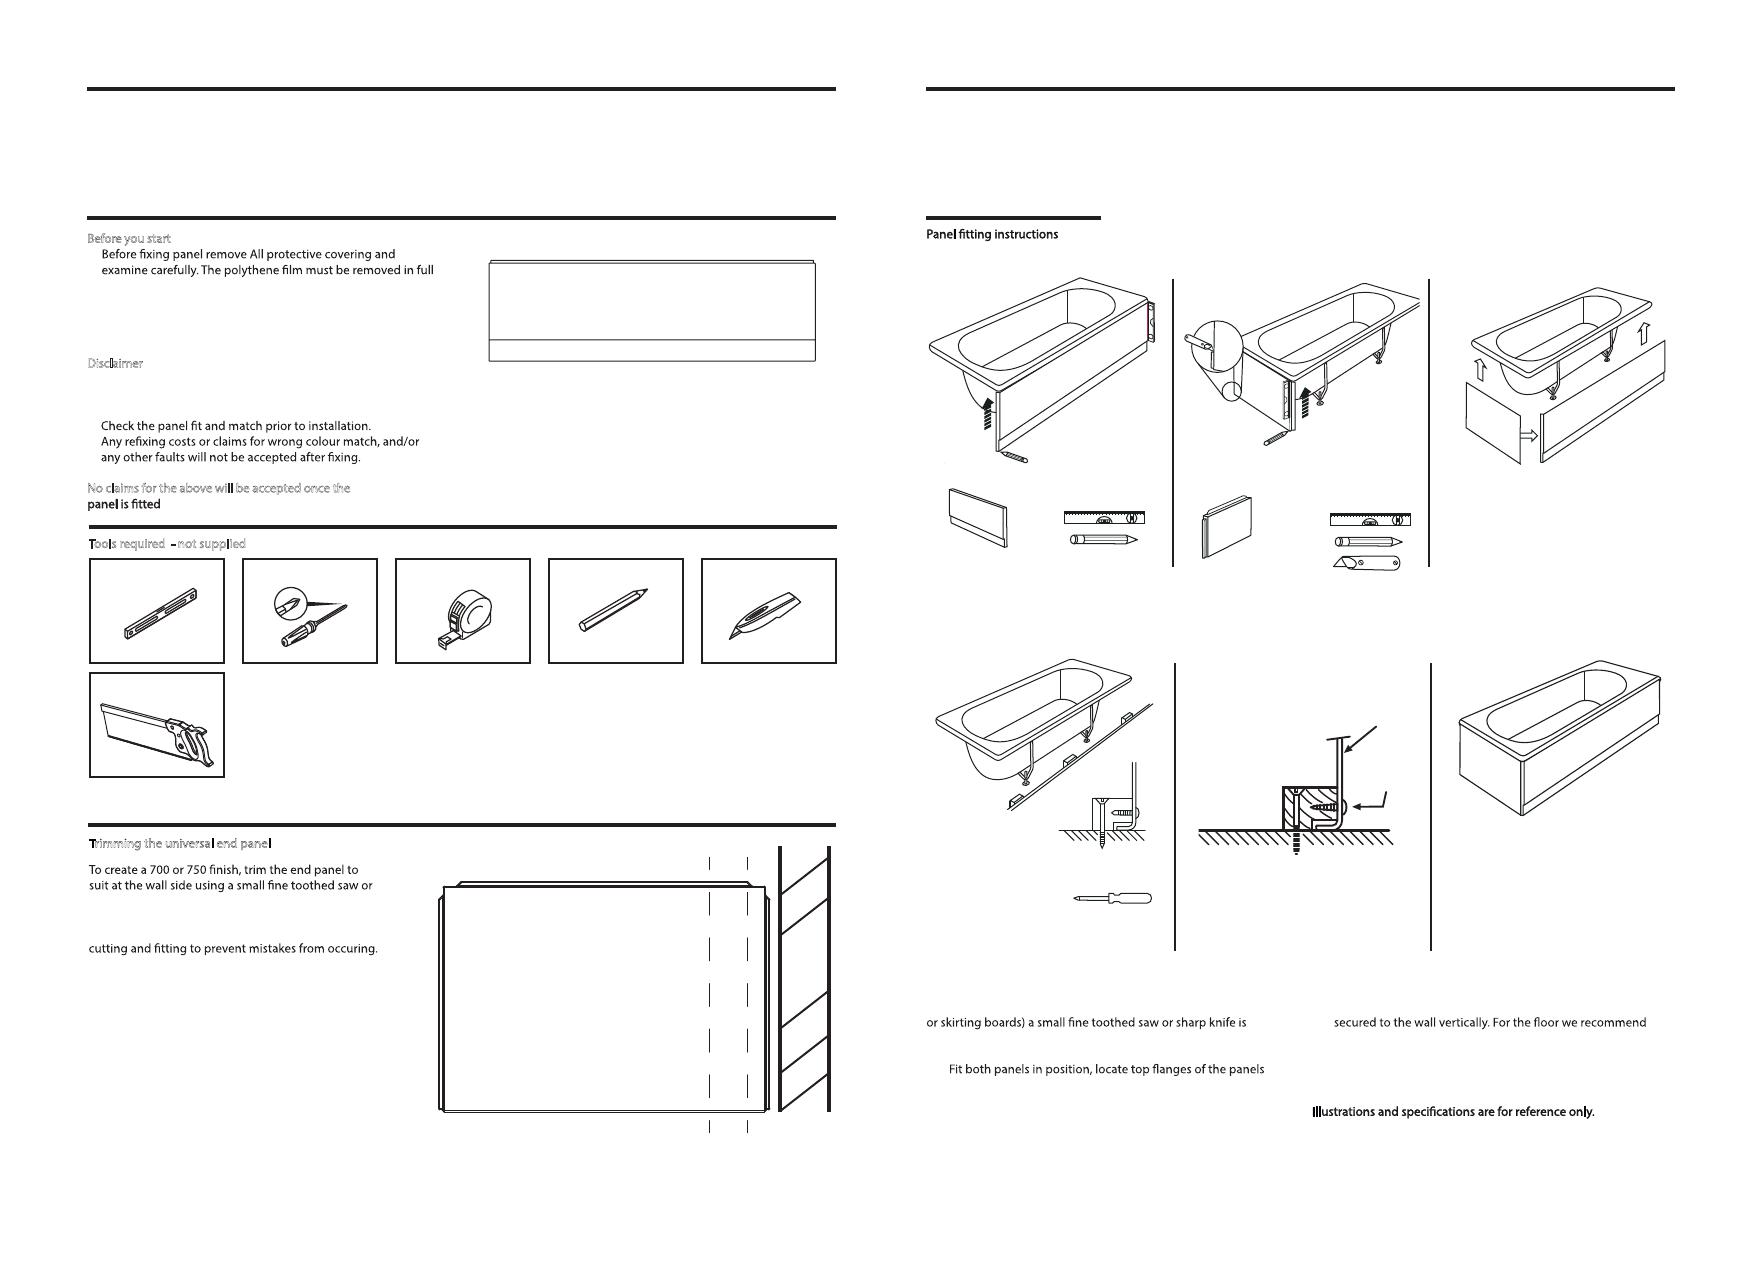
Before you start
–
and the panel checked for any visible damage.
– Unpack and check the product is complete and undamaged.
– Have the correct tools available.
Disclaimer
–
–
–
No claims for the above will be accepted once the
Fig. A
Bath Panel Fixing
Installation Instructions
02 03
You will also require a piece of timber and some
wooden rebated blocks
Spirit level Screwdriver Tape measure Pencil Utility knife
A
[01]
CD
Panel
Mirror
Screw
Wooden Battens
(not supplied)
Should the cutting of panels be necessary (due to water pipes
recommended.
A.
between bath frame and rim of bath.
B. Ensure that both panels are set vertical and that the end
panel is located behind the front panel at corner joint.
C. secure the panel to the wall use a piece of timber
some rebated blocks set equal distances apart.
D. Small mirror screws can be used to secure the panel against
the timber. Alternatively Velcro or Magnetic strips will secure
in a neat fashion.
Trim at wall side only
sharp knife.
It is recommended that sizes are checked prior to
Wall
700 750
Please note image shown opposite is for illustrative
purposes only.
Fine toothed saw
Prior to tting your panel, carefully remove all the
packaging and lm from the panel and examine the bath
for damage and suitability of colour match.
Tools required - not supplied
Trimming the universal end panel
To
68/2