Page is loading ...

Page 1 of 4
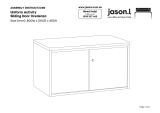
ASSEMBLY INSTRUCTIONS
Need help!
Call us on
1300 527 665
www.jasonl.com.au
Uniform Reception

Page 2 of 4
ASSEMBLY INSTRUCTIONS
Need help!
Call us on
1300 527 665
www.jasonl.com.au
Uniform Reception
Assemble side panel 2R & 2L into plinth
as shown in figure above.
Mount assembly STEP 1 onto front panel
as shown in figure above.
Mount assembly STEP 3 onto assembly
STEP 4 as shown in figure above.
Mount assembly STEP 4 onto top panel
as shown in figure above.
Assemble panel R, panel L & center panel
onto base panel as shown in figure above.
Side panel 2R
Side panel 2L
Panel R
Panel L
Center Panel
Plinth
Front panel
Top panel
Base panel
Step 1 Step 2 Step 3
Step 4 Step 5 Final assembly
Function of Klix Cam
Turn for locking
75° Min - 195° Max
Make sure the arrow is pointing
upwards before inserting into
the panel’s hole.
Function of Klix Cam
Turn for locking
75° Min - 195° Max
Make sure the arrow is pointing
upwards before inserting into
the panel’s hole.
Function of Klix Cam
Turn for locking
75° Min - 195° Max
Make sure the arrow is pointing
upwards before inserting into
the panel’s hole.
Function of Klix Cam
Turn for locking
75° Min - 195° Max
Make sure the arrow is pointing
upwards before inserting into
the panel’s hole.
UNCH1362
Counter Head

ASSEMBLY INSTRUCTIONS
Need help!
Call us on
1300 527 665
www.jasonl.com.au
Uniform Reception
Page 3 of 4
Allen
key
Front panel
Front panel
Double bolt
Hole bracket
Chipboard screw
Assembly of metal beam.
* Follow arrow direction.
Assembly of metal beam.
Set screw
Leveller
Assemble front panel into another front
panel as shown in figure above.
Assemble hole bracket onto front panels
as shown in figure above.
Assemble bracket into Side panel L &
assemble rectangular beam connector
A which is taken from hardware UNEXTBM
*Assembly of side panel R is mirror to
assembly side panel L
Step 1 Step 2 Step 3
Step 4 Step 5 Step 6
Allen
key
L Bracket
PHM Screw
Bracket
Rectangular Beam
Connector A
PHM Screw
D Nut
Side
Panel L
Function of Klix Cam
Turn for locking
75° Min - 195° Max
Make sure the arrow is pointing
upwards before inserting into
the panel’s hole.
UNEXTM
Extendable Beam
UNFPLR1095
Front Panel
UNWT107
Worktop
UNEXTM
Extendable Beam
UNSPLR7095
2x Side Panels
Assemble UNEXTBEM metal beam into
UNSPLR7095 side panels as above.
*Follow arrow direction
UNSPLR7095
UNEXTBEAM
UNSPLR7095

ASSEMBLY INSTRUCTIONS
Need help!
Call us on
1300 527 665
www.jasonl.com.au
Uniform Reception
Page 4 of 4
Mount assembly STEP 6 onto assembly 4
as shown in the figure above
PHM
Screw
Mount levellers into assembly STEP 6.
Final assembly of reception counter.
Mount rail into assembly STEP 7.
Rail
JCBC Screw
Step 7 Step 8 Step 9
Step 10 Step 11 Final Assembly
JCBC Screw
Leveller
UNWT107
UNCH1362
UNFPLR1095
UNSPLR7095
/