Crestron USB-NX2-REMOTE-1G Quick Start

Type
Quick Start

This manual is also suitable for

The Crestron® USB over Network Wall Plates with Routing
(USB-NX2-LOCAL-1G and USB-NX2-REMOTE-1G) deliver reliable,
high-speed USB signal extension and routing for USB 1.0, 1.1, and 2.0
devices throughout a home, business, or campus for distances up to
330ft (100m). Featuring Virtual Hub capabilities, five
USB-NX2-REMOTE-1G endpoints may simultaneously be connected to a
single USB-NX2-LOCAL-1G endpoint. Creating this virtual hub allows
numerous USB devices to control a single host device (such as a PC). The
USB signals are transported over the local network and managed through
a Crestron control system.
The USB-NX2-LOCAL-1G and USB-NX2-REMOTE-1G are functionally
similar. For simplicity within this guide, the term "USB endpoint" is used
except where noted. The USB endpoints are also compatible with the USB
over Ethernet Extenders with Routing (USB-EXT-DM-LOCAL and
USB-EXT-DM-REMOTE).
In the Box
1
USB-NX2-LOCAL-1G
1
or USB-NX2-REMOTE-1G
1
Additional Items
2 Screw, 6-32 x 1/4 in., Pan Head, SEMS (2007218)
1 Connector, 2-Pin (2003574)
1 Ferrite Bead, Cable Mount (2054945)
1. Refer to the USB-NX2-LOCAL-1G and USB-NX2-REMOTE-1G product pages for color
variations.
1
USB-NX2-LOCAL-1G/USB-NX2-REMOTE-1G
QuickStart
USB over Network Wall Plates with Routing
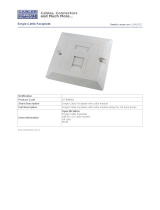
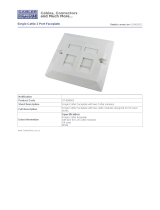
Install the USB Endpoint
The USB endpoint uses Power over Ethernet (PoE) and mounts in a North
American, unobstructed, 1-gang electrical box (not included). A minimum
mounting depth of 2in. (51mm) is required. The USB-NX2-LOCAL-1G also
receives power from the USB host port.
The USB-NX2-LOCAL-1G and USB-NX2-REMOTE-1G may be used
without a control system or DigitalMedia system to provide point-to-
point USB extension over a LAN or a dedicated CAT5e (or higher) cable.
NOTE: A ferrite bead is provided to reduce or prevent EMI
(electromagnetic interference). When using a power source other than
PoE, Crestron recommends installing this ferrite bead on the power
supply cable close to the device.
Connect the USB Endpoints
Connect the USB-NX2-LOCAL-1G to the USB-NX2-REMOTE-1G.
NOTE: Signal routing is not supported when the USB-NX2-LOCAL-1G
and USB-NX2-REMOTE-1G are used to provide point-to-point USB
extension or when PoE is not being used. In addition, a separate 24 V
0.75 A power supply is needed.
1. Feed the CAT5e (or better) shielded twisted-pair (STP) cable through
the opening on the top of the electrical box.
NOTES:
l To comply with the European Directive (CE), Crestron
recommends using high-quality, solid core CAT5e (or better)
shielded twisted pair (STP) cable.
l The CAT5e (or better) cable must have a straight-through
conductor configuration with no crossovers and must be
terminated with 8-conductor RJ45 connectors at both ends.
2. Connect one end of the CAT5e (or better) cable to the LINK port on the
USB-NX2-LOCAL-1G, and connect the other end to the LINK port on
the USB-NX2-REMOTE-1G. The maximum cable distance is 330ft
(100m).
CAUTION: Do not connect the USB-NX2-LOCAL-1G and
USB-NX2-REMOTE-1G to a USB-EXT-2-LOCAL-1G,
USB-EXT-2-REMOTE-1G, USB-EXT-2-LOCAL, or
USB-EXT-2-REMOTE extender.
The USB-EXT-2-LOCAL-1G, USB-EXT-2-REMOTE-1G,
USB-EXT-2-LOCAL, or USB-EXT-2-REMOTE are intended for use
as point-to-point USB extenders and must not be connected to an
Ethernet LAN or any other network device via the LINK port.
3. Using a USB 2.0A to B cable (not included), connect the USB B end to
the USB-NX2-LOCAL-1G host port ( ), and connect the USB A end
to a USB Type A port on the host device (USB 1.1 or 2.0 compatible).
2
USB-NX2-LOCAL-1G/USB-NX2-REMOTE-1G
QuickStart
USB over Network Wall Plates with Routing
*Connection to a 24 VDC power supply is not required when PoE is used to power the USB
extender or when the USB-NX2-LOCAL-1Gis connected to the Host device.
NOTE: The CONFIG jack on the USB endpoint is reserved for factory
use only.
Mount the USB Endpoint
1. Place the USB endpoint into the electrical box.
2. Use two included 6-32 x 1/4 in. pan-head mounting screws to attach
the USB endpoint to the electrical box.
3. Attach a faceplate (not included) to the USB endpoint.
3
USB-NX2-LOCAL-1G/USB-NX2-REMOTE-1G
QuickStart
USB over Network Wall Plates with Routing
Connect the USB Devices
1. Install any software on the host computer that is required to operate
the USB device(s). Refer to the USB device documentation for
installation instructions.
2. Using USB 2.0 cables (not supplied), connect the USB devices (USB 1.1
or 2.0 compatible) to the USB-NX2-REMOTE-1G. Up to four USB
devices may be connected.
3. Confirm that each USB device is properly installed on the host
computer and that it is detected by the operating system.
NOTES:
l The USB endpoint is engineered to deliver maximum
compatibility with the widest possible range of devices. Crestron
does not guarantee that all USB devices or hosts are compatible
with the USB endpoint.
l A web camera may not be used when five or more
USB-NX2-REMOTE-1G endpoints are paired.
l Video from two cameras connected to a USB-NX2-REMOTE-1G
may not be viewed on different applications simultaneously.
l The USB endpoint supports high-speed (480Mbps) USB devices;
however, DM 8G+® Ethernet links support speeds up to
100Mbps only. If higher bandwidth is required, ensure that the
USB endpoint is communicating via a gigabit Ethernet network.
Check the Installation
Check that the ACT, HOST, LINK, and PWR LEDs light on both the
USB-NX2-LOCAL-1G and the USB-NX2-REMOTE-1G. If the HOST or
LINK LEDs do not light, then the cabling between the USB endpoints and
the network may be installed incorrectly or may be defective.
The following table describes the behavior of the LEDs on the front panel
of the USBendpoint.
LED Color Description
ACT Flashing
amber
Data transmission is occurring between the
USB-NX2-LOCAL-1G and the
USB-NX2-REMOTE-1G.
HOST Solid green The host device is recognizing the USB endpoint.
LINK Solid green A valid link is established between the USB
endpoint.
Fast-flashing
green
The USB endpoint is in Pairing mode.
Slow-flashing
green
The USB endpoint is attempting to establish a
link.
PWR Blue The USB endpoint is receiving power.
Additionally, check to see whether USBendpoint system has been installed
correctly on the host computer. Refer to the below instructions.
For Windows Software:
1. Open Device Manager.
2. Expand the Universal Serial Bus controllers node.
3. Check to see if the extender system appears on the list of controllers.
If the extender system has been properly installed, it appears on the
list as a Generic USB Hub.
4
USB-NX2-LOCAL-1G/USB-NX2-REMOTE-1G
QuickStart
USB over Network Wall Plates with Routing
For macOS Software:
1. Open System Profiler.
2. In the left column under Hardware, select USB.
3. Check to see if the extender system appears in the USB Device Tree at
the top right of the System Profiler window. If the extender system
has been properly installed, it is listed as a Hub” under the USB High-
Speed Bus/USB Bus node.
If the USB endpoint system does not detect correctly or fails to detect,
refer to Troubleshoot the USB Endpoint.
Program the USB Endpoint
Program the USB endpoint using the USB-NX2 Module in the Crestron
Studi application or SIMPL Windows.
Pair the USB Endpoint (Optional)
Pairing the USB endpoint establishes a link between the
USB-NX2-LOCAL-1G and USB-NX2-REMOTE-1G. Manual pairing may be
performed when a USB-NX2-LOCAL-1G and a USB-NX2-REMOTE-1G
are directly connected to each other in a point-to-point configuration or
connected over the Network for multipoint connections. In a
point-to-point configuration, USB switching is not performed. In a
configuration in which USB switching is to be performed, SIMPL
programming automatically pairs the extenders.
Pair a USB-NX2-LOCAL-1G to a USB-NX2-REMOTE-1G.
1. Ensure that the USB-NX2-LOCAL-1G is directly connected to the
USB-NX2-REMOTE-1G.
2. On the USB-NX2-LOCAL-1G, press and hold the PAIR button for less
than 10 seconds. The LINK LED on the front panel of the endpoint
starts flashing green fast, indicating that the endpoint is in Pairing
mode.
NOTE:Press and hold the PAIR button a second time for less than
10 seconds to cancel Pairing mode.
3. Within 10 minutes of activating Pairing mode on the
USB-NX2-LOCAL-1G, press and hold the PAIR button on the
USB-NX2-REMOTE-1G for less than 10 seconds. The LINK LED on the
endpoint starts flashing green, indicating that the unit is in Pairing
mode.
NOTE:Press and hold the PAIR button a second time for less than
10 seconds to cancel Pairing mode.
4. Observe that the LINK LEDs on both endpoints may start flashing
slowly before turning solid green. Once the LINK LEDs are solid green,
a valid link is established between both endpoints.
NOTE: If more than 10 minutes pass and the endpoints are not yet
paired, the endpoints switch back to the regular mode of operation
and reestablish the previous links they had (if any).
Unpair a USB Endpoint
If pairing must be removed from an endpoint, press and hold the PAIR
button for more than 10 seconds.
5
USB-NX2-LOCAL-1G/USB-NX2-REMOTE-1G
QuickStart
USB over Network Wall Plates with Routing
Troubleshoot the USB Endpoint
The following table provides corrective actions for possible trouble situations. If further assistance is required, please contact a Crestron Customer
service representative.
Symptom Issue Action
The PWR LED on the
USB-NX2-LOCAL-1G is off.
The endpoint is not receiving power from the USB
port.
Ensure that the host device is connected to the USB-NX2-REMOTE-1G. If
the problem persists, connect the USB cable to another USB port on the
host device.
The PWR LED on the
USB-NX2-REMOTE-1G is off.
The endpoint is not receiving power from the PoE
connection or the optional AC power source.
Check the PoE connection or the optional power source for sufficient
supply.
The LINK LED is off. No connection exists between the
USB-NX2-LOCAL-1G and the
USB-NX2-REMOTE-1G.
Verify that the CAT5e (or better) cable connections between the
extenders.
The CAT5e (or better) cable is defective. Replace the cable.
The LINK LED is blinking fast. No connection exists between the
USB-NX2-LOCAL-1G and the
USB-NX2-REMOTE-1G.
Verify that the extenders are connected directly or are connected to active
network switches.
Network switches exist on different subnets. Ensure that network switches can communicate with each other and are
on the same subnet.
Network switch is blocking traffic from the
extenders.
Ensure that traffic is not blocked due to MAC address or traffic patterns. If
the problem persists, contact the network administrator.
The LINK LED is blinking slowly. The USB-NX2-LOCAL-1G and
USB-NX2-REMOTE-1G are paired with each other
but have not yet established a link.
If the LINK LED does not display solid green after a few minutes, contact
the network administrator to determine if any traffic is being blocked
between the endpoint.
The LINK LED on the
USB-NX2-LOCAL-1G is on, but
the Host LED is off.
One or more of the following conditions exist:
l The host device is not powered on.
l The USB-NX2-LOCAL-1G is not connected to
the computer.
l The host device is not recognizing the
USB-NX2-LOCAL-1G.
l The host device does not support USB hubs.
Disconnect and reconnect the devices and endpoints:
1. Disconnect all USB devices from the USB-NX2-REMOTE-1G.
2. Disconnect the USB-NX2-LOCAL-1G from the host device.
3. Disconnect the USB-NX2-REMOTE-1G from the AC power.
4. Reconnect the USB-NX2-LOCAL-1G to the host device.
5. Reconnect the USB-NX2-REMOTE-1G to the AC power.
6
USB-NX2-LOCAL-1G/USB-NX2-REMOTE-1G
QuickStart
USB over Network Wall Plates with Routing
Visit the Product Page
Scan the QR code to visit the product page.
USB-NX2-LOCAL-1G
www.crestron.com/model/6510562
USB-NX2-REMOTE-1G
www.crestron.com/model/6510564
Additional Information
Original Instructions
The U.S. English version of this document is the original instructions.
All other languages are a translation of the original instructions.
Crestron product development software is licensed to Crestron dealers and Crestron
Service Providers (CSPs) under a limited nonexclusive, nontransferable Software
Development Tools License Agreement. Crestron product operating system software is
licensed to Crestron dealers, CSPs, and end-users under a separate End-User License
Agreement. Both of these Agreements can be found on the Crestron website at
www.crestron.com/legal/software_license_agreement.
The product warranty can be found at www.crestron.com/warranty.
The specific patents that cover Crestron products are listed at
www.crestron.com/legal/patents.
Certain Crestron products contain open source software. For specific information, visit
www.crestron.com/opensource.
Crestron, the Crestron logo, DigitalMedia, and DM 8G+ are either trademarks or
registered trademarks of Crestron Electronics, Inc. in the United States and/or other
countries. macOS is either a trademark or registered trademark of Apple, Inc. in the
United States and/or other countries. Windows is either a trademark or registered
trademark of Microsoft Corporation in the United States and/or other countries. Other
trademarks, registered trademarks, and trade names may be used in this document
to refer to either the entities claiming the marks and names or their products. Crestron
disclaims any proprietary interest in the marks and names of others. Crestron is not
responsible for errors in typography or photography.
©2020 Crestron Electronics, Inc.
Doc ID 8374A
02/25/20
7
USB-NX2-LOCAL-1G/USB-NX2-REMOTE-1G
QuickStart
USB over Network Wall Plates with Routing
  • Page 1 1
  • Page 2 2
  • Page 3 3
  • Page 4 4
  • Page 5 5
  • Page 6 6
  • Page 7 7

Crestron USB-NX2-REMOTE-1G Quick Start

Type
Quick Start
This manual is also suitable for

Ask a question and I''ll find the answer in the document

Finding information in a document is now easier with AI