8
The machine displays the date and time, and if you
set up the Station ID it will add it to each fax you send.
1
Press Menu/Set.
2
Press 0.
3
Press 2.
4
Enter the last two digits of the year on the
dial pad, and then press Menu/Set.
(e.g. Enter 0, 7 for 2007.)
5
Enter the two digits for the month on the dial
pad, and then press Menu/Set.
(e.g. Enter 0, 3 for March)
6
Enter the two digits for the day on the dial
pad, and then press Menu/Set.
(e.g. Enter 0, 1.)
7
Enter the time in 24-hour format on the dial
pad, and then press Menu/Set.
(e.g. Enter 1, 5, 2, 5 for 3:25 P.M.)
8
Press Stop/Exit.
You should store your name and fax number to be
printed on all fax pages that you send.
1
Press Menu/Set.
2
Press 0.
3
Press 3.
4
Enter your fax number (up to 20 digits) on
the dial pad, and then press Menu/Set.
5
Enter your telephone number (up to 20
digits) on the dial pad, and then press
Menu/Set.
(If your telephone number and fax number
are the same, enter the same number
again.)
6
Use the dial pad to enter your name (up to
20 characters), and then press Menu/Set.
7
Press Stop/Exit.
6 Set the Date and Time
Year:2007
Month:03
Day:01
Time:15:25
If you make a mistake, press Stop/Exit to
start from Step
1
.
7 Set your Station ID
Fax:_
Tel:_
Name:_
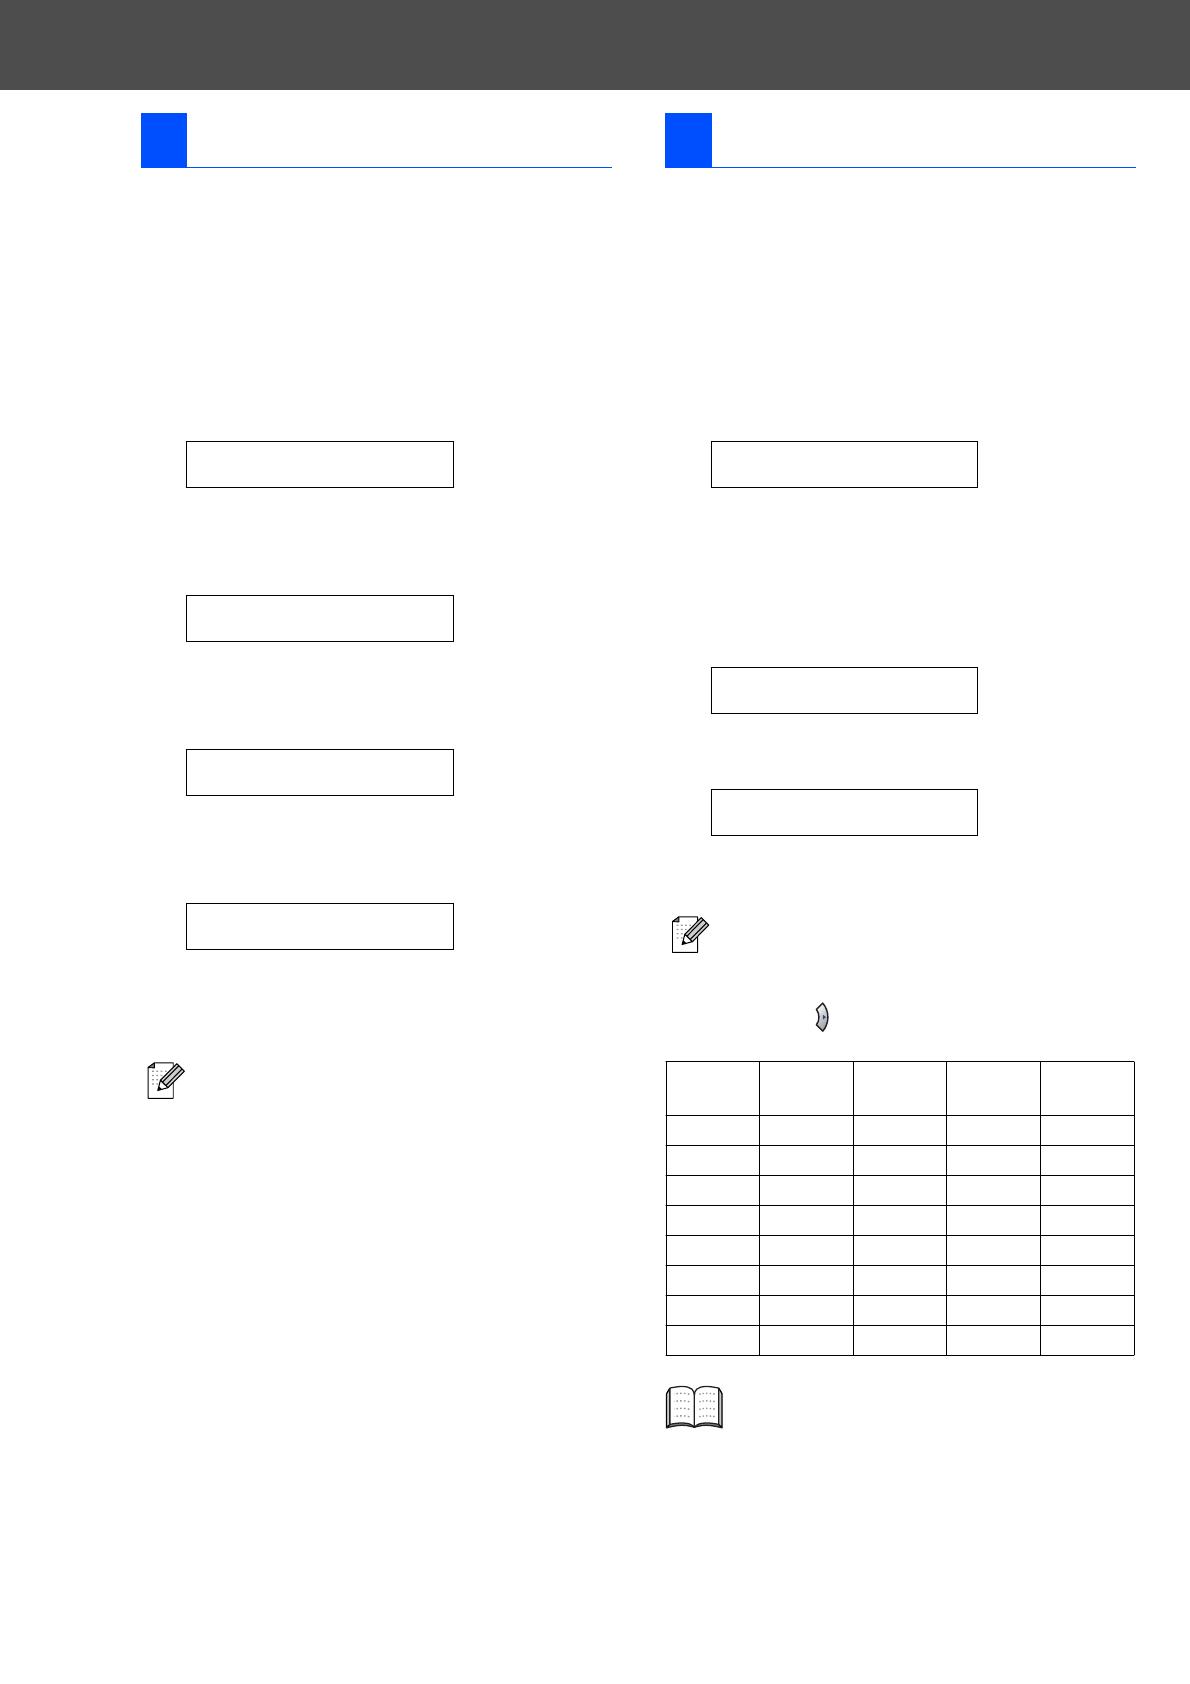
■ Refer to the following chart for entering
your name.
■ If you need to enter a character that is on
the same key as the previous character,
press to move the cursor to the right.
Press
key
One
time
Two
times
Three
times
Four
times
2 ABC2
3 DEF3
4 GH I 4
5 JKL5
6 MNO 6
7 PQRS
8 TUV8
9 WX Y Z
For more details, see “Entering Text” in
Appendix B of the User's Guide.
Setting Up the Machine


