Page is loading ...

M5STACK
ATOM-S3U
2022

CONTENTS
1. OUTLINE .......................................................................................................... 3
1.1. ESP32 S3 ................................................................................................................................................. 3
2. SPECIFICATIONS ............................................................................................ 5
3. QUICK START .................................................................................................. 6
3.1. ARDUINO IDE ............................................................................................................................ 6
3.2. BLUETOOTH SERIAL ................................................................................................................................................. 6
3.3. WIFI SCANNING ....................................................................................................................................................... 8

1.
OUTLINE
ATOM S3U is a very small and flexible IoT speech recognition development board,
using Espressif's `ESP32` main control chip, equipped with two low-power `Xtensa®
32-bit LX6` microprocessors, main frequency Up to `240MHz`. It has the characteristics
of compact size, strong performance and low power consumption. Integrated USB-A
interface, plug and play, easy to upload, download and debug the program. Integrated
`Wi-Fi` and `Bluetooth` modules, with built-in digital microphone SPM1423 (I2S), can
achieve clear audio recording, suitable for various IoT human-computer interaction,
voice input recognition scenarios (STT)
1.1.
ESP32 S3
•
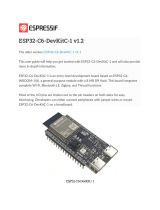
The ESP32-S3 is a low-power MCU system-on-a-chip (SoC) that supports 2.4GHz
Wi-Fi and Bluetooth® LE dual-mode wireless communication. The chip integrates
high-performance Xtensa® 32-bit LX7 dual-core processors, ultra-low power
coprocessors, Wi-Fi baseband, Bluetooth baseband, RF modules, and peripherals.

ESP32-S3 integrates all peripheral components seamlessly, including a crystal
oscillator, flash, filter capacitors and RF matching links in one single package.
Given that no other peripheral components are involved, module welding and
testing is not required either. As such, ESP32-S3 reduces the complexity of supply
chain and improves control efficiency. With its ultra-small size, robust performance
and low-energy consumption, ESP32-S3 is well suited for any space-limited or
battery-operated applications, such as wearable electronics, medical equipment,
sensors and other IoT products.

2.
SPECIFICATIONS
Resources
Parameter
ESP32-S3
Dual-core 240MHz, supporting 2.4ghz Wi-
Fi and
low-power Bluetooth dual-
mode wireless
communication
Input voltage 5V @ 500mA
button Programmable buttons x 1
Programmable RGB
LED WS2812 x 1
Antenna 2.4G 3D Antenna
Operating
temperature 32°F to 104°F ( 0°C to 40°C )

3.
QUICK START
3.1.
ARDUINO IDE
Visit Arduino's official website(https://www.arduino.cc/en/Main/Software),Select the installation
package for your own operating system to download.
>1.Open up Arduino IDE, navigate to `File`->`Peferences`->`Settings`
>2.Copy the following M5Stack Boards Manager url to `Additional Boards Manager URLs:`
https://raw.githubusercontent.com/espressif/arduino-esp32/gh-
pages/package_esp32_dev_index.json
>3.Navigate to `Tools`->`Board:`->`Boards Manager...`
>4.Search `ESP32` in the pop-up window, find it and click `Install`
>5.select `Tools`->`Board:`->`ESP32-Arduino-ESP32 DEV Module
>6Please install FTDI driver before use: https://docs.m5stack.com/en/download
3.2.
BLUETOOTH SERIAL
Open the Arduino IDE and open the example program
`File`->`Examples`->`BluetoothSerial`->`SerialToSerialBT`. Connect the device to the computer
and select the corresponding port to burn. After completion, the device will automatically run
Bluetooth, and the device name is `ESP32test`. At this time, use the Bluetooth serial port sending
tool on the PC to realize the transparent transmission of Bluetooth serial data.

#include "BluetoothSerial.h"
#if !defined(CONFIG_BT_ENABLED) || !defined(CONFIG_BLUEDROID_ENABLED)
#error Bluetooth is not enabled! Please run `make menuconfig` to and en
able it
#endif
BluetoothSerial SerialBT;
void setup() {
Serial.begin(115200);

3.3.
WIFI SCANNING
Open the Arduino IDE and open the example program `File`->`Examples`->`WiFi`->`WiFiScan`.
Connect the device to the computer and select the corresponding port to burn. After
completion, the device will automatically run the WiFi scan, and the current WiFi scan result can
be obtained through the serial port monitor that comes with the Arduino.
SerialBT.begin("ESP32test"); //Bluetooth device name
Serial.println("The device started, now you can pair it with bluetoot
h!");
}
void loop() {
if (Serial.available())
{ SerialBT.write(Serial.read());
}
if (SerialBT.available())
{ Serial.write(SerialBT.read());
}
delay(20);
}

#include "WiFi.h"
void setup()
{
Serial.begin(115200);
// Set WiFi to station mode and disconnect from an AP if it was pre
viously connected
WiFi.mode(WIFI_STA);
WiFi.disconnect();
delay(100);
Serial.println("Setup done");
}
void loop()
{
Serial.println("scan start");
// WiFi.scanNetworks will return the number of networks found
int n = WiFi.scanNetworks();
Serial.println("scan done");
if (n == 0) {
Serial.println("no networks found");
} else {
Serial.print(n);
Serial.println(" networks found");
for (int i = 0; i < n; ++i) {
// Print SSID and RSSI for each network found
Serial.print(i + 1);
Serial.print(": ");
Serial.print(WiFi.SSID(i));
Serial.print(" (");
Serial.print(WiFi.RSSI(i));
Serial.print(")");
Serial.println((WiFi.encryptionType(i) == WIFI_AUTH_OPEN)?"
":"*");
}
}
delay(10);
Serial.println("");
// Wait a bit before scanning again
delay(5000);
}

This device complies with part 15 of the FCC Rules. Operation is subject
to the following two conditions:
Any Changes or modifications not expressly approved by the party responsible
for compliance could void the user's authority to operate the equipment.
Note: This equipment has been tested and found to comply with the limits for a
Class B digital device, pursuant to part 15 of the FCC Rules. These limits are
designed to provide reasonable protection against harmful interference in a
residential installation. This equipment generates uses and can radiate radio
frequency energy and, if not installed and used in accordance with the instructions,
may cause harmful interference to radio communications. However, there is no
guarantee that interference will not occur in a particular installation. If this equipment
does cause harmful interference to radio or television reception, which can be
determined by turning the equipment off and on, the user is encouraged to try to
correct the interference by one or more of the following measures:
This equipment complies with FCC radiation exposure limits set forth for an
uncontrolled environment.
This equipment should be installed and operated with minimum distance 20cm
etween the radiator & your body.
(1) This device may not cause harmful interference, and (2) this device
must accept any interference received, including interference that may cause
undesired operation.
-Reorient or relocate the receiving antenna.
-Increase the separation between the equipment and receiver.
-Connect the equipment into an outlet on a circuit different from that to
which the receiver is connected.
-Consult the dealer or an experienced radio/TV technician for help.
/