Fluke 1730 Energy Logger Auxiliary Input Cable User manual

Category
Measuring, testing & control
Type
User manual
July 2014
© 2014 Fluke Corporation. All rights reserved. Specifications are subject to change without notice.
All product names are trademarks of their respective companies.
1730
Energy Analyzer
Calibration Manual
LIMITED WARRANTY AND LIMITATION OF LIABILITY
Each Fluke product is warranted to be free from defects in material and workmanship under normal use and service. The
warranty period is two years and begins on the date of shipment. Parts, product repairs, and services are warranted for 90
days. This warranty extends only to the original buyer or end-user customer of a Fluke authorized reseller, and does not
apply to fuses, disposable batteries, or to any product which, in Fluke's opinion, has been misused, altered, neglected,
contaminated, or damaged by accident or abnormal conditions of operation or handling. Fluke warrants that software will
operate substantially in accordance with its functional specifications for 90 days and that it has been properly recorded on
non-defective media. Fluke does not warrant that software will be error free or operate without interruption.
Fluke authorized resellers shall extend this warranty on new and unused products to end-user customers only but have no
authority to extend a greater or different warranty on behalf of Fluke. Warranty support is available only if product is
purchased through a Fluke authorized sales outlet or Buyer has paid the applicable international price. Fluke reserves the
right to invoice Buyer for importation costs of repair/replacement parts when product purchased in one country is
submitted for repair in another country.
Fluke's warranty obligation is limited, at Fluke's option, to refund of the purchase price, free of charge repair, or
replacement of a defective product which is returned to a Fluke authorized service center within the warranty period.
To obtain warranty service, contact your nearest Fluke authorized service center to obtain return authorization
information, then send the product to that service center, with a description of the difficulty, postage and insurance prepaid
(FOB Destination). Fluke assumes no risk for damage in transit. Following warranty repair, the product will be returned to
Buyer, transportation prepaid (FOB Destination). If Fluke determines that failure was caused by neglect, misuse,
contamination, alteration, accident, or abnormal condition of operation or handling, including overvoltage failures caused
by use outside the product’s specified rating, or normal wear and tear of mechanical components, Fluke will provide an
estimate of repair costs and obtain authorization before commencing the work. Following repair, the product will be
returned to the Buyer transportation prepaid and the Buyer will be billed for the repair and return transportation charges
(FOB Shipping Point).
THIS WARRANTY IS BUYER'S SOLE AND EXCLUSIVE REMEDY AND IS IN LIEU OF ALL OTHER WARRANTIES,
EXPRESS OR IMPLIED, INCLUDING BUT NOT LIMITED TO ANY IMPLIED WARRANTY OF MERCHANTABILITY OR
FITNESS FOR A PARTICULAR PURPOSE. FLUKE SHALL NOT BE LIABLE FOR ANY SPECIAL, INDIRECT,
INCIDENTAL OR CONSEQUENTIAL DAMAGES OR LOSSES, INCLUDING LOSS OF DATA, ARISING FROM ANY
CAUSE OR THEORY.
Since some countries or states do not allow limitation of the term of an implied warranty, or exclusion or limitation of
incidental or consequential damages, the limitations and exclusions of this warranty may not apply to every buyer. If any
provision of this Warranty is held invalid or unenforceable by a court or other decision-maker of competent jurisdiction,
such holding will not affect the validity or enforceability of any other provision.
Fluke Corporation
P.O. Box 9090
Everett, WA 98206-9090
U.S.A.
Fluke Europe B.V.
P.O. Box 1186
5602 BD Eindhoven
The Netherlands
11/99
To register your product online, visit register.fluke.com.
i
Table of Contents
Title Page
Introduction ............................................................................................ 1
How to Contact Fluke ............................................................................ 1
Safety Information ................................................................................. 2
Specifications ........................................................................................ 4
General Specifications ....................................................................... 4
Environmental Specifications ............................................................ 4
Electrical Specifications ..................................................................... 4
Accuracy at Reference Conditions .................................................... 6
Maintenance .......................................................................................... 8
How to Clean ..................................................................................... 8
Battery Replacement ......................................................................... 8
Replacement Parts ............................................................................ 9
Setup ..................................................................................................... 10
Required Equipment .......................................................................... 10
Equipment Assembly ......................................................................... 10
1730 Calibration Cable Assembly ................................................. 11
Verification Box Assembly ............................................................. 12
System Requirements ....................................................................... 13
USB Communication ......................................................................... 13
How to Use the Spreadsheet ............................................................. 14
Basic Instrument Setup for all Verifications ....................................... 18
Accuracy Verification Procedure ........................................................... 19
Voltage Measurement ....................................................................... 19
Current Measurement ........................................................................ 20
AUX Input Check ............................................................................... 21
Optional Flexi or Clamp Verification (Combined 1730 and Probe
Specifications) ................................................................................... 21
Calibration Adjust Procedure ................................................................. 23
1730
Calibration Manual
ii
iii
List of Tables
Table Title Page
1. Symbols ..................................................................................................... 3
2. Replacement Parts .................................................................................... 9
3. Required Equipment .................................................................................. 10
4. 1730 Calibration Cables, Voltage-to-Current-Input ................................... 11
5. 1730 Verification Box ................................................................................ 12
6. Dashboard in Excel Worksheet ................................................................. 15
7. Phasor in Excel Worksheet ....................................................................... 16
8. Calibration and Verification in Excel Worksheet ........................................ 17
9. Voltage Verification ................................................................................... 19
10. Flexi Current Probe Input Verification ....................................................... 20
11. AUX Input Verification ............................................................................... 21
12. Clamp Current Probe Input Verification ..................................................... 22
1730
Calibration Manual
iv
1
Introduction
 Warning
To avoid electric shock or personal injury, do not perform the
calibration verification tests or calibration procedures
described in this manual unless you are qualified to do so. The
information provided in this manual is for the use of qualified
personnel only.
The 1730 Energy Analyzer Calibration Manual provides all the information
necessary to perform basic maintenance and make calibration adjustments.
For complete operating instructions, refer to the 1730 Energy Analyzer Users
Manual on the USB drive provided with your product or at www.fluke.com.
How to Contact Fluke
To contact Fluke, use one of these telephone numbers:
USA: 1-800-760-4523
Canada: 1-800-36-FLUKE (1-800-363-5853)
Europe: +31 402-675-200
Japan: +81-3-6714-3114
Singapore: +65-6799-5566
Anywhere in the world: +1-425-446-5500
Go to www.fluke.com to register your product, download manuals, and find more
information.
To view, print, or download the latest manual supplement, visit
http://us.fluke.com/usen/support/manuals.
1730
Calibration Manual
2
Safety Information
A Warning identifies hazardous conditions and procedures that are dangerous to
the user. A Caution identifies conditions and procedures that can cause damage
to the Product or the equipment under test.
 Warning
To prevent possible electrical shock, fire, or personal injury:
Read all safety information before you use the Product.
Use the Product only as specified, or the protection
supplied by the Product can be compromised.
Comply with local and national safety codes. Use personal
protective equipment (approved rubber gloves, face
protection, and flame-resistant clothes) to prevent shock
and arc blast injury where hazardous live conductors are
exposed.
Examine the case before you use the Product. Look for
cracks or missing plastic. Carefully look at the insulation
around the terminals.
Replace the mains power cord if the insulation is damaged
or if the insulation shows signs of wear.
Use Product-approved measurement category (CAT),
voltage, and amperage rated accessories (probes, test
leads, and adapters) for all measurements.
Do not use test leads if they are damaged. Examine the test
leads for damaged insulation and measure a known voltage.
Do not use the Product if it is damaged.
The battery door must be closed and locked before you
operate the Product.
Do not work alone.
Use this Product indoors only.
Do not use the Product around explosive gas, vapor, or in
damp or wet environments.
Use only the external mains power supply included with the
Product.
Do not exceed the Measurement Category (CAT) rating of
the lowest rated individual component of a Product, probe,
or accessory.
Keep fingers behind the finger guards on the probes.
Do not use a current measurement as an indication that a
circuit is safe to touch. A voltage measurement is necessary
to know if a circuit is hazardous.
Energy Analyzer
Safety Information
3
Do not touch voltages >30 V ac rms, 42 V ac peak, or 60 V
dc.
Do not apply more than the rated voltage, between the
terminals or between each terminal and earth ground.
Measure a known voltage first to make sure that the Product
operates correctly.
De-energize the circuit or wear personal protective
equipment in compliance with local requirements before
you apply or remove the flexible current probe.
Remove all probes, test leads, and accessories before the
battery door is opened.
Table 1 is a list of symbols used on the Product or in this manual.
Table 1. Symbols
Symbol Description
Risk of Danger. Important information. See manual.
Hazardous voltage
Conforms to relevant South Korean EMC standards
Battery
Conforms to relevant Australian EMC standards
Conforms to relevant North American Safety Standards
Conforms to European Union directives
Double Insulation
CAT II
Measurement Category II is applicable to test and measuring circuits connected
directly to utilization points (socket outlets and similar points) of the low-voltage
MAINS installation.
CAT III
Measurement Category III is applicable to test and measuring circuits connected to
the distribution part of the building’s low-voltage MAINS installation.
CAT IV
Measurement Category IV is applicable to test and measuring circuits connected at
the source of the building’s low-voltage MAINS installation.
This product contains a Lithium-ion battery. Do not mix with the solid waste stream.
Spent batteries should be disposed of by a qualified recycler or hazardous materials
handler per local regulations. Contact your authorized Fluke Service Center for
recycling information.
This product complies with the WEEE Directive (2002/96/EC) marking requirements.
The affixed label indicates that you must not discard this electrical/electronic product
in domestic household waste. Product Category: With reference to the equipment
types in the WEEE Directive Annex I, this product is classed as category 9
“Monitoring and Control Instrumentation” product. Do not dispose of this product as
unsorted municipal waste. Go to Fluke's website for recycling information.
1730
Calibration Manual
4
Specifications
General Specifications
Color LCD Display ................................................ 4.3-inch active matrix TFT, 480 pixels x 272 pixels, resistive touch
panel.
Power/Charging/LED Indicator
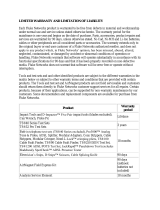
Warranty
1730 and Power Supply ...................................... 2 years (battery not included)
Accessories ........................................................ 1 year
Calibration Cycle ................................................... 2 years
Dimensions
1730 .................................................................... 19.8 cm x 16.7 cm x 5.5 cm (7.8 in x 6.6 in x 2.2 in)
Power Supply ...................................................... 13.0 cm x 13.0 cm x 4.5 cm (5.1 in x 5.1 in x 1.8 in)
1730 with power supply attached ....................... 19.8 cm x 16.7 cm x 9 cm (7.8 in x 6.6 in x 3.5 in)
Weight
1730 .................................................................... 1.1 kg (2.5 lb)
Power Supply ...................................................... 400 g (0.9 lb)
External Protection ............................................... Holster, Kensington lock
Environmental Specifications
Operating Temperature ........................................ 10 °C to 50 °C (14 °F to 122 °F)
Storage Temperature ............................................ 20 °C to 60 °C (4 °F to 140 °F), with battery: 20 °C to 50 °C (4 °F
to 122 °F)
Operating Humidity ............................................... <10 °C (<50 °F) non condensing
10 °C to 30 °C (50 °F to 86 °F) 95 %
30 °C to 40 °C (86 °F to 104 °F) 75 %
40 °C to 50 °C (104 °F to 122 °F) 45 %
Operating Altitude ................................................. 2,000 m (up to 4,000 m derate to 1000 V CAT II/600 V CAT III/300 V
CAT IV)
Storage Altitude .................................................... 12,000 m
IP Rating ................................................................ IEC 60529:IP50, in connected condition with protection caps in place.
Vibration ................................................................ MIL 28800E, Type 3, Class III, Style B
Safety ..................................................................... IEC 61010-1: Overvoltage CAT IV, Measurement 1000 V CAT III / 600
V CAT IV, Pollution Degree 2
Electromagnetic Environment ............................. IEC 61326-1: Industrial
Electromagnetic Compatibility ............................ Applies to use in Korea only. Class A Equipment (Industrial
Broadcasting & Communication Equipment)
[1]
[1] This product meets requirements for industrial (Class A) electromagnetic
wave equipment and the seller or user should take notice of it. This
equipment is intended for use in business environments and not to be used
in homes.
Radio Frequency Emissions ................................ IEC CISPR 11: Group 1, Class A.
Group 1 has intentionally generated and/or use conductively coupled
radio-frequency energy which is necessary for the internal functioning
of the equipment itself.
Class A equipment is suitable for use in non-domestic locations and/or
directly connected to a low-voltage power supply network.
Electrical Specifications
Power Supply
Voltage Range .................................................... nominal 100 V to 500 V (85 V min to 550 V max) using safety plug
input
Mains Power ....................................................... nominal 100 V to 240 V (85 V min to 265 V max) using IEC 60320 C7
input (figure 8 power cord)
Power consumption ............................................ Maximum 50 VA (max. 15 VA when powered using IEC 60320 input)
Standby Power ................................................... <0.3 W only when powered using IEC 60320 input
Efficiency ............................................................ 68.2 % (in accordance with energy efficiency regulations)
Mains Frequency ................................................ 50/60 Hz ±15 %
Battery Power ..................................................... Li-ion 3.7 V, 9.25 Wh, customer-replaceable
Energy Analyzer
Specifications
5
On-Battery Runtime ............................................ up to 4 hr (up to 5.5 hr in energy saving mode)
Charging Time .................................................... <6 hr
Data Acquisition
Resolution ........................................................... 16-bit synchronous sampling
Sampling Frequency ........................................... 5120 Hz
Input Signal Frequency ....................................... 50/60 Hz (42.5 to 69 Hz)
Wiring Configurations ......................................... 1-Φ, 1-Φ IT, Split phase, 3-Φ wye, 3-Φ wye IT, 3-Φ wye balanced, 3-Φ
delta, 3-Φ Aron/Blondel (2-element delta), 3-Φ delta open leg, 3-Φ high
leg delta, 3-Φ delta balanced. Currents only (load studies)
Interfaces
USB-A ............................................................. File transfer via USB Flash Drive, Firmware updates, max. supply
current: 120 mA
USB-mini ......................................................... Data download device to PC
Extension port ................................................. Accessories
Total Harmonic Distortion (THD) ........................ THD for voltage and current is calculated on 25 harmonics
Averaging Time ................................................... User selectable: 1 sec, 5 sec, 10 sec, 1 min, 5 min, 10 min, 15 min,
30 min
Averaging time min/max values
Voltage ............................................................ Full cycle RMS (20 ms at 50 Hz, 16.7 ms at 60 Hz) according to
IEC61000-4-30 Class A
Current ............................................................ Half cycle RMS (10 ms at 50 Hz, 8.3 ms at 60 Hz)
Aux, Power ..................................................... 200 ms
Demand Interval ................................................. User selectable: 5 min, 10 min, 15 min, 20 min, 30 min
Data Storage ....................................................... Internal flash memory (not user replaceable)
Memory Size ....................................................... Typical 20 logging sessions of 10 weeks with 10-minute intervals
[1]
Logging Period
Averaging Period Recommended for 20 sessions Logging Period for 1 session
1 sec 3 hr 2.5 days
5 sec 15 hr 12 days
10 sec 28 hr 24 days
30 sec 3.5 days 10 weeks
1 min 7 days 20 weeks
5 min 5 weeks 2 years
10 min 10 weeks >2 years
15 min 3.5 months >2 years
30 min 7 months >2 years
[1] The number of possible logging sessions and logging period depends on user requirements.
Voltage Inputs
Number of Inputs ................................................ 4 (3 phases and neutral)
Maximum Input Voltage ...................................... 1000 V
rms
(1700 V
pk
) phase to neutral
Input Impedance ................................................. 10 MΩ each phase to neutral
Bandwidth (3 dB) .............................................. 42.5 Hz - 2.3 kHz
Scaling ................................................................ 1:1, variable
Current Inputs
Number of Inputs ................................................ 3, mode selected automatically for attached sensor
Current Sensor Output Voltage
Clamp ............................................................. 500 mV
rms
/ 50 mV
rms
; CF 2.8
Rogowski Coil ................................................. 150 mV
rms
/ 15 mV
rms
at 50 Hz, 180 mV
rms
/ 18 mV
rms
at 60 Hz; CF 4; all
at nominal probe range
Range ................................................................. 1 A to 150 A / 10 A to 1500 A with iFlex1500-12
3 A to 300 A / 30 A to 3000 A with iFlex3000-24
6 A to 600 A / 60 A to 6000 A with iFlex6000-36
40 mA to 4 A / 0.4 A to 40 A with 40 A clamp i40s-EL
Bandwidth ........................................................... 42.5 Hz – 2.3 kHz
Scaling ................................................................ 1:1, variable
1730
Calibration Manual
6
Auxiliary Inputs
Number of Inputs ................................................ 2
Input Range ........................................................ 0 to ±10 V dc, 1 reading/s
Scale factor ......................................................... Format: kx + d (Gain and offset) user configurable
Displayed units ................................................... User configurable (up to 8 characters, for example °C, psi, or m/s)
Accuracy at Reference Conditions
Power/Energy
Parameter
Direct Input
[1]
iFlex1500-12 iFlex3000-24 iFlex6000-36 i40S-EL
Clamp: 50 mV/500 mV
Rogowski: 15 mV/150 mV
150 A/1500 A 300 A/3000 A 600/6000 A 4 A/40 A
Power Range W, VA, var
Clamp: 50 W/500 W
Rogowski: 15 W/150 W
150 kW/1.5 MW 300 kW/3 MW 600 kW/6 MW 4 kW/40 kW
Max. Resolution W, VA, var 0.1 W 0.1 kW/1 kW 1 kW/10 kW 1 kW/10 kW 1 W/10 W
Max. Resolution PF, DPF 0.01
Phase (Voltage to Current)
[1]
±0.2 ° ±0.28 ° ±1 °
[1] Only for calibration laboratories
Parameter Range Max. Resolution
Intrinsic Accuracy at
Reference Conditions
(% of Reading + % of
Range)
Voltage
1000 V 0.1 V ±(0.2 % + 0.01%)
Current
Direct Input
Rogowski Mode
15 mV 0.01 mV ±(0.3 % + 0.02 %)
150 mV 0.1 mV ±(0.3 % + 0.02 %)
Clamp Mode
50 mV 0.01 mV ±(0.2 % + 0.02 %)
500 mV 0.1 mV ±(0.2 % + 0.02 %)
1500A Flex
150 A 0.1 A ±(1 % + 0.02 %)
1500 A 1 A ±(1 % + 0.02 %)
3000 A Flexi
300 A 1 A ±(1 % + 0.03 %)
3000 A 10 A ±(1 % + 0.03 %)
6000 A Flexi
600 A 1 A ±(1.5 % + 0.03 %)
6000 A 10 A ±(1.5 % + 0.03 %)
40 A
4 A 1 mA ±(0.7 % + 0.02 %)
40 A 10 mA
±(0.7 % + 0.02 %)
Frequency
42.5 Hz to 69 Hz 0.01 Hz ±0.1 %
Aux Input
±10 Vdc 0.1 mV ±(0.2 % + 0.02 %)
Voltage Min/Max
1000 V 0.1 V ±(1 % + 0.1 %)
Current Min/Max
defined by accessory defined by accessory ±(5 % + 0.2 %)
THD on Voltage 1000 % 0.1 % ±(2.5 % + 0.05 %)
THD on Current 1000 % 0.1 % ±(2.5 % + 0.05 %)
Energy Analyzer
Specifications
7
Intrinsic Uncertainty ±(% of measurement value + % of power range)
Parameter
Influence
Quantity
Direct Input
[1]
iFlex1500-12 iFlex3000-24 iFlex6000-36 i40S-EL
Clamp: 50 mV/500 mV
Rogowski: 15 mV/150
mV
150 A/1500 A 300 A/3000 A 600/6000 A 4 A/40 A
Active Power P
Active Energy E
a
PF 0.99 0.5 % + 0.005 % 1.2 % + 0.005 % 1.2 % + 0.0075 % 1.7 % + 0.0075 % 1.2 % + 0.005 %
0.1 PF
< 0.99
0.5+
√1
3×
%
+0.005%
1.2+
√1
2×
%
+0.005%
1.2+
√1
2×
%
+0.0075%
1.7+
√1
2×
%
+0.0075%
1.2+1.7×
√1

%
+0.005%
Apparent Power S
Apparent Energy
E
a
p
0 PF 1 0.5 % + 0.005 % 1.2 % + 0.005 % 1.2 % + 0.0075 % 1.7 % + 0.0075 % 1.2 % + 0.005 %
Reactive Power Q
Reactive Energy E
r
0 PF 1 2.5 % of measured apparent power/energy
Power Factor PF
Displacement
Power Factor
DPF/cosφ
- Reading ± 0.025
Additional
uncertainty (% of
power high-range)
V
P-N
> 250 V 0.015 % 0.015 % 0.0225 % 0.0225 % 0.015 %
[1] Only for calibration laboratories
Reference Conditions:
Environmental: 23 °C ±5 °C, instrument operating for at least 30 minutes, no external electrical/magnetic field, RH <65 %
Input conditions: CosΦ/PF=1, Sinusoidal signal f=50/60 Hz, power supply 120 V/230 V ±10 %.
Current and power specifications: Input voltage 1ph: 120 V/230 V or 3ph wye/delta: 230 V/400 V
Input current > 10 % of current range
Primary conductor of clamps or Rogowski coil in center position
Temperature Coefficient: Add 0.1 x specified accuracy for each degree C above 28 °C or below 18 °C
Example:
Measurement at 120 V/16 A using an iFlex1500-12 in low range. Power Factor is 0.8
Active power uncertainty
:
=±1.2%+
.
×.
+0.005%×

=±
(
1.575%+0.005%×1000×150
)
(
1.575%+7.5
)
The uncertainty in W is ±
(
1.575%×120×16×0.8+7.5
)
=±31.7W
Apparent power uncertainty
:
=±1.2%+0.005%×

=±
(
1.2%+0.005%×1000×150
)
=±(1.2%+7.5)
The uncertainty in VA is ±
(
1.2%×120×16+7.5
)
=±30.54VA
Reactive/non-active power uncertainty
:
(
2.5%×
)
(
2.5%×120×16
)
=±48
In case of a measured voltage that is >250 V, the additional error is calculated with:
=0.015%×

=0.015%×1000×1500=225W / VA / var
1730
Calibration Manual
8
Maintenance
If the Logger is used appropriately it does not require special maintenance or
repair. Maintenance work may be executed only by trained and qualified
personnel. This work may only be done at a company related service center
within the guarantee period. See www.fluke.com for locations and contact
information of Fluke Service Centers worldwide.
Warning
To prevent possible electrical shock, fire, or personal injury:
Do not operate the Product with covers removed or the case
open. Hazardous voltage exposure is possible.
Remove the input signals before you clean the Product.
Use only specified replacement parts.
Have an approved technician repair the Product.
How to Clean
Caution
To avoid damage, do not use abrasives or solvents on this
instrument.
If the Logger is dirty, wipe it off carefully with a damp cloth (without cleaning
agents). Mild soap may be used.
Battery Replacement
The Logger has an internal rechargeable Lithium-ion battery.
To replace the battery:
1. Remove the Power Supply.
2. Unscrew the four screws and remove the battery door.
3. Replace the battery.
4. Fasten the battery door.
Caution
To prevent damage to the Product, use only original Fluke
batteries.
Energy Analyzer
9
Replacement Parts
Replacement parts and accessories are listed in Table 2. To order parts and
accessories, see How to Contact Fluke.
Table 2. Replacement Parts
4
5
9
6
1
2
3
8
7
11
10
hcf060.eps
Ref.
Description Qty.
Fluke Part
or Model Number
Power Supply 1 4212737
Battery Door 1 4388072
Battery Pack, Li ion 3.7 2500 mAh 1 4146702
USB Cable 1 1671807
Input Decal, country specific
(US, Canada, Europe/UK, UK/old, China)
1 varies
Line Cord, country specific
(N. American, Europe, UK, Australia, Japan,
India/S. Africa, Brazil)
1 varies
Set of Test Leads 0.10 m Red/Black, 1000 V Cat III 1 4344653
Set of Test Leads 2 m Red/Black, 1000 V Cat III 1 4344675
Color-coded Wire Clips 1 set 4394925
USB Flash Drive 1 4298561
Users Manual on USB Flash Drive 1 NA
1730
Calibration Manual
10
Setup
Before you start the verification procedures or make calibration adjustments,
refer to this section for the equipment, system, and setup requirements.
Required Equipment
See Table 3 for a list of requirements for the verification tests and calibration
adjustment of the 1730.
Table 3. Required Equipment
Equipment Model Notes
Used on:
Verification
Tests
Calibration
Adjustment
Calibrator 5522A
5520A is also
supported
X X
Coil 5500A/COIL
X X
Cable Assembly 3PHVL-1730
Voltage Test
Lead 3-Phase+N
X X
1730 AUX Input Cable PN 4395217 Qty. 2 required
X X
Male BNC to Dual
Female BNC Adapter
PM9093
X X
BNC Female to Double
Banana Plug
Pomona 1269
X X
1730 Calibration
Cables – Voltage-to-
Current Input Cable
Assembly
[1]
NA Qty. 3 required
X X
1730 Verification Box
[1]
NA optional
X
USB cable
type A-to-mini
A
X X
[1] The 1730 calibration cables and verification box are not available from Fluke. See Equipment Assembly for
information on how to make these items.
Equipment Assembly
The 1730 calibration cables and verification box are not available from Fluke. If
you plan to calibrate your Product rather than send it to a Fluke Service Center,
use the assembly instructions that follow.
Energy Analyzer
Setup
11
1730 Calibration Cable Assembly
See Table 4 for instructions on how to make the calibration cables.
Caution
Cable must be marked with “max. 30 V to earth.” Any voltage-,
category-, or current-ratings on safety plugs must be removed.
Table 4. 1730 Calibration Cables, Voltage-to-Current-Input
10
+
2
0
1930
±10
15
±1
4
-
0
1
5 max.
4 min.
Screen
(Pin 4)
N.C.
(Pin 3)
Red Wire
(Pin 1)
Black Wire
(Pin 2)
123
4
5
6
7
6
hcf104.eps
Item Description Part Number/Info QTY
Straight Plug, IP50, 4-Pole ODU: S21M08-P04MJG0-528S 1
Cable Bend Relief ODU: 701-023208965-040 1
Signal-Cable, 2x AWG 22-24, shielded 4-5 mm (Fluke equiv. # 3803634) 1
Test Lead with 4 mm Safety Plug, stackable red 1
Test Lead with 4 mm Safety Plug, stackable black 1
Heat Shrink Tubing, 2:1 =4.8 mm (3/16”); L=35 mm 3
Heat Shrink Tubing, 3:1, adhesive =12 mm (1/2”); L=60 mm 1
1730
Calibration Manual
12
Verification Box Assembly
This Verification Box provides more accurate voltages than a direct connection to
the 5520A. The 5520A uses a divider with a 50 Ω output impedance when
sourcing <330 mV. Due to variations in the 1730 input impedance, the actual
applied voltage is less than the programmed voltage. Using an external divider
where the parallel resistance is ~30 Ω allows calculation of the applied voltage
with confidence that the 1730 input loading will not significantly impact the
applied voltage.
Fluke recommends using a verification box that has a divider with 30 Ω across
the 1730 input and 10 kΩ in series with high side of the input. See Table 5 for
instructions on how to make the verification box.
Table 5. 1730 Verification Box
2
3
1
Contacts Pretinned
Contacts
Pretinned
Red Plug
Red
Socket
Black Socket
Black Plug
Soldered
Soldered
Soldered
Soldered
10 k
30 Ω
Red
Black Black
Red
hcf105.eps
Item Description Part Number/Info Fluke Part Number QTY
Multi-Contact Box: MA 524
Type: XKH-4/19/A
Order-No.: 66.9045-33
NA 1
Resistor, Metal Foil 10 kΩ,
±0.1 %, 0.6 W, ±4.5 PPM
Red Plug/Red Socket 2114858 1
Resistor, 30 Ω, 1W, 1% 20 PPM
Red Socket/Black Socket +
Bridge Black Plug/Socket
1757740 1
Energy Analyzer
Setup
13
System Requirements
The system requirements for this verification procedure are:
WinXP 32-bit, Windows 7 32/64-bit, Windows 8 32/64-bit
Monitor, 1280 x 1024 (@4:3) or 1440 x 900 (@16:10), wide-screen (16:10) at
higher resolution recommended
USB 2.0 port
RS232 port to control the calibrator (optional)
Microsoft Excel 2010 32-bit software or higher (versions below 2010 not
tested)
Fluke Energy Analyze software
USB Communication
Some of the range changes in the verification require remote commands to set
the range. To communicate between the PC and the 1730, the 1730 driver must
be installed. This driver is installed when the Fluke Energy Analyze (FEA)
software is installed.
Use these steps to identify the COM port:
1. Make sure the instrument is powered and connected with the PC.
2. Press: <Windows key>-R.
3. Type: devmgmt.msc <ENTER>.
4. Go to Ports (COM & LPT) and double-click to open the sub-tree.
5. Find Fluke 1730 Energy Logger. The port number is shown in parenthesis
after this text, for example, COM6.
A detailed description of the spreadsheet is found in the How to Use the
Spreadsheet section.
1730
Calibration Manual
14
How to Use the Spreadsheet
The Excel workbook, Fluke1730-ExcelTool_Vx.xx.xlsm, (ExcelTool-available at
www.fluke.com), communicates with the Fluke 1730 using remote commands
through the USB ports. The Excel file supports both the 5520A and 5522A
Calibrators.
Note
The Excel file uses macros. Make sure execution of macros is
enabled on your PC.
Make sure that Fluke Energy Analyze is closed when using the
Excel program. After closing Energy Analyze, disconnect and
reconnect the USB cable or turn off and turn on the instrument to
reset the communication protocol in the instrument.
In order to communicate, you must know which COM port the Fluke 1730 uses.
To find the COM port:
1. Make sure the instrument is powered and connected with the PC.
2. On the PC keyboard, press <Windows key> and type -R.
3. Type devmgmt.msc and press <ENTER>.
4. Go to Ports (COM & LPT) and double-click to open the sub-tree.
5. Find Fluke 1730 Energy Logger. The port number is shown in parenthesis
after this phrase, for example, COM6.
The workbook contains sheets for various tasks:
Dashboard – Live measurement parameters, set current input range/mode,
COM port configuration
Phasor – Displays a phasor diagram
Calibration & Verification – Procedures to perform the calibration and
verification
  • Page 1 1
  • Page 2 2
  • Page 3 3
  • Page 4 4
  • Page 5 5
  • Page 6 6
  • Page 7 7
  • Page 8 8
  • Page 9 9
  • Page 10 10
  • Page 11 11
  • Page 12 12
  • Page 13 13
  • Page 14 14
  • Page 15 15
  • Page 16 16
  • Page 17 17
  • Page 18 18
  • Page 19 19
  • Page 20 20
  • Page 21 21
  • Page 22 22
  • Page 23 23
  • Page 24 24
  • Page 25 25
  • Page 26 26
  • Page 27 27
  • Page 28 28
  • Page 29 29
  • Page 30 30

Fluke 1730 Energy Logger Auxiliary Input Cable User manual

Category
Measuring, testing & control
Type
User manual

Ask a question and I''ll find the answer in the document

Finding information in a document is now easier with AI