Page is loading ...

These instructions do not apply to all vehicles. They are only meant as a general
guide due to the number of different makes & models.
For vehicle specic questions contact your vehicle’s manufacturer.
MONITOR INSTALLATION
When choosing a location to mount the monitor, make sure the monitor is in an area
that will not obstruct your vision while driving. It can be placed on the dashboard, or
on the windshield depending on the angle.
Choose a Location and Power Cable
1. Temporarily place the monitor stand
in the location that you have chosen.
2. If you are using the supplied Moni-
tor Wiring Harness, route the power
cable to the vehicle’s fuse box.
If you are using the 12V adaptor, route
the power cable to the vehicle’s ciga-
rette lighter socket/12V power outlet.
The cable must not interfere with the
safe operation of the vehicle.
Mounting the Monitor
Before permanently mounting the monitor, clean
the mounting area well with isopropyl alcohol,
then dry thoroughly.
1. With the two pieces of the oval hook & Loop
fastener attached to each other, peel the back-
ing paper from “Loop” side the oval shaped
Hook & Loop fastener. (Fig. 1)
2. Next align the Hook & Loop fastener with the
bottom of the monitor stand and press rmly to
adhere. (Fig. 2)
3. With the “Hook” half of the hook & loop fastener
attached to the “Loop” half you just attached to
the monitor, peel off the backing paper. (Fig. 3)
4. Then press the monitor stand rmly onto the
area you just cleaned. Adhesive reaches maxi-
mum strength in 24 hours. Moving the fastener
from its original position will weaken the adhe-
sive and may damage the mounting surface.
(Fig. 4)
To maximize the effectiveness of the Hook & Loop fastener, it is recommended that
the application be performed under the following conditions:
Surface temperature should be between 21 C and 38 C (70F and 100F).
Application below 10C (50F) should be avoided.
Application should not occur in direct sunlight.
Mounting should be protected from exposure to direct sunlight for a period of 24 hours.
Automotive video equipment installations can be difcult at times, even to the most
experienced of installation technicians. If you are not condent working with 12 volt
DC vehicle wiring, removing and reinstalling interior panels, carpeting, dashboards or
other components of your vehicle, please call our Toll-Free Help Line 1-800-445-1797
and our in-house technical service team will answer your installation questions. If you
have vehicle specic questions, contact the vehicle’s manufacturer, or consider hav-
ing the VRBCS300W professionally installed.
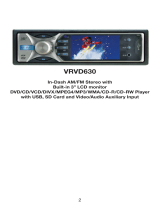
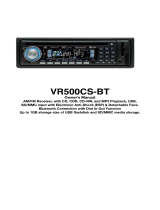
VRBCS300W
Wireless Back-Up Camera
and Monitor
Before You Install
Parts
Installation & Operation Installation & Operation
Dear Customer,
CONGRATULATIONS. The VRBCS300W Wireless Back-up Camera System, when
used as described, will give you years of dependable service in your car, truck, RV,
or mini-van. We have taken numerous measures in quality control to ensure that your
product arrives in top condition, and will perform to your satisfaction. In the rare event
that your VRBCS300W Wireless Back-up Camera System contains a damaged or
missing item, does not perform as specied, requires warranty service, or you have
an installation problem, DO NOT RETURN THIS PRODUCT TO THE STORE. PLEASE
CALL OUR TOLL FREE NUMBER FROM THE U.S.A. AND CANADA 1-800-445-1797
and ask to speak with a member of our technical service team, or submit your ques-
tions by e-mail to customerservice@vr-3.com and a member of our technical service
team will respond by e-mail to your questions. Our in-house technical service team
will expedite delivery of your part, advise you on installation, or help troubleshoot a
problem with you. If your product needs warranty service, our technical service team
representative will help you obtain the fastest remedy possible under the warranty.
CAMERA INSTALLATION
You may mount the camera using the license plate’s top or bottom mounting
bolts or screws, make sure that it’s eld of view is not obstructed. You may
mount the camera on the top or bottom of the license plate. Use the supplied
wedge shaped shims to adjust the angle that the camera is mounted.
1. Loosen the license plate bolts/screws,
then remove the rear license plate.
2. Insert each license plate bolt into a
supplied wedge, then through the bolt
holes of the camera, then through the
remaining wedges and the license
plate. (Fig.1)
3. Align with holes on vehicle and tem-
porarily tighten the license plate bolts/
screws. The wedges will angle the
camera down.
4. You will need to choose a route for the
camera’s power cable through the ve-
hicle’s body to the reverse light circuit.
Red LED Power Indictor
Image Orientation Button
Power ON/OFF Button
Brightness Control
Contrast Control
Red LED Power Indicator - When
the monitor is ON the red LED will
be lit. If there is power to the moni-
tor, but the monitor is OFF, the red
LED will be OFF.
Power Button - Press the Power
button to turn the display ON, the
red LED will be lit to indicate the
monitor is ON. Press it again to turn
the display OFF, the red LED will
turn off.
MONITOR CONTROLS
Contrast Control - There are 13 levels of contrast. To adjust the contrast, press the
Contrast Control button. Press the button to increase the contrast, at the highset level
it will return to the lowest level.
Brightness - There are 13 levels of brightness. To adjust the brightness, press the
Brightness Control button. Press the button to increase the brightness, at the highset
level it will return to the lowest level.
This device complies with Part 15 of the FCC Rules. Operation is subject to the fol-
lowing two conditions: (1) this device may not cause harmful interference, and (2)
this device must accept any interference received, including interference that may
cause undesired operation.
Fig. 1
Fig. 2
Fig. 3
Fig. 4
Power Cable with 12 Volt Cigarette Lighter Adaptor
1. Insert the small 12 Volt DC plug of the power cable into
the left side of the monitor.
2. Plug the 12 Volt cigarette lighter adaptor into the vehi-
cle’s cigarette lighter socket.
3.
Press the ON/OFF button to turn the monitor ON.
Fig.1
This device, as well as all other wireless devices, may be subject to interfer-
ence. Interference may be caused by cell phones, Bluetooth headsets, Wi-FI
routers, power lines and other various electrical equipment, etc.
Hard Wired to the Fuse Box
1. Disconnect the negative battery cable from the vehicle’s negative battery terminal.
2. Connect the Red wire to the 12 Volt +/ACC terminal in the vehicle’s fuse box. See
vehicle’s owner’s manual for fuse box diagram.
3. The ground cable must be located on an area of metal on the vehicle’s body/re-
wall that does not have any vehicle components behind it. Sand off any paint to
reveal bare metal, this area will be your chassis ground.
4. Drill a hole for the supplied self tapping sheet metal screw. Make sure there are no
vehicle components behind where you are drilling the hole.
5. Strip the insulation from the end of the black wire 1.3cm and wrap the wire around
the self-tapping sheet metal screw before tightening.
6. Re-connect the negative battery cable.
7.
Plug the power cord into the monitor, use the ON/OFF button to turn the monitor ON & OFF.
MONITOR POWER CONNECTION
There are two ways to supply the monitor with power, one uses a 12 Volt ciga-
rette lighter adaptor plugged into the vehicle’s cigarette lighter socket, and the
other uses a wiring harness hard wired to the vehicle’s fuse box.
NOTE: UNDER EXTREME BRIGHT LIGHT CONDITIONS, THE SCREEN IMAGE
MAY TAKE A FEW SECONDS TO STABLIZE. PLEASE WAIT UNTIL THE IMAGE
HAS STABLIZED BEFORE BACKING UP.

©2006 Virtual Reality Sound Labs
®
. U.S. and Foreign Patents Pending. All designs, logos and images are the exclusive property of Virtual Reality
Sound Labs
®
and/or its afliates. U.S. & Foreign Patents Pending. All rights reserved. 092206 Printed in China 00000
Installation
SCOTCH-LOK
®
INSTRUCTIONS
CAMERA WIRING DIAGRAM
1. Reattach the vehicle’s negative battery cable.
2. Turn the ignition key to the accessory position, do not start the vehicle.
3. Engage the parking brake, then put the shifter in the reverse position.
4. Turn the monitor ON by pressing the ON/OFF button on the monitor.
5. Look at the monitor, if the image does not match your rear view mirror press the
Image Orientation button on the monitor to correct the image.
There are four different views for the monitor, each time the button is pressed the im-
age will change.
These different views allow you to mount the camera and/or monitor either right side
up or upside down and still display the image correctly on the monitor. The image
displayed should match your rear view mirror.
After testing the unit and you are satised with the route you have chosen for the
cabling, you must permanently install it.
Fully tighten the license plate bolts.
Route all wires behind interior panels or under carpeting so they are hidden.
Use supplied cable ties to neatly gather any excess wire.
TESTING THE SYSTEM
+A
Mirror
Image
A+
Forward
Upside Down
A+
Normal
Image
A+
Mirror
Upside Down
Limited Warranty
WARNING: Changes or modications to this equipment not expressly approved by the party responsible for compliance could
void the user’s authority to operate the equipment.
NOTE: This equipment has been tested and found to comply with the limits for a Class B digital device, pursuant to Part 15 of
the FCC Rules. These limits are designed to provide reasonable protection against harmful interference in a residential installa-
tion. This equipment generates, uses and can radiate radio frequency energy and, if not installed and used in accordance with
the instructions, may cause harmful interference to radio communications.
However, there is no guarantee that interference will not occur in a particular installation. If this equipment does cause harmful
interference to radio or television reception, which can be determined by turning the equipment off and on, the user is encour-
aged to try to correct the interference by one or more of the following measures:
• Reorient or relocate the receiving antenna.
• Increase the separation between the equipment and receiver.
•
Connect the equipment into an outlet on a circuit different from that to which the receiver is needed.
• Consult the dealer or an experienced radio/TV technician for help.
This device complies with Part 15 of the FCC Rules, and applicable Industry Canada regulations. Operation is subject to the
following two conditions: (1) this device may not cause harmful interference, and (2) this device must accept any interference
received, including interference that may cause undesired operation of device.
The manufacturer is not responsible for any radio or TV interference caused by unauthorized modictions to this equipment.
Such modications could void the user’s authority to operate this equipment.
(For Canada)
This Class A/B digital apparatus meets all requirements of the Canadian Interference-Causing Equipment Regulations.
FCC & Industry Canada Information
Insert the existing wire
to be tapped.
Insert the wire to be
attached.
Crimp tap with pliers,
then close lock
You do not need to use the Scotch-Lok
TM
connectors. The camera can be wired directly
to the reverse light circuit by stripping the reverse light wires then twisting the camera
wires to the exposed reverse light wires. Once connected, wrap with electrical tape. Do
not attempt this if you are not knowledgeable with electrical installation practices.
6. If you are going to drill a hole, choose a
location as close to the camera where the
power cable comes out of it. Before you drill
a hole you MUST CHECK and see WHAT
IS BEHIND WHERE YOU ARE DRILLING. If
there are any vehicles components, such as
electrical parts or fuel system components
behind where you are drilling, you must take
whatever precaution is necessary not to
damage them. Remove the license plate and
camera before drilling.
7. After you have drilled a hole, insert the sup-
plied grommet (Fig.5), then pass the power
cable through the grommet into the vehicle
(Fig.6). You must use the grommet to prevent
the metal edge of the hole from cutting the
power cable.
10. The reverse light sockets on most vehicles have two wires connected to them.
Usually the negative wire is black and the positive wire is a colored wire. If you are
uncertain about the wiring, you can use a 12 volt test light available at most auto
parts stores to determine which is the positive wire.
a. Remove the the reverse light socket from its housing, then remove the blub from
the socket.
b. Engage the parking brake, turn the ignition key to the ON position, but do not start
the vehicle. Put the gear shift in the reverse position.
c. Attach the ground wire of the test light to the vehicle ground, then touch one of the
socket’s contacts with the positive lead.
e. If the test light lights up, then the wire corresponding to that contact is the positive
wire. If it doesn’t light up the opposite wire is the positive wire.
Follow the manufacturer’s instructions for the safe use of the test light.
Installation
5. Some vehicle’s may have a hole available to
pass the wire through, (Fig.3) such as where
the license plate light is mounted, or you can
drill a hole close to where the power cable
is attached to the camera. (Fig.4) Once you
have chosen where the cable will enter the
vehicle’s body, remove the camera. If you
able to use an existing opening, skip the
next two steps.
8. Next you’ll need to nd the vehicle’s reverse
lights. Turn the vehicle’s ignition key to the
accessory position, engage the parking
brake and put the car in reverse. Look at the
vehicle’s tail lights to see where the reverse
lights are located, they are the white lights.
To locate the reverse light’s 12V+ wire it will
be necessary to gain access to the rear of
the vehicle’s tail light.
For help locating the vehicle’s reverse light
circuit contact your vehicle’s manufacturer
for vehicle specic wiring diagrams.
Using an Existing Opening for Access
Fig.3
Drilling an Access Hole
Fig.4
Fig.5
Fig.6
9. Once you have located the reverse light cir-
cuit you will have to route the camera’s pow-
er cable to that location. You must securely
fasten the power cable to prevent it from be-
ing caught on any vehicle component such
as the trunk hinge (Fig.7). Never route the
cable on the outside of the vehicle.
Fig.7
11. After determining which wire is the positive and which is the negative, turn off the
ignition key, then remove the battery’s negative cable.
12.
Following the Scotch-LokTM instructions section, splice the Red wire using the
supplied in-line Scotch-LokTM wire connectors to the reverse light’s positive (+)
wire. Use a set of slip joint pliers to squeeze the TAP and insure good connection.
13. Next splice the black wire of the camera’s power cable to the reverse light’s nega-
tive (-) wire or ground.
14.
Replace the reverse light bulb, then re-install the light socket. Secure all the wires with
cable ties or electrical tape. Re-attach the negative battery cable to the battery.
Virtual Reality Video Labs
®
warrants, to the original purchaser, that its products are free from defects in material and
workmanship for 30 days from the date of original purchase, as part of our commitment to product excellence. Virtual
Reality Video Labs
®
and/or it’s afliates routinely improves the designs, materials or production methods of its exist-
ing products. Because it is impractical to publicize all changes in every product, we reserve the right to make such
changes without notice.
Disclaimer: Virtual Reality Video Labs
®
and/or its afliates, including without limitation Roadmaster
®
(USA) Corp., does
not guarantee or promise that the user of our Back-Up Cameras will not be in an accident or otherwise not collide with
an object and/or person. Our Back-Up Cameras are not intended in any way to be a substitute for careful and cautious
driving or for the consistent adherence to all applicable trafc laws and motor safety regulations. These products are
not intended to be a substitute for rearview mirrors or for any other motor vehicle or boat equipment mandated by law.
Even when properly installed, our Back-Up Cameras have a limited eld of vision and do not provide a comprehensive
view of the rear area of the vehicle. You should always look around outside your vehicle and use your mirrors to conrm
rearward clearance.
Virtual Reality Video Labs
®
and/or its afliates, including without limitation Roadmaster
®
(USA) Corp., shall have no
responsibility, liability or the like for damage and/or injury resulting from accidents occurring with vehicles having the
Back-Up Camera installed. Except as specically set forth herein, no warranty or representation, express or implied,
is made as to the Back-Up Cameras. Except as expressly modied herein, Virtual Reality Video Labs
®
and/or its af-
liates, including without limitation Roadmaster
®
(USA) Corp., specically disclaims, without limitation, any statutory
warranties, implied warranty of merchantability or tness for a particular purpose. Virtual Reality Video Labs
®
and/or
its afliates, including without limitation Roadmaster
®
(USA) Corp., is not responsible for a user’s intended or actual
use of the Back-Up Cameras or results deriving therefrom. In no event, shall Virtual Reality Video Labs
®
and/or its
afliates, including without limitation Roadmaster
®
(USA) Corp., have any liability for any losses (whether direct or
indirect, in contract, tort or otherwise) incurred in connection with the Back-Up Camera, including but not limited to
damaged property, injury and/or loss of life. Neither shall Virtual Reality Video Labs® and/or its afliates, including
without limitation Roadmaster
®
(USA) Corp., have any liability for any decision, action or inaction taken by any person
in reliance on the Back-Up Camera, or for any delays, inaccuracies and/or errors in connection with the Back-Up
Camera and its functioning.
CONDITIONS OF WARRANTY:
If during the 30 day warranty period your new product is found to be defective, Virtual Reality Video Labs
®
will repair
such defect, or replace the product, without charge for parts or labor subject to the following conditions:
1. All repairs must be performed by Virtual Reality Video Labs
®
and/or it’s afliates in Eatontown, New Jersey.
2. The equipment must not have been altered or been damaged through negligence, accident, or improper operation.
3.
The replacement of parts are exempted from this warranty when replacement is necessary due to normal wear and tear.
4. All warranty claims must be accompanied by a copy of the sales receipt or bill of sale.
5. Repair or replacement parts supplied by Virtual Reality Video Labs
®
under this warranty are protected only for the
unexpired portion of the original warranty.
6. In the case of car stereos, this warranty does not extend to the elimination of car static or motor noise; correction
of antenna problems; costs incurred for the removal or reinstallation of the product; damage to tapes, speakers, ac-
cessories or car electrical systems.
7. Virtual Reality Video Labs
®
will not be responsible for any charge incurred for installation.
OWNER’S RESPONSIBILITIES:
Virtual Reality Video Labs
®
will make every effort to provide warranty service within a reasonable period of time.
SHOULD YOU HAVE ANY QUESTIONS ABOUT SERVICE RECEIVED, OR IF YOU WOULD LIKE ASSISTANCE IN
OBTAINING SERVICE, PLEASE CALL TOLL FREE 1-800-445-1797, 8:30am - 4:30pm EST.
In order to provide you with the proper warranty service, we request that you adhere to the following procedure:
1. Include a copy of your sales receipt or bill of sale with your unit when it is returned for warranty service.
2. If it is necessary to return your product for service, please return it securely packed, preferably in the original ship-
ping carton, and freight and insurance prepaid to the following address: Virtual Reality Video Labs, Service Depart-
ment, 41 James Way, Eatontown, New Jersey 07724.
3. Please include a detailed explanation of the problem you are having.
4. If your product is found by Virtual Reality Video Labs
®
to have a defect in material or workmanship, within the war-
ranty period, it will be repaired or replaced at no charge and returned to you prepaid. Where permitted by Iaw Virtual
Reality Video Labs
®
liability shall be limited to that set forth in this warranty. This warranty shall be the exclusive remedy
of the purchaser.
Virtual Reality Video Labs
®
makes no other warranty of any kind, expressed or implied; and all implied warranties, are
hereby disclaimed by Virtual Reality Video Labs
®
and excluded from this warranty, Virtual Reality Video Labs
®
and/or
it’s afliates, the manufacturer, distributor and seller shall not be liable for any injury, loss or damage, incidental or
consequential, arising out of the use or intended use of the product.
/