Page is loading ...

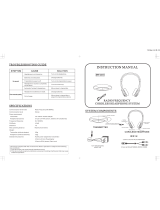
CL7300v2
Digital TV Listene
r
English

1
Introduction
The Geemarc Digital TV Listener is an amplification system specifically designed
for people with hearing difficulties.
It can be used with all kinds of Audio, Television systems, suitable for individuals
or groups without any interference.
Audio output from a TV or audio device is encoded and transmitted by the Base,
the wireless Headset receives the signal and decodes it to original audio sound.
One Base can be paired with up to 4 Headsets.
Safety & Care advice
To make the best use of this product and to use it safely, please read these
instructions thoroughly before use and keep safe for future reference.
Warning: This product can be very loud. Take care to prevent others from
using this product, if they do not have the same level of hearing loss. Excessive
sound pressure from earphones and headphones can cause hearing loss.
Caution: Electric shock. DO NOT insert unattached plug heads in to mains
power sockets. Plug heads MUST be fitted to the power adaptor.
Electrical connection: The unit is designed to operate from a 100-240VAC -
50/60Hz supply. (Classified as 'hazardous voltage' according to EN 60950
standard).
The unit does not incorporate an integral power on/off switch. To disconnect the
power, either switch off supply at the mains power socket or unplug the AC
adaptor. When installing the unit, ensure that the mains power socket is readily
accessible.
Caution: Risk of explosion if battery is replaced by an incorrect type.
Dispose of used batteries according to the instructions.
Keep the unit away from heat sources.
DO NOT expose the unit to direct sunlight.
Clean the Headset and ear pads regularly.
DO NOT modify the unit in any way.
Please note: The unit may be subject to interference from appliances that
generate strong electrical or magnetic fields e.g. microwaves, mobile phones,
lighting transformers etc.

2
Table of Contents
Pack contents 2 Pairing extra headsets 11 -12
First use / Charging batteries 3 - 5 Cleaning & Maintenance 12
Connecting to TV, HiFi and other
audio equipment 6 - 8
Spare/replacement parts 13
Using Headset 8-10 Customer support 13
Headset adjustments 8-10 General information 13-14
Battery status & recharging 10-11
1. Headset 2. Alternative ear pads
3. Base 4. Power adaptor with cable
(1.5m) (UK, EU & US)
5. Slider tool 6. Batteries
7. 3.5mm to 3.5mm cable
(1.5m)
8. 3.5mm to 6.3mm adaptor
9. 3.5mm to 2 pin RCA cable
(25cm)
10. 2-pin RCA scart adaptor
11. Microphone
Pack Contents

3
First use / Charging batteries
Important: The Geemarc Digital TV Listener is supplied with two batteries.
Before use, batteries MUST be fully charged, full charge will take about 2-3 hours
when the battery is empty.
Caution: If battery is already fully charged, the red LED will stay off.
Once fully charged the TV Listener has an approximate operating time of up to 3
hours (per battery, with Headset on medium volume).
Batteries cannot be overcharged, but to save power the Base should be
disconnected from the power supply when not in use.
Battery Warnings:
• DO NOT attempt to dismantle.
• DO NOT dispose of in fire.
• DO NOT swallow.
• Keep away from children.
• Batteries are to be inserted with the correct polarity.
• DO NOT short-circuit the supply terminals.
• Exhausted batteries are to be removed from the product.
• Only use Geemarc supplied 'Li-Po' batteries.
• Caution: Risk of explosion if battery is replaced incorrectly or
fitted with the wrong type of battery. Dispose of used batteries
according to the instructions.

4
Insert power adaptor into mains power
socket. Insert power jack (7) into ‘DC
IN 5V’ socket on the back of the Base.

5
Insert batteries (6) into Headset and
Base.
Place Headset in Base.
Caution: Please be sure to insert the
battery correctly (see above).
Turn power on at mains and Base.
Red lights will show on Base and
Headset to indicate batteries are
charging.
After 2-3 hours, when fully charged the
red lights will be off.

6
Connecting to TV, HiFi and other audio equipment
There are a number of alternative methods of connecting to the unit depending on
the make of TV, HiFi equipment.
Important: The Base MUST connect to 'OUTPUT' sockets on the TV, HiFi
equipment (never use the INPUT access sockets).
Important: If you are using cable TV, satellite, Internet or other services in
conjunction with your TV or sound device please ensure that you connect the
CL7300 to an audio output access on your TV and NOT on your set top box. If
you are unsure or cannot identify the right connection or the input/output definition
please refer to the user manual of your TV. A connection of the CL7300 to your
set top box instead of your TV output could result some channels being seen
without sound.
Please note: In the event of having difficulty with the connections, please call the
Customer Helpline: 01707 384438
Using 3.5mm to 3.5mm cable: Insert
one 3.5mm jack (8) into ‘Audio’ socket
on Base, insert other 3.5mm jack into
the ‘headphone’ socket on the TV, HiFi
equipment. If required use 3.5mm to
6.3mm jack adaptor (9).
Using 3.5mm to RCA cable: Insert
3.5mm jack (8) into 3.5mm RCA cable
(10). Connect to the RCA jacks (10) to
the corresponding red and white
'OUTPUT' sockets on the TV, HiFi
equipment.

7
Using scart adaptor: Insert 3.5mm
jack (8) into 3.5mm to RCA cable (10).
Insert scart adaptor (11) into a
compatible scart socket on the TV, HiFi
equipment.
Connect to corresponding red and
white RCA jacks (10) to scart adaptor
(do not use the yellow socket).
Note:
Some televisions and audio
devices have an audio output SCART
level greater than the 300mV standard.
This can cause some distortion or a
very high acoustic level, even with the
Volume set to Low. If this happens,
please contact the Geemarc Customer
Services department. They will be able
to provide you with a solution to
attenuate the sensitivity of your
CL7300.
Microphone connection: Only use the
supplied Geemarc microphone. Plug
microphone jack (12) into ‘MIC’ socket
on Base and place microphone near
source you wish to listen to.
Note: Volume levels will be lower and
background noise may be picked up
when using the microphone.

8
Using Headset: Once charged and
connected to your TV, HiFi equipment,
open the arms and Headset will
operate. A green light on the Headset
will show it is in use.
Headset will switch off when arms are
fully released.
Volume adjustment:
Press ‘+’ button to increase volume and
‘-’ button to decrease volume.
Headset beeps when volume reaches
maximum or minimum.
Headset adjustments
Volume, Balance, Tone and Mono/Stereo settings are preset to their middle
settings, these will be suitable for the majority of users.
Ensure that you try the Headset before adjusting the preset settings.
If adjustments are required use the 'slider tool' to adjust the settings.
Important: Once all the adjustments are complete, ensure that the Headset
slider is set to the Volume adjustment as described in step 11.

9
Use the slider tool (5) to adjust the
Volume, Balance, Tone or switch
Mono to Stereo. Open the back panel
on the Headset. 3 ‘slider switches’ will
be present.
Volume adjustment:
Set ‘BAL VOL’ slider to ‘VOL’.
Set ‘T <-> B/V’ slider to ‘B/V’
Press ‘+’ button to increase volume and
‘-‘ button to decrease volume.
Headset beeps when volume reaches
maximum or minimum.
Balance adjustment:
Set ‘BAL VOL’ slider to ‘BAL’
Set ‘T <-> B/V’ slider to ‘B/V’
Press ‘-’ button to decrease sound on
RIGHT side. Press ‘+’ button to
decrease sound on LEFT side.
Headset beeps when balance reaches
maximum, middle or minimum.

10
Tone adjustment:
Set ‘BAL VOL’ slider to ‘VOL’
Set ‘T <-> B/V’ slider to ‘T’
Press ‘+’ button to increase treble and
decrease bass. Press ‘-’ button to
increase base and decrease treble.
Headset beeps when tone adjustment
reaches maximum, middle or minimum.
Mono / Stereo adjustment:
Set ‘MS’ slider to ‘S’, Headset will be in
‘Stereo’.
Set ‘MS’ slider to ‘M’, Headset will be in
‘Mono’.
Battery status & recharging:When battery power is low, Headset
green light will flash and a low ‘beep’ will be heard through Headset.
Charging battery in Base: Insert
battery into Base charging
compartment and switch on
power. During charging the red
light will stay lit until fully charged.

11
Charging battery in Headset:
Insert battery into headset, place
Headset in Base. During charging
the red light on Headset will stay
lit until fully charged.
Pairing extra Headsets
Note: Up to 4 Headsets can be paired to each Base.
Important: Pairing must be completed while Base lights are flashing. If lights stop
flashing before pairing is complete you must repeat the process.
To pair Base and Headset ensure batteries are fully charged and the Base is
connected to mains power. Proceed as follows:

12
Base: Switch power off at Base.
Press and hold down ‘CH’ button, switch
power back on, continue to hold ‘CH’
button until both lights on the front start
flashing.
Base is ready for pairing.
Headset: Press and hold down the ‘-’
(minus) button.
While holding the button, open arms
and the green indicator lights up.
When light starts flashing pairing is
complete.
Cleaning & Maintenance
Note: DO NOT use alcohol, chemical
or spirit based cleaning agents.
Wipe Base and Headset clean with a
damp cloth.
Regularly remove and clean ‘Ear
pads’ with warm soapy water.
Two types of ear pad are supplied,
select the most suited to yourself.

13
Spare/replacement parts
Spare parts are available from either the
original place of purchase or by calling
the Customer Helpline Telephone:
01707 384438
1. Battery (x2)
2. Additional Headsets
3. Ear pads (both types x 2)
Customer support
For product support and help, visit
our website at www.geemarc.com
For our Customer Helpline
Telephone:
01707 384438
Fax: 01707 832529
General information
Specifications
Digital 2.4 GHZ AFHSS transmission (Adaptive Frequency Hopping) - CD sound
quality!
79 channels (20 hopping channels)
Receiving amplification: up to 125dBspl.
Frequency response: 45 - 15000Hz.
Operating range: outdoors up to 100 meters and Indoors up to 25m.
Continuous usage time: up to 3 hours (per battery).
Charged when you need it - Headset recharges itself when placed back into Base
unit.
Base unit has a charging port for the extra battery.
3.5mm audio input stereo jack access in Base unit.
2.5mm microphone input jack access in Base unit.
Weight: 50g.
Guarantee
From the moment your Geemarc product is purchased, Geemarc guarantee it for
the period of one year. During this time, all repairs or replacements (at our
discretion) are free of charge. Should you experience a problem then contact our
Helpline or visit our website at www.geemarc.com.
The guarantee does not cover accidents, negligence or breakage to any parts.
The product must not be tampered with or taken apart by anyone who is not an
authorised Geemarc representative.

14
The Geemarc guarantee in no way limits your legal rights.
Important: YOUR RECEIPT IS PART OF YOUR GUARANTEE AND MUST BE
RETAINED AND PRODUCED IN THE EVENT OF A WARRANTY CLAIM.
Please note: The guarantee applies to the United Kingdom only.
EEC Declaration
Geemarc Telecom SA hereby declares that this product is in compliance with the
essential requirements and other relevant provisions of the Radio and
Telecommunications Terminal Equipment Directive 1999/5 EEC and in particular
article 3 section 1a, 1b and section 2.
The declaration of conformity may be consulted at www.geemarc.com
Disposal information
Disposal of old electrical & electronic equipment (applicable in
the European Union and other European countries with separate
collection systems)
The symbol on the product or its packaging indicates that this product
may not be treated as household waste. Instead it should be handed
over to the applicable collection point for the recycling of electrical and electronic
equipment.
By ensuring this product is disposed of correctly, you will help prevent potential
negative consequences for the environment and human health, which could
otherwise be caused by inappropriate waste handling of this product.
For more detailed information about recycling this product, please contact your
local council office, your household waste disposal service or the shop where the
product was purchased.

15
UGCL7300v2_En_v1.8
/