375 FC True-RMS AC/DC Clamp Meter

Fluke 375 FC True-RMS AC/DC Clamp Meter User manual

  • Hello! I am an AI chatbot trained to assist you with the Fluke 375 FC True-RMS AC/DC Clamp Meter User manual. I’ve already reviewed the document and can help you find the information you need or explain it in simple terms. Just ask your questions, and providing more details will help me assist you more effectively!
February 2017 Rev. 1, 9/19
©2017-2019 Fluke Corporation. All rights reserved.
All product names are trademarks of their respective companies.
374 FC/375 FC/376 FC/
902 FC
Clamp Meter
Calibration Manual
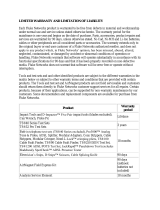
LIMITED WARRANTY AND LIMITATION OF LIABILITY
Each Fluke product is warranted to be free from defects in material and workmanship under normal use and service. The
warranty period is three years and begins on the date of shipment. Parts, product repairs, and services are warranted for 90
days. This warranty extends only to the original buyer or end-user customer of a Fluke authorized reseller, and does not
apply to fuses, disposable batteries, or to any product which, in Fluke's opinion, has been misused, altered, neglected,
contaminated, or damaged by accident or abnormal conditions of operation or handling. Fluke warrants that software will
operate substantially in accordance with its functional specifications for 90 days and that it has been properly recorded on
non-defective media.Fluke does not warrant that software will be error free or operate without interruption.
Fluke authorized resellers shall extend this warranty on new and unused products to end-user customers only but have no
authority to extend a greater or different warranty on behalf of Fluke. Warranty support is available only if product is
purchased through a Fluke authorized sales outlet or Buyer has paid the applicable international price. Fluke reserves the
right to invoice Buyer for importation costs of repair/replacement parts when product purchased in one country is submitted
for repair in another country. Fluke's warranty obligation is limited, at Fluke's option, to refund of the purchase price, free of
charge repair, or replacement of a defective product which is returned to a Fluke authorized service center within the
warranty period.
To obtain warranty service, contact your nearest Fluke authorized service center to obtain return authorization information,
then send the product to that service center, with a description of the difficulty postage and insurance prepaid (FOB
Destination). Fluke assumes no risk for damage in transit. Following warranty repair, the product will be returned to Buyer,
transportation prepaid (FOB Destination). If Fluke determines that failure was caused by neglect, misuse, contamination,
alteration, accident, or abnormal condition of operation or handling, including overvoltage failures caused by use outside
the product’s specified rating, or normal wear and tear of mechanical components, Fluke will provide an estimate of repair
costs and obtain authorization before commencing the work. Following repair, the product will be returned to the Buyer
transportation prepaid and the Buyer will be billed for the repair and return transportation charges (FOB Shipping Point).
THIS WARRANTY IS BUYER'S SOLE AND EXCLUSIVE REMEDY AND IS IN LIEU OF ALL OTHER WARRANTIES,
EXPRESS OR IMPLIED, INCLUDING BUT NOT LIMITED TO ANY IMPLIED WARRANTY OF MERCHANTABILITY OR
FITNESS FOR A PARTICULAR PURPOSE. FLUKE SHALL NOT BE LIABLE FOR ANY SPECIAL, INDIRECT,
INCIDENTAL OR CONSEQUENTIAL DAMAGES OR LOSSES, INCLUDING LOSS OF DATA, ARISING FROM ANY
CAUSE OR THEORY.
Since some countries or states do not allow limitation of the term of an implied warranty, or exclusion or limitation of
incidental or consequential damages, the limitations and exclusions of this warranty may not apply to every buyer. If any
provision of this Warranty is held invalid or unenforceable by a court or other decision-maker of competent jurisdiction, such
holding will not affect the validity or enforceability of any other provision..
11/99
Fluke Corporation
P.O. Box 9090
Everett, WA 98206-9090
U.S.A.
Fluke Europe B.V.
P.O. Box 1186
5602 BD Eindhoven
The Netherlands
ООО «Флюк СИАЙЭС»
125167, г. Москва,
Ленинградский проспект дом 37,
корпус 9, подъезд 4, 1 этаж
i
Table of Contents
Title Page
Introduction ..................................................................................................................................... 1
How to Contact Fluke ...................................................................................................................... 1
Safety Information ........................................................................................................................... 2
The Product .................................................................................................................................... 4
374 FC/375 FC/376 FC Electrical Specifications ............................................................................ 4
AC Current via Jaw ........................................................................................................... 4
AC Current via Flexible Current Probe ............................................................................. 4
Position Sensitivity .................................................................................................... 5
DC Current ................................................................................................................ 5
AC Voltage ................................................................................................................ 5
DC Voltage ................................................................................................................ 5
mV dc (375 FC and 376 FC) ..................................................................................... 5
Frequency via Jaw .................................................................................................... 6
Frequency via Flexible Current Probe ....................................................................... 6
Resistance ................................................................................................................. 6
Capacitance .............................................................................................................. 6
902 FC Electrical Specifications ..................................................................................................... 6
Mechanical Specifications ................................................................................................ 7
Environmental Specifications ........................................................................................... 7
Performance Tests .......................................................................................................................... 8
Calibration Adjustment .................................................................................................................... 9
Calibration Setup .............................................................................................................. 11
VAC Adjustment Procedure .............................................................................................. 12
VDC/mVDC Adjustment Procedure ........................................................................... 13
Ohm/Cap Adjustment Procedure .............................................................................. 13
AAC Adjustment Procedure (374 FC, 375 FC, 376 FC) ........................................... 14
AAC Adjustment Procedure (902 FC) ...................................................................... 14
ADC Adjustment Procedure (374 FC, 375 FC, 376 FC) .......................................... 14
uADC Adjustment Procedure (902 FC) ..................................................................... 14
ROGO Adjustment Procedure (374 FC, 375 FC, 376 FC) ....................................... 15
Temperature Adjustment Procedure (902 FC) ......................................................... 15
902 FC Temperature Zero Procedure ....................................................................... 15
Maintenance .................................................................................................................................. 15
Clean the Product .............................................................................................................15
Battery Replacement ........................................................................................................ 15
Replacement Parts ........................................................................................................... 16
ii
374 FC/375 FC/376 FC/902 FC
Calibration Manual
1
Introduction
XW Warning
To prevent electric shock or personal injury, read the Safety Information
before you use the Product.
This manual provides all the information necessary to perform basic maintenance and make calibration adjustments
for the 374 FC/375 FC/376 FC and the 902 FC Clamp Meters (the Product). All figures show the 376 FC unless
noted.
For complete operating instructions, refer to the 375 FC/375 FC/376 FC Users Manual and the 902 FC Users Manual
at www.fluke.com
.
How to Contact Fluke
To contact Fluke, use one of these telephone numbers:
Technical Support USA: 1-800-44-FLUKE (1-800-443-5853)
Calibration/Repair USA: 1-888-99-FLUKE (1-888-993-5853)
Canada: 1-800-36-FLUKE (1-800-363-5853)
Europe: +31 402-675-200
Japan: +81-3-6714-3114
Singapore: +65-6799-5566
China: +86-400-810-3435
Brazil: +55-11-3530-8901
Anywhere in the world: +1-425-446-5500
Or, visit Fluke's website at www.fluke.com
.
To register your product, visit http://register.fluke.com
.
To view, print, or download the latest manual supplement, visit http://us.fluke.com/usen/support/manuals
.
374 FC/375 FC/376 FC and 902 FC
Calibration Manual
2
Safety Information
A Warning identifies hazardous conditions and procedures that are dangerous to the user. A Caution identifies
conditions and procedures that can cause damage to the Product or the equipment under test.
XW Warning
To prevent possible electrical shock, fire, or personal injury:
Carefully read all instructions.
Read all safety information before you use the Product.
Use the Product only as specified, or the protection supplied by the Product can
be compromised.
Do not use the Product around explosive gas, vapor, or in damp or wet
environments.
Do not use the Product if it operates incorrectly.
Do not use the Product if it is altered or damaged.
Disable the product if it is damaged.
Prior to use, ensure the Product is clean, dry, and in good repair. Do not use the
Product if has been exposed to water, cleaning solutions, battery electrolyte
leakage, or other contaminants that may have entered the enclosure. These
contaminants can reduce or eliminate the protection provided by the Product
against electric shock or arc explosion. Have the product dried, cleaned, or
repaired as necessary to ensure continued safe operation.
Use only correct measurement category (CAT), voltage, and amperage rated
probes, test leads, and adapters for the measurement.
Do not exceed the Measurement Category (CAT) rating of the lowest rated
individual component of a Product, probe, or accessory.
Comply with local and national safety codes. Use personal protective
equipment (approved rubber gloves, face protection, and flame-resistant
clothes) to prevent shock and arc blast injury where hazardous live conductors
are exposed.
Before each use, examine the Product. Look for cracks or missing pieces of the
clamp housing or output cable insulation. Also look for loose or weakened
components. Carefully examine the insulation around the jaws.
Do not use test leads if they are damaged. Examine the test leads for damaged
insulation and measure a known voltage.
Do not touch voltages >30 V ac rms, 42 V ac peak, or 60 V dc.
Do not measure current while the test leads are in the input jacks.
Do not apply more than the rated voltage, between the terminals or between
each terminal and earth ground.
De-energize the circuit or wear personal protective equipment in compliance
with local requirements before you apply or remove the Flexible Current Probe.
Measure a known voltage first to make sure that the Product operates correctly.
Limit operation to the specified measurement category, voltage, or amperage
ratings.
The battery door must be closed and locked before you operate the Product.
Connect the common test lead before the live test lead and remove the live test
lead before the common test lead.
Remove all probes, test leads, and accessories before the battery door is
opened.
Keep fingers behind the finger guards on the probes.
Hold the Product behind the tactile barrier.
Replace the batteries when the low battery indicator shows to prevent incorrect
measurements.
Clamp Meter
Safety Information
3
Do not use the HOLD function to measure unknown potentials. When HOLD is
turned on, the display does not change when a different potential is measured.
Disconnect power and discharge all high-voltage capacitors before you
measure resistance, continuity, capacitance, or a diode junction.
Remove the input signals before you clean the Product.
Use only specified replacement parts.
When batteries are changed, ensure that the calibration seal in the battery
compartment is not damaged. If damaged, the Product may not be safe to use.
Return the Product to Fluke for replacement of the seal.
Do not use in CAT III or CAT IV environments without the protective cap of test
probe, The protective cap decreases the expose probe metal <4mm. This
decreases the possibility of arc flash from short circuits.
Do not place magnet inside Category IV panel. Place it outside the panel
instead.
For safe operation and maintenance of the Product:
Repair the Product before use if the battery leaks.
Have an approved technician repair the Product.
WCaution
To prevent possible damage to the Product or to equipment under test:
Use the correct terminals, function, and range for measurements.
Clean the case and accessories with a damp cloth and mild detergent only. Do
not use abrasives or solvents.
Note
The Measurement Category (CAT) and voltage rating of any combination of test probe,
test probe accessory, current clamp accessory, and the Product is the LOWEST rating
of any individual component.
Symbols used on the Product and in this manual are explained in Table 1.
Table 1. Symbols
Symbol Description
Consult user documentation.
W
WARNING. RISK OF DANGER.
X
WARNING. HAZARDOUS VOLTAGE. Risk of electric shock.
-
Do not apply around or remove from uninsulated hazardous live conductors without taking
additional protective measures.
,
Application around and removal from uninsulated hazardous live conductors is permitted.
Earth
T
Double Insulated
AC (Alternating Current)
DC (Direct Current)
Conforms to relevant Australian EMC standards.
)
Certified by CSA Group to North American safety standards.
P
Conforms to European Union directives.
Measurement Category II is applicable to test and measuring circuits connected directly to
utilization points (socket outlets and similar points) of the low-voltage MAINS installation.
Measurement Category III is applicable to test and measuring circuits connected to the
distribution part of the building’s low-voltage MAINS installation.
374 FC/375 FC/376 FC and 902 FC
Calibration Manual
4
The Product
XW Warning
To prevent possible electrical shock, fire, or personal injury:
When measuring current with the Jaw, keep fingers behind the Tactile
Barrier
.
fig01.eps
Figure 1. The Product
374 FC/375 FC/376 FC Electrical Specifications
AC Current via Jaw
Range
374 FC and 375 FC.............................................600.0 A
376 FC ................................................................999.9 A
Resolution ............................................................... 0.1 A
Accuracy .................................................................2 % ±5 digits (10 Hz to100 Hz)
2.5 % ±5 digits (100 to 500 Hz)
Crest Factor (50 Hz/60 Hz)
376 FC ................................................................3 @ 500 A
2.5 @ 600 A
1.42 @ 1000 A
374 FC and 375 FC.............................................2.5 @ 350 A
1.42 @ 600 A
Note: Add 2 % for C.F. > 2
AC Current via Flexible Current Probe
Range......................................................................2500 A
Resolution ...............................................................0.1 A (≤999.9 A)
1 A (≤ 2500 A)
Accuracy .................................................................3 % ±5 digits (5 Hz to 500 Hz)
Measurement Category IV is applicable to test and measuring circuits connected at the source of
the building’s low-voltage MAINS installation.
~
This product complies with the WEEE Directive marking requirements. The affixed label
indicates that you must not discard this electrical/electronic product in domestic household
waste. Product Category: With reference to the equipment types in the WEEE Directive Annex I,
this product is classed as category 9 “Monitoring and Control Instrumentation” product. Do not
dispose of this product as unsorted municipal waste.
Table 1. Symbols (cont.)
Symbol Description
Clamp Meter
Clamp Meter
374 FC/375 FC/376 FC Electrical Specifications
5
Crest Factor (50 Hz/60 Hz) ..................................... 3.0 at 1100 A (375 FC and 376 FC only)
2.5 at 1400 A
1.42 at 2500 A
Add 2 % for C.F. >2
Position Sensitivity
ghn12.eps
Figure 2. Position Sensitivity
DC Current
Range
374 FC and 375 FC ............................................ 600.0 A
376 FC ................................................................ 999.9 A
Resolution ............................................................... 0.1 A
Accuracy .................................................................2 % ±5 digits
AC Voltage
Range ..................................................................... 1000 V
Resolution ........................................................... 0.1 V (
600.0 V)
1 V (
1000 V)
Accuracy .................................................................1.5 % ±5 digits (20 Hz to 500 Hz)
DC Voltage
Range ..................................................................... 1000 V
Resolution ...............................................................0.1 V (
600.0 V)
1 V (
1000 V)
Accuracy .................................................................1 % ±5 digits
mV dc (375 FC and 376 FC)
Range ..................................................................... 500.0 mV
Resolution ...............................................................0.1 mV
Accuracy .................................................................1 % ±5 digits
Distance from Optimum i2500-10 Flex i2500-18 Flex Error
A 0.5 in (12.7 mm) 1.4 in (35.6 mm) ±0.5 %
B 0.8 in (20.3 mm) 2.0 in (50.8 mm) ±1.0 %
C 1.4 in (35.6 mm) 2.5 in (63.5 mm) ±2.0 %
Measurement uncertainty assumes centralized primary conductor at optimum position, no external electrical or magnetic field, and
within operating temperature range.
A
B
C
374 FC/375 FC/376 FC and 902 FC
Calibration Manual
6
Frequency via Jaw
Range
375 FC and 376 FC.............................................5.0 Hz to 500.0 Hz
Resolution ...............................................................0.1 Hz
Accuracy..................................................................0.5 % ±5 digits
Trigger Level ...........................................................5 Hz to 10 Hz,
10 A
10 Hz to 100 Hz,
5 A
100 Hz to 500 Hz,
10 A
Frequency via Flexible Current Probe
Range
375 FC and 376 FC.............................................5.0 Hz to 500.0 Hz
Resolution ...............................................................0.1 Hz
Accuracy..................................................................0.5 % ±5 digits
Trigger Level ...........................................................5 Hz to 20 Hz,
25 A
20 Hz to 100 Hz,
20 A
100 Hz to 500 Hz,
25 A
Resistance
Range
374 FC ................................................................6000
Ω
375 FC and 376 FC.............................................60 kΩ
Resolution
374 FC ................................................................0.1
Ω (600.0 Ω)
1
Ω (6000 Ω)
375 FC and 376 FC.............................................0.1
Ω (600.0 Ω)
1
Ω (6000 Ω)
10
Ω (60.00 k Ω)
Accuracy..................................................................1 % ±5 digits
Capacitance
Range......................................................................1000 μF
Resolution ...............................................................0.1
μF (100 μF)
1
μF (1000 μF)
Accuracy..................................................................1 % ±4 digits
902 FC Electrical Specifications
Function Range Resolution Accuracy
Voltage DC 600.0 V 0.1 V 1.0 % ±5 counts
Voltage AC (True-rms) 600.0 V 0.1 V 1.5 % ±5 counts (45 Hz to 400 Hz)
Current AC (True-rms) 600.0 A 0.1 A
2.0 % ±5 counts, (45 Hz to 65 Hz)
2.5 % ±5 counts, (65 Hz to 400 Hz)
Max Crest Factor (50 Hz/60 Hz)
3 @ 180 A
2.5 @ 220 A
1.42 @ 600 A
Note: Add 2 % for C.F. >2
Current DC (True-rms) 200.0
μA0.1 μA 1.0 % ±5 counts
Resistance
600.0
Ω
6000 Ω
60.00 kΩ
0.1 Ω
1 Ω
0.01 kΩ
1.0 % ±5 counts
Continuity <30
Ω -- --
Temperature -40.0 °C to 400.0 °C 0.1 °C 1.0 % ±8 counts
Capacitance
100.0
μF
1000
μF
0.1
μF
1
μF
1.0 % ±4 counts
Clamp Meter
902 FC Electrical Specifications
7
Mechanical Specifications
Size (L x W x H)
374 FC/375 FC/376 FC.......................................249 mm x 85 m x 45 mm
902FC ................................................................. 230 mm x 83.7 mm x 45.4 mm
Weight
374 FC/375 FC/376 FC.......................................410 g
902 FC ................................................................ 382 g
Environmental Specifications
Operating Temperature...........................................-10 °C to +50 °C
Storage Temp
374 FC/375 FC/376 FC....................................... -40 °C to +60 °C
902 FC ................................................................ -30 °C to +60 °C
Operating Humidity ................................................. Non condensing (<10 °C)
90 % RH (at 10 °C to 30 °C)
75 % RH (at 30 °C to 40 °C)
45 % RH (at 40 °C to 50 °C)
Operating Altitude ...................................................2000 meters
Storage Altitude ...................................................... 12 000 meters
Safety
374 FC/375 FC/376 FC.......................................IEC 61010-1, Pollution Degree 2
IEC 61010-2-032: CAT III 1000V / CAT IV 600V
IEC 61010-2-033: CAT III 1000V / CAT IV 600V
902 FC ................................................................ IEC 61010-1, Pollution Degree 2
IEC 61010-2-032: CAT III 600 V / CAT IV 300 V
IEC 61010-2-033: CAT III 600 V / CAT IV 300 V
Intrusion Protection (IP) Rating ..............................IEC 60529: IP30
Radio Frequency Certification................................. FCC ID:T68-FBLE IC:6627A-FBLE
Wireless Radio Frequency Range .......................... 2412 MHz to 2462 MHz
Output Power ......................................................... <100 mW
Electromagnetic Compatibility (EMC)
International ........................................................... IEC 61326-1: Portable, Electromagnetic Environment, IEC 61326-2-2, CISPR 11: Group 1,
Class A
Group 1: Equipment has intentionally generated and/or uses conductively-coupled radio frequency energy that is necessary for the
internal function of the equipment itself.
Class A: Equipment is suitable for use in all establishments other than domestic and those directly connected to a low-voltage power
supply network that supplies buildings used for domestic purposes. There may be potential difficulties in ensuring electromagnetic
compatibility in other environments due to conducted and radiated disturbances.
Caution: This equipment is not intended for use in residential environments and may not provide adequate protection to radio reception in
such environments.
Emissions that exceed the levels required by CISPR 11 can occur when the equipment is connected to a test object. The equipment may
not meet the immunity requirements of this standard when test leads and/or test probes are connected.
Temperature Coefficients........................................ Add 0.1 x specified accuracy for each °C above 28 °C or below 18 °C
374 FC/375 FC/376 FC and 902 FC
Calibration Manual
8
Performance Tests
Performance tests make sure that the Product operates within the published specifications. Do the performance tests
periodically and after service or repair. If the Product fails any part of the verification test, repair, and/or calibration
adjustments are required. See Calibration Adjustment.
In this section the Product is called the UUT (unit under test). Use these verification performance tests to make sure
the values indicated on the UUT correspond, as closely as possible, with the actual measurement values.
For each test:
1. Set the UUT to the appropriate function.
2. Connect the UUT to the Calibrator.
3. Set the Calibrator output.
4. Compare the results to Table 2. (Where X = not applicable.)
The test passes if the UUT reads between the upper and lower limit.
Table 2. Performance Tests
Function Calibrator Output 374 FC 375 FC 376 FC 902 FC
Meter Reading Limit
Lower Limit Upper limit
VAC
20 V, 20 Hz
X 19.2 20.8
10 V, 50 Hz
9.4 10.7
500 V, 50 Hz
492.0 508.0
1000 V, 5 0 Hz
X
980 1020
10 V, 400 Hz
9.4 10.7
500 V, 400 Hz
492.0 508.0
VDC
-1000
X -1015 -985
-10
-10.6 -9.4
10
9.4 10.6
500
494.5 505.5
1000
X 985 1015
mVDC
50 mV X
X 49.0 mV 51.0 mV
500 mV X
X 494.5 mV 505.5 mV
-500 mV X
X -505.5 mV -494.5 mV
Ohms
0 Ω
-0.5 Ω 0.5 Ω
10 Ω
9.4 Ω 10.6 Ω
300 Ω
296.5 Ω 303.5 Ω
3000 Ω
2965 Ω 3035 Ω
30 kΩ X
29.65 kΩ 30.35 kΩ
R

Capacitance
5 μF
4.6 μF 5.5 μF
90 μF
88.7 μF 91.3 μF
500 μF
491 mF 509 μF
AAC
with 50 turns coil
2 A, 50 Hz
97.5 102.5
12 A, 50 Hz
587.5 612.5
19.5 A, 50 Hz X X
X 955 995
Clamp Meter
Calibration Adjustment
9
Table 2. Performance Tests (cont.)
Calibration Adjustment
Use the calibration procedures to adjust the Product so that the values shown on the Product correspond as closely
as possible with the actual measured values. Table 3 is a list of the equipment required for the calibration adjustment.
Function Calibrator Output 374 FC 375 FC 376 FC 902 FC
Meter Reading Limit
Lower Limit Upper limit
ADC
with 50 turns coil
-19.5 A X X
X -995 A -955 A
-12 A
X -612.5 A -587.5 A
-0.2 A
X -10.7 A -9.3 A
0.2 A
X 9.3 A 10.7 A
2 A
X 97.5 A 102.5 A
12 A
X 587.5 A 612.5 A
19.5 A X X
X 955.0 A 995.0 A
iFlex Current
Probe (with
simulation)
3 mV, 50 Hz
X 96.5 A 103.5 A
27 mV, 50 Hz
X 872.5 A 927.5 A
60 mV, 50 Hz
X 1935 A 2065 A
75 mV, 50 Hz
X 2420 A 2580 A
750 mV, 500 Hz
X 2420 A 2580 A
iFlex Current
Probe (with 50
turns r-coil)
0.2 A, 50 Hz
X 9.2 A 10.8 A
10 A, 50 Hz
X 484.5 A 515.5 A
18 A, 50 Hz
X 872.5 A 927.5 A
6 A, 440 Hz
X 290.5 A 309.5 A
μADC
0 μA X X X
-0.5 μA 0.5 μA
10 μA X X X
9.4 μA 10.6 μA
200 μA X X X
197.5 μA 202.5 μA
-200 μA X X X
-202.5 μA -197.5 μA
Temperature
-40 °C X X X
-41.2 °C -38.8 °C
0 °C X X X
-0.8 °C 0.8 °C
50 °C X X X
48.7 °C 51.3 °C
400 °C X X X
395.2 °C 404.8 °C
Table 3. Required Equipment
Equipment Required Characteristics Recommended Model
Calibrator 4.5-digit resolution Fluke 55xxA Calibrator
Wired coil 50 turns 5500A/COIL
Test Lead for iFlex -- PN 666602
Test Lead for other -- PN 2070140
Power Supply +3.0 V
Common power supply or a 2 x AA or AAA
battery container
374 FC/375 FC/376 FC and 902 FC
Calibration Manual
10
h
Static Awareness
h
X
Semiconductors and integrated circuits can be damaged by electrostatic discharge during handling.
This notice explains how to minimize damage to these components.
1. Understand the problem.
2. Learn the guidelines for proper handling.
3. Use the proper procedures, packaging, and bench techniques.
Follow these practices to minimize damage to static sensitive parts.
XW Warning
To prevent electric shock or personal injury.
De-energize the product and all active circuits
before opening a product enclosure, touching or
handling any PCBs or components
.
Minimize handling.
Handle static-sensitive
parts by non-conductive
edges.
Do not slide static-
sensitive components
over any surface.
When removing plug-in
assemblies, handle only
by non-conductive
edges.
Never touch open-edge
connectors except at a
static-free work station.
Keep parts in the original
containers until ready for
use.
Use static shielding
containers for handling and
transport.
Avoid plastic, vinyl, and
Styrofoam
®
in the work
area.
Handle static-sensitive
parts only at a static-
free work station.
Put shorting strips on
the edge of the
connector to help
protect installed static-
sensitive parts.
Use anti-static type
solder extraction tools
only.
Use grounded-tip
soldering irons only.
Clamp Meter
Calibration Adjustment
11
Calibration Setup
To set up the Product for calibration:
1. Turn the Product over and use a flat-head screwdriver to remove the battery compartment screw. See Figure 3.
2. Remove the battery door.
3. Remove the batteries.
fig02.eps
Figure 3. Remove Batteries
4. Remove the calibration sticker.
5. Connect the Power Supply to the Product battery terminals.
6. Turn on the Product.
7. Use a small jumper to short the two pads together under the calibration sticker. See Figure 4.
ghn51.eps
Figure 4. Calibration Activation
8. To setup the current calibration see Figure 5.
1
2
3
374 FC/375 FC/376 FC and 902 FC
Calibration Manual
12
ghn50.eps
Figure 5. Current Calibration Setup
9. For each calibration adjustment:
a. Turn the rotary knob to select the function.
b. Apply the required output from the source to the Product.
c. Wait until each applied output stabilizes.
On the 37x FC Products, push to confirm the value and move to the next step in the Adjustment
Procedure. When you have completed all the steps, push
to save the data to NVRAM storage.
On the 902 FC Products, push
to confirm the value and move to the next step in the Adjustment
Procedure. When you have completed all the steps, push to save the data to NVRAM storage.
10. To view the target calibration point, push .
11. When calibration is complete:
a. Remove the power supply.
b. Replace the batteries.
c. Replace the battery compartment door and tighten the battery compartment screw.
VAC Adjustment Procedure
Step LCD Display 374 FC 375 FC 376 FC 902 FC Calibrator Output
1C-00
√√
0 V, 0 Hz
2C-01
√√
600 V, 50 Hz
3C-02
√√
300 V, 50 Hz
4C-03
√√
300 V, 100 Hz
5C-04
√√
300 V, 200 Hz
6C-05
√√
300 V, 300 Hz
7C-06
√√
300 V, 400 Hz
8C-07
√√
300 V, 500 Hz
9Save
√√
STBY
1
4
7
/
+
STB
Y
5522A
CALIBRATOR
HI
LO
TRIG
GUARD
TC
20A
NORMAL
AUX
SCOPE
OUT
V, , ,
RTD
A, -SENSE,
AUX V
20V PK MAX
20V PK MAX
Clamp Meter
Calibration Adjustment
13
VDC/mVDC Adjustment Procedure
Ohm/Cap Adjustment Procedure
Step LCD Display 374 FC 375 FC 376 FC 902 FC Calibrator Output
1C-08
√√
0 V
2C-09
√√
600 V
3C-10
√√
0 V
4C-11
√√
0.5 V
5Save
√√
STBY
Step LCD Display 374 FC 375 FC 376 FC 902 FC Calibrator Output
1C-12
√√
0 Ω
2C-13
√√
600 Ω
3C-14
√√
660 Ω
4C-15
√√
6000 Ω
5C-16
√√
6600 Ω
6C-17
√√
60 000 Ω
7C-18
√√
0.1 μF
8C-19
√√
0.5 μF
9C-20
√√
1.5 μF
10 C-21
√√
110 μF
11 C-22
√√
500 μF
12 C-23
√√
1000 μF
13 Save
√√
STBY
374 FC/375 FC/376 FC and 902 FC
Calibration Manual
14
AAC Adjustment Procedure (374 FC, 375 FC, 376 FC)
AAC Adjustment Procedure (902 FC)
ADC Adjustment Procedure (374 FC, 375 FC, 376 FC)
uADC Adjustment Procedure (902 FC)
Step LCD Display 374 FC 375 FC 376 FC Calibrator Output
1C-24
√√
0 A, 0 Hz
2C-25
√√
8 A, 50 Hz
3C-26
√√
3 A, 50 Hz
4C-27
√√
3 A, 100 Hz
5C-28
√√
3 A, 200 Hz
6C-29
√√
3 A, 300 Hz
7C-30
√√
3 A, 400 Hz
8C-31
√√
3 A, 440 Hz
9 Save
√√
STBY
Step LCD Display Calibrator Output
1 C-24 0 A, 0 Hz
2 C-25 3 A, 50 Hz
3 C-26 8 A, 50 Hz
4 C-27 3 A, 50 Hz
5 C-28 3 A, 100 Hz
6 C-29 3 A, 200 Hz
7 C-30 3 A, 300 Hz
8 C-31 3 A, 400 Hz
9 C-32 3 A, 440 Hz
10 Save STBY
Step LCD Display 374 FC 375 FC 376 FC Calibrator Output
1C-32
√√
0 A
2C-33
√√
10 A
3Save
√√
STBY
Step LCD Display 902 FC Calibrator Output
1C-32
0 A
2C-33
200 μA
3Save
STBY
Clamp Meter
Maintenance
15
ROGO Adjustment Procedure (374 FC, 375 FC, 376 FC)
Temperature Adjustment Procedure (902 FC)
902 FC Temperature Zero Procedure
After you do the temperature adjustment (See Temperature Adjustment Procedure (902 FC)), you must zero the
temperature.
1. Insert the K-type thermocouple connector to attach the 5522A and the Product.
2. Turn off the Product and wait 20 minutes.
3. Turn on the Product.
4. Use a small probe to push the calibration button.
5. Turn the control knob to
6. Push twice, until the LCD shows C-37.
Maintenance
This section contains basic maintenance procedures.
Clean the Product
WCaution
To prevent possible damage to the Product or to equipment under test, do not use
abrasive cleaners. They will damage the case.
To clean the Product, use a cloth with a mild cleaning solution.
Battery Replacement
XW Warning
To prevent possible electrical shock, fire, or personal injury, and to prevent
incorrect measurements, replace the batteries when the low battery
indicator shows.
Step LCD Display 374 FC 375 FC 376 FC Calibrator Output
1C-34
√√
0 V, 0 Hz
2C-35
√√
60 mV, 50 Hz
3C-36
√√
30 mV, 50 Hz
4C-37
√√
60 mV, 100 Hz
5C-38
√√
120 mV, 200 Hz
6C-39
√√
180 mV, 300 Hz
7C-40
√√
240 mV, 400 Hz
8C-41
√√
300 mV, 500 Hz
9Save
√√
STBY
Step LCD Display 902 FC Calibrator Output
1C-35
0 V, 0 Hz
2C-36
0.02 V, 0 Hz
3Save
STBY
Step LCD Display 902 FC Calibrator Output
1C-37
0 °C
2Save
STBY
374 FC/375 FC/376 FC and 902 FC
Calibration Manual
16
Replacement Parts
Replacement parts and accessories are listed in Tables 4. To order parts and accessories, see How to Contact Fluke.
Table 4. Replacement Parts and Accessories
Fluke Part Number Description Quantity
4696918 Battery Door Assembly 1
3752958 Soft Case (374 FC/375 FC/376 FC) 1
1997276 Soft Case(902 FC) 1
4705494 User Manual (374 FC/375 FC/376 FC) 1
4748982 User Manual (902 FC) 1
376756 Battery (AA 1.5 V) 2
855742 TL75 test leads 1
3798105 Fluke i2500-18 Rogowski coil 1
1997234 Thermocouple Assembly, K-Type,Beaded, Molded Dual Banana Plug (80BK) 1
4744076 FLUKE-374 FC,DECAL CELL 1
4744083 FLUKE-375 FC,DECAL CELL 1
4698317 FLUKE-376 FC,DECAL CELL 1
/