Page is loading ...

www.kleintools.com
Instruction
Manual
For Professionals...Since 1857
®
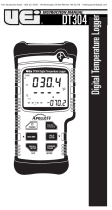
Digital Thermometer
Digital Thermometer
DTL302
•
2 TEMPERATURE
INPUTS
•
IP67 WATER/
DUSTPROOF RATING
•
MULTI PARAMATER
BACKLIT DISPLAY
•
CONVENIENT
PROBE STORAGE
•
MIN/MAX &
DATA HOLD
•
EXTERNAL USB
POWER FOR LONG-
TERM LOGGING
•
USB LOGGING
SOFTWARE
•
DIFFERENTIAL T1-T2
•
MAGNETIC MOUNT
STRAP
ENGLISH

WARNINGS:
Always wear approved eye protection.
Do NOT use on energized circuits.
3
Digital Thermometer
Instruction Manual
GENERAL SPECIFICATIONS
The Klein Tools DTL302 is a hand-held dual differential Digital Temperature
Tester that offers logging, monitoring and uploading capabilities to help
analyze system performance trends with the included software.
•
Dimensions:
7.20”h x 3.70”w x 1.70"d
•
Weight:
16.2 oz
•
Operating Temperature:
14° to 122°F (-10° to 50°C)
•
Storage Temperature:
-40° to 140°F (-40° to 60°C)
•
Humidity:
Non condensing <50°F (10°C)
85% RH: 50° to 86°F (10° to 30°C)
70% RH: 86° to 104°F (30° to 40°C)
45% RH: 104° to 122°F (40° to 50°C
)
•
Altitude:
Operating - up to 2000 m/Storage - 10000 m
•
Battery:
2 (AAA) type 1.5V
•
Certifi cations:
CE
IEC 1010-1 (2001)
EN 61010-1 (2001)
No. 1010.1 (1992)
IP67 IEC 60529, Immersion (30 min) & Dust proof
•
Overvoltage:
(Installation) CATEGORY I
•
Pollution Degree:
2 (IEC 1010-1)
WARNINGS
WARNINGS
To ensure safe operation and service of the tester, follow these instructions.
Failure to observe these warnings can result in severe injury or death.
•
Follow the manufacturer’s maintenance procedures when
servicing equipment.
•
Place ONLY thermocouples (type K, J, T, or E) in the thermocouple
ports.
•
Make sure your meter is set for the proper thermocouple type.
•
Be sure the thermocouple you use can withstand the temperature
extreme it may be exposed to in your service task.
•
Properly maintain your thermometer and calibrate it regularly.
•
Do not use if the thermometer has cracks or any other damage to
the case.
•
Disconnect thermocouple before replacing batteries or opening
case.
•
Replace batteries when low battery indicator appears on the
screen. Low batteries can aversely affect thermometer accuracy.
•
Do not apply voltage to thermocouples. There should be no more
than 1V between any two thermocouples, and no more than 30V
between any thermocouple and earth ground.

ENGLISH
4
FEATURE DETAIL
NOTE: Press all the dual function buttons momentarily to activate the
Upper Row Function, and press these buttons for more than 1 second
to activate the Lower Row Functions.
A. Thermocouple Inputs
.
•
T1 = Thermocouple Input 1, T2 = Thermocouple Input 2
•
Use thermocouples types K, J, T, or E
ONLY
in the input ports
ONLY in the input portsONLY
B. Backlit LCD Display
•
See DISPLAY section of this manual.
C. Power (
)
•
Press and Hold for more than 1 second to turn the thermometer
on and off.
•
Press to turn the backlight on and off. The backlight turns off after
30 seconds without any button pressed.
•
If the battery is low, the backlight is disabled.
D. Max/Min (
)
•
Press to step through the maximum, minimum, and average
readings in the secondary display. When viewing logged readings,
the maximum, minimum, and average measurements are
displayed.
•
Press and Hold for more than 1 second to turn off this display.
•
The “
” scroll function is activated in the “
RECALL
” and
“
SETUP
” modes only.
E. Recall Set Up (
Exit
)
•
Press to recall or stop viewing logged and MIN/MAX readings.
•
Press and Hold
for more than 1 second to start or exit “
SETUP
”.
•
The “
EXIT
” function is activated in the “
RECALL
” and
“
SETUP
” mode only.
A
B
C
D
E
G
H
I
F

5
F. USB Port / External Power
•
USB input jack
NOTE: Also used for AC power adapter.
G. T1/T2 T1-T2
•
While displaying T1 in the primary display press to scroll through
T2 or the internal temperature of the meter.
•
Press and Hold to change primary display to temperature
differential (T1-T2).
•
While displaying (T1-T2) in the primary display a quick press will
scroll through T1, T2, or the internal temperature of the meter in
the lower display
H. Hold °C/°F/K (
)
•
Press to freeze or release the displayed readings.
•
Press and Hold for more than 1 second to switch between Celsius
(°C), Fahrenheit (°F), and Kelvin (K).
•
The
“
”
function is activated in the “
RECALL
” and “
SETUP
”
modes only.
I. Logging Clear (Enter)
•
Press to start or stop logging.
•
Press and Hold for more than 1 second to clear logged readings.
•
To clear logged data press and hold until
“
”
appears in the
lower display. To execute the clear press and hold until
“
”
appears.
•
The “
ENTER
” function is activated in the “
SETUP
” mode only.
DISPLAY
1
2 3 4 5
6 7
12
8
9
10
11
1. Primary Display:
T1-T2 reading.
2. TYPE KJET:
Type of thermocouple.
3. SETUP:
Setup is in progress.
4. RECALL:
The logged readings are displayed.
5. OFFSET:
The thermocouple measurement includes an offset.
6. HOLD:
The display readings do not change.
7. LOW BATTERY:
Replace batteries.
8. USB:
The thermometer is connected to a PC via USB interface port.
9. LOG:
Readings are being logged.
10. °C,°F, K:
Temperature units.
11. Secondary Display:
Internal temperature of the thermometer,
MEMORY
,
MIN
,
MAX
,
AVG
, and
T1
or
T2
reading. Shows the
memory location initially when a logged reading is recalled.
12. Time Display:
24-hour clock, shows the INTERVAL length in
SETUP
.
•
Shows elapsed time when AVG is on or before clock has been set.
•
Shows the memory time later on when a logged reading is recalled.

6
ENGLISH
SET UP INSTRUCTIONS
A. Before Operating
•
Plug the thermocouple(s) into the input terminal(s).
•
Press “
” to turn the instrument on. After 1 second,
the thermometer displays the fi rst reading and its internal
temperature. If no thermocouple is plugged into the selected input
or the thermocouple is “
OPEN
”, the display shows “----”.
B. Set Up Mode
•
Use “
SETUP
” to reset the thermometer or change the date
settings, time units, time settings, thermocouple type, Auto-
Power-Off mode, logging interval, and offset.
•
When the thermometer is in “
SETUP
” mode, the display always
shows “
SETUP
”.
•
Press and Hold “
” for more than 1 second to start or exit
“
SETUP
” mode.
NOTE:
The meter must be in normal operation mode.
NOTE: The meter must be in normal operation mode. NOTE:
(Not logging or displaying Min/Max/Avg values)
•
Press “
EXIT
” or Press and Hold “
” for more than 1 second
to exit “
SETUP
”.
NOTE:
Press
NOTE: Press NOTE:
“
”
or
“
”
to scroll to the setup option you
want to change and then press
“
ENTER
”
to accept the selected
setup option.
C. Date
•
Entering Setup will show the first option of “
”
•
Press “
ENTER
” and the display will show “
”
•
Press “
” or “
” to select the correct year. Press “
ENTER
”
•
Next the meter will indicate month and day with “
”.
•
Press “
” or “
” to select the correct day. Press “
ENTER
”
•
Press “
” or “
” to select the correct month. Press “
ENTER
”
NOTE:
date and time must be set during the same session.
NOTE: date and time must be set during the same session.NOTE:
NOTE:
Both the date and time must be set in order to use the
NOTE: Both the date and time must be set in order to use the NOTE:
logging feature.
D. Time Unit
•
While in “
SETUP
” mode, scroll until the display shows “
“ in the primary display and “
“ in the secondary display.
•
Press “
ENTER
” to indicate you want to set the time units. The
display shows “
h:m
” blinking.
•
Press “
” or “
” to select the time units you want to
display, and press “
ENTER
” to store the time units in memory.
E. Time
•
Press “
” or “
” until the display shows “
”.
•
Press “
ENTER
” to indicate you want to set the time. The
display shows “
” blinking.
•
Press “
” or “
” until the display shows the correct hour
(24-hour format), and the press “
ENTER
” to store the time in
memory.
NOTE:
Holding down “
NOTE: Holding down “ NOTE:
” or “
” causes the number to
change more quickly.
F. Thermocouple Type
•
Press “
” or “
” until the display shows “
TYPE
”.
•
Press “
ENTER
” to display the thermocouple type choices (K, J,
E or T). The selected thermocouple type blinks.
•
Press “
” or “
” to scroll to the desired type appears on the
display, and press “
ENTER
” to store the thermocouple type in
memory.
G. Changing Auto-Power Off Time
•
The thermometer enters Auto-Power-Off mode if no button is
pressed for 30 minutes. Press “
” to turn the thermometer
on. You can enable or disable Auto-Power-Off mode and also
you can select the Auto-Power-Off mode and also you can
select the Auto-Power-Off time (in minutes) among the 9
choices below:
1.
00:10
h:m
2.
00:20
h:m
3.
00:30
h:m
4.
00:40
h:m
5.
00:50
h:m
6.
00:60
h:m
7.
00:70
h:m
8.
00:80
h:m
9.
00:90
h:m
Default >

7
•
Press “
” or
“
”
until the display shows “
”
.
•
Press “
ENTER
” to display “
” or “
” in the time display.
If “
” is displayed, press “
” or
“
”
to select “
”.
•
Press “
ENTER
” to display choice number 3 in the secondary
display and
00:30
h:m
in the time display.
•
Press “
” or
“
”
until the display shows the Auto-Power-
Off Time choice number you want, and then press “
ENTER
” to
store the Auto-Power-Off setting in memory.
•
Auto-Power-Off mode is automatically disabled in MIN/MAX
and logging modes.
H. Change Logging Interval
•
The logging interval determines how often the thermometer
stores logged readings in memory. You choose the length of
the logging interval. The thermometer stores logged readings
at the end of each logging interval.
•
Select logging intervals
•
Press “
” or
“
”
until the display shows
and “
LOG
”
.
•
Press “
ENTER
” to display the logging interval choices.
•
Press “
” or
“
”
until the display shows the logging
interval you want, and then press “
ENTER
” to select.
•
For user-defined logging interval (1 sec. to 23 hrs : 59 mins).
Press “
” or
“
”
until the display shows “
h:m
” or “
m:s
”,
and then press “
ENTER
” to select. The last number in the
time display blinks.
Press “
” or
“
”
until the logging interval you want
appears on the display, and then press “
ENTER
” to select.
•
Holding down “
” or
“
”
causes the number to change
more quickly.
I. Setting Temperature Offset
•
You can adjust the thermometer’s readings to compensate
for the errors of a specific thermocouple. The allowable
compensation range is ±5.0°C or K, and ±9.0°F. The DTL302
allows you to store individual offsets for T1 and T2.
•
Press “
” or
“
”
until the display shows “
OFFSET
”.
•
Press “
ENTER
” to display T1 reading (blinking), T1 offset.
•
Press “
” or
“
”
to display T1 or T2 in the primary display
to select 1 input.
•
Press “
” or
“
”
until the primary display shows the
correct reading, and then press “
ENTER
” to store the offset
setting in memory.
•
NOTE: Reset the offset to 0.0 when it is no longer needed.
•
NOTE: If T1 or T2 has no offset, “
OFFSET
”will not be displayed.
J. Resetting The Thermometer
•
To restore to factory settings, press “
” or
“
”
until
the display shows “
” then press “
ENTER
” to display
“
“ in the primary display. Press “
EXIT
” to exit setup.
FUNCTION INSTRUCTIONS
1. Connecting Thermocouples
•
Thermocouples are color coded based on the ANSI color code:
•
Plug a thermocouple into the input terminal(s).
•
Set the thermometer for the correct thermocouple type. To
change the thermocouple type, see:
Set Up Instructions
section,
Set Up Instructions section, Set Up Instructions
F: Thermocouple Type
1.
:01
sec
2.
:10
sec
3.
1:00
min
4.
10:00
min
User Defined
J Type =
Black
K Type =
Yellow
T Type =
Blue
E Type =
Purple

8
ENGLISH
2. Displaying Temperature
•
Press “
HOLD (°C/°F/K)
” for more than 1 second to select the
correct temperature unit.
•
Hold or attach the thermocouple(s) to the measurement
location. The temperature reading appears in the selected
display.
•
Press “
T1/T2 (T1 - T2)
” momentarily to show T1 reading in the
primary display, and toggle showing T2 reading, or the internal
temperature of the thermometer in the secondary display.
•
Press “
T1/T2 (T1 - T2)
” for more than 1 second to show T1-T2
reading in the primary display.
•
Press “
T1/T2 (T1 - T2)
” momentarily to toggle T1, T2, or the
internal temperature of the thermometer in the secondary
display while the primary display shows the T1-T2 reading.
•
NOTE:
The display shows “----” when a thermocouple is not
NOTE: The display shows “----” when a thermocouple is not NOTE:
connected. The display shows “
” (OVERLOAD) when the
temperature being measured is outside the thermocouple’s
valid range.
3. Holding the Displayed Temperature
•
Press “
HOLD (°C/°F/K)
” momentarily to freeze the readings on
the display. The display shows “
HOLD
”.
•
Press “
HOLD (°C/°F/K)
” momentarily again to turn off the “
HOLD
” function.
4. Viewing the MIN/MAX/AVG Readings
•
NOTE:
MIN/MAX and AVG values are captured only while this
NOTE: MIN/MAX and AVG values are captured only while this NOTE:
mode is active. Exiting the MIN/MAX/AVG mode will clear all
values.
•
Press “
MAX/MIN
” momentarily to step through the MIN
(minimum),MAX (maximum), or the AVG (average) readings in
the secondary display.
•
The elapsed time since entering MAX/MIN mode appears with
the average reading.
•
The time at which the MINIMUM or MAXIMUM occurred
appears with the MINIMUM or MAXIMUM reading on the
display.
•
Press “
T1/T2 (T1 - T2)
” momentarily to toggle showing the
maximum (MAX) of T1, or T2 readings and its displayed time.
•
Press “
T1/T2 (T1 - T2)
” for more than 1 second to show the
maximum (MAX) of T1-T2 reading and its displayed time.
•
The minimum (MIN) or average (AVG) reading can be
displayed in the similar way.
•
Press “
MAX/MIN
” for more than 1 second or “
” button
for more than 1 second to exit MIN/MAX mode.
5. Using the Offset to Compensate for Probe Errors
•
Use the offset option in “
SETUP
” to adjust temperature
readings to compensate for the errors of a specified
thermocouple.
•
Plug the thermocouple into the input terminal.
•
Place the thermocouple in a known stable temperature
environment (such as an ice bath or a dry well calibrator).
•
Allow the readings to stabilize.
•
In “
SETUP
”, change the offset until the primary display
reading matches the calibration temperature, see:
Set Up Instructions
section,
Set Up Instructions section, Set Up Instructions
I
: Setting Temperature Offset
6. Using Memory
•
During logging session, the thermometer stores logged
readings in its memory. At the end of the logging session you
can view the logged readings on the display. You can also
transfer the logged readings to a PC running the provided
software, which displays the readings on an online form,
which can be printed or stored for later use.

9
7. Initial Conditions and Data Entries
•
Logged readings include initial conditions and data entries.
The initial conditions are the thermocouple type and the
offsets for each thermocouple input. You can only view initial
conditions using the included software.
•
The data entries are a time stamp and the T1, T2 or T1-T2 reading.
You can view these values by pressing “
RECALL (SETUP)
”
momentarily or using the included software. The thermometer
has 9,999 memory locations. The thermometer stores 9,999 sets
of temperature readings and one set of initial conditions when
logging continuously. It stores 9,999 sets of temperature readings
and initial conditions when logging individual points manually.
8. Starting and Stopping Logging
•
Memory clear, and PC communications are inaccessible during
logging. Recall function is enabled during logging.
•
Set the time and the logging interval, see:
Set Up Instructions
sections,
E: Time
, and
H:
Change Logging Interval
.
Change Logging Interval.Change Logging Interval
•
Press “
LOGGING (CLEAR)
” momentarily to start logging. The
display shows “
LOG
“.
•
Press “
LOGGING (CLEAR)
” momentarily again to stop logging.
9. Clearing Memory
•
When memory is full, “
FULL
“ appears in the secondary
display and logging stops. You can clear memory in normal or
MAX/MIN mode.
•
Press “
LOGGING (CLEAR)
” for more than 1 second to display
“
” in the RECALL mode.
•
Press “
LOGGING (CLEAR)
” for more than 1 second again to
delete all logged readings from memory.
•
Press “
EXIT
” momentarily or turn off the thermometer to stop
clearing memory.
10. Viewing Logged Readings
•
Press “
RECALL
” momentarily to display the last logged
reading. If there is no logged readings, “
” appears in
the secondary display, and the thermometer returns to the
previous mode.
•
Press and Hold “
” or
“
”
to scroll through the logged
readings. The display shows each logged reading and its time
stamp, which is displayed 2 seconds after its memory location
appeared in the secondary display.
•
Press “
MAX/MIN
” momentarily to step through the minimum,
maximum, average, and currently logged reading.
•
Press “
T1/T2
” momentarily to display the logged readings you
want to view. Press “
T1-T2
” for more than 1 second to display
differential values between the logged readings you want to
view.
•
Press “
RECALL
” momentarily or turn off the thermometer to
stop viewing logged readings.
•
NOTE:
The thermometer calculates the minimum and
NOTE: The thermometer calculates the minimum and NOTE:
maximum of all logging sessions in memory.
11. USB Port / External Power
•
This thermometer is equipped with an USB interface port and
cable. Optional Windows® compatible software is available
for download at www.kleintools.com. This kit is required to
connect the thermometer to a PC.
•
The kit allows you to transfer the current data measured and
the contents of the thermometer’s memory to a PC. Refer to
the “HELP” menu in the software for further details.
•
The DTL302 can be powered through the USB cable or
included AC adapter. This allows long term monitoring or
logging without consuming battery power
•
NOTE:
The AC adapter and/or USB cable does NOT recharge
NOTE: The AC adapter and/or USB cable does NOT recharge NOTE:
the installed batteries.

10
ENGLISH
ELECTRICAL SPECIFICATIONS
Temperature
Range
J-type
-346°F~2192°F
-210°C~1200°C
64K ~ 1472K
K-Type
-328°F~2498°F
-200°C~1370°C
74K ~ 1642K
T-type -328°F~752°F -200°C~400°C 74K ~ 673K
E-Type -238°F~1832°F -150°C~1000°C 124K ~ 1273K
Display
Resolution
J-type
0.1°F<1000°F
0.1°C<550°C
0.1K<824K
1°F
≥
1000°F
1°C
≥
550°C
1K
≥
824K
K-Type
0.1°F<1000°F
0.1°C<750°C
0.1K<1000K
1°F
≥
1000°F
1°C
≥
750°C
1K
≥
1000K
T-type
0.1°F<752°F
0.1°C<400°C
0.1K<673K
N/A
N/A
N/A
E-Type
0.1°F<750°F
0.1°C<400°C
0.1K<673K
1°F
≥
750°F
1°C
≥
400°C
1K
≥
673K
Temperature
Accuracy*
J, K, E
Type
±[0.1% + 1.4˚F(0.8˚C)]
<-148˚F(-100˚C) add 0.2% of reading
T Type
±[0.3% + 2.7˚F(1.5˚C)]
<-148˚F(- 100˚C) add 0.5% of reading
Temperature
Coeffi cient
0.01% of reading 0.1°F per °F(+0.05°C per °C) for
<+64°F (+18°C) or +82°F (+28°C)
[Below -148°F (-100°C): add 0.05% of reading for J,
K, and E-type; and 0.1% of reading for T-type]
Real Time
Clock Tolerance
About 1 second per day
Max
Differential
Common Mode
Voltage
1V Maximum voltage difference
(between any pair of inputs)
Temperature
Scale
ITS-90 (International Temperature Scale of 1990)
Standards
N.I.S.T. Monograph 175 revised to ITS-90
* Accuracy is specified for ambient temperatures between 64°F and
82°F (18°C and 28°C) for a period of 1 year. The above specifications
do not include thermocouple error.

139722 Rev 9/12 B
12
BATTERY REPLACEMENT
Always use a fresh replacement battery of the specifi ed size and type.
Immediately remove the old or weak battery from the meter and dispose
of it in accordance with your local disposal regulations. Old or defective
batteries can leak chemicals that corrode electronic circuits.
WARNING!
To avoid electric shock, be sure to turn off the meter’s power and
disconnect thermocouples from any equipment before you remove or
install batteries.
Under NO circumstance should you expose batteries to
extreme heat or fire as they may explode and cause injury.
To install a
new battery, follow these procedures:
•
Remove the screws from the battery compartment cover on
the back of the meter and lift the cover (Fig 1).
•
Remove and discard the old batteries. Always dispose of old
•
batteries promptly in a manner consistent with local disposal
regulations.
•
Place a fresh batteries in the compartment.
•
NOTE: If you do not plan to use the meter for a month or
more, remove the battery and store it in an area that won’t be
damaged by a leaking battery.
•
Reattach the battery compartment cover to the meter and
reinstall the screws.
WARRANTY
This product is warranted to be free from defects in materials and work-
manship for a period of two years from the date of purchase. During this
warranty period, Klein Tools has the option to repair or replace or refund
the purchase price of any unit which fails to conform to this warranty
under normal use and service. This warranty does not cover dam-
age which occurs in shipment or failure which results from alteration,
tampering, accident, misuse, abuse, neglect, or improper maintenance.
Batteries and damage resulting from failed batteries are not covered by
warranty. A purchase receipt or other proof of original purchase date will
be required before warranty repairs will be rendered. Any implied war-
ranties, including but not limited to implied warranties of merchantability
and fi tness for a particular purpose, are limited to the express warranty.
Klein Tools shall not be liable for loss of use of the instrument or other
incidental or consequential damages, expenses, or economic loss, or for
any claim or claims for such damage, expenses or economic loss. Some
states or countries laws vary, so the above limitations or exclusions may
not apply to you. This warranty gives you specifi c legal rights, and you
may also have other rights which vary from state to state. If your Klein
product requires repair or for information on how to exercise your rights
under the terms of this warranty, please contact Klein Tools at 1-800-
553-4676.
CLEANING
Turn instrument off and disconnect any cables. Clean the instrument by
using a damp cloth. Do not use abrasive cleaners or solvents.
STORAGE
Remove the batteries when instrument is not in use for a prolonged
period of time. Do not expose to high temperatures or humidity. After a
period of storage in extreme conditions exceeding the limits mentioned
in the Specifi cations section, allow the instrument to return to normal
operating conditions before using it.
DISPOSAL / RECYCLE
Caution:
This symbol indicates that equipment and its
accessories shall be subject to a separate collection and
correct disposal.
CUSTOMER SERVICE
KLEIN TOOLS, INC.
450 Bond Street Lincolnshire, IL 60069
1-800-553-4676 •
www.kleintools.com

www.kleintools.com
Mode
d'emploi
Pour les professionnels...depuis 1857
®
Thermomètre
numérique
DTL302
•
2 ENTRÉES DE
TEMPÉRATURE
•
CARACTÉRISTIQUES
NOMINALES D'EAU/
ÉTANCHÉITÉ AUX
POUSSIÈRES IP67
•
ÉCRAN RÉTROÉCLAIRÉ
MULTIPARAMÈTRES
•
STOCKAGE
D'ÉCHANTILLONS
PRATIQUE
•
MIN/MAX ET
MAINTIEN DE
DONNÉES
•
ALIMENTATION USB
EXTERNE POUR
JOURNALISATION À
LONG TERME
•
LOGICIEL DE
JOURNALISATION USB
•
DIFFÉRENTIEL
T1-T2
•
BRIDE DE MONTAGE
MAGNÉTIQUE
FRANCAIS
/