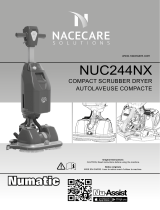
Henry HT4045

Numatic Henry HT4045, TT4045G, TT4055G Owner Instructions

  • Hello! I am an AI chatbot trained to assist you with the Numatic Henry HT4045 Owner Instructions. I’ve already reviewed the document and can help you find the information you need or explain it in simple terms. Just ask your questions, and providing more details will help me assist you more effectively!
HT4045, TT4045G & TT4055G
www.numatic.co.uk
Original Instructions
Warning! Read instructions before using the machine
Originalanleitung
Achtung! Vor Verwendung der Maschine bitte die Anleitung lesen
Notice originale
Attention ! Lisez la notice avant d’utiliser la machine
Originele instructies
Waarschuwing! Lees deze instructies voor u de machine gebruikt
SCRUBBER DRYER
SCHEUERSAUGMASCHINE
AUTOLAVEUSE
SCHROBZUIGMACHINE
SCRUBBER DRYER
Index
Überblick über die Maschine ...................... Seite 4-5
Einrichten der Maschine ............................... Seite 6-14
Umklappen des Bügels ................................ Seite 6
Anbringen des oberen Tanks ........................... Seite 8
Montieren der Bürste ................................ Seite 8
Anheben/Absenken des Bürstendecks ........... Seite 8
Anbringen des Abstreifers ............................. Seite 10
U-Bogen-Klemme für Schlauch ...................... Seite 10
Füllen des Frischwassertanks ......................... Seite 12
Frischwasserstand ................................ Seite 12
Frischwasserhahn .............................. Seite 12
Schalter zurücksetzen ................................ Seite 12
Vorreinigung ................................ Seite 14
Vorwäsche ................................ Seite 14
Absenken des Bodenwerkzeugs ..................... Seite 14
Ausbrechen des Bodenwerkzeugs .................. Seite 16
Einstellen der Reinigungssteuerung ................ Seite 16
Regelmäßige Wartung ................................ Seite 18-20
Tanks und Filter ................................ Seite 18
Auswechseln der Blätter
des Bodenwerkzeugs ................................ Seite 20
Montageanleitung Gesicht .............................. Seite 21-22
Technische Daten ................................ Seite 24
Problembehandlung ................................ Seite 25
Leistungsschild/Persönliche
Schutzausrüstung/Recycling ........................... Seite 29
Sicherheitsvorkehrungen ............................... Seite 30
Twintec Wartung ................................ Seite 35
Empfohlene Ersatzteile ............................... Seite 36
Funktionsschema ................................ Seite 36
EU-Konformitätserklärung ............................... Seite 37
Adressen des Unternehmens .......................... Seite 40
UK DE
HT4045, TT4045G & TT4055G
Machine Overview ................................ Pages 4-5
Machine Set up Guide ................................ Page 6-14
Tilting the Handle ................................ Page 6
Fitting the Top Tank ................................ Page 7
Fitting the Brush ................................ Page 7
Tipping the Brush Deck ................................ Page 7
Fitting the Floor-Tool .............................. Page 9
Fitting the Hose Guide ................................ Page 9
Filling the CleanWater Tank ............................. Page 11
Clean Water Level ................................ Page 11
Clean Water Tap On/O ................................ Page 11
Reset Switch ................................ Page 11
Pre Cleaning ................................ Page 13
Pre Scrubbing ................................ Page 13
Lowering the Floor-Tool ................................ Page 13
Break-away Floor-Tool Feature ....................... Page 15
Setting the Cleaning Controls ......................... Page 15
Regular Maintenance ................................ Page 17-19
Tanks and Filters ................................ Page 17
Changing Floor-Tool Blades ............................ Page 19
Face Fitting Instructions .............................. Page 21-22
Specications ................................ Page 23
Trouble Shooting ................................ Page 25
Rating Label / Personal Protective Equipment /
Recycling ................................ Page 27
Safety Precautions ................................ Page 28
Twintec Maintenance ................................ Page 35
Spare Parts .............................. Page 36
Schematic Diagram ................................ Page 36
EU Declaration Document ............................... Page 37
Company Address ................................ Page 40
5
T 01460 68600
1
Panneau de commande de l’opérateur
2
Séparateur
3
Réservoir supérieur (eau sale)
4
Tuyau de vidange de l’eau sale
5
Réservoir inférieur (eau propre)
6
Goupille de verrouillage de plateau
7
Plateau de brosses
8
Levier de positionnement de poignée
9
Commutateur de l’aspiration
10
Commutateur de la pompe
11
Voyant d’alimentation
12
Interrupteur Marche/Arrêt
13
Gâchette Marche/Arrêt
14
Point de remplissage du réservoir d’eau propre
15
Tuyau d’aspiration du suceur
16
Tuyau d’aspiration
17
Tuyau de vidange et niveau de remplissage du réservoir d’eau propre
18
Levier de levage du suceur
19
Boutons de retenue du suceur
20
Suceur semi-parabolique
21
Filtre d’eau propre
22
Brosse
23
Interrupteur de réinitialisation
1
Bedieningspaneel
2
Scheider
3
Bovenste tank (vuilwater)
4
Afvoerslang vuilwater
5
Onderste tank (schoon water)
6
Borgpen borstelplaat
7
Borstelplaat
8
Hendel voor instellen stuurhendel
9
Schakelaar zuigfunctie
10
Schakelaar pompfunctie
11
Voedingslampje
12
Aan/Uit-schakelaar
13
Aan/Uit-handgrepen
14
Vulpunt schoonwatertank
15
Zuigslang vloerelement
16
Zuigslang
17
Aftapslang schoonwatertank & vulniveau
18
Hefhendel vloerelement
19
Bevestigingsknoppen vloerelement
20
Gekromd vloerelement
21
Schoonwaterlter
22
Borstel
23
Reset schakelaar
Machine Overview / Überblick über die Maschine /
Description de la machine / Overzicht machine
(UK) AFTER THE REMOVAL OF ALL THE PACKAGING,
CAREFULLY OPEN AND CHECK THE CONTENTS.
(FR) APRÈS AVOIR RETIRÉ TOUS LES EMBALLAGES,
OUVREZ LE CARTON AVEC PRÉCAUTION ET
VÉRIFIEZ-EN LE CONTENU.
(NL) VERWIJDER ALLE VERPAKKINGSMATERIAAL,
OPEN HET PAKKET VOORZICHTIG EN CONTROLEER
OF DE INHOUD COMPLEET IS.
(DE) NACHDEM SIE DIE VERPACKUNG ENTFERNT HABEN,
ÖFFNEN SIE SORGFÄLTIG DAS PAKET UND PRÜFEN SIE
ES AUF VOLLSTÄNDIGKEIT.
1
Bedienfeld
2
Separator
3
Oberer Tank (Schmutzwasser)
4
Ablassschlauch für Schmutzwasser
5
Unterer Tank (Frischwasser)
6
Deck-Sicherungsstift
7
Bürstendeck
8
Griffpositionshebel
9
Saugschalter
10
Pumpenschalter
11
Kontrollleuchte
12
Ein-/Aus-Schalter
13
Ein-/Aus-Auslöseschalter
14
Einfüllpunkt für Frischwassertank
15
Saugschlauch für Bodenwerkzeug
16
Saugschlauch
17
Frischwasserablassschlauch und Füllstand
18
Anlüfthebel für Bodenwerkz
19
Bodenwerkzeug-Sicherungsknöpfe
20
Halbrundes Bodenwerkzeug
21
Frischwasserlter
22
Bürste
23
Schalter zurücksetzen
1
Operator Control Panel
2
Separator
3
Top Tank (waste-water)
4
Waste-water Emptying Hose
5
Bottom Tank (clean-water)
6
Deck Locking Pin
7
Brush Deck
8
Handle Position Lever
9
Vacuum Switch
10
Pump Switch
11
Power Light
12
On / Off Switch
13
Triggers
14
Clean-water Tank Fill Point / Filler Hose
15
Floor-tool Vacuum Hose
16
Vacuum Hose
17
Clean-water Tank Emptying Hose & Fill Level
18
Floor-tool Lifting Lever
19
Floor-tool Retaining Knobs
20
Semi Parabolic Floor-tool
21
Clean-water Filter
22
Brush
23
Reset Switch
Machine Set Up
Einrichten der Maschine
Préparation de la machine
Machine-instellingen
6
T 01460 68600
PLEASE READ BEFORE COMMENCING ANY OPERATION AFTER THE REMOVAL OF
ALL THE PACKAGING, CAREFULLY OPEN AND CHECK THE CONTENTS.
!!
Tilting the handle
Using the handle position lever
(Fig.1).
Move the handle into the
upright position (Fig.2).
2
1
Lesen Sie diese Anleitung durch, bevor Sie die Maschine in Betrieb nehmen.
Nachdem Sie die Verpackung entfernt haben, önen Sie das Paket und prüfen Sie es auf Vollständigkeit.
Umklappen des Bügels
Bedienung des Bügelpositionshebels (Abb. 1).
Den Bügel in die aufrechte Position (Abb. 2) klappen.
À lire avant d’entreprendre toute opération.
Après avoir retiré tous les emballages, ouvrez le carton avec précaution et vériez-en le contenu.
Inclinaison de la poignée
À l’aide du levier de positionnement de poignée (Fig. 1),
relevez la poignée en position verticale (Fig. 2).
Lees deze gids voordat u de machine in gebruik neemt.
Verwijder alle verpakkingsmateriaal, open het pakket voorzichtig en controleer of de inhoud compleet is.
De handgreep kantelen
Gebruik de hendel voor het instellen van de handgreep (Fig. 1).
Zet de handgreep in de rechtopstaande positie (Fig. 2).
Machine Set Up
7
T 01460 68600
Fitting the brush
Featuring the Nulock brush system.
The brush is simply pushed and twisted to lock, making tting and removal a simple process.
The Pad is retained using Numatic’s own PadLoc system (ask your supplier for details).
Only use manufacturer supplied brushes / pads.
TT 4045G requires a 450mm brush or a 400mm pad.
TT 4055G requires a 550mm brush or a 500mm pad.
Safety gloves are recommended for the changing of used brushes.
Fit the brush / pad to the drive chuck,
twist to lock the brush (Fig.5)
or pad in place (Fig.6).
5
6
ALWAYS ENSURE THAT THE MACHINE IS SWITCHED OFF
BEFORE MAKING ANY ADJUSTMENTS
! !
Tipping the Brush Deck
To tip the deck into the down position
(Operating mode): Press in the brush deck
locking pin (Fig.7) and rotate the brush deck
(Fig.8).
To change to brush deck up position,
(Transit mode) simply lift the deck and the
sprung loaded locking pin will activate to
hold the deck up.
7
8
Fit the top tank to the machine
(Fig.3).
Fit both the vacuum hose and the oor-tool
hose to the separator
(Fig.4).
Fitting top tank
3
4
Machine Set Up
9
T 01460 68600
Fitting the Floor-tool
The oor-tool has been designed for quick tting, allowing easy squeegee blade replacement and a safety knock-o feature if the oor-
tool gets snagged, whilst in transit.
Note:
It is easier to t the oor-tool if the weight of the machine is resting on the brush. Ensure the brush is tted rst.
Note:
Raise oor-tool again before driving to the cleaning area.
Raise the oor-tool for transit or lower for cleaning operation using the lifting handle
tted to the back of the machine (Fig.11).
For tting the oor-tool blades (See Page 30).
Fit the oor-tool and retain using
the detent pin (Fig.9).
The lifting strap is held by a
detent pin (Fig.10).
9
10
11
Ret vacuum hose to the Floor-tool when nished.
The vacuum hose has a U-bend clip which creates a U-bend in the hose preventing water spillage when the vacuum is switched o. If
you need to remove the U-bend clip for any reason always ensure it is retted correctly before you resume operation (Fig 12-15).
Fitting the Hose Guide
Note:
DO NOT push the vacuum hose onto the Floor-tool with the
Floor-tool in the raised position.
30mm
MAX
12
13
14
15
Machine Set Up
11
T 01460 68600
The water level in the clean-water tank can be seen
using the clean-water clear dump hose tted to the
rear of the machine.
The clean-water bottom tank holds 40 litres.
Control of Substances Hazardous to Health (COSHH)
For best results use a non-foaming type of chemical, dilute to the manufacturer’s specication.
For further guidance on hazardous substances refer to health and safety instructions online.
Visit http://www.hse.gov.uk/ for UK information.
Important
Do not operate machine unless the Operator Manual has been read and fully understood.
!!
When handling and mixing chemicals
Always ensure that chemical manufacturer’s safety guidelines are followed.
Only use chemicals recommended for use in auto scrubber-dryers.
! !
Clean water level
Turn on the clean water tap.
On
Off
Clean water tap
The TT Range are all equipped with a 40 litre clean-water tank allowing large areas to be cleaning in a single ll. To ll the clean-water
tank, use the FLEXI - FILL pipe from either a tap or hose pipe (Fig.16).
The large cap on the left can be
removed for lling from a bucket or
suitable container. (Fig.17).
Fill the clean-water tank to a
maximum of 40 litres, including
cleaning chemicals if required.
Follow chemical manufacturing
guide lines.
Note:
Great care must be taken to ensure that contaminants (leaves,hair, dirt, etc) are not allowed to enter the
clean-water tank during the lling process. If using a bucket or similar, ensure it is always clean and free from debris.
Filling the clean-water tank
MAX
16
17
Reset Switch (100-120V Only)
Press re-set switch to reset machine after trip out.
Machine Set Up
13
T 01460 68600
Note: The machine will still reverse with the oor-tool in the lowered position,
this could possibly damage the blades. Raise the oor-tool before reversing.
Pre-scrub mode
The TT Range have been designed to cope with a variety of oor types and dierent levels of soiling.
On heavily soiled oors use a ‘double scrub’ technique.
First pre-scrub the oor with the oor-tool in the raised position, allow the chemical time to work, then scrub the area a second time
with the oor-tool lowered.
ALWAYS ENSURE THAT THE FLOOR IS
PRE-SWEPT AND RELEVANT
SAFETY SIGNS ARE DISPLAYED.
! !
Numatic part (629044) Wet Floor sign
(available if required)
Pre-cleaning advice
Before performing the cleaning operation, place out
appropriate warning signs and sweep or dust-mop the oor
(Fig.18).
18
The clean-water / chemical mix is
dispersed via the ‘THRU-FEED’
system.
The waste water is then retrieved by the
oor-tool.
Overlap the scrubbing path by 10cm to
ensure an even clean (Fig.19).
If streaking occurs, wipe the
oor-tool blades clean (Fig.20).
Floor-tool in use
19
20
Lowering the floor-tool
After preparing the oor (see previous
section), we are now ready to set the
controls to suit the cleaning conditions.
Before any settings can be applied,
ensure the brush deck is lowered.
Move the Floor-tool lever (see Fig.21), to
it’s lower position (see Fig.22).
21
22
Setting the cleaning controls
15
T 01460 68600
1 1
To start: hold down either trigger and
press the yellow On / O Switch once
2
Ensure your TT machine has been plugged into a suitable power supply.
Select the desired function using the On / O switches tted to the handle.
Breakaway floor-tool
The oor-tool design incorporates a safety knock-o feature.
Allowing it to safely disengage from its mounting should it
become caught on an obstruction, during forward machine
movement.
To re-attach the oor-tool blade to its holder, rst loosen the retaining
knobs on the oor-tool body and slide onto the holding bracket.
Tighten retaining knobs to nger tight (See Fig.23).
Note:
Care must be taken to reduce speed when cornering or when manoeuvring around obstacles.
23
Regular Maintenance
17
T 01460 68600
ALWAYS ENSURE THAT THE BATTERY IS DISCONNECTED
PRIOR TO ANY MAINTENANCE OPERATION
! !
Remove the two hoses to disconnect the separator from the machine
(Fig.25).
Lift o the separator. The separator has a sealing-rubber which should be
examined at every clean-down (Fig.26).
Rinse using clean water.
Remove the lter tted into the separator and ush with clean water (Fig.27) (Fig.28).
Placed into the top tank is grey lter basket, clean and ush with clean water (Fig.29) (Fig.30).
The Bottom (Clean Water) tank is attached to the chassis and should only be removed by a
competent service engineer (Fig.31).
Clean by ushing with clean water if required.
Excess water can be drained using the clear dump hose tted to the rear of the machine.
Located under the left hand side is a clean water lter, ensure the clean water tap is turned
o before removing this lter (Fig.32).
Clean and ush with clean water if required.
The TT Range has been designed with ease of use in mind, this included easy stripping-
down and cleaning. After use, empty waste-water tank using emptying hose and ush
out with clean water (Fig.24).
24
25
26
29
30
27
28
31
32
Regular Maintenance
19
T 01460 68600
! !
ALWAYS ENSURE THAT THE BATTERY IS DISCONNECTED PRIOR TO
ANY MAINTENANCE
Note:
The blades are designed to be reversible, thus extending their useful working life.
Periodically the oor-tool blades should be examined and checked for wear and damage.
The blade removal is easy. Simply start by removing the four retaining pins (Fig.33), turn the oor-tool over and separate the blade
carrier from the body (Fig.34). Peel away the blades from their locating lugs (Fig.35) and examine or renew as required. Replacement is
a reversal of the removal process.
Floor-tool overview
1. Floor-tool main body
2. Rear blade
3. Blade carrier
4. Front blade (slotted)
5. Retaining pins x 4
1
2
3
4
5
The floor-tool
The TT range is provided with the aluminium oor-tool shown.
33
To clean the oor-tool, remove securing-pin and disconnect the lifting strap and remove the oor-tool securing pin pull-free the oor-
tool from the rear of the machine. Rinse the oor-tool assembly with clean water and ret.
34
35
Face Fitting Instructions
21
T 01460 68600
1
2
3
4
FRONT
TOP
BACK
BOTTOM
Face Fitting Instructions, For face removal reverse steps 8 to 5.
22
www.numatic.co.uk
5
6
7
8
HT 4045, TT 4045G & TT 4055G
Off-Aisle Cleaning Kit (Optional Extra Accessory)
23
T 01460 68600
In the event of a breakdown contact your Numatic dealer or the
Numatic Technical helpline +44 (0)1460 269268
TT 4055G
Brush Motor Vac Motor Brush Sizes Pad Net Weight Gross Weight
Protection
Class
Power
1500 W 1200 W 550 mm 500mm 68 Kg 108 Kg IPX4 220-240V / 50-60Hz
1500 W 800 W 550 mm 500mm 68 Kg 108 Kg IPX4 100-120V / 50-60Hz
Fluid
Flow
Speed Capacity
Cleaning
Range
Cleaning
Speed
Hand Arm
Vibration
Noise Size
0-2L/Min
150rpm @ 50Hz
180rpm @ 60Hz
40 L 42 m 0-4 kph 1.4 m/s
2
76±3 dB(A)
Width - 560mm
Length - 935mm
Height - 1100mm
HT 4045, TT 4045G
Brush Motor Vac Motor Brush Sizes Pad
Net
Weight
Gross
Weight
Protection
Class
Power
1500 W 1200 W 450 mm 400 mm 67 Kg 107 Kg IPX4 220-240V / 50-60Hz
1500 W 800 W 450 mm 400 mm 67 Kg 107 Kg IPX4 100-120V / 50-60Hz
Fluid
Flow
Speed Capacity
Cleaning
Range
Cleaning
Speed
Hand Arm
Vibration
Noise Size
0-2L/Min
150rpm @ 50Hz
180rpm @ 60Hz
40 L 42 m 0-4 kph 1.4 m/s
2
76±3 dB(A)
Width - 470mm
Length - 890mm
Height - 1100mm
Problembehandlung
Trouble- Shooting
25
T 01460 68600
PROBLEM CAUSE SOLUTION
Poor water pick-up Waste-water tank full
Clogged / blocked vacuum hose
Loose hose connections
Debris basket lter clogged / blocked
Separator lter clogged / blocked
Poor separator seal
Damaged separator seal
Damaged / split vacuum hose
Damaged oor-tool blades
Empty waste-water tank (page 28)
Remove and clean (page 28)
Push tight connections (page 28)
Remove and clean (page 28)
Remove and clean (Page 28)
Clean and ret (page 28)
Renew (contact service dept)
No brush / scrub function No brushes tted
Brush deck raised
Check and t (page 18)
Lower brush deck (page 18)
Little or no water ow Clean-water tank empty
Clean-water tank lter blocked /clogged
Brush deck raised
Fill clean-water tank (page 22)
Remove and clean (28)
Lower brush deck (page 18)
PROBLEM URSACHE LÖSUNG
Schlechte Wasseraufnahme Schmutzwassertank voll
Verstopfter/blockierter Saugschlauch
Lockere Schlauchverbindungen
Schmutzkorblter verstopft/blockiert
Separatorlter verstopft/blockiert
Schlechte Separatordichtung
Beschädigte Separatordichtung
Beschädigter/geschlitzter Saugschlauch
Beschädigte Bodenwerkzeugblätter
Schmutzwassertank leeren (Seite 29)
Ausbauen und reinigen (Seite 29)
Verbindungen schließen (Seite 29)
Entfernen und reinigen (Seite 29)
Reinigen und wieder einsetzen (Seite 29)
Erneuern (an Serviceabteilung wenden)
Keine Bürsten-/
Scheuerfunktion
Bürsten nicht montiert
Bürstendeck angehoben
Überprüfen und anbringen (Seite 19)
Bürstendeck absenken (Seite 19)
Wenig oder kein Wasserdurch-
uss
Frischwassertank leer
Filter am Frischwassertank blockiert/verstopft
Bürstendeck angehoben
Frischwassertank füllen (Seite 23)
Entfernen und reinigen (Seite 29)
Bürstendeck absenken (Seite 19)
Wenn Sie das Problem nicht beheben können oder wenn es zu einer Störung kommt, wenden Sie sich an Ihren Numatic-
Händler oder rufen Sie bei der Numatic Technical Helpline an unter 0049 (0)511 9842160.
(auf der Rückseite nden Sie die Unternehmensadresse oder Händlerstempel)
27
T 01460 68600
About the Machine
In the event of a breakdown contact your
Numatic dealer or the
Numatic Technical help line
+44 (0)1460 269268
Safety Critical Component:
Mains lead:
H05VV-F x 1.5 mm2 x 3 core
WEEE (Waste, Electrical and Electronic Equipment)
Scrubber dryer Accessories and packaging should be sorted for environmentally-friendly recycling.
Only for EU countries.
Do not dispose of scrubber-dryer into household waste.
According to the European Directive 2002/96/EC on waste electrical electronic equipment and its incorporation into
national law.
Scrubber-dryers that are no longer suitable for use must be separated, collected and sent for
recovery in an environmentally-friendly manner.
Ear Protection Safety Footwear Head Protection Safety Gloves
Dust / Allergens
Protection
Eye Protection Protective Clothing
Hi-Vis Jacket
Caution
Wet Floor Sign
PPE (Personal protective equipment) that may be required for certain operations.
Note: A risk assessment should be conducted to determine which PPE should be worn.
Rating Label
1
Company Name & Address
2
Machine Description
3
Power rating
4
Voltage Frequency
5
Max Gradient
6
CE Mark
7
Weight (ready to use)
8
WEEE Logo
9
Ingress Protection Rating
10
Machine yr/wk Serial number
11
Machine Description
12
Noise Rating
13
Hand Arm Vibration
1
2
3
4
8
5
6
9
10
7
11
12
13
28
www.numatic.co.uk
Information for Scrubber Dryer
ORIGINAL INSTRUCTIONS
READ MANUAL BEFORE USE
As with all electrical equipment care and attention must be exercised at all times during its use, in addition to ensuring that routine and
preventative maintenance is carried out periodically in order to ensure its safe operation.
Failure to carry out maintenance as necessary, including the replacement of parts to the correct standard could render this equipment
unsafe and the manufacturer can accept no responsibility or liability in this respect.
When ordering spare parts always quote the Model Number / Serial Number specied on the Rating Plate.
This appliance is not intended for use by persons (including children) with reduced physical, sensory or mental capabilities, or lack of experience and
knowledge, unless they have been given supervision or instruction concerning use of the appliance by a person responsible for their safety.
Children should be supervised to ensure that they do not play with the appliance.
Only use brushes provided with the appliance or those specied in the instruction manual.
The use of other brushes may impair safety.
A full range of brushes and accessories are available for this product.
Only use brushes or pads which are suitable for the correct operation of the machine for the specic task being performed.
It is essential that this equipment is correctly assembled and operated in accordance with current safety regulations.
When using the equipment always ensure that all necessary precautions are taken to guarantee the safety of the operator and any other persons who
may be aected.
Wear non-slip footwear when scrubbing. Use a respiratory mask in dusty environments.
The machine, while charging, must be positioned so that the mains plug is easily accessible.
When cleaning, servicing or maintaining the machine, replacing parts or converting to another function the power source shall be switched o.
Mains operated machines shall be disconnected by removing the power plug, and battery operated machines shall be disconnected by switching o
the isolating key.
Machines left unattended shall be secured against unintentional movement.
When detergents or other liquids are used, read the manufacturer’s instructions.
Do not allow the supply cord to come into contact with the rotating brushes.
Operators shall be adequately instructed as to the correct use of the machine.
This machine is not suitable for picking-up hazardous dust.
Do not use on surfaces having a gradient exceeding that marked on the appliance.
The machine is not to be stored outdoors in wet conditions.
This machine is for indoor use only.
Read the instruction manual before using the appliance.
This product meets the requirements of IEC 60335-2-72.
NOTE: This machine is also suitable for commercial use, for example in hotels, schools, hospitals, factories, shops and oces for other than
normal housekeeping purposes.
Ensure only competent persons unpack/assemble the machine.
Keep your machine clean.
Keep your brushes in good condition.
Replace any worn or damaged parts immediately.
Regularly examine the power cord for damage, such as cracking or ageing. If damage is found, replace the cord before further use.
Only replace the power cord with the correct Numatic approved replacement parts.
Ensure that the work area is clear of obstructions and / or people.
Ensure that the working area is well illuminated.
Pre-sweep the area to be cleaned.
Use steam cleaners or pressure washers to clean the machine or use in the rain.
Attempt machine maintenance or cleaning unless the power plug has been removed from the supply outlet,
Allow any inexperienced repairs. Contact your nearest service centre.
Strain cable or try to unplug by pulling on cable.
Leave the brush deck in the lowered position when not in use.
• Allow the machine to be used by inexperienced or unauthorised operators or without appropriate training.
Use the machine without the solution tanks properly positioned on the machine, as shown in the instructions.
Expect the machine to provide trouble-free, reliable operation unless maintained correctly.
Lift or pull the machine by any of the operating triggers, use the main handle.
Remove the handle from the machine except for service and repair.
Use on surfaces having a gradient exceeding that marked on the machine.
Run the machine over any power cables during operation.
WARNING
CAUTION
DO
DON’T
Component Interval Inspect for
Mains Lead DAILY Scufng, cracks, splits, conductors showing
Brushes DAILY Bristle damage, wear, drive collar wear
Squeegee Blade BEFORE EACH USE Wear, cracks, splits
Filters BEFORE EACH USE Clogging and debris retention
Tanks AFTER EACH USE Rinse dirty water tank after use
35
T 01460 68600
Twin Tec Maintenance / Twin Tec Wartung /
Twin Tec Entretien / Onderhoud Twin Tec
Twin Tec
Maintenance
Daily
Keep the machine clean
Ensure brushes/ pads/ squeegee/ lters are in good condition
Check for any worn or damaged parts and replace immediately
Drain and rinse dirty water tank after every use
Store machine with brush deck secured in tilted position
Weekly – as daily and –
Check brush or pad and skirt and rinse
Check oor-tool blades for wear and wipe clean
Clean separator assembly including lter and check condition of seal
Flush out system with clean water and clean lters
Do not steam clean or pressure wash
Twin Tec
Wartung
Täglich
Maschine nach Bedarf reinigen
Bürsten, Pads, Rakel und Filter instand halten
Abgenutzte oder beschädigte Teile unverzüglich ersetzen
Schmutzwassertank nach jedem Einsatz entleeren und spülen
Maschine mit hochgeklapptem, gesichertem Bürstendeck aufbewahren
Wöchentlich (zusätzlich zu den täglichen Aufgaben)
Bürste oder Pad und Schürze überprüfen und spülen
Blätter des Bodenwerkzeugs auf Verschleiß untersuchen und sauber wischen
Separator einschließlich Filter reinigen, Zustand der Dichtung prüfen
System mit klarem Wasser spülen und die Filter reinigen
Nicht unter Druck (d. h. mit Dampfstrahlgerät usw.) reinigen
Twin Tec
Entretien
Tous les jours
Maintenez votre machine propre.
Vériez que les brosses/disques/lamelles/ltres sont en bon état.
Vériez l’état des pièces et remplacez immédiatement toute pièce usée
ou endommagée.
Vidangez et rincez le réservoir d’eau sale après chaque utilisation.
Entreposez la machine avec le plateau de brosses maintenu en position inclinée.
Chaque semaine et quotidiennement
Vériez la brosse ou le disque et la jupe et rincez-les.
Vériez l’usure des lamelles du suceur et essuyez-les.
Nettoyez le séparateur y compris le ltre et vériez l’état du joint.
Rincez le système à l’eau claire et nettoyez les ltres.
Ne nettoyez pas à la vapeur ou sous haute pression.
Onderhoud
Twin Tec
Dagelijks
Houd de machine schoon
Controleer of de borstels/pads/vloerwisser/lters in goede staat zijn
Controleer of er versleten of beschadigde onderdelen zijn en vervang
deze onmiddellijk
Ledig en spoel de vuilwatertank na elk gebruik
Berg de machine op met de borstelplaat vergrendeld in de opgeklapte positie
Wekelijks - hetzelfde als dagelijks plus -
Controleer de borstel of pad en strip en spoel schoon
Controleer de wissers van het vloerelement op slijtage en maak deze schoon
Maak de scheiderinrichting inclusief lter schoon en controleer de toestand van de afdichting
Spoel het systeem met schoon water en reinig de lters
Gebruik geen stoom- of hogedrukreiniger
36
www.numatic.co.uk
237654
Top Tank - Blue
606203
450MM POLYSCRUB BRUSH
577839
Separator
606204
450MM NYLOSCRUB BRUSH
206953
DETENT PIN
606306
450MM LONGLIFE BRUSH
213058
Vac Hose
606028
550MM POLYSCRUB BRUSH
280019
Floor Tool Hose
606550
550MM NYLOSCRUB BRUSH
280018
Dump Hose - Top Tank
606551
550MM LONGLIFE BRUSH
213025
Dump Hose - Bottom Tank
606401
400mm PADLOC DRIVE BOARD
208960
Filler Hose - Bottom Tank
900526
500mm NULOC2 DRIVE BOARD
237718
Hose Guide
900521
650 Semi Parabolic Squeegee (4045)
206111
Dump / Filler Closure - Bottom Tank
900522
750 Semi Parabolic Squeegee (4055)
237268
Filler Cap Lid
900518
650 Floor Tool Blades - Green PU
207128
Filler Cap Filter
900519
750 Floor Tool Blades - Green PU
206265
Barrel Filter
236012
MAINS CABLE - UK
207000
Basket Filter
236132
MAINS CABLE - EURO
208888
Clean Water Filter
236020
MAINS CABLE - SWITZERLAND
208827
Clean Water Filter Body
236024
MAINS CABLE - SOUTH AFRICA
208890
Clean Water Filter Clear Bowl
236028
MAINS CABLE - USA
208830
Clean Water Filter Gasket
236118
MAINS CABLE - INDUSTRIAL 16 AMP
208889
Clean Water Filter Mesh
206813
SWITCH KEY
Spare Parts / Empfohlene Ersatzteile /Pièces de rechange
recommandées / Aanbevolen reserveonderdelen
HT 4045 / TT 4045G / TT 4055G - Schematic Diagrams
Schaltbild - Schéma de câblage - Bedradingsschema
37
T 01460 68600
EU Declaration of Conformity - EU Conformiteitsverklaring
EU Konformitätserkärung - Declaration de Confromite CE
/