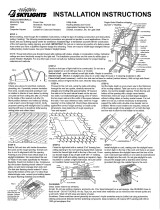
Velux FS M06 2005CS43 Installation guide

Type
Installation guide
2 VELUX
®
ENGLISH: Index
Page 3 Installation check list
Page 3 Important installation
requirements
Page 6 Planning
Pages 7-9 Preparing roof and
mounting skylight
Pages 10-13 Installing underlayment
Page 14 Installing flashing
Page 15 Interior finish
ESPAÑOL: Índice
Página 4 Lista de verificación de
instalación
Página 4 Requisitos importantes de
instalación
Página 6 Planificación
Páginas 7-9 Preparación del techo y
montaje del tragaluz
Páginas 10-13 Instalación de la lámina de
soporte
Página 14 Instalación del tapajuntas
Página 15 Acabado interior
FRANÇAIS : Index
Page 5 Liste de vérification
préinstallation
Page 5 Spécifications d'installation
importantes
Page 6 Planification
Pages 7-9 Préparation de la toiture
et montage du puits de
lumière
Pages 10-13 Installation de la membrane
de toiture
Page 14 Installattion du solin
Page 15 Finition intérieure
TOOLS
HERRAMIENTAS
OUTILS
VELUX
®
3
ENGLISH: Installation check list
Installer should verify that:
Deck mounted skylights FS are installed in roof pitches from
14° to 85°.
Rough opening is dimensioned correctly according to these
installation instructions.
Skylight is properly wrapped in VELUX adhesive skylight
underlayment according to installation instructions supplied with the
underlayment.
Proper VELUX flashing for the actual roofing material is installed
according to installation instructions supplied with the flashing.
Skylight cladding is properly secured and counter-flashed over all
flashing on the skylight frame.
Bottom frame rubber gasket extends over the bottom sill flashing
section and can be seen below the bottom frame cladding.
Skylight and accessories operate properly.
Customer is informed of the required maintenance of the product as
found at www.velux.com.
Customer is informed of the warranty claim procedure. For full
VELUX warranty, go to www.velux.com.
IMPORTANT: Failure to install the skylight, flashing and blinds in strict
accordance with these VELUX instructions shall void the VELUX warranty.
Important installation requirements
Roof pitch
FS is designed for roof pitches 14° - 85° (3:12 - 137:12). In case of roof
pitches below 14° (3:12), please contact your VELUX sales company for
installation guidelines.
Importance of proper installation
Satisfactory product performance depends on proper installation.
Seller accepts no responsibility whatsoever for failure of an installer to
install VELUX
®
roof windows and skylights in accordance with these
installation instructions. Although VELUX roof windows and skylights are
designed and manufactured to the highest standards, severe climatic ex-
posure as well as adverse indoor conditions (ie high humidity) may produce
temperature conditions which exceed product performance standards. In
these cases, special preventive measures may be necessary.
Seller reserves the right to implement product changes for improvement
without prior notification.
Sunscreening accessories
Refer to instructions for accessory type in question or contact your
VELUX sales company for further information.
Vapor barrier
Where a vapor barrier is part of the roof construction, this barrier must be
extended and connected to the skylight finish groove.
Treatment of wooden frame
Most VELUX skylights are pre-painted white but the option exists to order
stain grade skylights. These stain grade skylights received a temporary
treatment against mold and mildew. Further treatment with wood stain,
paint etc is necessary and can be done prior to installation or shortly after
installation. Care should be taken to ensure wood stain, paint etc is not
applied to gaskets.
Consult local jurisdictions and authorities for recycling and proper
disposal of removed skylights and materials.
NOTICE
Skylights and interior surfaces in older homes may have been painted
with lead-based paint, and removal of the skylights may disturb this
paint. Take proper precautions to minimize exposure to dust and debris.
For more information on the proper removal of lead paint go to
www.epa.gov/lead.
Seller assumes no obligation whatsoever for failure of an architect,
installer or building owner to comply with all applicable laws, ordi-
nances, building codes and safety requirements.
NOTICE
In rare circumstances, all glass may be subject to unexpected and spon-
taneous breakage due to imperfections in the glass that are undetectable
during the manufacturing and inspection process by the manufacturer of
the glass and the VELUX factory.
Your VELUX sales company offers the choice of laminated or tempered
glass skylights. Laminated glass is a combination of two or more glass
sheets with one or more interlayers of plastic (PVB) or resin. In case of
breakage, the interlayer is designed to hold the fragments together. Tem-
pered glass does not contain an interlayer to hold the fragments together.
Instead, tempered glass is designed to break into small, pebble-like pieces.
When tempered glass breaks, pieces of glass come loose and may strike an
individual.
Consult local regulations and/or building material consultants to
determine which type of glass is right for you or if laminated glass is
required in your application.
Important installation requirements for the USA
VELUX
®
series A21 skylights are designed and engineered to be installed
with VELUX flashing systems. VELUX flashing systems include VELUX ad-
hesive skylight underlayment in a quantity sufficient to install one skylight
of the size for which the flashing system was designed.
The VELUX "No Leak" installation warranty is based upon installation
strictly in accordance with VELUX deck or curb mounted skylight and re-
lated deck or curb mounted flashing installation instructions, which specify
the use and proper installation of the VELUX adhesive skylight underlay-
ment packaged with the flashing system.
If VELUX adhesive skylight underlayment is not used or is not properly in-
stalled and a service issue occurs related to underlayment omission, failure,
or its proper installation as detailed in the VELUX deck or curb mounted
skylight and deck or curb mounted flashing installation instructions, the
VELUX "No Leak" installation warranty is void.
VELUX America Inc. understands that there are other types of adhesive
underlayment that are of equal or higher quality than what is provided
by VELUX America Inc. However, VELUX America Inc. cannot approve
or validate that any specific type of adhesive underlayment is better or
worse. Thus, VELUX America Inc. places the risk of using an alternative
adhesive underlayment onto the specifier by stating that if the alternative
underlayment becomes a failure point for the skylight or flashing system
even if installed according to our instructions, then the VELUX "No Leak"
installation warranty cannot be honored. Further, the alternative underlay-
ment must not in any way obstruct, alter or prevent the proper functioning
of the complete skylight and flashing installation, such as increasing the
overall flashing system thickness beyond prescribed dimensions.
VELUX America Inc. affirms that if a high quality alternative adhesive
underlayment, installed per our instructions, does not fail but a leak occurs
in some other VELUX skylight or flashing component due to no cause from
the alternative underlayment, then such a leak would be covered under the
terms of the VELUX "No Leak" installation warranty.
VELUX
®
7
Skylight size
Tamaño del
tragaluz
Taille du puits
de lumière
Rough opening
Medida del
hueco
Dimensions de
l'ouverture brute
A06
14
1
2" x 45
3
4"
368 mm x 1162 mm
C01
21" x 26
7
8"
533 mm x 682 mm
C04
21" x 37
7
8"
533 mm x 962 mm
C06
21" x 45
3
4"
533 mm x 1162 mm
C08
21" x 54
7
16"
533 mm x 1382 mm
C12
21" x 70
1
4"
533 mm x 1784 mm
D26
22
1
2" x 22
15
16"
572 mm x 582 mm
D06
22
1
2" x 45
3
4"
572 mm x 1162 mm
M02
30
1
16" x 30"
763 mm x 762 mm
M04
30
1
16" x 37
7
8"
763 mm x 962 mm
M06
30
1
16" x 45
3
4"
763 mm x 1162 mm
M08
30
1
16" x 54
7
16"
763 mm x 1382 mm
S01
44
1
4" x 26
7
8"
1123 mm x 682 mm
S06
44
1
4" x 45
3
4"
1123 mm x 1162 mm
W
H
1
W
H
min 12"
min 300 mm
min 12"
min 300 mm
min 12"
min 300 mm
ENGLISH: Cut rough opening according to the
measurements in the chart.
Roof with battens:
Clear away battens from rough opening to allow
for proper installation of underlayment.
ESPAÑOL: Corte el hueco de acuerdo a las medi-
das en la tabla.
Techo con rastreles:
Quite los rastreles del hueco para permitir la cor-
recta instalación de la lámina de soporte.
FRANÇAIS : Coupez l'ouverture brute selon les
dimensions du tableau.
Toiture avec voliges :
Retirez les lattes de toit de l'ouverture brute
pour permettre une installation adéquate de la
membrane.
8 VELUX
®
2
3
4½"
113 mm
4½"
113 mm
7"
180 mm
1½"
38 mm
X
X
ENGLISH: Remove existing roofing underlayment
around the rough opening as shown.
ESPAÑOL: Retire la lámina de soporte existente
de la zona alrededor del hueco tal como se indica.
FRAAIS : Retirez la membrane de toiture
existante autour de l'ouverture brute, tel
qu'illustré.
ENGLISH: Mark corners of the rough opening.
ESPAÑOL: Marque las esquinas alrededor del
hueco.
FRAAIS : Marquez les coins de l'ouverture
brute.
ENGLISH: Roof with battens: Place 1½"
(38 mm) wide battens around rough opening.
Batten thickness around rough opening should
be equal to thickness of battens used for roofing
material.
ESPAÑOL: Techo con rastreles: Coloque
rastreles de 1½" (38 mm) de ancho alrededor
del hueco. Los rastreles a colocar sobre el hueco
deben tener el mismo grosor que los usados para
el material de cubierta.
FRAAIS : Toiture avec voliges : Placez
des lattes de largeur 1½" (38 mm) autour de
l'ouverture brute. L'épaisseur des lattes utilisées
autour de l'ouverture devrait être égale à
l'épaisseur des lattes utilisées pour le matériel de
toiture.
12 VELUX
®
9a
9b
1
2
ENGLISH: To allow for proper drainage,
interweave roofing underlayment as shown in
9a
for new construction applications. For retrofit
applications, interweave roofing underlayment as
shown in
9b
.
ESPAÑOL: Para lograr un drenaje adecuado,
intercale la lámina de soporte para techo como
se indica en
9a
para construcciones nuevas. Para
aplicaciones mejoradas, intercale la lámina de
soporte para techos como se indica en
9b
.
FRAAIS : Pour assurer un drainage adéquat,
entrecroisez avec la membrane de toiture
tel qu'illustré à la figure
9a
dans le cas d'une
installation sur une nouvelle construction. Pour une
installation sur une toiture existante, entrecroisez
avec la membrane de toiture, tel qu'illustré à la
figure
9b
.
14 VELUX
®
E K L
E K W
E D L
E D W
E D M
E K L
E K W
E D L
E D W
E D M
E K L
E K W
E D L
E D W
E D M
10
2
2
1
ENGLISH: You are now ready to install the
flashing. If the flashing is not to be installed
immediately, reinstall cladding.
ESPAÑOL: Ya puede instalar el tapajuntas. Si no
va a instalar el tapajuntas inmediatamente, vuelva
a colocar el recubrimiento.
FRAAIS : Vous êtes maintenant prêt à installer
les solins. Si les solins ne sont pas installés
immédiatement, réinstallez le revêtement.
ENGLISH: For flashing information, see
instructions supplied with the relevant flashing.
ESPAÑOL: Para obtener información sobre el
tapajuntas, consulte las instrucciones provistas
con el tapajuntas pertinente.
FRAAIS : Pour des informations sur les solins,
veuillez vous rérer aux instructions fournies
selon les difrents types de solins.
US: VELUX America LLC
1-800-88-VELUX
CA: VELUX Canada Inc.
1 800 88-VELUX (888-3589)
www.velux.com
ENGLISH:
Home owner information
Please complete and give to home owner.
Date: ...................................................................................................................................................................................................................................................................
Product number: ............................................................................................................................................................................................................................................
(stamped on product exterior)
Quantity: ...........................................................................................................................................................................................................................................................
Flashing: ............................................................................................................................................................................................................................................................
Accessories installed: ...................................................................................................................................................................................................................................
Model ................ Size ............... Variant code ..........................
Roofing material: ...........................................................................................................................................................................................................................................
Installation contractor: ................................................................................................................................................................................................................................
Dealer purchased from: ...............................................................................................................................................................................................................................
ESPAÑOL:
Información del propietario
Completar y entregar al propietario.
Fecha: ................................................................................................................................................................................................................................................................
Número de producto: ....................................................................................................................................................................................................................................
(impreso en la parte externa del producto)
Cantidad: ..........................................................................................................................................................................................................................................................
Tapajuntas: ......................................................................................................................................................................................................................................................
Accesorios instalados: ..................................................................................................................................................................................................................................
Modelo ............... Tamaño .............. Código de variante ..........................
Material de cubierta: ..................................................................................................................................................................................................................................
Instalador: ........................................................................................................................................................................................................................................................
Distribuidor al que se comp el producto: ...........................................................................................................................................................................................
FRANÇAIS :
Information pour le propriétaire occupant
Veuillez compléter et remettre au propriétaire occupant.
Date : ..................................................................................................................................................................................................................................................................
Numéro de produit : .....................................................................................................................................................................................................................................
(étampé sur la partie exrieure du produit)
Quantité : ..........................................................................................................................................................................................................................................................
Solin : .................................................................................................................................................................................................................................................................
Accessoires installés : ..................................................................................................................................................................................................................................
Modèle ................ Dimension ............... Code ..........................
Matériel de toiture : .....................................................................................................................................................................................................................................
Entrepreneur en installation : ...................................................................................................................................................................................................................
Détaillant : .......................................................................................................................................................................................................................................................
FS DECK MOUNTED SKYLIGHT INSTALLATION INSTRUCTIONS. ©2009, 2016 VELUX GROUP ® VELUX AND THE VELUX LOGO ARE REGISTERED TRADEMARKS USED UNDER LICENSE BY THE VELUX GROUP
INSTRUCTION D'INSTALLATION DU PUITS DE LUMIÈRE FS À CADRE INTÉGRÉ MONTÉ DIRECTEMENT SUR LA TOITURE. ©2009, 2016 VELUX GROUP ®VELUX ET LE LOGO VELUX SONT DES MARQUES DE COMMERCE DÉPOSÉES ET EMPLOYÉES SOUS LICENCE DE VELUX GROUP
  • Page 1 1
  • Page 2 2
  • Page 3 3
  • Page 4 4
  • Page 5 5
  • Page 6 6
  • Page 7 7
  • Page 8 8
  • Page 9 9
  • Page 10 10
  • Page 11 11
  • Page 12 12
  • Page 13 13
  • Page 14 14
  • Page 15 15
  • Page 16 16

Velux FS M06 2005CS43 Installation guide

Type
Installation guide

Ask a question and I''ll find the answer in the document

Finding information in a document is now easier with AI