Page is loading ...

M-1
3/17/2017
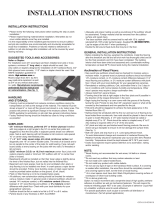
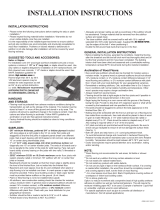
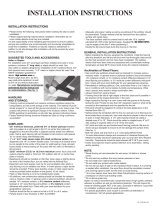
(fig. 1)
INSTALLATION INSTRUCTIONS
• Please review the following instructions before starting the strip or plank
installation.*
• Please inspect flooring material before installation. Warranties do not cover
visible defects once they are installed.
It is the responsibility of the installer/supervisor/owner to ensure subfloor
and job site conditions are environmentally and structurally acceptable for
wood floor installation. Problems or failures related to deficiencies in
subfloor or job site damage after installation will not be covered by wood
flooring warranty.
*Recommended Maple & Hickory 4" & 5" serpentine glue and mechanically
fastened. See note below.
SUGGESTED TOOLS AND ACCESSORIES:
Nailer or Stapler:
For installation over 3/4” wood type sub-floors installed over joist or truss
systems a minimum 1 1/2” or 2” long cleat, or staple should be used. Use
only nailers or staplers designed for installation of 3/4” hardwood floors. 3/4”
thick plywood over concrete, 1 1/2” cleats or stapler should be used. See
NW
FA installation guideline for
details. High moisture areas or
Rooms larger than 20 ft. by 20 ft.
1/32 aluminum spacers may be
needed for extra expansion as well
as 3/4” at any vertical obstruction.
i.e. walls. Mullican recommends
prefinished foot for manual and
air nailers/staplers. (See fig. 1)
HANDLING
AND STORAGE:
• Flooring must be protected from adverse moisture conditions during the
transportation as well as the storage of the material. The material must be
stored at least 4” or more off the ground and stored in a dry area. This
practice will prevent a significant change in the moisture content. Open the
cartons and allow flooring to acclimate. Follow NWFA guideline for
acclimation on job site! See general instructions below.
• Factory finished flooring should be installed as close to living conditions
as possible!
SUBFLOOR:
• 5/8” minimum thickness, preferred 3/4” or thicker plywood installed
with long edges at a right angle to the 16” on center floor joists and
staggered so that the end joints in adjacent panels break over different
joists. Nail at each bearing with 6d threaded or 8d common nails spaced
10” on center along intermediate joists.
• 1” x 4” to 6” wide, square edge, kiln dried coniferous lumber, laid
diagonally over 16” on center wooden joists. The ends of all boards are to
be cut parallel to the center of the joists for solid bearing. Face nail each
board solidly at every bearing on the joists with two nails (7d threaded or
8d common).
• 23/32” minimum O.S.B. on 19.2-inch maximum center floor joists with
system properly nailed or minimum 7/8” subfloor with 24” on center floor
joists or trusses.
• Baseboards should be installed so that their lower edge is slightly above
the level of the finished floor, but not nailed into the finished floor.
• Basement and crawl spaces must be dry and ventilated when plank or
strip flooring is to be installed over them. In crawl spaces a vapor barrier
should be provided. Follow local building codes or black vapor barrier
must be provided below subfloor on the ground. (6 mil. black)
• Plank or Strip flooring is not to be installed below grade.
• All subfloors, new construction existing should be checked for moisture
using a moisture meter. In general wood or plywood subfloors should not
exceed 14% moisture content, or 4% moisture content difference
between 2 1/4” wood flooring and subfloor, or 2% moisture content
difference with plank floor. Check with your local distributor for your
geographical variances.
• Subfloor should be flat or made to be flat to 3/16” in a 8 ft. radius.
• Particle board of any thickness is NOT ALLOWED!
• Adequate and proper nailing as well as soundness of the subfloor should
be ascertained. Foreign material shall be removed from the subfloor
surface and swept clean.
• The clean subfloor shall be covered wall to wall with 15 lb. asphalt
saturated felt, SVS under layment paper, Aquabar®B, or Mullican Moisture
Mat (NO ROSIN PAPER). Lap the edges of this felt 4” when positioning it.
Double the felt around heat ducts that may be in the floor.
GENERAL INSTALLATION INSTRUCTIONS
• Before installing the flooring, ascertain the conditions. Install the flooring
after the sheetrock and tile and all brick work has thoroughly dried and all
but the final woodwork and trim have been completed. The building
interior shall have been dried and seasoned and a comfortable working
temperature (at least 60°F) should exist during the material installation.
Acclimation of Wood Floors:
• New wood type subfloors should also be checked for moisture using a
moisture meter. In general wood or plywood subfloors should not exceed
14% moisture content, or 4% moisture content difference between 2 1/4”
wood flooring and subfloor, or 2% moisture content difference with plank
floor. Check with your local distributor for your geographical variances.
• Remodeled or existing subfloors, Oak, acclimation time is 3 to 5 days in
live in conditions with normal relative humidity and temperature. Other
wood species may require a longer acclimation time.
• Always install from several boxes.
• Flooring should be laid at right angles to the floor joists and if possible in
the direction of the longest dimension in the room.
• Begin laying the flooring in a room corner with the groove of the flooring
facing the wall. Provide no less than 3/4” expansion space or what will be
covered by the baseboard and trim specified for the job.
• End joints should be staggered to achieve the best appearance in the
finished floor (Min. 6”).
• Nailing should be scheduled with the first run and last run of flooring to be
faced nailed then countersunk, face nails should be placed in face of wood
in grain to match filler/putty. 2 1/4” wide material should be nailed or
stapled every 8” to 10”. Plank should be nailed or stapled every 6” to 8”.
Also nailing is required within 2” to 3“ of the end joints.
• 3/4” plank and strip are pre-finished wood flooring products. Be sure to
check nail gun faceplate to ensure it will not damage the surface finish.
(See fig. 1)
• Both 3/4” plank and strip have a U.V. cured polyurethane finish.
• To avoid dimensional change and movement in hardwood flooring the
Relative Humidity should be maintained year round at 35%-55% Relative
Humidity. Temperature should be kept between 68°F-78°F year round.
• Exotic wood species require special attention as to acclimation, nailing
and/or sanding.
NOTE:
**Wood flooring not recommended for wet areas, full baths or shower rooms.
**Do not sand any subfloor that may contain asbestos or lead.
**Do not install over radiant heated floors.
**Do not install any product with visible defects.
**Do not use any type of tape on the hardwood finish surface. If a covering is
needed after installation, the wood floor should be completely covered and
covering taped to itself, not the finish of wood flooring.
** ALL crawl spaces must have 6mil. Black Polyethylene covering surface of
crawlspace or follow local building codes.
**On or above grade only.
Recommeded for maple and hickory 4" & 5" to reduce movement add a
serpentine bead of high quality urethane adhesive to subfloor as well as
mechanical fasteners. This will require the moisture inhibiting paper NOT to
be used. (Example of adhesive- Liquid Nail or Lockedtite: urethane wood to
wood adhesive.)
*For special applications such as glue to concrete call distributor or
manufacturer. (No full spread applications)
/

