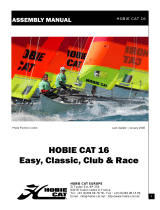
Hobie 16 User manual

Type
User manual

Hobie 16 is a versatile and durable catamaran designed for recreational sailing, racing, or fishing. Its lightweight and stable design make it ideal for beginners and experienced sailors alike. With its spacious cockpit and easy-to-use controls, the Hobie 16 is perfect for day trips or weekend getaways. Whether you're looking for a relaxing sail or an exhilarating race, the Hobie 16 is the perfect choice.

Hobie 16 is a versatile and durable catamaran designed for recreational sailing, racing, or fishing. Its lightweight and stable design make it ideal for beginners and experienced sailors alike. With its spacious cockpit and easy-to-use controls, the Hobie 16 is perfect for day trips or weekend getaways. Whether you're looking for a relaxing sail or an exhilarating race, the Hobie 16 is the perfect choice.

Hobie 16
Owners Manual
®
.
In 1950, Hobie’s dream was born in his
parents’ garage when he decided to apply
his love of woodworking to the sport of
surfing. Dad backed out the Buick... Hobie
carved out his very first surfboard...
Hobie’s business of fun had begun.
4
Table of Contents
Terminology .........................................................................................................................................................5
Safety Advice .......................................................................................................................................................6
Handling and Maintenance ...........................................................................................................................8
Warranty ............................................................................................................................................................10
Your Distribution ............................................................................................................................................12
List of the Parts ..............................................................................................................................................13
Hull/Crossbar Assembly ............................................................................................................................ .15
Trampoline Assembly/Righting Line ......................................................................................................16
Rudder Assembly ............................................................................................................................................18
Adjust Rudder Rake .......................................................................................................................................20
Mast Preparation ........................................................................................................................................... .24
Stepping the Mast ..........................................................................................................................................27
Main Sail ..............................................................................................................................................................28
Boom and Cunningham ................................................................................................................................30
Mainsheet System ..........................................................................................................................................31
Jib ...........................................................................................................................................................................32
Look for this icon. Online video is available at
www.hobiecat.com/support/products
Please read through the instruction manual before using this product
Owner’s Manual
Assembly Manual
5
hobie.com
Terminology
Forestay
Battens
Shroud
Mast
Boom
Main Sheet System
Tiller Arm
Rudderhead
Rudder
Downhaul
Forestay /
Bridle
Adjuster
Bridle
Hull
Sail
6
Safety Advice
Whether on land or on the water, WATCH FOR OVERHEAD POWER
LINES. Contact with power lines can cause serious injury or death.
DO NOT sail while under the influence of alcohol and/or drugs
Only sail in conditions in which you feel comfortable and where
you feel confident that you can safely sail the boat. Never go out in
conditions beyond your ability.
Everyone on board should wear a life jacket at all times (see the
regulations in force).
If you are in the water, remain in contact with the boat, even if it is
capsized. A sailboat can drift away faster than a person can swim.
Never sail without a righting line.
Wear appropriate clothes. Wear a wet suit or dry suit in cold
weather or cold water conditions.
Protect yourself against heat and sun.
Learn about the local sea regulations.
Learn the right of way rules and when in doubt, give way to others.
When not sailing, always keep the boat pointed into the wind
whether in the water or on the beach.
Read the instruction manual carefully.
Make sure everyone on the boat reads and understands these
safety instructions.
Read Carefully Before Sailing:
7
hobie.com
Safety Advice
ALWAYS check that the drain plugs are screwed in before launch-
ing your catamaran. Remove the plugs after sailing to drain any
water that may have leaked into the hulls.
Safety Equipment:
All necessary safety equipment must be available on board. (Life jack-
ets, etc.) and must correspond to the boat type, weather conditions,
etc. This material is mandatory in some countries. The crew must
know how to use this material and how to behave in case of emergency
(men at sea, towing, etc.) ; Sailing schools and clubs regularly organise
training sessions to learn how to use the safety equipment and how to
behave in case of emergency.
INTERNATIONAL HOBIE CLASS ASSOCIATION (I.H.C.A.)
Hobie Cat owners are organized in a world-wide class association:
the IHCA (International Hobie Class Association).
For North America, you can contact the Hobie Class Association of North
America.
Visit their web site : http://hcaona.hobieclass.com
8
Handling and Maintenance
Before sailing, check the following points :
1/ Install the drain plugs (if any) – do not overtighten, hand tight is suf-
ficient. Overtightening may cause the drain plug flange to distort and
cause leakage.
2/ Tension the rig. This can be accomplished by having your assistant
hang from the trapeze or you can use mainsheet tension on one side
at a time so that you can adjust the shroud position in the side stay
adjusters.
3/ Check all fastenings :
- Mast tang shackles and shrouds (to prevent the mast to fall down)
- pins and trapeze rope locks (to prevent falling out in the water if the
trapeze is not well fastened)
- pins and spring rings on the forestay and shrouds (to prevent the
mast to fall down)
- spring rings on the rudder pins (to prevent loosing the rudder as-
sembly in case of capsizing)
Transport
In order to avoid hull damages :
- Always use a dolly to transport your Hobie on the beach (even if it is
sand beach) and for launching. Step into the water with the dolly and
once the cat is afloat take out the dolly.
- DO NOT BEACH. Beaching, even smoothly, may damage the hulls. use
your beach dolly to take the boat out of the water.
- For towing, always use an homologated road trailer with cradles.
Launching your Hobie Cat
Launching the boat is easiest when the boat can be pointed into the
wind to keep it de-powered and floated into deep enough water to
lower the rudders.
It is possible to launch in shallow water with the rudders partly up.
Try not to steer with too much force on the rudders until you lock them
in the down position.
Keep the sail loose and trimmed out completely until you can power up
and steer away from any obstacle.
9
hobie.com
Handling and Maintenance
Righting your Hobie Cat
If you tip the boat over, in order to avoid the mast from sinking under the
hull, one of the crew must rapidly climb on the hull that remains on the
water. In the meantime, the other crew uncleat all the lines and sheets.
It is not necessary, but it is easier, to right the boat when the bow and
the mast are pointed into the wind. There will be less resistance and
better control in this position.
Skipper and crew stand up on the hull. Using the righting line, skipper
and crew pull the righting line that is against the upper hull and hold the
line while slowly leaning back away from the trampoline. As the mast
and sail lift out of the water, drop down to your knees then into the wa-
ter. Hold on to the crossbar near the hull that you were standing on.
Be well aware of the hull and crossbar coming down over your head.
Holding the crossbar or righting line will also insure that you remain
with the boat when it is righted. Climb aboard and continue sailing.
Maintenance of your Hobie
This manual is not an exhaustive guide for the maintenance or repair of
your Hobie.
Always use the service of an experienced professional for the
maintenance, the mounting of accessories or the modifications to your
Hobie.
Modification that may affect the safety use of the boat must be checked
before processing and made by an experienced professional. The
builder cannot be held for responsible for modification that he has not
duly approved.
In some countries, prior authorizations are necessary or specific
regulations are in force. Check them. Always maintain your boat and
take into account the deterioration that may occur with the time or
following inappropriate or intensive use. Any boat (even the strongest
one) may be severely damaged if it is not used the right way. This is not
compatible with safe sailing.
Hobie Cat does not recommend leaving your Hobie in the water on a
mooring. Accelerated wear to the boat and rigging will be
experienced. Damage to the hull material is possible. Limitation
of the mast rotation and tensioning of the rigging are required to
lessen this wear. Inspect rigging often and tape rigging rings and
shackles to prevent loosening.
After sailing, it’s recommended to wash the hulls to remove the salt.
Also remove the sails and wash them. Only store them when they
are perfectly dry.
There is one plug in the rear of each hull. These plugs are used to
drain the hulls. The plugs should be in place before sailing. Remove
the plugs after sailing to drain any water that may have leaked into
the hulls. It is best to travel with and store the boat with the plugs
removed to allow for pressure changes due to heating, cooling, and
altitude changes. This will prevent warping of the hull surface.
10
Warranty
Our Commitment
Here at Hobie we’re enthusiasts like you. We know all about early morn-
ing fishing trips, family time at the beach, or summer time on the lake.
We love being out there, and we’re sure you do too. Our goal is to keep
you out on the water having fun for many years to come.
Warranty
Rest assured that when you purchase your new Hobie from an autho-
rized Hobie dealer it comes with a 3-Year Warranty. The Warranty does
not cover normal wear and tear, improper storage, or running into
stuff. The Warranty covers defects in the materials, manufacturing and
design.
To Obtain Warranty Service
Within 30 days of discovering a defect, take your Hobie product, along
with proof of purchase (sales receipt or registration card) to the autho-
rized Hobie dealer from whom you purchased your boat, unless you have
moved or are traveling. In that case, take it to the nearest authorized
Hobie dealer.
Disclaimer – Product Life Cycle
Every Hobie has a useful product life cycle. The length of that life cycle
will vary depending on multiple factors including; the construction
and materials, storage and transport, maintenance and care, and the
amount and type of use your Hobie is subjected to over its life. We have
been engineering fun on the water since 1950. However, we can’t engi-
neer our products to survive improper usage, such as incorrect storage
or transport, exposure to excessive heat or sunlight, or collisions with
your garage. Whatever the case may be, we’ll always point you in the
right direction.
11
hobie.com
Warranty
Hobie Sailboats
The sailboat warranty does NOT cover:
Normal wear and discoloration.
Damage caused by abuse or failure to perform normal maintenance.
Damage caused by alterations or modifications.
Transportation of boat or parts to Hobie Cat Company or its dealers.
Any boat used as a rental or placed in commercial service of any kind.
Any other consequential damage, incidental damage or incidental ex-
pense, including damage to property.
Damage caused by modifying the mainsheet block arrangement beyond
what was supplied as standard. Contact Hobie Cat Company for more
information.
Damage or blistering of gel coat caused by mooring or storing boat in
water.
Damage caused by failure to follow procedures in sailing and assembly
manuals.
Damage caused by improperly supporting sailboat when transporting or
storing.
Weather related damage, such as freezing, prolonged sun exposure, or
high winds.
Any other consequential damage, incidental damages or incidental
expense, including damage to property. Some states do not allow the
exclusion or limitation of incidental or consequential damages, so this
limitation may not apply to you.
12
Your Distributor
Your dealer is our representative and will bring
you all necessary assistance in order to solve
problems you may encounter.
Please carefully read the warranty conditions
written in this manual.
Please carefully and thoroughly read
this manual. Keep it in a safe place.
Give it to the new owner if you resell
your Hobie.
13
hobie.com
List of Parts
1
2
3
4
5
6
7
Wires
Big jib halyard block
Small jib halyard block
2 sets of trapeze
2 shrouds
Forestay + pigtail +
8 mm shackle
Trapezes
4 Trapeze handles
4 adjusting rope locks
2 shackles
2 Trapeze shock cords
4 trapeze lines
Cordages
1. Main halyard rope on mast
2. Jib sheet
3. Righting line
4. Rigged Jib halyard rope
5. Main sail downhaul line
6. Trampoline side lacing
line
7. 2 trampoline rear lacing
lines
14
List of Parts
Rig bag
2 stay adjusters + twist toggles
2 stay adjuster + shackles
Additional stay adjuster
4 pylon screws + 4 pylon screws
2 rudder pin
2 jibsheet blocks + shackles
Teflon washer
4 split rings
2 drain plugs + washers
Gooseneck
Mainsheet system
15
hobie.com
Hull/Crossbar Assembly
Position the hulls parallel (2 meters apart) and check the left from
the right hull (anti-skid on the deck towards the outside). Start each
corner casting onto the pylon just to get them together. Use the soft
mallet.
1. Insert the sidebars in their
slots on the front cross-
bar. The flared portion of
the sidebar track must be
forward and facing inward.
Fit in the rear crossbar
onto the rear of the hulls
and on the other end of
each sidebar.
2. Once the frame is
assembled and fitted
onto the hulls, drive each
corner casting down onto
the pylon until the bolt
holes line up. Strike the
casting directly over the
pylon only. Use the soft
mallet only.
3. Install the four pylon bolts
and nuts, with the nuts
inboard. Tighten securely,
but do not over-torque.
16
Trampoline Assembly - Righting Line
1. Insert trampoline half into
the flared sidebar track
so that the grommets are
running down the center and
across the back. Position
the forward edge even with
the forward crossbar. Insert
the forward edge of the
trampoline into the front
cross bar track adjacent to
the corner casting and slide
it all the way to the center.
Repeat this operation for the
opposite side. Install the aft
lacing strip by feeding the
larger bead into the track in
the aft crossbar. Make sure it
is centered. The hiking straps
should be on top.
2. Tie each aft lacing line to the
aft corner casting as follows:
Start with an 8 knot at one
end of the line which you will
block into the inferior hole of
the rear casting (behind the
crossbar fitting). Then, pass
the line through the grommet
on the side of the trampoline
(from underneath), then in
the rear trampoline strip
(from above). After 3 or 4
laces, temporarily tie it at
the aft end. Repeat the same
operation on the other side.
Make sure you pass the line
above the crossbar binding
nut to avoid friction during
sailing.
17
hobie.com
Trampoline Assembly - Righting Line
3. Tie the center lacing line.
Start with a bowline knot.
Lace the line back and forth
taking up slack as you go.
When lacing go through the
grommets over/under.
4. Stop the central lacing by
a triangle. Use the central
grommet on the rear trampo-
line stripe. Make a key at the
end.
5. Temporarily tie off the line
at the aft end, then remove
slack again by working it out
front to back. Lace the two aft
lines simultaneously in the
same manner.
Righting line
Attach the righting line to one of the front pylon with a figure eight
knot. Tie the other end to the opposite pylon.
The line should be lead under the trampoline through the center
lacing.
18
Rudder Assembly
1. Rudder head
Identify the right rudder as-
sembly and the left one. They
must not be reversed. Slip
the rudder pin down through
the casting and gudgeons.
Insert the split pin in the hole
of the rudder pin so that it
prevents it from falling down.
Do the same thing on the op-
posite side.
Make sure that the plastic
cam has the nose up as indi-
cated on the drawing.
2. Standard tiller crossbar
Attach the tiller crossbar (1)
to the Rudder arm (2). Pay
attention to the left and right
side. Insert the screw as
shown on the photo. Repeat
the same operation on the
opposite side.
2. Race tiller crossbar
1
2
19
hobie.com
Rudder Assembly
5. Fixation of the tiller
extension
(all models)
4. Rudder adjustment
The two rudder blades must
be parallel or slightly turned
inside (3-4 mm). To do this
it is necessary to adjust the
length of the tiller crossbar.
The screw under the tiller
crossbar allows for this
adjustment. Unscrew it and
you can move the bar inside
or outside. Once the rudder
blades are well trimmed, do
not forget to retighten the
screw.
20
Adjust Rudder Rake
Now, for the first time, you may readily, and easily, adjusr the rake
for your rudder blades on the Hobie 14 and 16. The amount of rake in
a rudder lade affects the “feel” at the tiller. Basically, more foreward
rake increases the leward pull on the tiller. Turning blades for a
comfortable feel is a metter of individual preference but a close to
neutral “feel” generally provides the best steerin. (see figure below.)
Centerline of rudder pin
Standard setting = 1-1/8”
Increase forward rake
for less tiller pull
Decrease forward rake
for more tiller pull
Rudder blade rake is preset at the factpry to 1-1/8”. This amount will
be best for the average sailer and is a good starting point from which
to begin any adjustments.
1. The first step is making any rudder rake adjustment is to
determine the existing rake. This is done with the rudder assembly
hanging on the boat’s transom, blade down and locked. Using a
straight edge extend the centerline of the rudder pivot pin down,
across the leading edge of the blade and draw a [encil line along
the straight edge. Measure the distance from the pencil line to the
most forward spot on the blade. (see figure below.)
  • Page 1 1
  • Page 2 2
  • Page 3 3
  • Page 4 4
  • Page 5 5
  • Page 6 6
  • Page 7 7
  • Page 8 8
  • Page 9 9
  • Page 10 10
  • Page 11 11
  • Page 12 12
  • Page 13 13
  • Page 14 14
  • Page 15 15
  • Page 16 16
  • Page 17 17
  • Page 18 18
  • Page 19 19
  • Page 20 20
  • Page 21 21
  • Page 22 22
  • Page 23 23
  • Page 24 24
  • Page 25 25
  • Page 26 26
  • Page 27 27
  • Page 28 28
  • Page 29 29
  • Page 30 30
  • Page 31 31
  • Page 32 32
  • Page 33 33
  • Page 34 34
  • Page 35 35
  • Page 36 36

Hobie 16 User manual

Type
User manual

Hobie 16 is a versatile and durable catamaran designed for recreational sailing, racing, or fishing. Its lightweight and stable design make it ideal for beginners and experienced sailors alike. With its spacious cockpit and easy-to-use controls, the Hobie 16 is perfect for day trips or weekend getaways. Whether you're looking for a relaxing sail or an exhilarating race, the Hobie 16 is the perfect choice.

Ask a question and I''ll find the answer in the document

Finding information in a document is now easier with AI