15ENGLISH
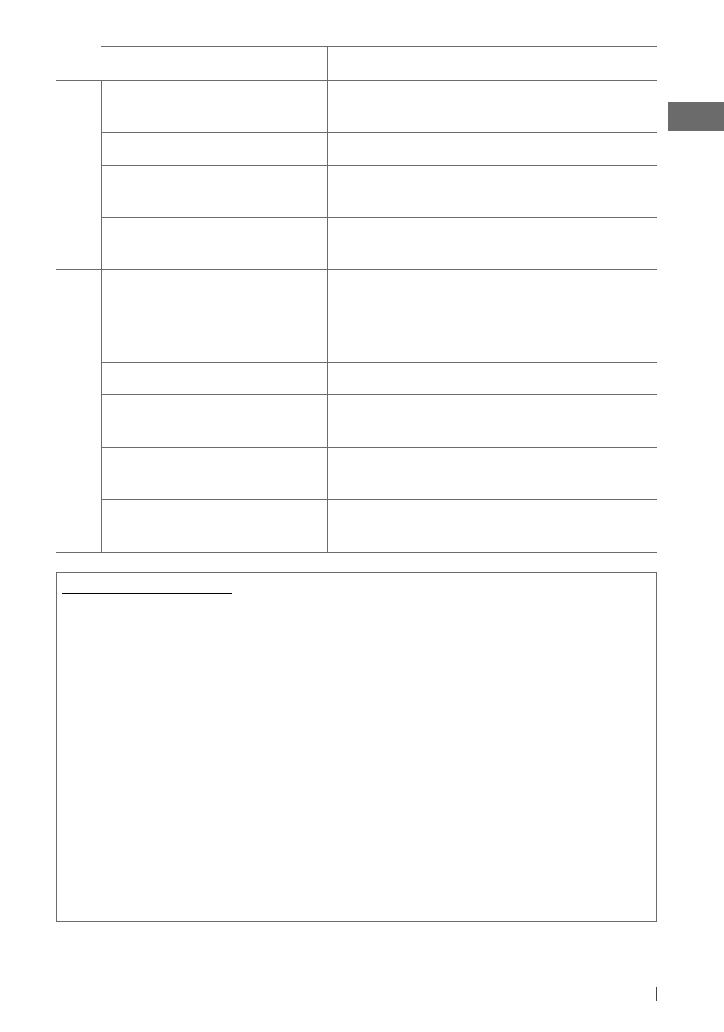
Symptom Remedy/Cause
Disc playback
Disc sound is sometimes interrupted. Stop playback while driving on rough roads. / Change the disc. /
Check the cords and connections.
“NO DISC” appears on the display. Insert a playable disc into the loading slot.
“PLEASE” and “EJECT“ appear alternately
on the display.
Press
0
, then insert a disc correctly.
“IN DISC” appears on the display. The disc cannot be ejected properly. Make sure nothing is
blocking the loading slot.
MP3/WMA playback
Disc cannot be played back. • Use a disc with MP3/WMA tracks recorded in a format
compliant with ISO 9660 Level 1, Level 2, Romeo, or Joliet.
• Add the extension code <.mp3> or <.wma> to the file
names.
Noise is generated. Skip to another track or change the disc.
“READING” keeps flashing on the display. A longer readout time is required. Do not use too many
hierarchical levels and folders.
Tracks do not play back in the order you
have intended them to play.
The playback order is determined when the files are recorded.
The elapsed playing time is not correct. This sometimes occurs during playback. This is caused by how
the tracks are recorded on the disc.
Additional information
• This unit can play back multi-session discs; however,
unclosed sessions will be skipped while playing.
• This unit can play back files with the extension code
<.mp3> or <.wma> (regardless of the letter
case—upper/lower).
• This unit can play back the files meeting the conditions
below:
– Bit rate: MP3/WMA: 8 kbps — 320 kbps
– Sampling frequency:
MP3: 48 kHz, 44.1 kHz, 32 kHz, 24 kHz, 22.05 kHz,
16 kHz, 12 kHz, 11.025 kHz, 8 kHz
WMA: 48 kHz, 44.1 kHz, 32 kHz, 22.05 kHz
• This unit can show WMA Tag and ID3 Tag Version
1.0/1.1/2.2/2.3/2.4 (for MP3).
• The search function works but search speed is not
constant.
• The maximum number of characters for file/folder
names vary depending on the disc format used (includes
4 extension characters—<.mp3> or <.wma>).
ISO 9660 Level 1 and 2, Romeo: 64 characters, Joliet:
32 characters, Windows long file name: 64 characters
• This unit can play back files recorded in VBR (variable
bit rate). (Files recorded in VBR have a discrepancy in
elapsed time indication.)
• This unit cannot play back the following files:
– MP3 files: encoded in MP3i and MP3 PRO format; an
inappropriate format; layer 1/2.
– WMA files: encoded in lossless, professional, and
voice format; not based upon Windows Media®
Audio; copy-protected with DRM.
– Files which have data such as AIFF, ATRAC3, etc.
EN02-17_KD-HDR44[J]_f.indd 15EN02-17_KD-HDR44[J]_f.indd 15 11/23/10 11:14:35 AM11/23/10 11:14:35 AM


