Mr Handsfree blue compact User manual

Category
Car kits
Type
User manual

This manual is also suitable for

DECLARATION OF CONFORMITY
We, the undersigned
Company: TE-GROUP nv
Address: Kapelsestraat 61, 2950 Kapellen - BELGIUM
declare, that the following equipment:
Product Name:
mr Handsfree BLUE COMPACT
Product Type: Bluetooth
®
Carkit
Conforms with the requirements of European Council Directive 89/336/EEC amended with 92/31/EEC
Blue Compact parts
9 [ 4
Option 2
2
3 [ 5
1. (SM2)
8. (M1)
Option 1
10.2 (SC2)
10.3 [ 5
10.1 (SC3)
11.1 (MB1)
11.2
14
7
6
5
4. (D2)
13
15
16



Option 3
12.1
12.2
12.3
12.4
TABLE OF CONTENTS
TABLE OF CONTENTS
SAFETY INSTRUCTIONS .............................................................................................................2
AVAILABLE VERSIONS ................................................................................................................2
WHAT DOES MR HANDSFREE BLUE COMPACT INCLUDE? ...................................................2
DESCRIPTION ...............................................................................................................................3
INSTALLATION .............................................................................................................................5
OPERATION ..................................................................................................................................10
TROUBLE-SHOOTING ..................................................................................................................24
TECHNICAL PARAMETERS .........................................................................................................25
BLUETOOTH
®
................................................................................................................................25
CARE AND TECHNICAL MAINTENANCE ................................................................................... 26
GUARANTEE .................................................................................................................................26
GB - 2
SAFETY INSTRUCTIONS
SAFETY INSTRUCTIONS
1. Before starting the installation, make sure that the car ignition is off.
2. Make sure that the operation of the carkit will never influence your safety.
3. Make sure not to damage electrical cables, fuel or brake lines or safety equipment during the installation.
4. Make sure not to impact the steering or braking system or other key systems essential for the proper operation of the
car when installing the carkit. Make sure that the deployment of the airbags is not blocked or impaired in any way.
5. The carkit may only be used at an operating voltage of 12V with the minus pole earthed. Failure to observe this require-
ment may result in damage to the car’s electronics system.
6. Do not operate your carkit off the car battery for a long time, i.e. with the engine switched off, as this may cause your
battery to run dry.
AVAILABLE VERSIONS
AVAILABLE VERSIONS
The mr Handsfree Blue Compact is available in 3 versions:
1. Blue Compact Plug & Play: for easy installation
2. Blue Compact Pro: for professional installation with sound of carkit over the car speakers
3. Blue Compact Pro Music 100: for professional installation with sound of carkit and MP3 player over the car speakers
WHAT DOES MR HANDSFREE BLUE COMPACT INCLUDE?
See illustration page
1. Handsfree unit with built-in speaker (SM2)
2. Double-sided tape plate for fixation of the handsfree unit
3. Set of screws for fixation of the handsfree unit – 5 pcs.
4. Screen (D2)
5. Angular bracket for the screen with corresponding fixing parts and screws
6. Double-sided tape plate for fixation of the angular bracket
7. Double-sided tape plate for fixation of the screen to vertical surfaces
8. Microphone (M1)
9. Clips for guiding the microphone cable – 4 pcs.
10. Cable set – Option 1 – for Blue Compact Plug & Play (Optional)
10.1. Adapter for connecting the handsfree unit to the car via the cigarette lighter (SC3). It includes a changeable fuse
and coil cord.
10.2. Power cable for connecting the handsfree unit to the power supply of the car, the ignition system and for muting
the radio (SC2). It includes a changeable fuse.
10.3. Contact clips for connecting the SC2 cable to the car circuitries – 5 pcs.
11. Cable set – Option 2 – for Blue Compact Pro (Optional)
11.1. Mute box (MB1)
11.2. Cable with ISO sockets for connection to the car circuitries
12. Cable set – Option 3 – for Blue Compact Pro Music 100 (Optional)
12.1. Pro Music 100 cable
12.2. DIN/ISO/FAKRA converter cables
12.3. 2,5 / 3,5 mm stereo jack plug
12.4. Charging cables for audio device
13. CD with manual and drivers
14. USB reprogramming cable
15. Quick Reference Guide
GB - 3
16. Screw driver
17. button
18. Central button
19.
button
DESCRIPTION
DESCRIPTION
HANDSFREE UNIT (SM2)
The handsfree unit includes built-in speaker, echo canceller, noise suppressor and Bluetooth
®
wireless technology, which
provides a wireless connection with Bluetooth
®
mobile phones.
The handsfree unit has the following jacks for connecting external units:
1. Socket for screen (D2) cable.
2. Microphone socket M1.
3. Socket for external speaker connection (3-6W, min 8 Ohm). When the external speaker is connected to socket 3, the
built-in speaker is switched off automatically.
4. Socket for SC2, SC3, MB1 or Pro Music 100 cable connection.
1
2
3
4
SCREEN (D2)
The screen unit includes:
1. LCD with big symbols and icons.
2. Convenient adjustable fixation system, which allows you to choose the best viewing position of the LCD.
3. Backlight with variable light colors and day and night mode.
If press:
- Receiving a call.
- Connecting with paired phone in Handsfree
or Headset profile.
If press and hold:
- Switching on pairing mode.
If turn Central button to the right or to
the left:
- Navigation in the menu.
If press Central button:
- OK button.
- Opening the menu.
If press:
- Ending a call.
- Rejecting an incoming call.
- Returning to the previous level of the menu.
- Deleting input data.
If press and hold:
- Returning to Standby mode.
GB - 4
MICROPHONE (M1)
The microphone is developed especially for in-car use. The location of the microphone significantly influences the acoustic
quality. For a recommendation on locating the microphone, see the “Installation” chapter.
The microphone has a 2 positional button for adjusting its sensitivity. Press the button on the microphone to increase the
volume to the other caller.
SYSTEM CABLES SC2 AND SC3 (Optional)
System cable SC2 connects the handsfree unit with the power supply and the ignition system and is used for muting the radio.
System cable SC3 is used for plug & drive installation. It provides power supply via the cigarette lighter.
Both system cables are supplied with changeable fuses. How to change the fuses is indicated in the illustration below.
SYSTEM CABLE MB1 (Optional)
System cable MB1 connects the handsfree unit with the power supply, the ignition system, the mute socket of the car radio
and the 2 front car speakers. It includes the mute box with relay components and a cable with ISO standard sockets. Please
see the chapter “Installation” where the connection diagram is shown.
SYSTEM CABLE PRO MUSIC 100 (Optional)
This cable connects the handsfree unit with the power supply, the ignition system, the mute socket, the speakers and the
radio of the car. It also provides a connection to your MP3 player and antenna cables.
Please see the chapter “Installation” where the connection diagram is shown.
Fuse
Fuse
SC2
SC3
GB - 5
INSTALLATION
INSTALLATION
HANDSFREE UNIT (SM2)
Search for a location in your car where the handsfree unit fits and where it is comfortable for use. Make sure that the loca-
tion in your car where you would like to install your handsfree unit is free from dust and dirt.
We recommend mounting the handsfree unit at a less visible position in the car. However, make sure that the unit can
provide good acoustic, by directing the speaker in the opposite direction of the microphone and by placing the unit at a
distance of more than 1 meter from the microphone.
The handsfree unit can be fixed in 2 ways:
1. Under the dashboard or at any other place in the car using the installation screws.
2. Under the dashboard or at any other place in the car using the double-sided tape plate.
SCREEN UNIT (D2)
Search for a location in your car where the screen unit fits and where it is comfortable for use. Make sure that the location
in your car where you would like to install your screen unit is free from dust and dirt.
The screen unit can be fixed in 2 ways:
1. Mount the bracket to the screen unit, using the supplied screws. Then please mount the bracket with the screen unit,
using the double-sided tape, on the dashboard or at any other place where it is clearly visible but make sure not to
impair control or operation of the vehicle.
2. The most advanced and nice looking option is to place the screen directly on the dashboard, without the bracket, using
the double-sided tape.
The cable that comes out of the screen unit is used for connecting the screen unit to the handsfree unit. Make sure that the
cable is placed so that it will not be damaged (e.g. not laid under car seats or over sharp edges).
MICROPHONE (M1)
Mount the microphone close to the user’s head (30 cm is optimal) and place it so that it is directed towards the mouth.
Experience has shown that the best location is near the rearview mirror or to the left of the sun visor. To avoid echo, it is
recommended to have a minimum distance of 1 meter between the microphone and the handsfree unit.
Make sure to mount the microphone so that it is not exposed to air streams from the vents. Do not lay the microphone cable
in the heating, ventilation or AC systems. Fix the microphone using Velcro.
CONNECTING TO THE POWER
There are 4 ways of connecting the Blue Compact to the car’s electronic system:
1. Plug & drive connection: Via the adapter for the cigarette lighter (SC3) (Optional).
GB - 6
2. Built-in connection: Immediately to the car’s electronic system via system cable SC2 (Optional).
The wires of cable SC2 are color-coded. They are listed in Table 1 in column A and each wire should be connected to
the corresponding item listed in column B.
Table 1
AB
Red wire The + voltage of the car’s power supply
Black wire The negative GND connection
Blue wire Ignition
Brown wire Used for Car Radio Muting (CRM) and has to be connected to the car radio (Mute)
To avoid distortions, make sure that the cables are laid far away from the electronic systems of the car.
Connect the wires with the contact clips. Put the car wire in the through groove of the clips and the cable wire in the
groove with the confining rib.
Attention!
If there is no “Ignition” wire or if it is unavailable, you should connect the blue cable wire to the red wire of the handsfree
unit and the red cable wire to the “Continuous” wire of the car which keeps the voltage when ignition is turned off. In
this case, the phone call will not be disconnected if the ignition is turned off.
CAR RADIO MUTING (CRM)
The Blue Compact allows muting your car radio when there is an incoming call.
Check the user’s manual of your car radio and ensure that it has a Mute function. If additional settings have to be
set from the car radio menu, make sure that they are done correctly.
Remove the control panel of the car radio.
Remove the decorative panel and take the car radio out of the sleeve using the handles. Disconnect the car radio plug.
Connect the wires of the mr Handsfree Blue Compact to the corresponding wires of the car radio according to Table
1. Use the contact clips for the connection.
Restore the connection and installation of the car radio.
3. Professional built-in connection: Immediately to the car’s electronic system via system cable MB1 (Optional).
Disconnect the car radio and power leads.
Join the cable according to the connection diagram shown below. If the car radio has a mute jack, connect the yel-
low wire of the cable to one of the “mute in” jacks (1, 2 or 3). Refer to your car radio manual to determine the position
of the mute jack.
GB - 7
78
56
34
12
78
56
34
12
X1
X2
7 8
5 6
34
1 2
78
5 6
3 4
1 2
Y1 Y2
POWER/MUTE Y1
1. green yellow ignition (+12V)
2. black (Ground)
3. blue (Aerial*)
4. violet (Illumination*)
5. green (Mute N1)
6. yellow (+12V) permanent
7. white (Mute N2)
8. brown (Mute N3)
SPEAKERS X2
1. green (LB+)
2. green yellow (LB-)
3. blue (LF+)
4. white (LF-)
5. yellow (RF+)
6. brown (RF-)
7. black (RB+)
8. violet (RB-)
SPEAKERS Y2
1. green (LB+)
2. green yellow (LB-)
3. white (LF+)
4. blue (LF-)
5. brown (RF+)
6. yellow (RF-)
7. violet (RB+)
8. black (RB-)
POWER/MUTE X1
1.
3.
4.
5.
6.
7. white (Mute N2)
blue (to mute box) +
green yellow (toY1) ignition (+12V)
8. brown (Mute N3)
green (Mute N1)
green yellow (to
mute box) + yellow
(to Y1) (+12V) permanent
blue (Aerial*)
violet (Illumination*)
2. black + black (Ground)
GB - 8
4. Professional built-in connection: Immediately to the car’s electronic system via system cable Po Music 100 (Optional)
Take out your car radio according to the specifications of your car and your radio.
Unplug the antenna plug from your radio and connect it to the female antenna socket of your Pro Music 100.
If the car has DIN type (1), make the connection via the conversion plug (3).
If the car has ISO type (2), make the connection directly.
If the car has FAKRA type, make the connection via the conversion plug (4.2).
123
4.2
4.1
Plug the male antenna plug from the Pro Music 100 into the car radio.
If the car has DIN type (1), make the connection directly.
If the car has ISO type (2), make the connection via the conversion plug (3).
If the car has FAKRA type, make the connection via the conversion plug (4.1).
Select a frequency with the 4 dip switches on the Pro Music 100. The frequency table is printed on the backside of
your Pro Music 100. Please take a close look at this frequency table!
Connect the ISO-plug to the radio and speakers. If your car is provided with plugs other than ISO-plugs, you will
need adapters. These are not included.
Guide the wire with the button and the 2.5 mm / 3.5 mm jack plug to the place where your audio device is located.
Select your charging wire, for mini USB or iPod, and connect this to the Pro Music 100. Guide this wire also to the
place where your audio device is located.
Place your Pro Music 100 in the hole behind your car radio and place your car radio back into its place.
Use with audio device
Connect the jack plug of your Pro Music 100 to your audio device.
Connect your charging cable to your music device when you need to charge the battery.
Select the frequency of the Pro Music 100 on your car radio (please store this frequency as a preset).
Press the control button on the cable of your Pro Music 100 to switch it on or off.
GB - 9
78
56
34
12
78
56
34
12
7 8
5 6
34
1 2
78
5 6
3 4
1 2
DIN/ISO/FAKRA TO ANTENNA
JACK + MOLEX PLUG TO CARKIT
YELLOW WIRE TO MUTE FROM RADIO
*
FREQUENCY SELECTOR FOR FM
CAR SPEAKERS
CAR POWER
CAR RADIO
TO MP3 ETC. JACK 3.5/2.5 MM
FUSE 2 A
MUTE 1
MUTE 2
MUTE 3
X1 X2
Y1 Y2
POWER/MUTE Y1
1. green yellow ignition (+12V)
2. black (Ground)
3. blue (Aerial*)
4. violet (Illumination*)
5. green (Mute N1)
6. yellow (+12V) permanent
7. white (Mute N2)
8. brown (Mute N3)
SPEAKERS X2
1. green (LB+)
2. green yellow (LB-)
3. blue (LF+)
4. white (LF-)
5. yellow (RF+)
6. brown (RF-)
7. black (RB+)
8. violet (RB-)
SPEAKERS Y2
1. green (LB+)
2. green yellow (LB-)
3. white (LF+)
4. blue (LF-)
5. brown (RF+)
6. yellow (RF-)
7. violet (RB+)
8. black (RB-)
POWER/MUTE X1
1.
3.
4.
5.
6.
7. white (Mute N2)
blue (to mute box) +
green yellow (toY1) ignition (+12V)
8. brown (Mute N3)
green (Mute N1)
green yellow (to
mute box) + yellow
(to Y1) (+12V) permanent
blue (Aerial*)
violet (Illumination*)
2. black + black (Ground)
TO iPod
TO MP3-Player
(mini USB)
GB - 10
OPERATION
OPERATION
Since devices with Bluetooth
®
technology communicate through radio waves, your carkit and your mobile phone do not
need to be in direct line-of-sight. The 2 devices only need to be within a maximum of 10 meters of each other, so you don’t
need to take your phone out of your pocket or bag to make and receive calls via the carkit.
Since Bluetooth
®
phones produced by different manufacturers provide various functionalities; some functions described in
this user’s manual could be different or may not be available.
SWITCHING ON/OFF
If the mr Handsfree Blue Compact is connected to the power via the adapter with cable SC3, you can switch on the unit by
clicking the adapter into the cigarette lighter.
If the mr Handsfree Blue Compact is connected to the power via cable SC2 or MB1 or Pro Music 100, the unit will switch
on automatically when you turn the ignition key on.
Mr Handsfree Blue Compact will turn off automatically when the ignition is off.
MENU STRUCTURE
All functions of the unit are grouped in the menu.
To access the menu, press the central button once. The menu of quick access appears on the display.
To move in the menu, turn the central button to the left or to the right.
The menu structure is shown below:
GB - 11
2. Phonebook
1. Call list *
3. Keypad
4. Profiles
4.2. Add
4.3. Settings 4.3.1. Phonebook
4.1. Select *
1.3. Missed calls *
1.1. Dialed numbers *
1.2. Received calls *
4.3.1.1. Copy
4.3.1.3.2. Delete selected*
4.3.3.1. Brightness
4.3.1.2. Open *
4.3.1.3. Delete*
4.3.1.5. Settings *
4.3.1.4. Receive business card
4.3.2. Volume control
4.3.3. Display
4.3.3.5. Backlight off time
4.3.3.3. Color
4.3.3.2. Contrast
4.3.1.3.1. Delete all*
4.3.1.5.1. SIM + Phone*
4.3.1.5.2. Phone*
4.3.1.5.3. SIM*
4.3.3.3.1. Red
4.3.3.3.2. Magenta
4.3.3.3.3. Orange
4.3.3.3.4. Yellow
4.3.3.3.5. Green
4.3.3.3.6. Cyan
4.3.3.3.7. Blue
4.3.3.3.8. White
4.3.3.3.9. Custom
4.3.3.1.2. Night
4.3.3.1.3. Custom
4.3.3.1.1. Day
5.1. Connection
5.2. Disconnection
5.3. Pairing
5. Bluetooth
6. SMS
7. Software version
6.1. SIM *
8. Voice call
4.4. Delete
4.3.6. Set default
4.3.5. Security
4.3.4. Language
4.3.3.4. Rotate
4.3.7.1. Carkit front, back silent
4.3.7.2. Carkit front, back music
4.3.7.3. No music mute
6.2. Phone *
4.3.7. Mute
4.3.1.1.1. Phone *
4.3.1.1.2. SIM *
* These menus will only be visible when this information is avail-
able in your carkit/mobile phone.
GB - 12
USER PROFILES
The Blue Compact supports a multiple user profiles structure. The maximum quantity of user profiles is four. Every user
can copy and keep in the carkit memory his phonebook, call list and configuration settings of the device. The name of each
profile is identified according to the Bluetooth
®
name of the corresponding mobile phone. If no phone is paired with the
carkit, the pairing operation has to be done first.
As soon as the carkit is switched on, the latest profile is activated automatically and the carkit is making an attempt to con-
nect with the corresponding phone. If the last paired phone is not found, the carkit will switch to Standby mode. For your
security, every profile can be protected by a PIN code (up to 4 digits). You can read more detailed information about the
profiles in the chapter “Profiles”.
PAIRING, CONNECTION AND DISCONNECTION
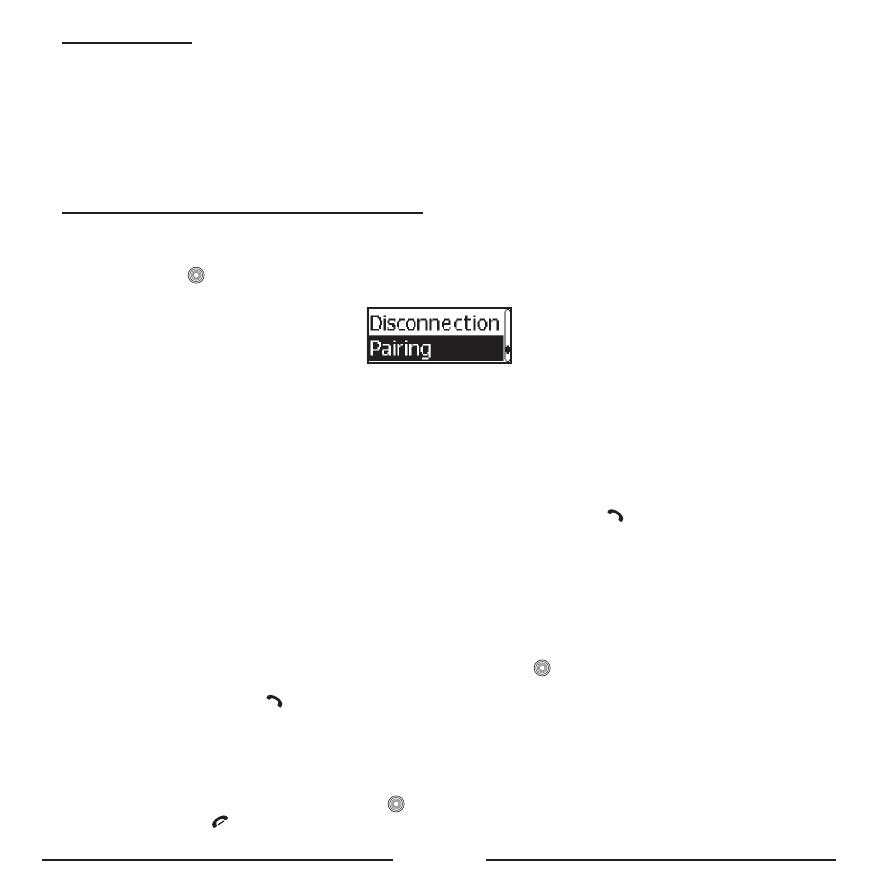
A. PAIRING
For pairing the mr Handsfree Blue Compact with your Bluetooth
®
mobile phone, you should go to Bluetooth
®
Pairing
and then press
. Now your Blue Compact is in registration mode for about 2 minutes. The corresponding message
appears on the display and a confirmation tone will be heard.
• Activate the Bluetooth
®
function in your mobile phone.
Search for available Bluetooth
®
devices by entering the corresponding submenu of the phone. Your phone will find all
Bluetooth
®
devices within 10 meters distance and display them as a list.
Select “Blue Compact” from the list.
Enter the passkey “0000”. “Pairing OK” will appear on the display and the device will return to Standby mode. “Blue
Compact” will be stored in the list of paired devices in your phone.
We suggest setting the Blue Compact as “authorized” in your mobile phone.
Note:
If necessary, the pairing mode could be activated by pressing and holding the
button on the screen unit for
more than 5 seconds.
If you want to pair a new phone with the Blue Compact and store the currently paired phone in the carkit’s
memory, you should create a new user.
B. CONNECTION
In some cases the device could be disconnected from your phone. For example, if the Blue Compact was switched off. To
restore the connection between the Blue Compact and your phone:
Switch on the power and the connection will be restored automatically; OR
Use the central button to go to Bluetooth
®
Connection and press . “Connection” will appear on the display;
OR
In Standby mode, press the
button on the screen unit.
C. DISCONNECTION
Sometimes you need to disconnect your phone from the Blue Compact. For example, if the phone should communicate
with another Bluetooth
®
device. To disconnect the Blue Compact and your phone:
Switch off the Blue Compact; OR
• Go to Bluetooth
®
Disconnection and press ; OR
Press and hold the
button on the screen unit for 5 seconds; OR
GB - 13
Take the phone more than 10 meters away from the Blue Compact; OR
Disconnect the Blue Compact and the phone through the phone’s menu.
Note:
If the Blue Compact and your phone were disconnected and you want to reconnect them it is not necessary to
pair these 2 devices again. Restoring of the connection will be performed without asking for the access code.
FUNCTIONS
1. CALL LIST
You can use this feature to review the call lists and dial the numbers the same way as you do with your mobile phone. The
call lists are stored in the carkit memory even if you switch off the power. There are three call lists for every profile: received
calls, dialed numbers and missed calls. Each call list can keep up to 32 numbers.
In every profile you can keep your call lists:
Incoming calls – up to 32 numbers
Outgoing calls – up to 32 numbers
Missed calls – up to 32 numbers
Remark:
Only the calls that were made with the carkit will be stored in the call list memory.
These lists will only be shown when there are numbers available in these lists.
2. PHONEBOOK
You can use this item to review your phonebook and quickly search for a necessary phone number by name. When you
have already copied a phonebook into the carkit, this menu item will show the phonebook. When there is no phonebook
available, because it has not yet been copied to the carkit, you have to copy the phonebook first.
The records of the phonebook are displayed in alphabetical order in the display. For a quick search of the desired name,
find its first letter with the cursor using the central button and press to see the list of the names. Select the desired name
or number and press to see the details or press to dial the number. The phonebook is stored per user profile, so that
each user can store is own phonebook. The Blue Compact phonebook can store up to 1000 records for every profile. This
is divided into 250 records for SIM card copy and 750 records for phone memory copy.
There are several ways to copy the phonebook to your carkit:
2.1 Copy the phonebook to the SIM card, and insert the SIM card temporarily in your carkit
In your mobile telephone, you will find your phonebook and an “Options” menu. In this “Options” menu, you can choose to
copy the contents of the phonebook to the SIM card. The physical memory on the SIM card is often 250 names & numbers.
To copy the phonebook using the SIM card reader, please insert the SIM card into the SIM card holder according to the
picture. Make sure that you push the card deep enough, until it clicks into place.
GB - 14
If the Blue Compact already has some phonebook records in the current profile, a warning message will appear.
• Press
to confirm the phonebook erasing or press to cancel.
If the SIM card is PIN code protected, the screen keypad will appear:
Enter the PIN code by turning the central button to the left or the right to select digits.
Press to confirm your choice. The selected digits will appear on the top part of the display.
To delete an incorrect digit, press or hold for a few seconds to delete all digits.
• Press to confirm the PIN code.
The phonebook copying will start accordingly. The existing phonebook, stored in the Blue Compact, will be erased
automatically.
If your SIM card is not PIN code protected, the phonebook copying process will start automatically.
As soon as the phonebook copying process is finished, you can remove the SIM card from the holder. To release the
card from the holder, you should press it.
Insert the SIM card in your mobile phone and switch it on.
Activate the menu of the Blue Compact and select Bluetooth
®
Connection.
Press to confirm your choice.
The connection should be restored.
2.2 Copy the phonebook to the SIM card, and copy the SIM card contents via Bluetooth
®
In your mobile telephone, you will find your phonebook and an “Options” menu. In this “Options” menu, you can choose to
copy the contents of the phonebook to the SIM card. The physical memory on the SIM card is often 250 names & numbers.
After this copy, please make sure that the phone is connected to the carkit via Bluetooth
®
. Select respectively: Profiles
Settings
Phonebook Copy SIM card in the menu. The phonebook will now be copied into your
carkit, if your mobile phone supports this feature.
2.3 Copy the phonebook records saved in your phone memory via Bluetooth
®
Make sure that the phone is connected to the carkit via Bluetooth
®
. Select respectively: Profiles Settings
Phonebook
Copy Phone in the menu. The phonebook will now be copied into your carkit, if your mobile
phone supports this feature.
2.4 Send business cards from the phone to the carkit.
If your phone supports the Bluetooth
®
OPP profile, it can send business cards to the carkit. Depending on your mobile
phone type, this can be one-by-one or all business cards at once. Firstly you have to set the carkit in receiving mode for
business cards. Select respectively: Profiles
Settings Phonebook Receive business card . The
carkit is now waiting for the business cards that have to be sent from your phone. Please check the user’s manual of your
phone for more information on how to send business cards (Normally this can be done from the options menu when you
GB - 15
are in the phonebook of your mobile phone). After you have sent your business cards, you need to press the red button on
the carkit to exit this screen. The phonebook is now updated.
3. LCD KEYPAD
By using the LCD keypad and the central button you can dial out any number.
• Press to open the menu.
Turn the central button to the left or the right to move and choose a digit on the display.
Press to confirm or press
to delete a digit.
• Press to dial the number.
4. PROFILES
The maximum quantity of user profiles is four. Every user can copy and keep in the carkit memory his phonebook, call list
and configuration settings of the device. The name of each profile is identified according to the Bluetooth
®
name of the
corresponding mobile phone. If no phone is paired with the carkit, the pairing operation has to be done first.
As soon as the carkit is switched on, the latest profile is activated automatically and the carkit is making an attempt to
connect with the corresponding phone. If the last paired phone is not found, the carkit will switch to Standby mode.
4. 1. Select
Use this item to select the necessary profile by name to activate it. This item is only available when various profiles have
been created. If the necessary profile is protected by a PIN code, the digital keypad will appear and you have to enter the
PIN code accordingly (up to 4 digits). If the PIN code is correct, you will get access to your phonebook and settings.
4. 2. Add
Use this item to create a new profile.
Press to open the menu.
As soon as this item is selected, the Blue Compact will ask you to enter the PIN code for the new profile and the digital
keypad will appear.
You can enter the PIN code (up to 4 digits) and press to confirm.
If you decide not to use a PIN code, just press .
To activate the pairing procedure, press and pair your mobile phone according to the instructions.
The name of the profile is identical to the Bluetooth
®
name of your mobile phone.
If the pairing procedure passed successfully, the carkit is connected to your phone automatically.
GB - 16
4. 3. Settings
Use this item to choose your individual settings for the Blue Compact.
4. 3. 1. Phonebook
4. 3. 1. 1. Copy
Use this item to copy the phonebook of your phone to the Blue Compact phonebook. The maximum number of phonebook
records is 1000 for each profile.
For more information on phonebook copy, please read chapter “2. Phonebook”.
4. 3. 1. 2. Open
Use this item to view the phonebook records.
4. 3. 1. 3. Delete
Use this item to delete all the phonebook records.
4. 3. 1. 4. Receive Business card
For more information on receiving business cards, please read chapter “2.4 Send business cards from the phone to the carkit”.
4. 3. 2. Volume control
This item is used for setting the desired volume of the speaker of the Blue Compact in Talk mode and the volume of the
incoming call ringer.
Press to open the menu.
Turn the central button to the left or the right to set the volume and press
to exit the menu. The volume setting has
now been saved.
4. 3. 3. Display settings
4. 3. 3. 1. Brightness
Choose this menu item for setting the brightness of the display backlight.
Press to open the menu.
GB - 17
Choose “Day” for the brightest backlight: press to confirm and press to exit the menu.
Choose “Night” for a darker backlight: press to confirm and press to exit the menu.
Night
Day
Custom
Choose “Custom” if you want to tune the brightness:
– Press to enter the submenu.
Turn the central button to the left or the right to choose the desirable brightness.
Press to confirm or press
to restore the previous setting of the brightness.
– Press to exit the menu.
The custom setting of brightness has 16 levels. Level 0 switches the backlight off, level 15 is the maximum.
4. 3. 3. 2. Contrast
Use this menu item for setting the contrast of the display.
• Press to open the menu.
Turn the central button to the left or the right to set the desirable contrast.
Press to confirm or press to restore the previous setting of the contrast.
• Press to exit the menu.
The contrast has 16 levels. Level 0 is the minimum, level 15 is the maximum.
4. 3. 3. 3. Color
Choose this menu item for setting the color of the display backlight.
Press to open the menu.
Choose one of the available colors:
1. Red
2. Magenta
3. Orange
4. Yellow
5. Green
6. Cyan
7. Blue
8. White
9. Custom
Choose the menu item “Custom” to tune the color of the backlight smoothly.
GB - 18
Turn the central button to the left or the right to choose the desired color for tuning: R, G or B.
• Press to activate.
Turn the central button to the left or the right to tune the level of the desirable color.
Press to confirm or press to restore the previous setting of the color.
4. 3. 3. 4. Rotate screen
For mounting in upside down position, you can rotate the screen.
• Press to open the menu.
• Press to confirm.
4. 3. 3. 5. Backlight off time
Choose this menu item to set the time after which the backlight will be switched off.
• Press to open the menu.
Turn the central button to the left or the right to set the timer. If you choose “Always on”, the backlight will not be
switched off. Timer steps are 10 seconds, maximum is 1 minute.
Press to confirm or press to restore the previous setting and exit the menu.
4. 3. 4. Language
• Press to open the menu.
Choose one of the available languages (English, Russian, Dutch …).
Press to confirm or press to restore the previous setting and exit the menu.
4. 3. 5. Security
Choose this menu item to activate or deactivate the security PIN code for the current profile.
Press to open the menu.
The digital keypad will appear.
Enter the PIN code by turning the central button to the left or the right to select digits.
  • Page 1 1
  • Page 2 2
  • Page 3 3
  • Page 4 4
  • Page 5 5
  • Page 6 6
  • Page 7 7
  • Page 8 8
  • Page 9 9
  • Page 10 10
  • Page 11 11
  • Page 12 12
  • Page 13 13
  • Page 14 14
  • Page 15 15
  • Page 16 16
  • Page 17 17
  • Page 18 18
  • Page 19 19
  • Page 20 20
  • Page 21 21
  • Page 22 22
  • Page 23 23
  • Page 24 24
  • Page 25 25
  • Page 26 26
  • Page 27 27
  • Page 28 28
  • Page 29 29
  • Page 30 30
  • Page 31 31
  • Page 32 32
  • Page 33 33
  • Page 34 34
  • Page 35 35
  • Page 36 36
  • Page 37 37
  • Page 38 38
  • Page 39 39
  • Page 40 40
  • Page 41 41
  • Page 42 42
  • Page 43 43
  • Page 44 44
  • Page 45 45
  • Page 46 46
  • Page 47 47
  • Page 48 48
  • Page 49 49
  • Page 50 50
  • Page 51 51
  • Page 52 52
  • Page 53 53
  • Page 54 54
  • Page 55 55
  • Page 56 56
  • Page 57 57
  • Page 58 58
  • Page 59 59
  • Page 60 60
  • Page 61 61
  • Page 62 62
  • Page 63 63
  • Page 64 64
  • Page 65 65
  • Page 66 66
  • Page 67 67
  • Page 68 68
  • Page 69 69
  • Page 70 70
  • Page 71 71
  • Page 72 72
  • Page 73 73
  • Page 74 74
  • Page 75 75
  • Page 76 76
  • Page 77 77
  • Page 78 78
  • Page 79 79
  • Page 80 80
  • Page 81 81
  • Page 82 82
  • Page 83 83
  • Page 84 84
  • Page 85 85
  • Page 86 86
  • Page 87 87
  • Page 88 88
  • Page 89 89
  • Page 90 90
  • Page 91 91
  • Page 92 92
  • Page 93 93
  • Page 94 94
  • Page 95 95
  • Page 96 96
  • Page 97 97
  • Page 98 98
  • Page 99 99
  • Page 100 100
  • Page 101 101
  • Page 102 102
  • Page 103 103
  • Page 104 104
  • Page 105 105
  • Page 106 106
  • Page 107 107
  • Page 108 108
  • Page 109 109
  • Page 110 110
  • Page 111 111
  • Page 112 112
  • Page 113 113
  • Page 114 114
  • Page 115 115
  • Page 116 116
  • Page 117 117
  • Page 118 118
  • Page 119 119
  • Page 120 120
  • Page 121 121
  • Page 122 122
  • Page 123 123
  • Page 124 124
  • Page 125 125
  • Page 126 126
  • Page 127 127
  • Page 128 128
  • Page 129 129
  • Page 130 130
  • Page 131 131
  • Page 132 132
  • Page 133 133
  • Page 134 134
  • Page 135 135
  • Page 136 136
  • Page 137 137
  • Page 138 138
  • Page 139 139
  • Page 140 140
  • Page 141 141
  • Page 142 142
  • Page 143 143
  • Page 144 144
  • Page 145 145
  • Page 146 146
  • Page 147 147
  • Page 148 148
  • Page 149 149
  • Page 150 150
  • Page 151 151
  • Page 152 152
  • Page 153 153
  • Page 154 154
  • Page 155 155
  • Page 156 156
  • Page 157 157
  • Page 158 158
  • Page 159 159
  • Page 160 160
  • Page 161 161
  • Page 162 162
  • Page 163 163
  • Page 164 164
  • Page 165 165
  • Page 166 166
  • Page 167 167
  • Page 168 168
  • Page 169 169
  • Page 170 170
  • Page 171 171
  • Page 172 172
  • Page 173 173
  • Page 174 174
  • Page 175 175
  • Page 176 176
  • Page 177 177
  • Page 178 178
  • Page 179 179
  • Page 180 180
  • Page 181 181
  • Page 182 182
  • Page 183 183
  • Page 184 184
  • Page 185 185
  • Page 186 186
  • Page 187 187
  • Page 188 188
  • Page 189 189
  • Page 190 190
  • Page 191 191
  • Page 192 192
  • Page 193 193
  • Page 194 194
  • Page 195 195
  • Page 196 196
  • Page 197 197
  • Page 198 198
  • Page 199 199
  • Page 200 200
  • Page 201 201
  • Page 202 202
  • Page 203 203
  • Page 204 204
  • Page 205 205
  • Page 206 206
  • Page 207 207
  • Page 208 208
  • Page 209 209
  • Page 210 210
  • Page 211 211
  • Page 212 212
  • Page 213 213
  • Page 214 214
  • Page 215 215
  • Page 216 216
  • Page 217 217
  • Page 218 218
  • Page 219 219
  • Page 220 220
  • Page 221 221
  • Page 222 222
  • Page 223 223
  • Page 224 224
  • Page 225 225
  • Page 226 226
  • Page 227 227
  • Page 228 228
  • Page 229 229
  • Page 230 230
  • Page 231 231
  • Page 232 232
  • Page 233 233
  • Page 234 234
  • Page 235 235
  • Page 236 236
  • Page 237 237
  • Page 238 238
  • Page 239 239
  • Page 240 240
  • Page 241 241
  • Page 242 242
  • Page 243 243
  • Page 244 244
  • Page 245 245
  • Page 246 246
  • Page 247 247
  • Page 248 248
  • Page 249 249
  • Page 250 250
  • Page 251 251
  • Page 252 252
  • Page 253 253
  • Page 254 254
  • Page 255 255
  • Page 256 256
  • Page 257 257
  • Page 258 258
  • Page 259 259
  • Page 260 260
  • Page 261 261
  • Page 262 262
  • Page 263 263
  • Page 264 264
  • Page 265 265
  • Page 266 266
  • Page 267 267
  • Page 268 268
  • Page 269 269
  • Page 270 270
  • Page 271 271
  • Page 272 272
  • Page 273 273
  • Page 274 274
  • Page 275 275
  • Page 276 276
  • Page 277 277
  • Page 278 278
  • Page 279 279
  • Page 280 280
  • Page 281 281
  • Page 282 282
  • Page 283 283
  • Page 284 284
  • Page 285 285
  • Page 286 286
  • Page 287 287
  • Page 288 288
  • Page 289 289
  • Page 290 290
  • Page 291 291

Mr Handsfree blue compact User manual

Category
Car kits
Type
User manual
This manual is also suitable for

Ask a question and I''ll find the answer in the document

Finding information in a document is now easier with AI