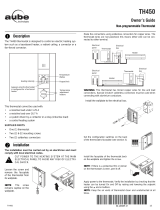
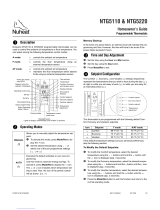
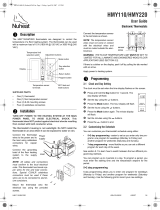
Honeywell RLV4300 User manual

Category
Thermostats
Type
User manual

Honeywell RLV4300 is an electronic programmable thermostat, designed to control electric heating systems. It features a 5-2 programmable schedule, allowing you to set different temperatures for different times of day and days of the week. The thermostat has an easy-to-use interface with a large backlit display, and it can be mounted on a wall or electrical box. Other features include temporary override, automatic daylight saving time adjustment, and a fan-forced heater mode.

Honeywell RLV4300 is an electronic programmable thermostat, designed to control electric heating systems. It features a 5-2 programmable schedule, allowing you to set different temperatures for different times of day and days of the week. The thermostat has an easy-to-use interface with a large backlit display, and it can be mounted on a wall or electrical box. Other features include temporary override, automatic daylight saving time adjustment, and a fan-forced heater mode.

RLV4300
5-2 Programmable Thermostat
Owners
Guide
400-622-004-C (69-1918EF-02 Honeywell RLV4300) ENG.fm Page -1 Tuesday, September 29, 2009 3:20 PM
Owner’s Guide 69-1918EF-02
Overview
About your new thermostat ................................................................................... 1
Controls................................................................................................................. 2
Display .................................................................................................................. 3
Installation
Installation guidelines ............................................................................................ 4
Wiring .................................................................................................................... 5
Mounting the thermostat ....................................................................................... 6
Operation
Advanced settings................................................................................................. 7
Clock and day setting.......................................................................................... 10
Temperature display and setting ..........................................................................11
Automatic mode .................................................................................................. 12
Manual mode ...................................................................................................... 15
Economy mode ................................................................................................... 15
Appendices
Power outage ...................................................................................................... 18
In case of difficulty............................................................................................... 19
Specifications ...................................................................................................... 20
Warranty.............................................................................................................. 21
Table of contents
400-622-004-C (69-1918EF-02 Honeywell RLV4300) ENG.fm Page 0 Tuesday, September 29, 2009 3:20 PM
RLV4300
1
This thermostat is designed to control an electric heating system such as a
baseboard heater, a radiant ceiling, a convector or a fan-forced heater.
The thermostat CANNOT be used with:
a resistive load under 1.25 A
a resistive load over 12.5 A
a system driven by a contactor or a relay (inductive load)
a central heating system
SUPPLIED PARTS
One (1) thermostat
Two (2) 6-32 mounting screws
Two (2) solderless connectors
About your new thermostat
Do you need assistance?
We are here to help.
Call 1-800-468-1502.
400-622-004-C (69-1918EF-02 Honeywell RLV4300) ENG.fm Page 1 Tuesday, September 29, 2009 3:20 PM
Owner’s Guide 69-1918EF-02
2
Controls
Advanced
setup
Up/Down buttons
Mode button
Day button
Hour button
Program button
Return button
Screen
Minute button
Pull cover down
400-622-004-C (69-1918EF-02 Honeywell RLV4300) ENG.fm Page 2 Tuesday, September 29, 2009 3:20 PM
RLV4300
3
Display
Temperature
Heating intensity
indicator
Time and day
Manual
mode
Automatic
mode
Economy
mode
Appears when power to
the thermostat is cut off
Appears when
the setpoint is
displayed
Appears when
the thermostat is
configured for a
fan-forced heater
Appears when the
clock has been reset
400-622-004-C (69-1918EF-02 Honeywell RLV4300) ENG.fm Page 3 Tuesday, September 29, 2009 3:20 PM
Owner’s Guide 69-1918EF-02
4
TURN OFF POWER TO THE HEATING SYSTEM AT THE MAIN
POWER PANEL TO AVOID ELECTRICAL SHOCK.
All cables and connections must comply with local electrical
codes.
This thermostat has tinned copper wires for line and load connec-
tions. Special CO/ALR solderless connectors must be used if
these wires will be connected to aluminium conductors.
Install the thermostat onto an electrical box.
Install the thermostat about 1.5 m (5 feet) high, on an inside wall
facing the heater.
Avoid locations where there are air drafts (such as the top of a
staircase or an air outlet), dead air spots (such as behind a door),
or direct sunlight.
Do not install the thermostat on a wall that conceals chimney or
stove pipes.
The thermostat wires are not polarized; either wire can be con-
nected to the load or to the power supply.
Installation guidelines
400-622-004-C (69-1918EF-02 Honeywell RLV4300) ENG.fm Page 4 Tuesday, September 29, 2009 3:20 PM
RLV4300
5
Connect the thermostat wires to the heating system (load) and
to the power supply using solderless connectors for copper
wires.
Wiring
2-wire Installation
4-wire Installation
400-622-004-C (69-1918EF-02 Honeywell RLV4300) ENG.fm Page 5 Tuesday, September 29, 2009 3:20 PM
Owner’s Guide 69-1918EF-02
6
Loosen the screw underneath the thermostat and
separate the faceplate from the wallplate.
NOTE: The screw remains captive and cannot be
completely removed.
Mount the wallplate to the electrical box using the
provided screws. Insert the screws through the two
left or the two right mounting holes of the wallplate.
Reinstall the faceplate onto the wallplate and tighten
the screw underneath the thermostat.
NOTE: If there is a protective film or sticker on the
thermostat’s screen, peel it off.
Apply power to the heating system. Verify the
installation by checking that the heating system can
be turned On by raising the setpoint using the Up
button or turned Off by lowering the setpoint using the
Down button.
WARNING: Keep the thermostat's air vents clean and
free from obstructions.
Mounting the thermostat
400-622-004-C (69-1918EF-02 Honeywell RLV4300) ENG.fm Page 6 Tuesday, September 29, 2009 3:20 PM
RLV4300
7
NOTE: The parameter tables are on the following pages.
n Pull the cover down.
o Briefly insert a pointed object (e.g., paperclip) through the
advanced setting opening. The first parameter will appear.
p To display the next parameter, press the Mode button.
q To modify a parameter, press the Up or Down button.
r To exit the menu, press the Ret button or do not press any
button for 1 minute.
Advanced settings
400-622-004-C (69-1918EF-02 Honeywell RLV4300) ENG.fm Page 7 Tuesday, September 29, 2009 3:20 PM
Owner’s Guide 69-1918EF-02
8
Advanced settings (cont’d)
Parameter
and Options
Display and
Default Setting
Parameter
and Options
Display and
Default Setting
Temperature
display format
•°C / °F
Time display
format
24 h / 12 h
Early Start *
OF (Off) / On
Automatic Daylight
Saving Time
**
OF (Off) / On
* Early Start is used in Automatic mode only. When Early Start is enabled (On), the thermostat determines
when to start heating so the desired temperature be reached at the beginning of periods 1 and 3. When
Early Start is disabled (Off), heating does not start in advance, and therefore the desired temperature will
not yet be reached at the beginning of these periods.
** When Automatic Daylight Saving Time is enabled (On), the thermostat automatically switches to
daylight saving time on the second Sunday of March and to normal time on the first Sunday of November.
400-622-004-C (69-1918EF-02 Honeywell RLV4300) ENG.fm Page 8 Tuesday, September 29, 2009 3:20 PM
RLV4300
9
Advanced settings (cont’d)
Parameter
and Options
Display and
Default Setting
Parameter
and Options
Display and
Default Setting
Year ***
00 - 99
Month ***
•1 - 12
Day ***
•1 - 31
Cycle length ****
Std / Fan
*** Available only if Daylight Saving Time is enabled (On).
**** Generally set to 15-second cycle (Std) as it provides better temperature control. However,
set to 5-minute cycle (Fan) if you have a fan-forced heater to prevent premature fan motor
burnout. Fan appears on the thermostat’s screen when 5-minute cycle is selected.
400-622-004-C (69-1918EF-02 Honeywell RLV4300) ENG.fm Page 9 Tuesday, September 29, 2009 3:20 PM
Owner’s Guide 69-1918EF-02
10
The clock must be set when Time appears on the screen.
n Pull the cover down.
o Press the Day button to set the day.
p Use the Hour and Min buttons to set the clock.
q Press the Ret button to exit.
Clock and day setting
400-622-004-C (69-1918EF-02 Honeywell RLV4300) ENG.fm Page 10 Tuesday, September 29, 2009 3:20 PM
RLV4300
11
The thermostat normally displays the room (measured)
temperature.
To display the set temperature (setpoint), press the Up or
Down button once. The setpoint temperature will remain
on the screen for 5 seconds.
To change the setpoint temperature, press the Up or Down
button repeatedly until the desired temperature is
displayed.
The screen is backlit for 12 seconds when any button is
pressed.
Temperature display and setting
400-622-004-C (69-1918EF-02 Honeywell RLV4300) ENG.fm Page 11 Tuesday, September 29, 2009 3:20 PM
Owner’s Guide 69-1918EF-02
12
To place the thermostat in Automatic mode, press the Mode
button until Auto appears on the screen. The current period
number also appears.
In this mode, the thermostat follows the programmed schedule.
You can program up to 4 periods in a day. You can set 2
different programs: one for the weekdays (Monday to Friday)
and another one for the weekend (Saturday and Sunday).
By default, the thermostat is programmed with the following
schedule:
Temporary Override
You can temporarily override the current temperature using the Up or Down but-
ton. The new setpoint will be used until the end of the current period. During the
override, Auto flashes on the screen.
Automatic mode (running the schedule)
Period Monday to Friday Saturday & Sunday
Start Time Temperature Start Time Temperature
1 Wake 6:00 21.0°C (70°F) 6:00 21.0°C (70°F)
2 Leave 8:00 16.0°C (61°F) -- --
3 Return 18:00 21.0°C (70°F) -- --
4 Sleep 22:00 16.0°C (61°F) 22:00 16.0°C (61°F)
400-622-004-C (69-1918EF-02 Honeywell RLV4300) ENG.fm Page 12 Tuesday, September 29, 2009 3:20 PM
RLV4300
13
To modify the schedule:
n Press the Mode button until Auto appears on the screen.
o Press the Pgm button. Period 1 of the weekday (Monday to
Friday) program is displayed
p To display another period, press the Pgm button.
q To toggle between the weekday (Mon to Fri) program and the
weekend (Sat & Sun) program, press the Day button.
r Press the Hour and Min buttons to set the start time of the
displayed period.
NOTE: To cancel the period, press the Mode button. The
thermostat will display --:--. During operation, the thermostat will
skip over that period.
s Press the Up or Down button to set the temperature of the
displayed period.
t Repeat steps 3 through 6 to set another period.
u Press the Ret button to end programming.
Automatic mode (cont’d)
400-622-004-C (69-1918EF-02 Honeywell RLV4300) ENG.fm Page 13 Tuesday, September 29, 2009 3:20 PM
Owner’s Guide 69-1918EF-02
14
Automatic mode (cont’d)
400-622-004-C (69-1918EF-02 Honeywell RLV4300) ENG.fm Page 14 Tuesday, September 29, 2009 3:20 PM
RLV4300
15
To place the thermostat in Manual mode, press the
Mode button until Man appears on the screen. In this
mode, any modification to the temperature must be
done manually. Press the Up or Down button to set the
temperature. The default setting is 21°C (70°F).
To place the thermostat in Economy mode, press the
Mode button until Econo appears on the screen. This
mode is ideal for weekend residences (cottages) as it
can be used to keep the temperature at an economy
level during most of your absence and raise the
temperature to a comfortable level by your usual arrival
time. If you do not show up at your cottage, the
temperature will return to the economy level until the
following weekend.
Manual mode (permanent override of schedule)
Economy mode
400-622-004-C (69-1918EF-02 Honeywell RLV4300) ENG.fm Page 15 Tuesday, September 29, 2009 3:20 PM
Owner’s Guide 69-1918EF-02
16
The Economy mode has two periods which you can set as follows:
The Economy mode can be used as follows:
Place the thermostat in Economy mode during your absence.
When you arrive, place the thermostat in Automatic mode or in
Manual mode before the temperature drops to the economy level.
When you leave, switch the thermostat back to Economy mode.
Economy mode (cont’d)
Period Temperature Start Time
1
Set to a comfortable level
(e.g., 22°C).
Set the day and time that you want the tem-
perature to start rising so that the comfort-
able level is reached by the time you arrive
(e.g., Friday at 3:00 pm).
2
Set to an economy level
(e.g., 15°C).
Set the day and time that you want the tem-
perature to start dropping to the economy
level if you do not show up (e.g., Friday at
8:00 pm).
400-622-004-C (69-1918EF-02 Honeywell RLV4300) ENG.fm Page 16 Tuesday, September 29, 2009 3:20 PM
RLV4300
17
To program the two periods of the Economy mode:
n Press the Mode button until Econo appears on the screen.
o Press the Pgm button. Period 1 is displayed.
p Press the Day button to set the start day of the displayed period.
q Press the Hour and Min buttons to set the start time of the
displayed period.
r Press the Up or Down button to set the temperature.
s Press the Pgm button to select Period 2.
t Repeat steps 3 through 5 to set Period 2.
u Press the Ret button to end programming.
Temporary Override
You can temporarily override the current temperature using the Up or
Down button. The new setpoint will be used until the end of the current
period. Econo flashes during the override.
Economy mode (cont’d)
400-622-004-C (69-1918EF-02 Honeywell RLV4300) ENG.fm Page 17 Tuesday, September 29, 2009 3:20 PM
Owner’s Guide 69-1918EF-02
18
During a power outage, the thermostat display remains lit for the
first 2 minutes. During this time, the LP (low power) indicator
appears and all buttons are disabled. Then the screen turns blank.
The settings are stored in memory. When power returns, the ther-
mostat returns to the mode of operation preceding the power out-
age. If the power failure exceeded 5 hours, the clock and date must
be re-adjusted. Set Automatic Daylight Saving Time back to On if
you wish to continue using the feature.
Power outage
400-622-004-C (69-1918EF-02 Honeywell RLV4300) ENG.fm Page 18 Tuesday, September 29, 2009 3:20 PM
  • Page 1 1
  • Page 2 2
  • Page 3 3
  • Page 4 4
  • Page 5 5
  • Page 6 6
  • Page 7 7
  • Page 8 8
  • Page 9 9
  • Page 10 10
  • Page 11 11
  • Page 12 12
  • Page 13 13
  • Page 14 14
  • Page 15 15
  • Page 16 16
  • Page 17 17
  • Page 18 18
  • Page 19 19
  • Page 20 20
  • Page 21 21
  • Page 22 22
  • Page 23 23
  • Page 24 24
  • Page 25 25
  • Page 26 26
  • Page 27 27
  • Page 28 28
  • Page 29 29
  • Page 30 30
  • Page 31 31
  • Page 32 32
  • Page 33 33
  • Page 34 34
  • Page 35 35
  • Page 36 36
  • Page 37 37
  • Page 38 38
  • Page 39 39
  • Page 40 40
  • Page 41 41
  • Page 42 42
  • Page 43 43
  • Page 44 44
  • Page 45 45
  • Page 46 46
  • Page 47 47
  • Page 48 48

Honeywell RLV4300 User manual

Category
Thermostats
Type
User manual

Honeywell RLV4300 is an electronic programmable thermostat, designed to control electric heating systems. It features a 5-2 programmable schedule, allowing you to set different temperatures for different times of day and days of the week. The thermostat has an easy-to-use interface with a large backlit display, and it can be mounted on a wall or electrical box. Other features include temporary override, automatic daylight saving time adjustment, and a fan-forced heater mode.

Ask a question and I''ll find the answer in the document

Finding information in a document is now easier with AI

in other languages