Page is loading ...

P
P
R
R
O
O
F
F
I
I
T
T
N
N
E
E
S
S
S
S
M
M
A
A
G
G
N
N
E
E
T
T
I
I
C
C
C
C
Y
Y
C
C
L
L
E
E
(
(
4
4
.
.
2
2
K
K
G
G
)
)
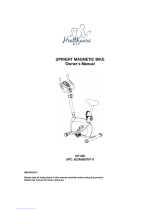
OWNER’S MANUAL
The specifications of this product may vary
from this photo and are subject to change
without notice.
1

IMPORTANT SAFETY NOTICE:
NOTE THE FOLLOWING PRECAUTION BEFORE ASSEMBLING OR OPERATING THE
MACHINE.
1、 Assemble the machine exactly as the descriptions in the instruction manual.
2、 Check all the screws, nuts and other connections before using the machine for the first time
and ensure that the trainer is in the safe condition.
3、 Set up the machine in a dry level place and leave it away from moisture and water.
4、 Place a suitable base (e.g. rubber mat, wooden board etc.) beneath the machine in the area of
assembly to avoid dirt and etc..
5、 Before beginning training, remove all objects within a radius of 2 meters from the machine.
6、 DO NOT use aggressive cleaning articles to clean the machine, only use the supplied tools or
suitable tools of your own to assemble the machine or repair any parts of machine. Remove
drops of sweat from the machine immediately after finishing training.
7、 Your health can be affected by incorrect or excessive training. Consult a doctor before
beginning a training program. He can define the maximum setting (Pulse. Watts. Duration of
training etc) to which you may train yourself and can get precise information during training.
This machine is not suitable for therapeutic purpose.
8、 Only do training on the machine when it is in correct working way. Use only original spare parts
for any necessary repairs.
9、 This machine can be used for only one person’s training at a time.
10、 Wear training clothes and shoes which are suitable for fitness training with the machine. Your
training shoes should be appropriate for the trainer.
11、 If you have a feeling of dizziness, sickness or other abnormal symptoms, please stop training
and consult a doctor asap.
12、 People such as children and handicapped persons should only use the machine in the
presence of another person who can give aid and advice.
13、 The power of the machine increases with increasing the speed, and the reverse. The machine
is equipped with adjustable knob which can adjust the resistance. Reduce the resistance by
turning the adjusting knob for the resistance setting towards stage 1. Increase the resistance
by turning the adjusting knob for the resistance setting towards stage 8.
14、 The maximum user’s weight is 100kg, and for home use only.
15、 WARNING: the safety level of the equipment can be maintained only if it is examined regularly
for damage and wear, e.g. ropes, pulleys, connection points;
16、 Please examine the equipment carefully before you use it, especially the components most
susceptible to wear, e.g. handlebar, end caps and screws which touching the ground or the
connection points frequently.
17、 Please stop using the equipment immediately once there’re any defective components and
keep it out of use before you replace the components or repair it by designated agent.
18、 Please notice that the unsupervised children should keep away from the equipment.
19、 Saddle post: the minimum insertion depth should not lower than the mark of MAX and it has
210mm adjusting range.
20、 WARNING! Heart rate monitoring systems may be inaccuracy. Over exercise may result
serious injury or death. If you feel faint stop exercise immediately.
21、 The braking system is adjustable.
22、 Not for commercial use
2

WARNING: Before beginning this or and exercise program, consult your doctor. This is
especially important for people over the age of 35 or those with health
problems. Read all instructions before using the exercise bike.
EXPLODED DIAGRAM
3

Parts List
Parts No. Description QTTY Parts No. Description QTTY
1 Main Frame 1 21 Leveler Cap 2
2 Front Stabilizer 1 22 Roller Cap 2
3 Rear Main Frame Section 1 23 Nylon Nut 3
4 Handlebar Post 1 24 Cushion Pad 1
5 Handlebar 1 25 Locking Knob 1
6 Saddle 1 26 Seat Post Bushing 1
7 Seat Post 1 27 Round Cap 2
8 Expansion Sleeve 1 28 Crank 1
9L/R Pedal (L/R) 1each 29 Tapping Screw 1
10 Meter 1 30 Upper Sensor Wire 1
11 Carriage Bolt 2 31 Foam Grip 2
12 Acorn Nut 2 32 Pulse Sensor Wire 2
13 Arc Washer 2 33 Meter Bracket 1
14 Allen Bolt 8 34 Tension Controller 1
15 Flat Washer 4 35 Tension Controller Cover 1
16 Spring Washer 2 36 Flat Washer 1
17 Locking Bolt 2 37 Phillips Screw 1
18 Decorate Cover 1 38 Flat Washer 3
19 Tension Control Cable 1 39 ARC WARCHER 4
20 Sensor Wire 1
NOTE:
Most of the listed assembly hardware has been packaged separately, but some hardware items
have been preinstalled in the identified assembly parts. In these instances, simply remove and
reinstall the hardware as assembly is required.
Please reference the individual assembly steps and make note of all preinstalled hardware.
4

5

All the hardware items of the page have been preinstalled in the identified assembly parts. In these
instances, simply remove and reinstall the hardware as assembly is required.
Please reference the individual assembly steps and make note of all preinstalled hardware.
6

ASSEMBLY INSTRUCTION
Step 1:
A: Install the Front Stabilizer & Rear Main Frame Section.
Attach the Front Stabilizer (2) onto the Main Frame (1), secure with the Carriage Bolts (11), Arc Washers
(13) and Acorn Nuts (12) which are pre-attached to the stabilizer. Insert the Rear Main Frame Section (3) to
the Base Beam, and then secure with the Allen Bolts (14) and Flat Washers (15).
B: Install the Pedals.
Secure the Pedals (9L/R) to the Crank (28) respectively, viewed from the rider’s seated position. (Please
follow the same way with the optional pedal)
NOTE: Roller Cap (22) may be easy broken, using it carefully!
CAUTION:
Both pedals are labeled L FOR LEFT and R FOR RIGHT. To tighten turn the left pedal
COUNTERCLOCKWISE and the right pedal CLOCKWISE.
7

Step 2: Install the Handlebar Post.
Connect the Sensor wire (20) to the Upper Sensor Wire (30), feed the Tension Control Cable (19) through
the Handlebar Post (4) and out off the Tension Controller hole. Then, insert the Handlebar Post (4) over the
Main section (1), secure in place with the Bolts (14) and Arc Washers (39) which are pre-attached to the
Main Section.
★Ensure that ALL bolts and washers are in place and partially threaded in before completely tightening
any ONE bolt.
8

Step 3: Install the Tension Controller and Handlebar.
Connect the Tension Control Cable (19) to the Tension Controller (34), make sure it has been connected
correctly as shown, and then secure the Tension Controller (34) and the Cover (35) in place with the Screw
(37) and Flat Washer (36).
Feed Pulse Sensor Wires (32) (IF WITH PULSE) through hole in front of Handlebar Post (4), and out off the
top of the Handlebar Post. Fit the Handlebar (5) across the Handlebar Post (4), secure in place with the
Spring Washers (16) and Locking Bolts (17) which are pre-attached to the Handlebar Post, and then clip
the Decorate Cover (18).
NOTE: Foam Grip (31) may be easy broken, using it carefully!
9

Step 4: Install the Meter.
Feed the Pulse Sensor Wires (32) (IF WITH PULSE) and Upper Sensor Wire (30) through hole of the
Bracket (33), and then connect the Wires to the Meter (10) respectively.
Insert the Bracket onto the Handlebar Post (4), fix the Computer onto the Bracket.
(Please follow the same way with the OPTIONAL METER)
Step 5: Install the Saddle and Seat Post.
Place the Saddle (6) over the Seat Post (7), secure in place with the Flat Washers (38) and Nylon Nuts (23)
which are pre-attached to the Saddle.
Slide the Expansion Sleeve (8) onto the Seat Post, then insert the Seat Post into the Main Section, adjust
to a proper position, secure in place with the Locking Knob (25).
10

COMPUTER INSTRUCTION MANUAL
FUNCTIONAL BUTTON:
MODE/RESET -Push down to select functions.
-Push down for 3 seconds to reset time, distance and calories .
FUNCTION AND OPERATIONS:
1. SCAN: Press MODE button until “SCAN” appears, monitor will rotate through the following functions: time, speed,
distance, total distance(IF HAVE) and calories. Each display will be hold 6 seconds.
2. TIME(TMR): Count the total time from exercise start to end.
3. SPEED(SPD): Display current speed.
4. DISTANCE(DST): Count the distance from exercise start to end.
5. TOTAL DISTANCE(ODO)(IF HAVE): Count the total distance after installing the batteries.
6. CALORIES(CAL): Count the total calories from exercise start to end .
7. PULSE RATE(IF HAVE):
Press MODE button until〝PULSE〞appears. Before measuring your pulse rate, please place both your palms on the
contact pads and the monitor will show your current heart beat rate in beats per minute(BPM) on the LCD after 3~4
seconds.
Remark: During the process of pulse measurement, because of the contact jamming, the measurement value may be
higher than the virtual pulse rate during the first 2~3 seconds, then it will return to normal level. The measurement
value can not be regarded as the basis of medical treatment.
8. AUTO ON/OFF & AUTO START/STOP
Without any signal for 4 minutes, the power will turn off automatically.
When the wheel is in motion or pressing the button, the monitor is in action.
Note:
The computer can be programmed before delivery with Metric or Imperial system. If you find “K” in right side of
monitor screen, it is with Metric system and the unit will be kilometer. If you find “M” in right side of monitor screen,
it is with Imperial system and the unit will be mile.
SPECIFICATIONS:
AUTO SCAN Every 6 seconds
TIME(TMR) 0:00~99:59 (minutes:seconds)
CURRENT SPEED(SPD)
The maximum pick-up signal is
99.9KM/H or Mile/H (or 1500RPM)
TRIP DISTANCE(DST) 0.00~99.99KM or Miles
TOTAL DISTANCE(ODO)(IF HAVE) 0.0~999.9~9999KM or Miles
CALORIES(CAL) 0.0~999.9Kcal
FUNCTION
PULSE RATE(PUL)(IF HAVE) 30~240BPM (beat per minute)
BATTERY TYPE 2PCS of SIZE-AAor UM-3
OPERATING TEMPERATURE
0℃~+40℃ (32℉~104℉)
STORAGE TEMPERATURE
-10℃~+60℃(14℉~168℉)
CONDITIONING GUIDELINES
The following guidelines will help you to plan your exercise program. Remember that proper nutrition and
adequate rest are essential of successful results.
WARNING: Before beginning this or and exercise program, consult your doctor. This
is especially important for people over the age of 35 or those with health
problems.
WHY EXERCISE?
Exercise has been proven essential for good health and general wellbeing. Regular exercise will:
Relieve tension and stress
Provide enjoyment and fun
Stimulate the mind
Help maintain stable weight
11

Control appetite
Boost self-image
Improve muscle tone and strength
Improve flexibility
Lower blood pressure
Relieve insomnia
TARGET HEART RATE
TRAINING ZONE
AGE MIN-MAX (BPM)
20 133-167
25 132-166
30 130-164
35 129-162
40 127-161
45 125-159
50 124-156
55 122-155
60 121-153
65 119-151
70 118-150
75 117-147
80 115-146
85 114-144
Note: This is a guide only and performance will depend on the fitness and condition
(health) of the person using the magnetic bike.
BEGINNERS GUIDE
If you’re beginning an exercise program, you should check with your doctor if:
You have been diagnosed with heart problems, high blood pressure or other medical conditions.
You have not exercised for over a year.
If you are over 35 and no not currently exercise,
You are pregnant.
You have diabetes.
You have chest pain, or experience dizziness or fainting spells.
You are recovering from an injury or illness.
WORK-OUT TIPS
Always perform stretching exercises both before and after your work-out see page 9.
Start slowly; doing too much too soon can lead to injuries.
If you are sore or tired, give yourself a few extra days to recover.
HOW TO BEGIN
Start with two or three 15 minute sessions per week with a rest day between work-outs.
Warm-up for 5 to 10 minutes with gentle movements like walking or swinging your arms in a circle and then
stretch the muscles you’ll use during your work-out. Seated cycling works mainly the quadriceps (thing) and
hamstrings.
12

Increase the pace and resistance to slightly harder than comfortable and exercise for as long as you can.
You may only be able to exercise for a few minutes at a time, but that will change quickly if you exercise
regularly.
End each work –out with a 5-minute cool down with the resistance set to a low level. You should then stretch
the muscles you’ve just worked to prevent injury and cramp.
Increase your work-out time by a few minutes each week until you can work continuously for 30 minutes per
session,
Don’t worry about distance or pace. For the first few weeks, focus on endurance and conditioning.
HOW HARD SHOULD YOU WORK?
When exercising, you should try to stay within your target heart rate (THR) zone.
The table on the previous page will tell you the THR for your age. This is only a guide and will depend on the
fitness and condition (health) of the person using the magnetic bike.
Always be aware of how you feel when you exercise. If you feel dizzy or light-headed, stop immediately and rest.
If you’re not breaking a sweat, speed it up!
STRETCHING GUIDE
TIPS FOR STRETCHING
z Begin with gradual mobility exercises of all the joints, i.e. simply rotate the wrists, bend the arm and roll your
shoulders. This will allow the body’s natural lubrication (synovial fluid) to protect the surface of your bones at
these joints.
z Always warm up the body before stretching, as this increases blood flow around the body, which in turn
makes the muscles suppler?
z Start with your legs, and work up the body.
z Each stretch should be held for at least 10 seconds (working up to 20 to 30 seconds) and usually repeated
about 2 or 3 times.
z Do not stretch until it hurts. If there’s any pain, ease off.
z Don’t bounce. Stretching should be gradual and relaxed.
z Don’t hold your breath during a stretch.
z Stretch after exercising to prevent muscles from tightening up.
z Stretch at least three times a week to maintain flexibility.
WARM UP AND COOL DOWN ROUTINE
A good exercise program consists of a warm-up, aerobic exercise, and a cool down. Do the entire program at
least two to three times a week, resting for a day between workouts. After several months you can increase
your workouts to four or five times per week.
AEROBIC EXERCISE is any sustained activity that sends oxygen to your muscles via your heart and lungs.
Aerobic exercise improves the fitness of your lungs and heart. Aerobic fitness is promoted by any activity that
uses your large muscles eg: legs, arms and buttocks. Your heart beats quickly and you breathe deeply. An
aerobic exercise should be part of your entire exercise routine.
The WARM-UP is an important part of any workout. It should begin every session to prepare your body for
more strenuous exercise by heating up and stretching your muscles, increasing your circulation and pulse rate,
and delivering more oxygen to your muscles.
COOL DOWN at the end of your workout, repeat these exercises to reduce soreness in tired muscles.
13

Inner Thigh Stretch
Sit with the soles of your feet together with your
knees pointing outward. Pull your feet as close
into your groin as possible. Gently push your
knees towards the floor. Hold for 15 counts.
Hamstring Stretch
Sit with your right leg extended. Rest the sole of your
left foot against your right inner thigh.Stretch toward
your toe as far as possible.
Hold for 15 counts. Relax and then repeat with left leg
extended.
Head Roll
Rotate your head to the right for one count, feeling
the stretch up the left side of your neck. Next, rotate
your head back for one count, stretching your chin to
the ceiling and letting your mouth open. Rotate your
head to the left for one count, and finally, drop your
head to your chest for one count.
Warm Up Exercises
Calf-Achilles Stretch
Lean against a wall with your left leg in front of the right and your
arms forward. Keep your right leg straight and the left foot on the
floor; then bend the left leg and lean forward by moving your hips
toward the wall. Hold, then repeat on the other side for 15 counts.
Shoulder Lift
Lift your right shoulder up toward your ear for one count.
Then lift your left shoulder up for one count as you lower
your right shoulder.
14

t, step on the pedal and both hands hold on the handle bars move the pedal
rward to do the body workout
Toe Touch
Slowly bend forward from your
shoulders relax as you stretch
down as far as you can and ho
waist, letting your back and
toward your toes. Reach
ld for 15 counts.
ISE
Side Stretch
d
etch up your
right side. Repeat this action with your left arm.
Open your arms to the side and continue lifting them until they
are over your head. Reach your right arm as far upward towar
the ceiling as you can for one count. Feel the str
EXERC
BIKING: Seat on the seat pos
fo
TENSION CONTROLL
Turn the tension knob by clockwise to
Increase the resistance .To des-crease
the resistance .Turn the knob by anti-clockwise.
15

SPECIFICATIONS
47.5X10⁸CM
” size
aximum User Weight 100kg
lease note that the specifications are subject to change without notice.
Dimensions (L x W x H) 98.5X
Batteries 2 x “AA
Class Rating HC
M
P
Retailer: ARG
Retailer address:
489-499 Avebury Boulevard
Saxon Gate West
Central Milton Keynes
Bucks, MK9 2NW
16
/