Page is loading ...

056022-001r6 Printed in USA July, 2016
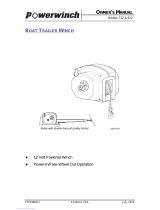
OWNER'S MANUAL
MOTORIZED FOLDING CAMPER
W
INCH
With 1200lb Lift Capacity
The 12 Volt Motorized Folding Camper Winch is used to raise and lower
folding campers with the touch of the switch, eliminating hand cranking.
This manual also contains instructions for
mounting the Carefree Cover.
Thoroughly read the manual furnished with this product and be
familiar with the controls. Do not allow individuals to operate
the winch without understanding the safe operation and
procedures for the equipment.
FCWa010

TABLE OF CONTENTS
Safety Information ................................................................................... 3
Winch Installation ................................................................................... 4
Electrical Setup ............................................................................................. 4
Setting the Cable ........................................................................................... 5
Setting the Limit Switches ............................................................................. 5
Setting the Lower Limit Switch ............................................................... 6
Setting the Upper Limit Switch ............................................................... 6
Mounting the Carefree Cover ................................................................. 7
Mounting the Switch in the Cover .................................................................. 8
Operating the Winch ............................................................................... 9
Manual Override ............................................................................................ 9
Maintenance ........................................................................................... 10
Cable .................................................................................................... 10
Electrical .............................................................................................. 10
Troubleshooting Guide ................................................................................ 11
Replacement Parts List ........................................................................ 12
Warranty ................................................................................................. 14
Powerwinch 2145 W. 6th Avenue Broomfield, CO 80020
by Carefree of Colorado www.powerwinch.com

SAFETY INFORMATION
The following Safety Precautions Must be Followed at ALL Times. Failure
to follow the warnings and cautions in this manual could result in serious
injury and/or property damage.
WARNING ALWAYS unplug the wiring harness before attempting
to install, relocate, service or perform maintenance on the winch.
WARNING NEVER use the winch to lift or move people or animals.
WARNING NEVER use the winch to exclusively hold, support or
permanently secure the top. Use separate brace(s) to support the camper
top when raised.
WARNING NEVER extend the top beyond the visual height
indicators on the camper.
WARNING ALWAYS stand away from the winch during operation.
ALWAYS keep objects, people and animals away from the camper and camper top
when operating the winch. Serious injury could occur if the cable breaks.
WARNING NEVER wear loose fitting clothes, scarves, ties or jewelry
when operating the winch. Loose clothing can become caught in moving parts.
CAUTION ALWAYS keep hands clear of the cable spool (drum area).
CAUTION ALWAYS wear leather gloves when handling the cable.
Steel cable can cause serious damage to hands.
CAUTION Remove all tools used for manual override operation
before operating the winch with the electrical power.
NOTICE Do not use this winch on any campers with a top (including
accessories) that exceeds 1200 pounds in weight.
NOTICE Do not lift the camper top if there is cargo such as luggage
or bicycles on the camper top. The extra load can overload the winch and
cause damage that may void the warranty.
NOTICE The winch has a 5-minute duty cycle. Wait at least 5
minutes between each lifting cycle. Running the winch continuously will
damage the motor and gears and void the warranty.
CALIFORNIA PROPOSITION 65
WARNING This product contains chemicals known to the state
of California to cause cancer or birth defects or other reproductive harm.
California’s Proposition 65 requires this warning to be given to customers
in the state of California.

MOTORIZED FOLDING CAMPER WINCH POWERWINCH
4
WINCH INSTALLATION
1. Park the camper on a hard level
surface. Place wheel chocks under
the wheels to prevent the camper
from moving.
2. Make sure the camper top is
lowered completely and there is no
tension on the winch cable.
Remove the cable from the existing
winch.
3. Remove the existing winch. S
AVE
the fasteners to install the new
winch.
NOTE: If there is not an existing
winch, the installer must furnish
three (3) each of 3/8-16 x 1 carriage
bolts, lock washers and nuts.
4. Using the fasteners from step 3 and attach the new winch to the trailer frame.
Ensure that the winch is centered and vertical. Torque nuts to 20 ft-lbs.
ELECTRICAL SETUP
(Refer to the wiring diagram on page 10.)
1. Determine the mounting location of the switch. The position should provide easy
access but not in a position where the switch can be accidentally damaged.
The cable is 12" from the winch to the switch.
There is 36" of cable from the winch to the battery connection.
Before continuing, lay the cable
out to be sure that the switch
will mount without straining the
wires allowing a minimum of
1"-2" of slack. The wires must
be mounted to avoid moving
parts such as the gear train
and cable.
2. Drill a 15/32" hole.
3. Clean and dry the surface then peel off the paper backing from the switch
plate and adhere the switch plate over the hole. The hole in the plate must
align with the hole drilled in step 2.
4. Mount the switch using the supplied jamb nuts and the rubber switch boot.
Orient the switch so that the notch in the switch aligns with the tab in the
hole of the switch plate.
5. Route the battery wires to the battery.
6. Attach the
RED wire with the 40-amp circuit breaker to the POSITIVE (+)
terminal of the battery; attach the
BLACK wire to the NEGATIVE (-) terminal.
7. Route wire cables away from any moving parts such as the gear train and
cable and secure to the frame using nylon ties or equivalent.
Switch
Switch Plate
Switch
Boot
3 3/4"
7/8"
FCWa003
15/32" Hole
2 5/8"
Trailer Frame (ref)
Winch
3/8-16 Carriage Bolt,
Lock Washer & Nut
(not included w/ winch)
FCWa002

POWERWINCH MOTORIZED FOLDING CAMPER WINCH
5
SETTING THE CABLE
1. Using the switch, move the cable shaft until the cable hole and the setscrew are
accessible.
2. Insert the cable into the large hole of the drum shaft.
3. Using a 1/8" allen wrench, tighten the setscrew to hold the cable in shaft.
4. Begin wrapping the cable onto the shaft by holding the switch in the "UP" position.
The cable must have a minimum of three (3) complete wraps around the shaft.
5. Check the cable, there must be no slack in the cable. If there is slack, use the up
switch to continue winding the cable on the drum until the slack is gone.
NOTE: The cable is slack if there is perceptible sag or waviness between
the winch and other end of the cable.
SETTING THE LIMIT SWITCHES
The limit switches turn off the winch when the camper top is closed (lower limit
switch) and when the top is fully extended (upper limit switch).
NOTICE Failure to set the lower limit switch can cause the top to not close
completely (switch shuts off early) or cause the motor to run after the top is
down causing an overload for the motor. Both conditions can result in damage
to the winch and/or camper and will void the warranty.
NOTICE The upper limit switch shuts the winch off when the camper top
is raised to the height recommended by the camper manufacturer. Failure to set
the upper limit switch can cause the top to not extend completely (switch shuts
off early) or cause the top to be overextended. Both conditions can result is
personal injury and/or damage to the winch and camper.
NOTICE The winch has a 5-minute duty cycle. Wait at least 5 minutes
between each lifting cycle. Running the winch continuously will damage the
motor and gears.
NOTE: On early units, the limit switches are accessed from below the frame. Newer
units are accessed from the top as shown on the next page. The procedure is same for
either position.
NOTE: The limit switches are not pre-set before shipping. During setup, the switch
adjustment screws may initially require several complete turns (50 to 100) before the
settings are obvious and can be fine-tuned for a particular installation.
Rear of
Camper
Front of
Camper
Winch Cable
from Camper
SetScrew
View Looking Up
from Ground
FCWa004
Cable Shaft

MOTORIZED FOLDING CAMPER WINCH POWERWINCH
6
Setting the Lower Limit Switch
After attaching and winding the cable as described previously (page 5), it is
necessary to set the lower limit switch.
1. Locate the RED down limit switch.
2. Using a 4mm allen wrench, turn the screw clockwise to increase the time the motor
runs. Turn the screw counterclockwise to decrease the motor run time.
3. Test the setting:
Make sure that the latches for the camper top are released.
Use the winch switch and raise the camper top 10"-12".
Use the winch switch to lower the camper top.
If the top does not close completely before the motor stops, the limit
switch is prematurely shutting off the motor. Repeat steps 1 through 3
to increase the motor run time
If the motor continues to run after the top is down, the limit switch is not
shutting off the motor soon enough. Repeat steps 1 through 3 to
decrease the motor run time.
Setting the Upper Limit Switch
1. Raise the camper top to the maximum height recommended by the camper
manufacturer. There is generally a cord or other visual indicator to indicate
when the top is at the correct height.
2. Use a brace to support the camper top while adjusting the winch.
3. Locate the WHITE up limit switch.
4. Using a 4mm allen wrench, turn the screw clockwise to increase the time the motor
runs. Turn the screw counterclockwise to decrease the motor run time.
5. Test the setting:
Remove the support brace from step 2.
Use the winch switch and lower the camper top 10"-12".
Use the winch switch to raise the camper top.
If the camper top stops below the recommended height, the limit switch
is prematurely shutting off the motor. Repeat steps 1 through 5
increase the motor run time.
If the motor continues to run after the camper top is fully raised, the
switch is not shutting off the motor soon enough. Repeat steps 1
through 5 to reduce the motor run time.
Down Limit Switch
(Red)
4mm Hex
(Increases Run Time)
(Decreases Run Time)
FCWa005a
Limit Switch Assy
Up Limit Switch
(White)

POWERWINCH MOTORIZED FOLDING CAMPER WINCH
7
MOUNTING THE CAREFREE COVER
The cover assembly for the Powerwinch Motorized Folding Camper Winch is
provided for aftermarket installations. The cover is designed to fit most general
applications but may not fit all camper styles. Many camper manufacturers also
offer cover options and may install their own for OEM applications.
1. Install and adjust the winch according to the instructions in this manual.
2. Inspect the winch frame. On early units, it will be necessary for the installer
to drill a 1/4" mounting hole for the cover bracket.
2.1. Use the dimensions shown above.
2.2. After drilling, clean and deburr hole.
2.3. Thoroughly clean any debris and shavings from the winch.
3. Remove the frame screw. Keep track of the washer, spacer and nut.
4. Attach the cover bracket using the frame screw, washer, spacer and nut.
5. On the opposite side, attach the bracket using a 1/4-20 x 1/2" screw and lock nut.
6. If installing the switch in the cover, go to page 8. After installing the switch,
continue with step 7.
7. Press the trim molding onto the back edge of the front cover.
8. Gently press the cover between the bracket and the upper lip of the
mounting plate. Align the holes in the cover with the top holes in the
mounting bracket.
Frame
Screw
1/4-20 x 1/2" Screw
and Lock Nut
Cover Bracket
#10 x 3/8" Screw (x2)
Trim Molding
Front
Cover
Bottom
Cover
#10 x 3/8"
Screw (x3)
FCWa012
5/16"
1/4"
Ø 1/4"
Mounting Hole

MOTORIZED FOLDING CAMPER WINCH POWERWINCH
8
9. Secure the cover to the bracket using two (2) #10 x 1/2 self-threading
screws.
10. Check that the wire harnesses are routed away from any moving parts such as the
gear train and cable and secure to the frame using nylon ties or equivalent.
11. Place the bottom cover on the bottom of the top cover and align the three (3)
attachment holes.
12. Attach the bottom cover using three (3) #10 x 3/8 self-tapping screws. Use care to
not over tighten the screws. Over tightening can cause the plastic to strip out.
Tip: Install the front screw first then install the two side screws.
13. Check that all fasteners and wire cables are secure then attach the winch
power cables to the battery. The
RED wire with the 50 amp circuit breaker
goes to the
POSITIVE (+) terminal of the battery/ the BLACK wire to the
NEGATIVE (-) terminal.
MOUNTING THE SWITCH IN THE COVER
These directions are if the switch is to be mounted in the cover if there is not a
suitable frame location.
1. Locate the mounting hole in the right side of the top cover.
2. Clean and dry the surface then peel off the paper backing from the switch
label and adhere switch plate over the hole. The hole in the plate must align
with the hole in the cover.
3. Set the cover next to the winch so that the switch wires can reach the hole in
the cover.
4. Mount the switch using the supplied jamb nuts and the rubber switch boot.
Orient the switch so that the notch in the switch aligns with the tab in the
hole of the switch plate.
5. Connect the switch wires use the wiring diagram on page 10.
6. Return to step 7 on the previous page.
Switch
Switch Boot
Switch Label
Front
Cover
FCWa011

POWERWINCH MOTORIZED FOLDING CAMPER WINCH
9
OPERATING THE WINCH
NOTICE The camper must be on a hard surface and leveled before
raising or lowering the top.
NOTICE Make sure that the travel latches for the camper top ARE
RELEASED before operating the winch to raise the camper top.
NOTICE The winch has a 5-minute duty cycle. Wait at least 5 minutes between
each lifting cycle. Running the winch continuously will damage the motor and gears.
MANUAL OVERRIDE
In the case of a power failure, (battery
is discharged or missing), the winch
can be operated manually to raise or
lower the camper top.
1. Locate the 3/4" manual drive nut
located at the end of the motor
drive shaft.
2. Using a 3/4" socket, turn the bolt
clockwise to lower the top;
counterclockwise to raise the top.
NOTICE If using an electric
driver (i.e. drill) for the socket, use
care to not overextend the top
when raising or overwind when
lowering the top. Over winding
can cause damage to the winch
motor and gears.
CAUTION Remove all tools used for manual override operation
before operating the winch with the electrical power.
Press Up and Hold to
RAISE the camper top
Press Down and Hold to
LOWER the camper top
FCWa009
P91087
FCWa006
3/4” Override Nut
To Lower: Turn Clockwise
To Raise: Turn Counterclockwise
Lower
Raise

MOTORIZED FOLDING CAMPER WINCH POWERWINCH
10
MAINTENANCE
WARNING Always disconnect power to the winch before
attempting to install, service or perform any maintenance on the unit.
Cable
Periodically inspect the cable for kinks, cuts, or breaks. Immediately replace
the cable if any damage is found. Replacement cables are available from
the camper manufacturer.
Lubricate the cable with 30 weight motor oil a minimum of once a year.
Electrical
Periodically check the wiring for cuts, breaks and corrosion. Replace any broken
wires. Clean any corrosion found on the electrical connections. Tighten any loose
connections.
W
IRING DIAGRAM
NOTE: On early units, the Yellow and White wires from the limit switch may be
reversed. If replacing the relay, ensure that the wires go to the same terminals
on the new relay as they were positioned on the old relay. If replacing the limit
switch, connect the color wires as shown.
M1
S1
S3
S2
M2
FCWa008a
Black
Battery
Circuit
Breaker
(40 amp)
Red
Black
Red
Motor
Limit Switch
Control
Switch
Yellow
(short)
White
(short)
Yellow
(long)
White
(long)
80A Relay Pack

POWERWINCH MOTORIZED FOLDING CAMPER WINCH
11
TROUBLESHOOTING GUIDE
WINCH DOES NOT OPERATE
A. Confirm power to winch
1. Check battery is fully charged
2. Confirm connections are for tight & clean.
3. Check if wires are worn or bare that may
cause shorts
Correct as required.
B. Check circuit breaker at battery
Bypass circuit breaker and test winch.
Does the winch run?
CAUTION Do not operate the winch
without the circuit breaker. Removing the CB
from the circuit is ONLY for testing.
YES If winch runs, circuit
breaker is bad, replace.
NO Reconnect circuit breaker.
CAMPER TOP OVER OR UNDER EXTENDS
A. Lower Limit Switch: If the motor continues
to run after the top is down; or, the motor
stops before the top is down.
The lower limit switch is set
incorrectly. Refer to "Setting the
Lower Limit Switch" on page 6.
B. Upper Limit Switch: If the motor continues
to run after the camper top is fully raised;
or, the top is not raised high enough
before the motor shuts off.
The upper limit switch is set
incorrectly. Refer to "Setting the
Upper Limit Switch" on page 6.
CAMPER TOP LOWERS WITHOUT MOTOR
1. The folding camper winch uses a clutch
to maintain tension in the drive gears. If
the top slowly slips down, it will be
necessary to tighten the clutch.
2. Locate the clutch on the right side of the
winch.
3. Loosen the jam nut.
4. Tighten the inner nut approximately 1/8
of a turn.
5. Tighten the outer jam nut.
6. Retest and repeat as necessary.
FCWa007
Loosen Outer Jam Nut
Tighten Inner Nut

MOTORIZED FOLDING CAMPER WINCH POWERWINCH
12
REPLACEMENT PARTS LIST
FCWa501
1
2
3
4
5
22
13
13
13
13
13
14
16
17
17
18
18
11
11
11
11
15
7
7
12
12
12
6
8
9
10
19
20
21
23
24
24
25

POWERWINCH MOTORIZED FOLDING CAMPER WINCH
13
Item Part Number Description Notes
1
R001749 Motor Assembly 1,2
2
R001750 Limit Switch Assembly 2
3
R001751 Relay Assembly 2
4
R001752 Switch Kit
5
P7832300AJ Circuit Breaker, 40A
6
P9107400AJ Cable Shaft
7
R001753 Flange Kit
8
P7170500AJ Gear, 57T
9
P7182900AJ Washer, .75" I.D.
10
P7165100AJ Bearing, .75" I.D.
11
P7182200AJ Washer, .5" I.D. pkg of 6
12
P7973800AJ Jamb Lock Nut, 1/2-20 pkg of 3
13
P7160700AJ Bearing, .5" I.D.
14
P3005300AJ Level Wind Plate 2
15
R001754 Pawl Kit 2
16
P9107200AJ Shaft, Stage 1
17
R001755 Pinion Gear, 12T
18
R001756 Gear, 24T 2
19
R001757 Stud, Combo Gear 2
20
R001758 Gear, Combo, 120T/12T 2
21
P9108400AJ Shaft, Stage 2
22
R001759 Clutch and Gear Kit
23
P9108400AJ Nut, Jamb, 1/2-20 pkg of 2
24
P3003800AJ Retaining Ring Kit, Assorted pkg of 3
25
R001760 Cover Kit 2
Notes:
1. Motor includes gear and override nut.
2. Fasteners are included with kit.

MOTORIZED FOLDING CAMPER WINCH POWERWINCH
14
WARRANTY
Carefree of Colorado (hereafter referred to as Carefree) warrants to the FIRST retail Purchaser that
the Powerwinch Product described in this manual is free of defects in material and workmanship
within the terms and conditions as set forth below. Carefree’s obligation under this warranty is
limited to the repair or replacement, at Carefree’s option, of any defective component within the
stated warranty period. T
HIS WARRANTY IS NOT TRANSFERABLE.
1. D
URATION
1.1. 1 year on parts and labor.
1.2. Carefree will pay the transportation charges for return shipment to the purchaser of any
product received for legitimate warranty repair.
Warranty duration is not extended by the length of time the product is not in use or the time
that the purchaser is deprived the use of the product. The duration of coverage is determined
by the date of the original product purchase, not the date of repairs.
2. W
HAT IS COVERED UNDER THIS WARRANTY
Defects in the manufacturer’s material and workmanship of product under normal use, and
which occur within the duration of the warranty period.
3. W
HAT IS NOT COVERED UNDER THIS WARRANTY
3.1. Improper installation and/or any consequent damage or failure that results from
improper installation of the product.
3.2. Normal wear.
3.3. Conditions that are not related to the material or workmanship of the product: including
any failure that results from an accident, wind, rain, or other acts of God.
3.4. Purchaser’s abuse, including but not limited to neglect; failure to operate, use or
maintain the product in accordance with the instructions provided with the product.
3.5. Any component not sold or manufactured by Carefree.
3.6. Any failure that results from the use of another manufacturer’s product with a Carefree
product that is not specifically approved by Carefree.
3.7. Any incidental, indirect, or consequential loss, damage or expense that may result from
any defect, failure or malfunction of the product.
3.8. The removal or alteration of any product component or device. In the event of such
removal or alteration, this warranty is void.
3.9. Any expense related to delivery or pick-up of product to/from the service dealer.
4. R
ESPONSIBILITIES OF THE PURCHASER
I
N ORDER FOR THE WARRANTY TO BE HONORED, THE PURCHASER MUST HAVE PROOF OF
PURCHASE
. FAILURE TO PROVIDE THE REQUIRED DOCUMENTATION MAY DELAY OR VOID ANY
WARRANTY CLAIM
.
4.1. Retain dated proof of purchase for the product, and provide it as requested.
4.2. Perform “Periodic Maintenance” as specified in Owners Manual.
4.3. Use reasonable care in maintenance, operation, use and storage of the product in
accordance with the instructions contained in the owner’s manual.
4.4. If the product fails because of defects in the manufacturer's material or workmanship
within one (1) year of the date of purchase, return the product and dated proof of
purchase to the Powerwinch dealer for replacement.
T
HIS WARRANTY GIVES THE OWNER SPECIFIC LEGAL RIGHTS. THE LAWS OF CERTAIN JURISDICTIONS MAY
GRANT THE OWNER ADDITIONAL RIGHTS AND PRIVILEGES
. Except as set forth above; Carefree makes
no warranty, whether statutory or otherwise, including without limitation, any warranty of
merchantability or fitness for a particular purpose. Carefree shall have no liability except to repair,
replace or adjust defective products and parts. Carefree specifically excludes any liability, whether
in contract, tort or otherwise, for personal injury, property damage, economic or consequential
losses. Carefree has not authorized any person or company to alter the terms of this warranty.
It is Carefree of Colorado’s policy and practice to continuously improve the company’s products and
services. Therefore, Carefree reserves the right to make changes in design and components,
without notice, whenever it is believed the quality of the product will be improved, but without
incurring any obligation to incorporate such improvements in any product, which has been shipped,
or in service.

POWERWINCH MOTORIZED FOLDING CAMPER WINCH
15
FOR YOUR RECORDS:
DEALER/INSTALLER
N
AME:
A
DDRESS:
PHONE:
PURCHASE DATE:
PART NUMBER:
SERIAL NUMBER:
PRODUCT NAME
OR DESCRIPTION:
Retain your original proof of purchase.
It is required for all warranty repairs and returns.
NOTES:
PROPRIETARY STATEMENT
The Powerwinch Motorized Folding Camper Winch is a product of Carefree of Colorado, located in
Broomfield, Colorado, USA. The information contained in or disclosed in this document is
considered proprietary to Carefree of Colorado. Every effort has been made to ensure that the
information presented in the document is accurate and complete. However, Carefree of Colorado
assumes no liability for errors or for any damages that result from the use of this document.
The information contained in this manual pertains to the current configuration of the model(s) listed
on the title page. Earlier model configurations may differ from the information given. Carefree of
Colorado reserves the right to cancel, change, alter or add any parts and assemblies, described in
this manual, without prior notice.
Carefree of Colorado agrees to allow the reproduction of this document for use with Carefree of
Colorado products only. Any other reproduction or translation of this document in whole or part is
strictly prohibited without prior written approval from Carefree of Colorado.
www.powerwinch.com
/