Page is loading ...

RCi SERIES
the speaker specialists
®
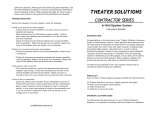
RC60i
RC80i
RC55i
RC65i
RC85i
Owner’s
Manual
High
Performance
In-Wall
Speakers

RC55i, RC65i, RC85i models: Holding the
edges of the tweeter carefully between the
thumbs and forefingers of both hands, rock
the tweeter slightly to aim it [figure 4].
RC60i, RC80i models: Grasping the round
tweeter with the tips of the fingers of one
hand, pivot the tweeter toward the direction
you desire [figure 5]. Do not “turn” the
tweeter like a door knob.
Note: RCi Series In-Wall Loudspeakers are
not magnetically shielded and should not
be placed closer than 1’ (30cm) from a
television or video monitor. If you experience
discoloration or distortion, immediately
move the speakers away from your TV.
Get more information and exclusive accessories, visit www.polkaudio.com
2
For Customer Service, call 800-377-7655.
3
PLACEMENT OPTIONS
Polk Audio RCi Series In-Wall Loudspeakers
give you nearly endless placement options.
But remember that placement choice for your
in-wall speakers bears careful consideration,
as installation requires that you cut a hole in
your wall!
Fill a room with sound by installing in-wall
speakers in nearly any wall or ceiling
location [figure 1]. Polk RCi Series In-Wall
Loudspeakers have a wide dispersion pattern
and aimable tweeters that allow you to focus
their sound.
ADJUSTING THE TWEETER
Aiming the tweeter toward your listening
position improves imaging and detail. When
using RCi Series In-Wall Loudspeakers as
front/main home theater speakers [figure 2],
aim the tweeter toward your listening posi-
tion. For rear/surround speakers installed in
walls or ceilings [figure 3], aim the tweeter
toward the nearest reflecting surface (an
adjacent wall or ceiling) for a more diffuse
sound field (if you so desire; for more
direct sound, aim the tweeters at your
listening position).
FIGURE 1
RC Series audio and A/V placement
options, in wall or ceiling.
Opciones de ubicación al ras de la pared o del cielorraso para
equipo audiovisual y de audio de la Serie RC.
Recommended measurements for HT front stage placement.
Platzierungsmöglichkeiten für RC-Systeme in Wand oder
Zimmerdecke (Audio und kombiniertes Audio/Video)
FIGURE 2
Recommended measurements
for HT front stage placement.
Medidas recomendadas para la ubicación
en el escenario del cine en casa.
Mesures recommandées pour l'installation
des haut-parleurs avant.
Empfohlene Abmessungen für die Platzierung
in Heimtheatern (Frontbeschallung).
FIGURE 3
Examples of in-wall and in-ceiling placement. When used as
rear/surrounds, aim tweeter toward the nearest reflecting surface
(an adjacent wall or ceiling) for a more diffuse sound field.
Ejemplos de ubicación al ras de la pared o del cielorraso. Cuando
se use como altavoz posterior o surround, oriente el tweeter
hacia la superficie reflectora más cercana (pared o cielorraso
adyacente) para producir un campo de sonido más difuso.
Exemples d'installations au mur et au plafond. Pour usage
arrière-ambiophonique, dirigez les tweeters vers la surface
réfléchissante la plus proche (mur ou plafond) si vous
désirez une image sonore plus diffuse.
Beispiele zur Platzierung in Wand und Zimmerdecke. Bei
Verwendung als Hintergrund-/Surround-System sollten die
Hochtonlautsprecher zur besseren Zerstreuung des Schallfelds
in Richtung der nächstliegenden reflektierenden Flächen
positioniert werden (Wand oder Zimmerdecke).
FIGURE 5
RC60i, RC80i models: Grasping the round tweeter with the
tips of the fingers of one hand, pivot the tweeter in the
direction you desire. Do not turn tweeter like a door knob.
Modelos RC60i, RC80i: Sujete el tweeter redondo con las
puntas de los dedos de una mano y luego oriéntelo en la
dirección deseada. No haga girar el tweeter como
si fuera el pomo de una puerta.
RC60i et RC80i : Pour orienter le tweeter,tenez-le du bout des
doigts et faites-le pivoter dans la direction désirée. Ne le
tournez jamais comme une poignée de porte.
Modelle RC60i, RC80i: Halten Sie den runden
Hochtonlautsprecher mit den Fingerspitzen einer Hand,
während Sie ihn in die gewünschte Richtung drehen.
Der Hochtonlautsprecher darf nicht wie ein Türknauf
gedreht werden.
FIGURE 4
RC55i, RC65i, RC85i models: Holding the edges of the oblong
tweeter carefully between the thumbs and forefingers of both
hands, rock the tweeter slightly to aim it.
Modelos RC55i, RC65i, RC85i: Sujete cuidadosamente los bor-
des del tweeter oblongo entre sus pulgares e índices y, con un
movimiento de vaivén, oriente cuidadosamente el tweeter.
RC55i, RC65i et RC85i : Pour orienter le tweeter, tenez
son rebord avec le pouce et l'index des deux mains et
basculez-le délicatement.
Modelle RC55i, RC65i, RC85I: Halten Sie die Kanten der
rechteckigen Hochtonlautsprecher vorsichtig zwischen Daumen
und Zeigefinger. Rücken Sie den Lautsprecher leicht hin und
her, um ihn entsprechend auszurichten.

4
For Customer Service, call 800-377-7655.
5
PREPARING TO PAINT:
1. Separate the parts of the speaker. If the
speaker is not yet installed, the grille can
be removed simply by pushing the clamp
screws forward to push the grille off the
speaker from the inside. If the speaker is
already in the wall, carefully hook the
grille with a bent paper clip and pull it
gently away from the frame [figure 6].
2. When painting the frame of the speaker,
use the supplied paint masks to carefully
mask off the front of the speakers to pro-
tect the drivers and baffles while painting.
You can do this while the speaker is
already installed in the wall (if, for
instance, you’re repainting the room). If
you do not have the paint masks, carefully
mask the speaker components using paper
and masking tape.
PAINTING THE FRAME:
1. Apply paint to exposed (unmasked parts).
Use two or more thin coats. Spray painting
is recommended [figure 7].
2. When the paint is completely dry, remove
the masking material.
PAINTING THE GRILLE:
1. The grille of the RCi Series speaker fea-
tures an even, protective powder coating.
This powder coating is an ideal primer.
2. Grilles must be spray painted. Do not use
a brush and paint. Thick, brushed paint
may clog the grille holes.
3. RC55i, RC65i, RC85i models: Before spray
painting the grille, carefully remove the
grille’s fabric scrim by peeling it away from
the inside of the grille [figure 8]. Place this
on a clean, flat surface where
it will not get wrinkled.
Get more information and exclusive accessories, visit www.polkaudio.com
FIGURE 6
Use a paperclip to remove grille.
Use un sujetapapeles para quitar la rejilla.
Utilisez un trombone pour retirer la grille.
Entfernen Sie den Gitteraufsatz mit einer Büroklammer.
FIGURE 7
Mask the drivers and baffles, then spray paint in thin coats.
Enmascare los excitadores y los bafles, luego
aplique manos delgadas de pintura aerosol.
Masquez les haut-parleurs et les écrans acoustiques
puis vaporisez la peinture en couches minces
Decken Sie die Treiber und Resonanzwände ab.
Spritzen Sie dann den Lack in dünnen Schichten auf.
FIGURE 8
Peel away fabric grille scrim before painting grille.
Retire la gasa difusora de la rejilla antes de pintar la rejilla.
Avant de peinturer la grille, détachez et enlevez le tissu.
Ziehen Sie den Stofffilter vom Schutzgitter, bevor Sie das
Schutzgitter streichen.
FIGURE 9
Paint the grille. Use thin coats of spray paint.
Do not block grille holes with paint.
Pinte la rejilla. Aplique manos delgadas de pintura aerosol.
No bloquee con pintura los agujeros de la rejilla.
Peinturez la grille. Appliquez des couches minces de peinture
aérosol. N'obstruez pas les trous de la grille de peinture.
Streichen Sie den Gitteraufsatz. Verwenden Sie dazu dünne
Spritzlackschichten. Die Öffnungen des Gitteraufsatzes dürfen
nicht mit Farbe bzw. Lack blockiert werden.
PAINTING YOUR RCi SERIES IN-WALL
LOUDSPEAKERS
You will need:
• Paint of your choice (to make the job easi-
er, we recommend spray painting the grille)
• A paperclip or corkscrew (for removing the
paintable grille, corkscrew can also be used
to open the wine when you relax with your
newly painted RCi speakers))
• Masking tape
• Paint mask (to cover unpaintable
parts, supplied!)
4. After removing the grille by carefully hook-
ing it with a bent paper clip and pulling it
gently away from the frame, spray on two
thin coats of finish color. If you’re using a
compressor and spray gun, use the finest,
most diffuse setting. Be careful not to fill
the holes in the grille with paint [figure 9].
5. When the paint is completely dry, carefully
reinstall the grille by fitting it into its
recess so that it is just resting on the
frame. Starting with one corner, go around
the speaker and push the grille into the
grille notch a little bit at a time. Be gentle;
the grille may be easily bent out of shape
by rough handling. You will feel a positive
“snap” when it is fully in place.
6. RC55i, RC65i, RC85i models: When the
grille is dry, carefully press the fabric
scrim back into place on the inside of the
grille. The special fabric scrim hides the
speaker’s drivers from view, and will not
interfere with the sound.

6
Get more information and exclusive accessories, visit www.polkaudio.com
For Customer Service, call 800-377-7655.
7
INSTALLATION
Out of the box and into the wall, that’s how
easy it is to install Polk RCi Series In-Wall
Loudspeakers.
If you intend to do the installation yourself
we recommend that you possess some skill
in the proper use of hand and power tools.
You should have a thorough understanding of
local building and fire codes and a familiarity
with the area behind the wall or ceiling into
which you plan to install your speakers.
Install speaker wires before installing speak-
ers. Wire meeting appropriate building and
fire codes must be used. Use at least 18
gauge wire or heavier for the utmost in sound
quality. Wiring is best performed by an expe-
rienced professional. If you are in doubt that
you possess the necessary skills or tools,
consult your Polk Audio dealer, or a profes-
sional installer.
YOU WILL NEED:
• Pencil for marking the location
of installation
• Keyhole saw, utility knife or material-
appropriate incising implement for
cutting drywall or other wall material
• Level
• Screwdriver, preferably powered,
with Phillips head bit
• Power drill with appropriate bit
(optional, for starting wall cut)
FOLLOW THESE EASY STEPS:
• Make sure the material into which you plan
to mount the speakers (plaster, drywall,
paneling, stone, etc.) can support the
weight of the speakers (see specification
page for the weight of your model).
• Make sure the locations you select do not
conceal studs, electrical wiring or plumb-
ing. Prior to installation, hold the speaker
in your chosen location to make sure it
safely clears obstacles such as studs, cor-
ners, beams, lighting fixtures and door/win-
dow frames. Your cutout must be at least
1" (25mm) from adjoining walls or ceiling,
internal studs or plumbing.
• Using the template, trace the installation
location with a pencil. You can do this by
holding the template in your preferred
location and tracing around it (rectangle)
or within the template pop-out area
(round). Use a level to make certain the
template is straight and plumb. This is
the exact cutout size [figures 10a & 10b].
• Carefully cut the hole with the appropriate
cutting tool for your wall or ceiling material.
Start the hole by drilling a hole on the inside
of the tracing (with the drill bit touching the
line). Use this hole to insert the saw or knife
and begin cutting [figure 11].
• Once you have cut the hole, fish your previ-
ously positioned wiring out of the hole and
connect the speaker. Follow the hookup
directions included with your receiver. Strip
2 inch (12 mm) of insulation from each of
the two conductors of the wire to expose
the bare metal and twist each of the con-
ductors into a single unfrayed strand (so
you have two unfrayed strands). Note that
one of the terminals on the rear of each
speaker is red (+) and the other is black
(-). Make certain that you connect the wire
from the red terminal (+) of your amplifier
or receiver to the red terminal (+) on your
speaker and the wire from the black termi-
nal (-) of your amplifier or receiver to the
black terminal (-) on your speaker. Most
wire has some indicator (such as color-cod-
ing, ribbing or writing) on one of the two
conductors to help you maintain consisten-
cy [figure 12].
FIGURE 10b
Rectangular Template: Trace around the template.
Plantilla rectangular: Marque alrededor de la plantilla.
Gabarit rectangulaire: Tracez autour du gabarit.
Rechteckige Vorlage: Umranden Sie den äußeren
Rand der Vorlage mit einem
TEMPLATE
FIGURE 10a
Round Template: Trace within the pop-out area.
Plantilla redonda: Marque dentro del área que
se va a desechar.
Gabarit rond: Tracez à l'intérieur du gabarit.
Runde Vorlage: Umranden Sie den inneren,
gestanzten Teil der Vorlage.
POP-OUT AREA
TEMPLATE
FIGURE 11
Cut the hole with the appropriate tool.
Haga el corte con la herramienta apropiada.
Taillez l'ouverture avec l'outil approprié
Schneiden Sie die Öffnung mit dem
entsprechenden Werkzeug aus.
FIGURE 12
Hook up the speaker wires.
Conecte los cables de los altavoces.
Branchez les fils de haut-parleur.
Schließen Sie die Lautsprecherkabel an.
+
_
+
_
+
_
+
_
LEFT
AMP
RIGHT

8
For Customer Service, call 800-377-7655.
9
Get more information and exclusive accessories, visit www.polkaudio.com
• To install the speaker, first carefully remove
the grille using a straightened paperclip or
other pointed metal tool. Insert the point
into one of the grille perforations near a
corner and lift the grille free. Never use
a knife or screwdriver to pry between the
grille and the speaker frame. This will
damage your speaker.
• Loosen the rotating wall clamps by
unscrewing them. Make sure that the
rotating wall clamps are flipped inwards
so that your speaker fits into your cutout
without nicking your wall. Then place the
speaker carefully into the cutout [figure
13]. If you have a level, use it to help you
correctly align the speaker. Tighten the
wall clamp screws with a screwdriver. This
will rotate the wall clamps and secure the
speaker to the wall. Hint—on the RC55i,
RC65i and RC85i models, tighten the center
screws before tightening the corners for
the most flush fit to your wall. Do not over-
tighten the wall clamp screws [figure 14].
• Carefully reinstall the grille by fitting it into
its recess so that it is just resting on the
frame. Starting with one corner, go around
the speaker and push the grille into the
grille notch a little bit at a time. Be gentle;
the grille may be easily bent out of shape
by rough handling. You will feel a positive
“snap” when it is fully in place. (Where’s
the corkscrew?)
SAFETY FIRST
When installing your RCi Series In-Wall
Loudspeakers, be aware of the weight of your
particular model (see specification page for
the weight of your model) and the sturdiness
of the material into which you are installing
the speaker. Also be aware of any concealed
studs, electrical wiring or plumbing in the
wall or ceiling into which you are installing
the speakers. If you are not sure of a safe
way to install these speakers, consult a
professional installer, your authorized Polk
Audio dealer, or a building contractor.
If you plan to install your RCi Series speakers
where water will directly contact them, it is
advisable to use a silicone sealant or caulk
between the frame of the speaker and the
wall surface. This seal should prevent water
from getting behind the loudspeaker and
possibly damaging the wall surface. Do not
position the speaker where water can pool
on the surface of the woofer cone or tweeter
dome, as this will great decrease the
speaker’s useful life (and everything will
sound—glub! glub!—like it’s coming from
under water!).
FIGURE 14
Tighten retaining wall clamps to engage wall. Use a
#2 Phillips head screwdriver or a powered screwdriver.
Apriete las prensas de retención de la pared para
enganchar el altavoz a la pared. Use un destornillador
Phillips No. 2 o un destornillador eléctrico.
Reserrez les attaches murales pour fixer solidement l'unité au
mur. Utilisez un tournevis ou une perceuse à tête Phillips no 2.
Ziehen Sie die Wandklemmen fest, um das System an der
Wand zu befestigen. Verwenden Sie dazu einen
Kreuzschlitzschraubendreher (Nr. 2) oder einen
Schraubendreher mit Motorantrieb.
FIGURE 13
Place the speaker carefully into the cutout.
Coloque cuidadosamente el altavoz en el agujero.
Placez délicatement le haut-parleur dans l'ouverture.
Platzieren Sie die Lautsprecher vorsichtig in der
ausgeschnittenen Öffnung.

10
Get more information and exclusive accessories, visit www.polkaudio.com
SPECIFICATIONS
RC55i RC65i RC85i
Frequency Response 67Hz-20Khz 32Hz-20Khz 30Hz-20Khz
Recommended Power 20-100wrms 20-100wrms 20-100wrms
Impedance Compatible with 8 Ohm amplifiers Compatible with 8 Ohm amplifiers Compatible with 8 Ohm amplifiers
Efficiency (dB 1w/1m) 89db 89db 90db
Drive Unit Complement
Mid-Bass
1–54" (13.3cm) mineral 1–62" (16.5cm) mineral 1–8" (20cm) mineral
filled polypropylene cone, filled polypropylene cone, filled polypropylene cone,
rubber suspension rubber suspension rubber suspension
Tweeter w" (1.9cm) soft dome w" (1.9cm) soft dome 1" (2.5cm) soft dome
in swivel mount in swivel mount in swivel mount
Cutout Dimensions 6x" x 9s" (15.7cm x 24.4cm) 7c" x 10w" (18.6cm x 27.3cm) 8n" x 12w" (22.1cm x 32.4cm)
15.72cm x 24.45cm 18.57cm x 27.31cm 22.07cm x 32.39cm
Depth with 2" drywall 2x" (5.56cm) 2v" (6.19cm) 2d" (7.30cm)
Shipping Weight Pair 72 LBS- 3.4 Kg 8 LBS- 3.63 Kg 112 LBS- 5.22 Kg
RC60i RC80i
Frequency Response 40Hz-20Khz 35Hz-20Khz
Recommended Power 20-100wrms 20-100wrms
Impedance Compatible with 8 Ohm amplifiers Compatible with 8 Ohm amplifiers
Efficiency (dB 1w/1m) 89db 90db
Drive Unit Complement
Mid-Bass
1–62" (16.5cm) mineral 1–8" (20cm) mineral
filled polypropylene cone, filled polypropylene cone,
rubber suspension rubber suspension
Tweeter w" (1.9cm) soft dome 1" (25mm) soft dome
in ball and socket in ball and socket
Cutout Dimensions 7b" (19.21cm) diameter 9a" (23.81cm) diameter
Depth with 2" drywall 2a" (6.03cm) 34" (8.26cm)
Shipping Weight Pair 52 LBS- 2.5 Kg 92 LBS- 4.31 Kg

the speaker specialists
®
5601 METRO DRIVE,
BALTIMORE, MARYLAND 21215, USA,
800-377-7655, FAX: 410-764-5266
www.polkaudio.com

Thank
you
for
purchasing
Please
send
other
correspondence
to:
Polk
Audio,
Inc.
5601
Metro
Drive
Baltimore,
MD
21215
129
E
BUSINESS REPLY MAIL
FIRST-CLASS MAIL PERMIT
NO.
18230 BALTIMORE, MD
POSTAGE
WILL
BE
PAID
BY ADDRESSEE
PRODUCT
REGISTRATION
DEPARTMENT
5601
METRO
DRIVE
BALTIMORE
MD
21215-9956
NO POSTAGE
NECESSARY
IF MAILED
INTHE
UNITED STATES

REGISTER
It's faster...easier...and you
get
COOL stuff!
Register on-line
to
get:
• An entry
into
a
monthly
drawing
for
a free
Po~k
subwoofer (home
or
car,
your
choke)
• The peace
of
mind
that
we
have a record
of
your purchase
to
verify purchase date
and warranty status.
•
Privacy.
The data
we
gather on our on-line registration
is
never sold
or
otherwise
shared
with anyone.
• Free membership
in
Club Polk. Club Poik members enjoy valuable services and benefits
not
available
to
the
general
pubHc.
• A free subscription
to
Polk's newspaper
The
Speaker Specialist
..
to
help you
get
better
performance and more enjoyment
from
your
audio system.
•
www.polkaudio.com/home/registration
tw.0320-4

RM
0296-1
PRODUCT
REGISTRATION
CARD
By
completing
and
returning
the
attached
Product
Registration
Card
you
will:
•
CONFIRM
YOUR
WARRANTY
•
REGISTER
YOUR
PRODUCT
•
PROTECT
YOUR
NEW
PRODUCT
PLEASE
FOLD
AND
SEAL
WITH
TAPE
BEFORE
MAILING.
DO
NOT
STAPLE.

RC65;
Mounting
Template
Follow
these steps before
installing
the
RC65i.
1) Determine speaker location.
Be sure that
it
does not interfere with studs/joists.
2)
Hold
or
tape the template
to
the mounting location.
Be sure the template is level.
3)
Trace along the outside
of
the template.
4)
Carefully cut a hole ensuring that
it
is no larger
than the shape you traced.
5)
Remove the speaker grilles.
6)
Attach ttie speaker wires
to
the spring clips on the
back
of
the speaker. Use REO'for the positive (+) wire
and BLACK
for
the negative
(-)
wire.
7)
Loosen the
six
screws until the wall clamps swing freely.
8)
Rotate the
six
mounting clamps inward and insert the
speakers into the wall opening.
9)
Level the speakers and tighten the six screws until snug.
CAUTION:
DO
NOT
OVER-TIGHTEN
SCREWS!
10) Reinstall grilles.
Refer
to
owner's manual
for
further installation instructions.

Lifetime Warranty for Polk Audio In-Wall and In-Ceiling Speakers (For
Products purchased after September 9, 2009)
• Polk Audio warrants to the original retail purchaser that Polk Audio branded in-wall and
in-ceiling speakers, including passive CSW series subwoofers (collectively "product"),
will be free from defects in materials and workmanship for the life of the product, under
normal use and conditions.
• Should this product prove to be defective in material or workmanship, Polk will, at its
option: repair the product, or (b) replace the product.
• If the product model is no longer available and cannot be repaired effectively, or replaced
with an identical model, Polk may, at its sole and absolute discretion, replace the unit
with a current model of equal or greater value.
• To obtain warranty service, you may refer to the instructions in your owner's manual or
visit the Polk Audio website at www.polkaudio.com. You may also contact Polk Audio
Customer Service at 1-800-377-7655 for instructions on where to send the product.
Lifetime Warranty for Polk Audio-Branded In-Wall and In-Ceiling Speakers
(For Products purchased after September 9, 2009)
Polk Audio, Inc., ("Polk") warrants to the original retail purchaser that Polk Audio branded in-wall and in-ceiling
speakers, including passive CSW series subwoofers (collectively "product"), will be free from defects in materials
and workmanship for the life of the product, under normal use and conditions. Should this product prove to be
defective in material or workmanship, Polk will, at its option, (a) repair the product, or (b) replace the product. If the
product model is no longer available and cannot be repaired effectively, or replaced with an identical model, Polk
may, at its sole and absolute option, replace the unit with a current model of equal or greater value.
To obtain warranty service, you may refer to the instructions in your owner's manual or visit the Polk Audio website
at www.polkaudio.com
. You may also contact Polk Audio Customer Service at 1-800-377-7655 for instructions on
where to send the product. You will be required to provide an original receipt or bill of sale, identifying you as the
original purchaser and identifying the purchase made through an authorized Polk retailer. You will need to ship the
product, prepaid and insured, together with the proof of purchase to Polk Audio, Inc. 1 Viper Way, Vista, CA
92081. Risk of loss or damage in transit shall be borne by the purchaser. Freight collect shipments will be refused.
This warranty is non-transferable and does not apply to any product that has been modified or used in a manner
contrary to its intended purpose, and does not cover damage to the product caused by installation or removal of the
product. If modification(s) to a mounting surface are made to product(s) that have been substituted under warranty,
Polk assumes no responsibility or liability for any modification made to the mounting surface or otherwise. This
limited warranty is void if the product has an altered or missing serial number, or if the product was purchased from
someone other than an authorized dealer. This limited warranty is void if the product has been damaged by accident
or unreasonable use, neglect, improper service or other causes not arising out of defects in material or construction.
Product(s) which are found to be damaged by abuse resulting in thermally damaged voice coils are not covered by
this warranty but may be replaced at the sole and absolute discretion of Polk. This warranty terminates if you sell or
otherwise transfer the product to another party. This limited warranty does not cover cosmetic damage, paint
damage, damage to other components, parts or premises, or any consequential damages which may result for any
reason. This limited warranty does not cover labor costs for the removal and/or reinstallation of the product.
THIS WARRANTY GIVES YOU SPECIFIC LEGAL RIGHTS AND YOU MAY HAVE OTHER RIGHTS
THAT VARY FROM STATE TO STATE. ALL WARRANTIES, INCLUDING BUT NOT LIMITED TO
EXPRESS WARRANTY, IMPLIED WARRANTIES OF MERCHANTABILITY AND FITNESS FOR A
PARTICULAR PURPOSE ARE EXPRESSLY EXCLUDED AND DISCLAIMED TO THE MAXIMUM
EXTENT ALLOWED BY LAW, AND POLK NEITHER ASSUMES NOR AUTHORIZES ANY PERSON

TO ASSUME FOR IT ANY LIABILITY IN CONNECTION WITH THE SALE OF THE PRODUCT.
POLK HAS ABSOLUTELY NO LIABILITY FOR ANY ACTS OF THIRD PARTIES. SOME STATES DO
NOT ALLOW THE EXCLUSION OF CERTAIN IMPLIED WARRANTIES, OR CONDITIONS ON AN
IMPLIED WARRANTY, SO THE ABOVE LIMITATION MAY NOT APPLY TO YOU. POLK DOES NOT
ACCEPT LIABILITY FOR SPECIAL, INDIRECT, INCIDENTAL, PUNITIVE OR CONSEQUENTIAL
DAMAGES, LOST PROFITS, LOST SAVINGS OR DAMAGES RESULTING FROM IMPROPER USE,
OR THE INABILITY TO USE THE PRODUCT. THE MAXIMUM LIABILITY FOR WHICH POLK MAY
BE RESPONSIBLE SHALL NOT EXCEED THE PURCHASE PRICE OF THE PRODUCT. SOME
STATES DO NOT ALLOW THE EXCLUSION OR LIMITATION OF INCIDENTAL OR
CONSEQUENTIAL DAMAGES, SO THE ABOVE LIMITATION OR EXCLUSIONS MAY NOT APPLY
TO YOU.
/