Quick Start Guide
Guide de démarrage
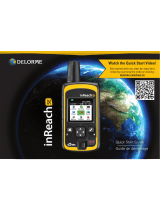
Watch the Quick Start Video!
Get started with our step-by-step intro
video by scanning the code or visiting:
delorme.com/how-to
This device must be turned off at all times while on board aircraft. The device may be used by
the pilot or with the pilot's consent (US Code of Federal Regulation (CFR): 47 C.F.R. 25.285).
BC

The Latest and Most Comprehensive
Information is Always Online!
Manage Your inReach Account / Gérer votre compte inReach
explore.delorme.com
User Manuals / Manuels d’utilisation
manuals.delorme.com
Community Forum / Forum communautaire
forum.delorme.com
Technical Support / Assistance technique
support.delorme.com
News and Real-Life Examples / Nouvelles et exemples de vie réelle
inreachdelorme.com/life
Watch the Quick Start Video!
Scan the code or visit:
delorme.com/how-to

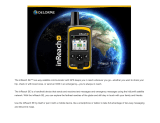
WARNING: Messaging, tracking and SOS functions require an active Iridium satellite subscription.
Always test your device before you go.
This manual is provided as a convenience.
GARMIN IS NOT RESPONSIBLE FOR THE ACCURACY OF THIS MANUAL AND DISCLAIMS
ANY LIABILITY ARISING FROM THE RELIANCE THEREON.

1inReach Explorer Quick Start Guide
Read before you activate!
Before you use your inReach Explorer two-way satellite communicator with GPS, you’ll need to:
• Set up your airtime plan and Explore account (see page 3).
• Step outside with a clear view of the sky to get a satellite signal (see page 4).
If you plan to use your inReach Explorer with your mobile device, you’ll also need to:
• Download the Earthmate app to your Apple
®
or Android mobile device (see page 8).
• Pair your device with your Apple or Android mobile device (see page 8).
Follow this Quick Start Guide step by step to streamline setup!
Use this Quick Start Guide along with inReach Explorer to streamline your account activation and device setup process. To ensure success with
setup, complete each step before moving on to the next. Once you finish the setup, you’ll be able to start using your inReach Explorer to share
your trip details, send and receive messages with friends and family, send an SOS in an emergency, or use the navigation features.
Learn more about inReach Explorer capabilities in this Quick Start Guide or online at inreachdelorme.com.
Troubleshooting
If you have any issues during the inReach setup process or while operating your device, you can find answers on your device or online:
• inReach Explorer has a “Help” function built in. Select “Help” from the Home page and search for solutions to common questions.
• Go online from your computer to manuals.delorme.com for a full user’s manual.
If you can’t find answers to your questions through the inReach device help or the online user manual, visit support.delorme.com.
IMPORTANT! Some of the information in this guide may be outdated due to
firmware updates. The latest version of this guide and the detailed inReach User
Manual are available in PDF format at manuals.delorme.com.

2
Check the contents of your box.
Please note: Charge your inReach Explorer fully before using.
Connect the device to the AC adaptor and plug it into an electrical
outlet or use the USB cable to charge from your computer.
Antenna – When using inReach Explorer, point the antenna up toward the sky,
and position the face of the device away from your body when attached to a
pack or a vest.
Display Screen – The screen turns off automatically after 30 seconds without
activity to preserve power and prevent accidental button presses. To unlock
the screen, press the Power/Enter button, and then press the Left Arrow and
Enter to select Unlock. This sequence must be done within 5 seconds or the
screen will remain locked. You can change the timing of the auto-lock feature by
selecting Settings, then Display, and modifying the Display Timer.
Status Light – The Status Light flashes green when there is a new message
waiting. The Status Light flashes red when there is something important for you
to see, like low power or a sending message delay. The light is NOT an indicator
of satellite connection.
Micro-USB Port – Lift the protective cover to access the micro-USB port. Plug
in your USB cable for charging and for updates (when notified). While the cover
is not part of the internal waterproofing, it does protect against corrosion from
salt water.
SOS Button Lock
inReach Explorer Overview
Status Light
Antenna
SOS
Directional Pad
Power/Enter
Quit/
Preset Messages
Shortcut
Micro-USB Port
• inReach Explorer device
• Lanyard
• USB cable
• AC adaptor
• Pack clip
• Quick Start Guide
Your inReach Explorer box includes:

3inReach Explorer Quick Start Guide
Power/Enter –
• To turn the device on, press and hold the Power/Enter button for 1.5
seconds. When the Power On screen appears, press the Left Arrow and
then Enter to select Power On. Note that this sequence must be done in 5
seconds or the device will turn off.
• To turn the device off, press and hold the Power/Enter button for 1.5
seconds. When the Power Off screen appears, press the Up Arrow and then
Enter to select Power Off. This sequence must also be done in 5 seconds or
the device will remain on.
• When the device is turned on, press the Power/Enter button to select
highlighted objects or hold it down to access keyboard shortcuts when
sending messages (see page 6).
Directional Pad – Press arrows to highlight a selection on the screen or hold
arrows down to access keyboard shortcuts when sending messages (see page
6).
Quit/Preset Messages Shortcut –
• Press Quit/Preset to back out of pages or operations.
• Press and hold Quit/Preset to access the Preset Messages page.
SOS Button Lock –
• In an emergency, slide the SOS button lock to the left to unlock the SOS.
To avoid triggering a false alarm, make sure your SOS
slider is locked. Slide left to unlock and slide right until
you HEAR IT CLICK to lock it! If you do not HEAR IT CLICK,
then the SOS is not locked.
SOS Button – Press and hold the SOS button for three seconds to send a
“distress” message to emergency response. If SOS is no longer needed, press
and hold the SOS button for 5 seconds to send a “cancel SOS” message to
emergency response.
Activating your inReach Explorer
You must activate your inReach directly with DeLorme using the
DeLorme Activation Portal and DeLorme Airtime Plans. Use of
this device is governed by the Terms and Conditions outlined at
files.delorme.com/support/inreachwebdocs/TC_inReach_
Consumer_US.pdf.
If you do not agree to these Terms and Conditions, please return the
inReach to the place of purchase or contact DeLorme Customer Care
directly at contact.delorme.com.
Step One: Power on your device.
Turn your inReach Explorer on by holding down the power button
until the Power On screen displays. Press the Left Arrow and then
Enter. The screen will display a welcome message and begin the
setup process.
Follow the on-screen instructions to continue the setup process.
Step Two: Set up your airtime plan and
Explore account.
Your inReach Explorer requires a satellite airtime plan and an online
Explore account to send and receive messages, much like a mobile
phone plan (Note: Your inReach Explorer GPS features will not work
without a satellite airtime plan). inReach uses Iridium's satellite
network to track, share information, and send and receive messages.
To choose your plan and set up your account, use the DeLorme
Explore website:

4
• Go online from your computer to explore.delorme.com and
follow the instructions.
• You will be prompted for your IMEI number and Authorization
Code; find these in the Setup Wizard on inReach Explorer.
During the online account setup process, you'll choose your inReach
service plan, enter your payment information and contact details,
and add your emergency contacts that will be used if your inReach
Explorer is placed into SOS mode.
During the setup process you should also add the following details to
prepare your inReach Explorer:
• Add contacts to your device by selecting the Contacts tab.
• Link your Twitter and Facebook accounts to share messages
with your friends. Set up your MapShare web page to let
others follow your trip and send you messages on your inReach
Explorer.
• Create some commonly used text messages that will be
stored in your device, e.g. “Busy, will reply later!” Select the
Messages tab and edit the Quick Text Messages.
• Write special Preset Messages that you think you’ll use
often, e.g. “Just arrived and doing well” or “Leaving now for
my next destination.” Select the Messages tab and edit the
Preset Messages. Specify a group of recipients to whom
you’ll send your regular updates.
Preset Messages let you send a message you created ahead of
time to a list of people you specified when creating the preset. You
can send this message with just a few button presses. A Quick Text
Message is a message you know you’ll use often when replying to
or sending messages, and you don’t want to type it each time. Send
it with just a few button presses.
Step Three: Check your connection.
inReach Explorer needs a clear satellite signal from the sky to
complete the setup process. Go outside and stand in an open area
away from tall buildings, roof overhangs and trees.
When you set up your Explore account, DeLorme sent you a welcome
message for testing your inReach. Your device will receive this
message during the activation process. When you have a clear view
of the sky, press Enter to activate and receive your message.

5inReach Explorer Quick Start Guide
The activation process could take up to 20 minutes.
Activation of your inReach with the Iridium satellite network
is a one-time step that uses a different process than standard
inReach functions. Please be patient while your inReach
communicates with the Iridium network for the first time.
To read your welcome message, select Messages from the device's
Home page and choose the new message from DeLorme.
Send a test reply to DeLorme. You are allowed five free test
messages per month. Select Type Reply, and then type a message
using the on-screen keyboard. Press Send. DeLorme will send you an
automatic reply when your message is received.
Your inReach Explorer will listen for waiting messages every 20
minutes by default. Use the Check page and press Check Now to look
for the reply from DeLorme. Use the Check Now feature if you are
only turning inReach Explorer on briefly to check for messages before
powering off again.
Time – Displays the current inReach time. Go to Settings>Time to
change your time zone.
Sending – The sending indicator appears when inReach Explorer is
sending or receiving messages or track points; it lets you know that
your device is active.
GPS Signal – The signal strength indicator lets you know when
inReach Explorer is searching for a GPS signal and when it has
acquired a 2D or 3D satellite fix. A 3D fix indicates a strong GPS
satellite signal and accurate location information.
Messages Waiting – The number next to the envelope icon and
the Messages page icon tells you how many unread messages are
waiting.
Bluetooth – The Bluetooth icon appears when Bluetooth is turned
on. The icon is highlighted when a mobile device is connected to your
inReach.
Charging – A lightning bolt icon lets you know you are connected to
external power and charging. A percentage appears to tell you how
full your battery is. When the device reaches 100%, the lightning bolt
is replaced with a plug icon to indicate the device is running from
external power.
Tracking – A checkmark appears on the Tracking page icon when
the device is actively sending location updates to the Explore
website.
Time
Sending
Charging/
Percent Charged
Bluetooth
Messages Waiting Tracking
GPS Signal

6
Keypad Shortcuts – Use keypad shortcuts to type messages
quicker.
• Press and hold the Left Arrow to delete a letter, continue to hold
to delete a word.
• Press and hold the Right Arrow to insert a space.
• Press and hold the Down Arrow to highlight the OK button when
there are no word suggestions.
• Press and hold the Up Arrow to change between lower and
upper case, or between the number and symbol keyboards.
Word Suggestion Shortcut – inReach Explorer will suggest words
to complete what you have typed. Hold the Down Arrow to accept
the word or continue typing to see a different suggestion.
Keyboard Shortcuts – Use keyboard shortcuts for more typing
options.
• Press and hold the Enter button when highlighting a key with
accents or to see a pop-up list of additional options.
• Press the ABC/abc button to switch between upper and lower
case keyboards.
• Press and hold the 123/<;] button to switch between number
and symbol keyboards.
• Press and hold the OK button to accept all of your typing and
return to the Compose Message page.
Setting up your inReach Explorer
Step One: Sync your inReach Explorer.
After activating your inReach Explorer, set up the device with the
information you will need while on your trip. During the activation
process on the Explore website, you should have created your
Contacts, Preset and Quick Text Messages, and set up your Social
Media links. You can return to the Explore website at any time to
change or update this information.
Once you’ve made sure all of your Contacts, Preset Messages, and
Quick Text Messages have been created, and your Social Media
accounts have been connected, sync your inReach Explorer with your
Explore account. Connect your inReach to your computer using your
micro-USB cable. Go to the Sync tab in your online Explore account,
and follow the directions on that page to add all of your information
to the device.
Shortcuts
Additional Keys
Pop-up
Upper & Lower
Case Keyboards
Accept Text/Return
to Conversation
Number & Symbol
Keyboards

7inReach Explorer Quick Start Guide
To manually calibrate the altimeter, go to Settings>Compass
& Altimeter and choose Calibrate Altimeter. There are three
methods to calibrate the altimeter:
• Known Elevation – Enter the true elevation from a source such
as a trail marker or a topographic map.
• Known Pressure – Enter the atmospheric pressure from a
current source such as a local weather report.
• GPS Elevation – Use this option if you do not know the correct
elevation or pressure.
Select a method and follow the on-screen instructions.
Note: Manually calibrating disables auto calibration until the device
is restarted. Changes in weather conditions can impact barometric
altimeter readings, so consider enabling auto calibration in these
situations.
Step Two: Calibrate your digital compass.
inReach Explorer uses a digital compass to give accurate heading
and bearing information whether you’re stationary or moving. The
device automatically checks compass calibration and will tell you to
calibrate if necessary. For best performance, calibrate your digital
compass any time the device prompts you or manually calibrate
before a trip when you expect compass use to be important.
To manually calibrate the compass, go to Settings>Compass &
Altimeter, and then choose Calibrate Compass. Rotate inReach in
a figure-8 pattern, turning all sides of the device to the ground, and
continue until the device beeps to report successful calibration.
Step Three: Calibrate your barometric
altimeter.
inReach Explorer uses a barometric altimeter to give accurate
elevation readings when you are climbing or descending. The
device automatically calibrates the barometric altimeter using GPS
elevation each time it is powered on. Auto calibrating with GPS
elevation is a good method if you do not know the correct elevation
or pressure for your location. For best performance, manually
calibrate your barometric altimeter before any trip during which high-
accuracy elevation readings are important.

8
Using the Earthmate App with your
inReach Explorer
Step One: Download the Earthmate app to
your mobile device.
While inReach Explorer works as a stand-alone device, you have the
option of using your inReach Explorer in conjunction with your mobile
device — such as a smartphone or tablet — through a process
called pairing. Pairing your mobile device provides access to your
phone or tablet’s address book and keyboard, as well as the ability
to use Earthmate for the most critical inReach functions, including
messaging, SOS, tracking, waypoints, routes, and unlimited access
to download topographic maps and US NOAA charts.
Download the free Earthmate app by
visiting your mobile device's app store.
The Earthmate app is available from
the App Store
SM
and Google Play.
Note: Your Android mobile device
must have 4.0 or later firmware. Your
Apple mobile device must have iOS
7.0 or later.
Step Two: Pair your inReach to your mobile
device.
To pair your inReach with your mobile device, go to Settings on
your inReach, select Bluetooth and then Pair inReach. Follow the
instructions on the screen.
On your mobile device, turn on Bluetooth. Select inReach from the
list of available devices on your Bluetooth menu. The devices must be
within Bluetooth range to pair with each other.
Your inReach will notify you when it has successfully paired with
your mobile device. You only need to pair the devices once; from then
on, the devices will communicate with each other anytime they are
both turned on and Bluetooth is active.
Your inReach will only pair with one device at a time. If you want
to change the mobile device with which your inReach is paired,
you will need to unpair it first. To unpair inReach Explorer go to
Settings>Bluetooth>Connected and select Forget this device.
With Bluetooth turned on, go to the Settings of your mobile device
and select inReach from the list of devices. On an Android, select
"Unpair"; on an Apple device, select "Forget this device." After you
have unpaired your inReach and mobile device, you can go through
the pairing process again with a new mobile device.
Once your devices are paired and you have a data connection, enter
your inReach account information into the Earthmate app Options
page to sync it with the Explore website.

9inReach Explorer Quick Start Guide
Using Your inReach Explorer.
If you’ve followed all the instructions to activate your device, set up
your online account, and set up your device, you can now use your
inReach device to send and receive messages, track your locations,
and share your trip through text messages and social media. You can
also use your inReach device for navigating during your trip.
Messages – Send and receive text messages when out of cell
phone range with inReach. Select Messages from the inReach Home
page and choose New Message. Type a recipient’s email address
or SMS phone number. You can also select recipients from your
Contacts list. Type your message or choose from your list of Quick
Text Messages. Press Send to send your message.
Step Three: Add your contacts.
Your inReach device will already have the information for any
contacts you added on the Explore website if you have synced your
inReach with your Explore account. To move the same contacts into
the Earthmate app, sync it with your Explore account as well:
1. From your mobile device, open the Earthmate app.
2. For iOS devices, select Options, and then Account & Sync. For
Android devices, select Menu, and then Settings and Account.
3. Enter your email address and your Explore account password.
4. Select Sync.
All of your Explore account contacts will now appear in the
Earthmate app Contacts list or be available when typing a message
recipient.

10
MapShare. Therefore, inReach allows you to adjust two different
tracking intervals — a send interval and a log interval.
The send interval determines how often inReach transmits your
tracking data to your MapShare page online. With most of our
subscription plans, you can set inReach to transmit your location at
intervals ranging from 10 minutes to 4 hours. DeLorme’s Extreme
subscription plan offers sending intervals as frequently as 2 minutes.
The log interval determines how often inReach records and stores
tracking data in the device’s memory. The default log interval when
you are sending track points to your MapShare page is 5 minutes.
The default log interval when you are not sending track points is 10
minutes. Data recorded at the log interval is NOT transmitted via
satellite while you are in the field. (Note: Upload your log data to
your Explore account by syncing your device via your computer after
your trip.) Set your inReach to log your location on your device at
intervals ranging from 1 second to 4 hours. A shorter log interval will
give a high level of detail but will fill the device memory quickly and
use more battery power.
Note: Clear the stored log on the Tracking page when starting a new
trip to have full log capacity available.
Tracking – Track your trip and share your location details online
with family and friends from anywhere in the world. Tracking allows
you to send your trip details, including GPS coordinates, course,
elevation and speed to your MapShare page online. To get started,
select Tracking from the inReach Home page. Then select Start
Sending to begin, and select Stop Sending when you finish your trip
or want to stop sending your trip details.
Adjusting the tracking intervals
The default tracking interval for sending your location information
to MapShare is 10 minutes. To change the tracking intervals, go to
Settings>Tracking. Using the Extended Tracking mode (with a clear
view to the sky) can increase the device's battery life by days or even
weeks. Messaging and SOS are still available in this mode, but some
features are automatically disabled. See the online help manual for
details on use.
Adjusting the tracking intervals on inReach is not required, but doing
so can offer greater flexibility depending on your trip speed and
desired level of trip detail. inReach will automatically record
and store tracking data in a trip log in the device’s memory,
whether or not you choose to send your track points to

11inReach Explorer Quick Start Guide
SOS – Request emergency help with your inReach device by
selecting SOS. Please use the SOS function only in a real emergency
situation. Your inReach device will contact GEOS, our 24/7 search
and rescue monitoring center, who will then dispatch help to your
location.
MapShare – Send your friends live updates about your location by
turning on MapShare on your Explore account online. Your location
information will appear on your MapShare web page that you can
share with others. Post your MapShare page to social media so your
friends and family can follow your trip and send you messages. From
your inReach device, select Tracking, and then select Start Sending
to share your MapShare link.
Note: Auto Send MapShare can be disabled in Settings>Tracking.
Social – Let your friends and family see your progress and updates
on Facebook, Twitter, and MapShare. Link your Facebook and Twitter
accounts on the Explore website using a computer or tablet. Select
the Social tab and enter your usernames and passwords for your
accounts. Once you’ve linked your accounts, you’ll be able to send
updates to them through your inReach device.
Waypoints – Mark important locations by creating waypoints.
Select Waypoints from the Home page of your inReach device.
Press New Waypoint at the location you would like to save. Enter
a name and choose a symbol to save the location for reference
later. Waypoints you create during your trip will also appear on your
MapShare web page for others to see.
Note: Be sure to mark the location of your starting point when you
begin a trip so you can find your way back should you get disoriented.

12
Route – Plan routes on your Explore account in advance of your trip
and then follow them on your inReach device using Routes. View
the list of routes you’ve created on the device by pressing the Route
icon on the Home page. Select the route you would like to follow and
press Navigate to see bearing and distance information reported on
the Compass page and an orange route highlight displayed on the
Map page. You can also create a direct route to a saved waypoint
or a point picked from the map by viewing the details page for that
object. Navigation information for your selected route will also
appear on your MapShare web page for others to see.
Compass – Use the Compass page to view your current heading
or see the bearing to your destination when navigating. When
navigating, the info field also shows the distance to your destination.
Map – View the Map page to see all of your waypoints, track points,
and any messages you sent or received. Your track log appears as a
green line showing where you've traveled. Track points sent to your
MapShare web page appear as yellow icons. Planned routes appear
on the map along with a route highlight when you are navigating a
destination.
• Zooming – To zoom in, press Enter and then press the Up Arrow.
To zoom out, press the Down Arrow. Press Quit to return to your
GPS position.
• Panning – Press the Directional Pad to pan the map to a new
location. Press Quit to return to your GPS position.
• Selecting – Press Enter while panning to select an object from
the map and view details.
Track Points Sent
Track Points Logged

13inReach Explorer Quick Start Guide
Trip Info – See statistics for your travels including your average
moving speed and the distance that you’ve traveled by viewing the
Trip Info page. Trip Info statistics report details for all travel, whether
sending track details or not. Change the Logging Only interval in
Settings>Tracking to Off to only include statistics while sending.
Note: Before starting a new trip, press Reset to clear any old
information.
Weather – inReach Weather delivers forecasts directly to your
inReach. Request weather forecasts for your current location, for a
specific waypoint, or by manually entering waypoints. From the home
screen, select Weather, and then select New Location. Select either
Use My Location, Manually Enter Coordinates, or Select a Waypoint.
For information please visit inreachdelorme.com/weather.
Troubleshooting
If you have any issues during the inReach setup process, go online
from your computer to manuals.delorme.com for a full user’s
manual. Some helpful tips to remember:
• You must choose a satellite airtime plan and create an Explore
account online at explore.delorme.com before you can begin
using your device.
• Your inReach must be outside with a clear view of the sky to
send and receive messages or track your location.
• You don’t need to pair your inReach with a mobile device to use
it as a standalone device, but you must pair it in order to use
inReach with the Earthmate app.
• If you choose to pair your inReach with your mobile device, they
must be within Bluetooth range (32 feet or less) of each other.
• To reset your inReach device, simultaneously press X and the
Down Arrow for 10 seconds. Your device will turn off. Power it
back on to continue using it.
• Your inReach has a “Help” function built in. Select “Help” from
the main menu and search for solutions to common questions.
If you can’t find answers to your questions through the inReach
device help or the online user manual, visit support.delorme.com.

14
inReach Explorer Specifications
• GPS accuracy to +/- 5 meters
• Rugged, dustproof & impact-resistant (Mil-STD-810G for shock;
IP67 for dust)
• Water rating: IP67 - withstands incidental water exposure;
tested for submersion at 1 meter for 30 minutes. When using
inReach in saltwater environments, rinse device in fresh
water, including the area around the USB port and dust cover,
and allow to air dry before plugging it into a wall charger or a
computer. When using inReach in any water-based activity,
exceeding a depth of one meter or exposing the device to high
water pressure could cause damage to your device. Use caution
when entering the water or using the device in water that is
moving rapidly.
• Height (including antenna): 5.83 in (14.8 cm)
• Height (not including antenna): 4.5 in (11.4 cm)
• Width: 2.46 in (6.3 cm)
• Depth (including belt clip): 1.34 in (3.4 cm)
• Depth (not including belt clip): 1.04 in (2.6 cm)
• Weight: 6.7 oz (190 g)
• Operational temperature range: -4 F to 140 F (-20 C to +60 C)
• Storage temperature range: -40 F to 185 F (-40 C to +85 C)
• Battery charging temperature range: 32 F to 113 F (0 C to +45 C)
Note: For optimal battery life, DeLorme recommends that
devices are stored with a charge level between 40% to 60%
and temperatures between 32 F to 86 F (0 C to 30 C).
• Battery life and usage: 100 hours of battery life in 10-minute
tracking mode with a clear view to the sky.
This device includes an internal lithium polymer battery (2,450
mAh capacity at 3.7 V). For proper performance the battery must
be charged before use. The battery can be charged using the
micro-USB connector on the side of the device or using the power
pins on the back with an approved accessory.
Efficiency Level: V
Certifications
FCC compliance statement (United States)
This device complies with Part 15 of the FCC Rules. Operation is subject to the
following two conditions: (1) this device may not cause harmful interference,
and (2) this device must accept any interference received, including interference
that may cause undesired operation.
Changes and modifications not expressly approved by DeLorme Publishing can
void your authority to operate this equipment under Federal Communications
Commission’s rules.
RADIO AND TELEVISION INTERFERENCE
This equipment has been tested and found to comply with the limits for a Class
B digital device, pursuant to Part 15 of the FCC Rules. These limits are designed
to provide reasonable protection against harmful interference in a residential
installation. This equipment generates, uses and can radiate radio frequency
energy and, if not installed and used in accordance with the manufacturer’s
instructions, may cause interference harmful to radio communications. There
is no guarantee, however, that interference will not occur in a particular

15inReach Explorer Quick Start Guide
installation. If this equipment does cause harmful interference to radio or
television reception, which can be determined by turning the equipment off and
on, the user is encouraged to try to correct the interference by one or more of
the following measures:
• Reorient or relocate the receiving antenna.
• Increase the separation between the equipment and receiver.
• Connect the equipment to an outlet on a circuit different from that to
which the receiver is connected.
• Consult the dealer or an experienced radio/TV technician for help.
This device has been tested to meet FCC RF Exposure regulations. This device
is restricted to the belt-clip supplied with the product or holsters or belt clips
that maintain the same separation distance and contain no metallic component
in the assembly.
Industry Canada certification
This device complies with RSS-310 of Industry Canada. Operation is subject to
the condition that this device does not cause harmful interference.
This device has been tested to meet Industry Canada RF Exposure regulations.
This device is restricted to the belt-clip supplied with the product or holsters or
belt clips that maintain the same separation distance and contain no metallic
component in the assembly.
CAN ICES-3 (B)/NMB-3(B)
EU Regulatory Conformance
DeLorme hereby declares that this inReach device is in compliance with the
essential requirements and other relevant provisions of Directive 1999/5/EC,
Directive 2002/95/EC, and Directive 2002/96/EC. The Declaration of Conformity
made under Directive 1999/5/EC (HG nr.88/2003) is available for viewing at the
following location in the EU community: manuals.delorme.com.
inReach Explorer Limited Warranty
inReach warrants that your inReach Explorer will be free from defects in
materials and workmanship for one year from the date of purchase. If your
inReach fails in normal use during the one year warranty period, inReach will
either repair or replace the unit at inReach's sole discretion. Such repairs or
replacements will be made at no charge for labor, materials or shipping if within
the United States. Additional charges will apply for expedited or International
shipping.
Any repaired or replaced product will be warranted for ninety (90) days from the
date of return shipment, or for the balance of the original warranty, whichever is
longer. This warranty does not cover failures due to abuse, misuse, accidents, or
unauthorized disassembly or modification. Any evidence of tampering with the
devices will void the warranty.
inReach DISCLAIMS ANY LIABILITY FOR ANY SPECIAL, INDIRECT, INCIDENTAL,
OR CONSEQUENTIAL DAMAGES, INCLUDING, BUT NOT LIMITED TO, LOSS
OF REVENUES OR PROFITS, EVEN IF inReach HAS BEEN ADVISED OF THE
POSSIBILITY OF SUCH DAMAGES. THIS LIMITED WARRANTY CONTAINED
HEREIN IS IN LIEU OF ALL OTHER EXPRESS WARRANTIES. ANY AND
ALL IMPLIED WARRANTIES, INCLUDING ANY IMPLIED WARRANTIES OF
MERCHANTABILITY OR OF FITNESS FOR A PARTICULAR PURPOSE, SHALL LAST
FOR ONE YEAR.
This warranty gives you specific legal rights and you may also have other rights
which vary by jurisdiction. Some states do not allow the exclusion or limitation
of relief such as incidental or consequential damages, or limitations on how long
an implied warranty lasts, so the above limitations or exclusions may not apply
to you. This warranty applies to the original purchaser of the product ONLY.
REMINDER: Be sure to retain the sales receipt proving the date of your original

16
purchase. This will be needed if warranty service is ever required. inReach
reserves the right to refuse warranty if a receipt is not provided or if the receipt
is incomplete/illegible.
Before you return a product, you must contact inReach Suppot at
contact.delorme.com to obtain an RMA number and return shipping label.
For the latest warranty and repair information, visit support.delorme.com.
inReach Customer Service and Support
United States and E.U.
Please login to your account at explore.delorme.com to activate
your device, review invoices, change your plan, suspend or cancel
service.
Customer Service
Please visit: contact.delorme.com
Phone: 800-511-2459
(outside the U.S. call +1 207-847-1165)
Tech Support
Please visit: contact.delorme.com
Phone: 207-846-8900
DeLorme Customer Care is available Monday – Friday,
9:00 a.m.– 6:00 p.m. Eastern Time (U.S.).
Canada
Find information on rate plans, activations, general information, and
support at inreachcanada.com.
Customer Service
inreachcare@roadpost.com
Call Customer Service or Tech Support
Monday – Friday, 9:00 a.m.– 6:00 p.m. Eastern Time (Canada).
Phone: 800-337-3155
Tech Support
inreachtech@roadpost.com
Page is loading ...
Page is loading ...
Page is loading ...
Page is loading ...
Page is loading ...
Page is loading ...
Page is loading ...
Page is loading ...
Page is loading ...
Page is loading ...
Page is loading ...
Page is loading ...
Page is loading ...
Page is loading ...
Page is loading ...
Page is loading ...
Page is loading ...

View destination, distance remaining and bearing, including useful
trip statistics while in the eld, such as trip time, max speed,
moving average, trip distance, and an odometer.
Create or view a route, drop waypoints, see your tracks, and navigate
with the on-screen map view.
COMMUNICATE & NAVIGATE ANYWHERE IN THE WORLD.
Send and receive 160-character text messages with GPS
coordinates to cell phone numbers or email addresses worldwide and
post updates to Facebook and Twitter, all from one device.
*
Adjust tracking intervals to track your trip and share your location, including
GPS coordinates, course, elevation and speed. Record and store more
frequent tracking data on inReach to create a high detail breadcrumb trail.
Trigger an SOS in case of an emergency and communicate back
and forth with our 24/7 search and rescue monitoring center.
*Email, SOS and tracking functions work anywhere in the world; SMS availability may vary by country.
inreachdelorme.com
For more information, visit
BC
/