Page is loading ...

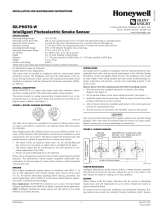
2D51 Photoelectric Smoke Detector
FOR USE WITH INNOVAIRFLEX 4-WIRE DUCT SMOKE DETECTOR
HOUSINGS OR PENDANT MOUNT APPLICATIONS
INSTALLATION AND MAINTENANCE INSTRUCTIONS
3825 Ohio Avenue, St. Charles, Illinois 60174
1-800-SENSOR2, FAX: 630-377-6495
www.systemsensor.com
BEFORE INSTALLING
Please thoroughly read System Sensor’s Applications Guide for System Smoke
Detectors (SPAG91), which provides detailed information on detector spacing,
placement, zoning, wiring, and special applications. This manual is available
online at www.systemsensor.com.
NOTICE: This manual should be left with the owner/user of this equipment.
IMPORTANT: The detector must be tested and maintained regularly following
NFPA 72 requirements. The detector should be cleaned at least once a year.
GENERAL DESCRIPTION
The 2D51 photoelectronic detector uses a state-of-the-art optical sensing
chamber. This detector is designed to provide protection in duct applications
when installed with an Innovair Flex 4-wire duct smoke detector housing and
to be used with compatible UL listed control panels only.
The 2D51 can also be used in pendant mount applications when installed with
a B210LP or B501 base and D4P120 power board components.
Two LEDs on each detector provide local visible alarm indication. They flash
every five seconds indicating that power is applied and the detector is working
properly. The LEDs latch on in alarm. LEDs will be off when a trouble condi-
tion exists indicating that the detector sensitivity is outside the listed limit.
See applicable Innovair Flex duct smoke detector installation manual for more
information.. The alarm can be reset by a momentary power interruption,
test/reset button, or remote test accessory with reset function. This detector
may be tested by activating the internal reed switch with a magnet, test/reset
button, or remote test accessory.
INSTALLATION
NOTE: All wiring must conform to applicable local codes, ordinances, and
regulations.
WARNING
Remove power from initiating-device circuits before installing detectors.
1. Install detectors:
a. Place the detector into the detector base.
b. Turn the detector clockwise until the detector drops into place.
c. Continue turning detector clockwise to lock it in place.
2. After all detectors have been installed, apply power to the control unit.
3. Test the detector using the test/reset button or magnet as described
under TESTING
4. Reset the detector at the system control panel or on power board.
5. Notify the proper authorities that the system is back on line.
CAUTION
Dust covers are an effective way to limit the entry of dust into smoke detector sens-
ing chambers. However, they may not completely prevent airborne dust particles
from entering the detector. Therefore, System Sensor recommends the removal
of detectors before beginning construction or other dust producing activity.
Be sure to remove the dust covers from any sensors that were left in place dur-
ing construction as part of returning the system to service.
TESTING
Before testing, notify the proper authorities that the smoke detector system
is undergoing maintenance and will temporarily be out of service. Detectors
SPECIFICATIONS
Height: 2.0 in
Diameter: 4.1 in; 6.1 in
Weight: 3.1 oz. (88 g)
Operating Temperature Range: –20°C to 70°C (–4°F to 158°F)
Operating Humidity Range: 0% to 95% Relative Humidity Non-condensing
must be tested after installation and as part of periodic maintenance. Test the
2D51 as follows:
NOTE: Before testing the detector, check to ensure the the power board LEDs
blink. If they do not, the detector may not have power or may not be installed
properly (check the wiring), if it is defective, or the detector sensitivity is out-
side the listed limits return it for repair.
ALARM TESTS
1a. Test/Reset Button - Press and hold the test button located on the power
board cover for at least 2 seconds.
OR
1b. M02-04-00 Magnet Test - Place the painted surface of the magnet onto
the MAGNET TEST location on the sensor cover or the duct smoke
detector (Figure 1).
2. The red alarm LED on the sensor and the power board should latch on,
as should any accessories (i.e. RA100Z, RTS151). Verify system control
panel alarm status and control panel execution of all intended auxiliary
functions (i.e fan shutdown, damper control, etc.).
3. The detector must be reset by the system control panel, front cover Test/
Reset button, or remote accessory.
4. To reset using the Test/Reset button on the power board cover simply
press and release.
SMOKE RESPONSE TESTS
To determine if smoke is capable of entering the sensing chamber, visually
identify any obstructions. Plug the exhaust and sampling tube holes to pre-
vent ducted air from carrying smoke away from the detector head, then blow
smoke such as cigarette, cotton wick, or punk directly at the head to cause
an alarm. REMEMBER TO REMOVE THE PLUGS AFTER THIS TEST, OR THE
DETECTOR WILL NOT FUNCTION PROPERLY.
SMOKE ENTRY USING AEROSOL SMOKE
This test is intended for low-flow systems (100-500 FPM). If the air speed is
greater than 500 FPM, use a conventional manometer to measure differential
pressure between the sampling tubes, as described per the installation manual
provided with the duct smoke detector.
Drill a
1
⁄4 inch hole 3 feet upstream from the duct smoke detector. With the air
handler on, measure the air velocity with an anemometer. Air speed must be
at least 100 FPM. Spray aerosol smoke* into the duct through the
1
⁄4 inch hole
for five seconds. Wait two minutes for the duct smoke detector to alarm. If the
duct smoke detector alarms, air is flowing through the detector. Remove the
duct smoke detector cover and blow out the residual aerosol smoke from the
chamber and reset the duct smoke detector. Use duct tape to seal the aerosol
smoke entry hole.
*Aerosol smoke can be purchased from Home Safeguard Industries at home-
safeguard.com, model 25S Smoke Detector Tester, and Chekkit Smoke De-
tector Tester model CHEK02 and CHEK06 available from SDi. When used
properly, the canned smoke agent will cause the smoke detector to go into
alarm. Refer to the manufacturer’s published instructions for proper use of the
canned smoke agent.
CAUTION
Canned aerosol simulated smoke (canned smoke agent) formulas will vary by
manufacturer. Misuse or overuse to these products may have long term adverse
effects on the smoke detector. Consult the canned smoke agent manufacturer’s
published instructions for any further warnings or caution statements.
I56-3140-004R
1 I56-3140-004R
06-10

SENSITIVITY VERIFICATION
The sensitivity of the sensor is confirmed to be operating within its allowable
range each time the sensor and power board LEDs blink green every 5 sec-
onds. Note in a maintenance condition the sensor LEDs will blink red every 5
seconds and power board will blink amber. The maintenance condition indi-
cates that the sensor is operating outside its original factory preset sensitivity
and shall be cleaned or replaced. This is a valid UL test.
Notify the proper authorities that the system is back on line.
Detectors that fail these tests should be cleaned as described below and re-
tested. If the detectors still fail these tests, they should be returned for repair.
MAINTENANCE OF DUCT SMOKE DETECTORS
Duct smoke detector should be tested and inspected in accordance with NFPA
72 recommendations. Detectors should be tested annually and visually in-
spected semiannually. It may be necessary to clean or maintain duct smoke
detectors more frequently based on indoor air quality conditions.
If any unitary packaged air conditioning units are run during the drywall in-
stallation phase of any building under construction to accelerate the drying of
joint compound, the subsequent sanding of those drywall joints and resulting
dust may compromise the sensor heads in duct smoke detectors.
The 2D51 sensor head in 4-wire InnovairFlex duct smoke detectors may exhibit
a “maintenance” condition that will require cleaning of the sensing chambers
on the sensor head or replacement of the sensor head. The “maintenance”
condition is indicated at the fire alarm panel if present or on the sensor or
power board of the duct smoke detector (the sensor LED will blink “red” every
five seconds and the power board LED will blink “amber every five seconds).
To avoid this condition, it is recommended that the sensor heads be removed
during the construction phase and replaced once construction is completed
and the Certificate of Occupancy is issued. The sensor heads twist out for
removal and twist in for insertion.
CLEANING
Before removing the detector, notify the proper authorities that the smoke
detector system is undergoing maintenance and will be temporarily out of
service. Disable the zone or system undergoing maintenance to prevent un-
wanted alarms. If the sensor heads are not removed during the construction
phase and the senor chamber becomes dirty causing a maintenance condition
(it will not always be visible on the exterior black screen on the sensor head),
the sensor head must be cleaned with compressed air. To clean the sensor
head chamber, follow the following step-by-step instructions:
1. Remove the sensor to be cleaned from the system.
2. Remove the sensor cover by pressing firmly on each of the four removal
tabs that hold the cover in place.
3. Vacuum the screen carefully without removing it.
4. Remove the chamber cover/screen assembly by pulling it straight out.
5. Use a vacuum cleaner or compressed air to remove dust and debris from
the sensing chamber.
FIGURE 1. CO-LOCATED INNOVAIR FLEX DUCT SMOKE DETECTOR:
SENSOR UNIT
TEST MAGNET
POSITION
LED STATUS INDICATORS
POWER BOARD UNIT
TEST/RESET BUTTON
H0614-00
6. Reinstall the chamber cover/screen assembly by sliding the edge over the
sensing chamber. Turn until it is firmly in place.
7. Replace the cover using the LEDs to align the cover and then gently
pushing it until it locks into place.
8. Reinstall the detector.
REINSTALLATION
1. Reinstall the detector in its housing.
2. Restore system power.
3. Perform Detector Check.
4. Notify the proper authorities testing has been completed and the smoke
detector system is back in operation.
NOTE: Verify sensor cover gasket is properly seated on cover prior to cover
installation. Refer to applicable Innovair Flex duct smoke detector installation
manual for more information.
NOTE: If excessive dust is found in the detector housing and/or sampling
tubes they should also be cleaned with a vacuum cleaner or compressed air.
FIGURE 2:
SENSOR
COVER
SENSING
CHAMBER
COVER
AND
SCREEN
SENSOR
CHAMBER
COVER
REMOVAL
TABS
C1009-00
2 I56-3140-004R
06-10

PENDANT MOUNT APPLICATION
The 2D51 can also be used as a pendant mount detector for use in no-flow/
low-flow air-handling systems (0-4000 fpm). The pendant mounted 2D51 is to
be installed into a B210LP or B501 base and wired to a D4P120 power board
only control unit. The D4P120 power board is capable of controlling up to (2)
2D51 sensors.
INSTALLATION/WIRING
The B210LP or B501 base(s) can be wired to the D4P120 power board per the
following:
1. Install a jumper wire across the sensor #1 (Y,Y) Tamper terminals as
shown in Figure 3 of the power board.
2. Connect wires to Terminals 1 and 2 of the base. Route wires through the
conduit openings in the D4P120 power board housing. NOTE: Terminal 3
on base is unused.
3. Connect the opposing end of the wires to the terminal connections
marked “SENSOR 1” on the power board. See Figure 3 for Reference.
Ensure that wires are connected to the appropriate terminal locations. A
No. 0 or 1 phillips screwdriver should be used for terminal connection.
If a second sensor is to be installed repeat steps 1-3 while substituting SEN-
SOR 2 in all references. In addition, adjust the middle Dip switch on the pow-
erboard to indicate (2) sensors as shown in Figure 3.
3 2 1
Y Y R B
+ –
TAMPER
+ –
SENSOR 1
D4P120
FIELD INSTALLED
JUMPER WIRE
B501/B210LP
B501/B210LP
FIELD SELECTABLE
DIP SWITCHES
TEST/RESET
BUTTON
GROUND
SCREW
SENSOR #1
TERMINALS
24V AC/DC, 10
24V AC/DC, 9
AUX OUT +, 19
AUX OUT -, 20
INT/AUX-, 1
INT+, 12
ALARM, 15
R TEST, 11
R RESET, 2
ACC -
ACC +
120 VAC
B
-
R
+
YY
B
-
R
+
Y
Y
TAMPER
TAMPER
SENSOR 1SENSOR 2
OFF/ON TRBL SHUTDN
1/2 SENSORS
7/0 MIN TMPR DELAY
7, NO
18, C
AUX B
8, NC
17, NO
AUX A
6, C
16, NC
14, N0
3, C
13, NC
5, NO
SUPALARM
4, C
SENSOR #2
TERMINALS
POWER
BOARD LED 1
POWER
BOARD LED 2
120
VAC INPUT
24 VAC/
DC INPUT
3
2
1
BASE
TERMINAL 3
BASE
TERMINAL 2
BASE
TERMINAL 1
TAMPER PROOF
TAB
FIGURE 3: WIRING OF BASE TO D4P120
H0577-11
3 I56-3140-004R
06-10

System Sensor warrants its enclosed smoke detector to be free from defects in materials
and workmanship under normal use and service for a period of three years from date
of manufacture. System Sensor makes no other express warranty for this smoke detec
-
tor. No agent, representative, dealer, or employee of the Company has the authority to
increase or alter the obligations or limitations of this Warranty. The Company’s obligation
of this Warranty shall be limited to the repair or replacement of any part of the smoke
detector which is found to be defective in materials or workmanship under normal use
and service during the three year period commencing with the date of manufacture.
After phoning System Sensor’s toll free number 800-SENSOR2 (736-7672) for a Return
Authorization number, send defective units postage prepaid to: Honeywell, 12220 Rojas
THREE-YEAR LIMITED WARRANTY
Drive, Suite 700, El Paso TX 79936, USA. Please include a note describing the malfunc-
tion and suspected cause of failure. The Company shall not be obligated to repair or
replace units which are found to be defective because of damage, unreasonable use,
modifications, or alterations occurring after the date of manufacture. In no case shall the
Company be liable for any consequential or incidental damages for breach of this or any
other Warranty, expressed or implied whatsoever, even if the loss or damage is caused by
the Company’s negligence or fault. Some states do not allow the exclusion or limitation of
incidental or consequential damages, so the above limitation or exclusion may not apply
to you. This Warranty gives you specific legal rights, and you may also have other rights
which vary from state to state.
Please refer to insert for the Limitations of Fire Alarm Systems
4 I56-3140-004R
©2016 System Sensor. 06-10
/