Page is loading ...

DreamMatePro Instruction Manual

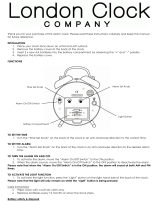
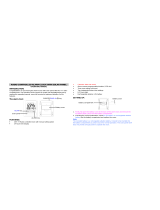
Words in the figure:
Figure 1:
ENGLISH
OTHER LANGUAGE
FRONT VIEW
DCF ICON
TIME
SLEEP ON
ALARM TIME
ALARM ON
TOP VIEW
PROJECTOR
ALARM ON-OFF
DOWN/ WAVE
SNOOZE/ DIMMER
UP
SLEEP
SET
PROJECTION
BACK VIEW
RESET
4.5V DC SOCKET
4.5V 200MA AC/DC ADAPTOR
BOTTOM VIEW
ROTARY KNOB OF
PROJECTOR
INSERT AC/DC ADAPTOR
JACK
BATTERY DOOR
REMOTE CONTROL OF
SLEEP FUNCTION
Thank you for your purchase of this radio controlled projection alarm clock. Please read these
instructions carefully and keep the manual well for future reference.
General information
Problems getting asleep can lead to a severe psychological strain of affected people. The thoughts of having to necessarily go to
sleep, to meet the requirements of the next day, create even a higher psychological pressure that prevents falling asleep. It's a
circle that it needs to be broken. Because there are also many other causes of a sleep disorder, you should not miss to see a
doctor to clarify the reasons. In particular, if the sleep disorder lasts several weeks. Very often organic or psychological disorders
are diagnosed and the sleep problems disappear after their medical treatment and healing.
By many researchers who deal with sleep disorders, attention is drawn again and again to certain rules for a reasonable sleep
hygiene. This includes the design of the sleeping environment and the daily routine, the natural sleep-wake cycle and the
behavioral recommendations for the night. If you have difficulties falling asleep, please take the following precautions.
• Don’t drink caffeinated drinks such as coffee, black tea or cola after lunch
• Never use alcohol as a sleep aid
• Avoid the use of appetite suppressants
• Do not eat heavy meals in the evening
• Decrease your mental and physical exertion before bedtime
• Ensure a pleasant atmosphere in the bedroom
• Ventilate the bedroom well
• Only go to bed when you are tired
• Use the bed only for sleeping and not for reading, drinking, smoking or watching television
• Get up every morning at the same time
• Do not sleep during the day
It proves to be particularly efficient to set up a personal ritual. What this means is to do the same actions just before bedtime.
Examples for this are
• Drink a cup of tea or milk with honey
• Apply cream on a certain part of the body (eg the face)
• Apply an aromatic oil on your cheeks
• Breathe 10 times in and out deeply in front of the open window
Now use the use the Dream Mate. The principle is very simple. By being forced to focus on the device and to react with a remote

control, your thoughts are directed in a certain direction. Other thoughts are stopped and pondering about unresolved conflicts is
interrupted.
Setting up the device
The device projects lines with a random timing on the ceiling or a wall. Place the projector so you can have a good look on the
projection in your sleep position. At best you should look over the tip of your nose, so you don’t have to open your eyes too wide.
Start of the sleep cycle
Before you reduce or turn off the room lights, please take the remote control in your hand and check where the control key is
located. Now take your sleep position. If you just press the button once now, the time how long the timer should run appears in the
display. The default is 1 minute. If you prefer a longer period of time, press the button repeatedly until the time starts to flash.
Then increase the interval in 1-minute increments (for detailed information see “To use the sleep function”). When you are finished,
wait until the flashing stops. Now the countdown starts. You can follow the first few seconds on the display. Then projection
changes to lines and you need to continue to count the seconds in your head. If you think the set time is up, press the button again.
Now you see if you were right. If you should have significantly miscalculated the time, try it again. You will gradually achieve better
results.
You will notice that your eyelids will become heavy. If you feel the need to sleep now, allow yourself to do so. Do not think about
anything else but the numbers. If you find yourself that your mind wanders away, immediately open your eyes again and start a
new sleep cycle. Do not let your brain begin to brood over any problems! Concentrate only on your sleep cycle and the numbers.
End of the sleep cycle
The sleep cycle will stop if have not pressed on the remote button for a long time. The unit will return to normal time display or
projection.
INSTALLATION
Plug in the AC/DC adaptor and then plug the DC jack to the lower left back of the unit. Your unit is ready to work for you.
DC BATTERY INSTALLATION
Your clock requires 3 x new AAA batteries (not included) to provide backup power to it in the event of a temporary power
interruption.
1. Place your unit face down on a flat surface.
2. Remove the battery cover at the back of your unit.
3. Insert 3 x new AAA batteries into the battery compartment by observing the correct “+” and “-“ polarity.
4. Replace the battery cover.
At DC battery mode, the unit can work normally except project function. The DC battery will keep the time and all settings of your
unit. Make sure new AAA batteries are used.
DCF SIGNAL RECEPTION AND SIGNAL INDICATOR
After your clock is powered up, it starts to receive DCF signal. The icon flashes.
Weak or no DCF signal (only icon flashing)
Receiving strong DCF signal ( icon flashing)
Successful Reception ( icon becomes static)
Failed Reception ( icon disappear)
Remark: when your clock is receiving radio controlled time signal, all buttons except the SNOOZE / DIMMER button do not
function.
DCF TIME SIGNAL RECEPTION
Your clock will automatically update itself to the exact time after receipt of the DCF time code. The clock starts automatic reception
everyday at 1:00, 2:00, and 3:00. If it fails to receive the DCF signal at 3:00, it will start reception at 4:00. If it fails again, it will start
reception at 5:00. If it fails again, it will start automatic reception at 1:00 again in the next day.
To start DCF reception manually, press WAVE button for 3 seconds. To stop DCF reception, press and hold WAVE for 3
seconds.
TO SET TIME, 12/24 HR TIME AND SNOOZE DURATION
1. Press and hold SET, 24hr flash, press or to select 24hr 12hr. In 12-hour mode, PM will appear on the
display to indicate afternoon time. There is no AM indicator.
2. Press SET once again, the time digits change to “00”. Press or to set the time zone.
-01 GMT 00 hour (e.g. UK)
00 GMT + 1 hour (e.g. Germany)
01 GMT + 2 hour (e.g. Finland)

3. Press SET once again, the hour digits flash. Press or to set the hours. Press and hold or will
accelerate setting in fast speed.
4. Press SET once again, the minute digits flash. Press or to set the minutes. Press and hold or will
accelerate setting in fast speed.
5. Press SET once again, 05 flash and SN appears. Press or to set snooze duration (from 5 min to 60 min.)
6. Press SET again or if no key pressed for approx. 10 seconds to exit the setting mode.
TO SET ALARM
1. Press and hold ALM ON-OFF until the hour digit flash. Then press or to set alarm hours. Press and hold
or to accelerate setting in fast speed. PM will appear on the display to indicate afternoon time. There is no AM
indicator.
2. Press ALM ON-OFF once again, alarm minute digits flash. Then press or to set alarm minutes.
3. Press ALM ON-OFF once again or if no key pressed for approx. 10 seconds to exit the Alarm setting mode.
4. After setting the alarm it is activated automatically. The symbol will appear, when the alarm is
activated.
TO TURN THE ALARM ON OR OFF
1. At normal time display, when the alarm is deactivated, press ALM ON-OFF once to activate the alarm and the symbol
appears.
2. Press ALM ON-OFF once again to deactivate Alarm and disappears.
TO STOP THE ALARM AND REPEAT ON THE NEXT DAY
When alarm is sounding, the alarm icon flashes. Press any button except SNOOZE / DIMMER or PROJECTION once to stop the
alarm and reset it to come on the following day. After that remains on the display.
TO ACTIVATE THE SNOOZE FUNCTION (default snooze duration is 5 minutes)
When alarm is sounding, press SNOOZE/ DIMMER once, the alarm will be silenced and keeps flashing, alarm come on
again after the set snooze duration.
Remarks: if only use the batteries, press SNOOZE/ DIMMER once to activate the backlight for 5 seconds.
TO USE THE SLEEP FUNCTION
Please note the instructions and further explanations from the introduction - in the beginning of the manual - to use the
sleep function effectively!
1. Simply press SLEEP on the unit or on the remote once to active the sleep function.
2. The countdown time appears “01” (1 minute is default time).
3. Press the SLEEP or the remote button repeatedly to increase the countdown time up to “06” minutes (320 seconds), when “06”
is reached and the SLEEP button or remote button is pressed once again the countdown time returns to “01”. If no button is
pressed for 3 seconds the countdown starts.
4. The countdown starts and is displayed / projected in seconds. After 4 seconds the display changes to segment display. The
timing the segments appear is random.

The segments will count down in a loop pattern approximately as below :-
5. Try to countdown the set time in your mind. When you think the time is up, press SLEEP on the unit or the remote button. Try to
hit the set time as good as possible. Now the clock will display one of the results below, depending on when the button was
pressed.
6. After 10 minutes or by pressing by pressing SLEEP on the unit or remote button, the clock returns to normal time display.
Repeat by pressing SLEEP on the unit or remote button again.
TO ADJUST DISPLAY BRIGHTNESS
Press SNOOZE/ DIMMER repeatedly to select brightness of the display Bright => Low => Off => Bright.
This can only be done when the adapter is being used.
TO USE THE PROJECTION (operated by adaptor only)
1. Press PROJECTION once to turn on the projection.
2. Press PROJECTION once again to turn off the projection
3. When the projection is turned on, press and hold PROJECTION to flip the projected image upside down.
4. At the bottom of your unit, use the rotary knob to rotate the projected image by 90 degree.
Remark: when the clock is running the SLEEP function, the segment counting will be displayed and projected
at the same time.
REPLACING THE BATTERY OF THE REMOTE
Press down the latch on the remote, then open up the front and back case. Replace the lithium battery with a fresh one, make sure
the + polarity is facing up. Replace the front and back cases.

TROUBLE SHOOTING
If your clock displays irrelevant time or does not function properly, which maybe caused by electro-static discharge or other
interference. Use a sharp object to press the reset button at the back of your unit once.
Your unit will be reset to default settings and you need to set it again.
Environmental reception effects
The clock obtains the accurate time with wireless technology. Same as all wireless devices, the reception is maybe affected by the
following circumstances:
• long transmitting distance
• nearby mountains and valleys
• near freeway, railway, airports, high voltage cable etc.
• near construction site
• among tall buildings
• inside concrete buildings
• near electrical appliances (computers, TV’s, etc) and metallic structures
• inside moving vehicles
Place the clock at a location with optimal signal, i.e. close to a window and away from metal surfaces or electrical appliances.
Precautions
• This main unit is intended to be used only indoors.
• Do not subject the unit to excessive force or shock.
• Do not expose the unit to extreme temperatures, direct sunlight, dust or humidity.
• Do not immerse in water.
• Avoid contact with any corrosive materials.
• Do not dispose this unit in a fire as it may explode.
• Do not open the inner back case or tamper with any components of this unit.
Batteries safety warnings
• Use only alkaline batteries, not rechargeable batteries.
• Install batteries correctly by matching the polarities (+/-).
• Always replace a complete set of batteries.
• Never mix used and new batteries.
• Remove exhausted batteries immediately.
• Remove batteries when not in use.
• Do not recharge and do not dispose of batteries in fire as the batteries may explode.
• Ensure batteries are stored away from metal objects as contact may cause a short circuit.
• Avoid exposing batteries to extreme temperature or humidity or direct sunlight.
• Keep all batteries out of reach from children. They are a choking hazard.
GENERAL SPECIFICATIONS
Alarm duration 2 minutes
Snooze duration 5 to 60 minutes
Default settings:-
Alarm 6:00 (AM) (default)
Snooze duration 05 (5 minutes) (default)
Transmission Frequency 433Mhz
Transmission Distance 10 meters (open air transmission with no obstructions)
Battery of remote 1 x CR2032 (included)
Backup battery of main unit 3 x AAA (not included)

Environmental Protection
Consideration of duty according to the battery law
Old batteries do not belong to domestic waste because they could cause damages of health and environment. You can return
used batteries free of charge to your dealer and collection points. As end-user you are committed by law to bring back needed
batteries to distributors and other collecting points!
Consideration of duty according to the law of electrical devices
This symbol means that you must dispose of electrical devices separated from the General household waste when it reaches the
end of its useful life. Take your unit to your local waste collection point or recycling centre. This applies to all countries of the
European Union, and to other European countries with a separate waste collection system.
/


