Technoline WT 189 User manual

Category
Table clocks
Type
User manual

Technoline WT 189: A Comprehensive Digital Clock with Radio-Controlled Precision

The Technoline WT 189 is an advanced digital clock designed to provide accurate timekeeping, weather information, and alarm functionality. Equipped with radio-controlled technology, it automatically synchronizes with the official time signal, ensuring precise timekeeping without manual adjustments.

Key Features:

  • Radio-controlled clock: Automatically sets and updates time based on official time signal.

  • Manual time setting: Allows for manual time adjustment when radio signal is unavailable.

  • 12/24-hour display: Choose between 12-hour or 24-hour time formats.

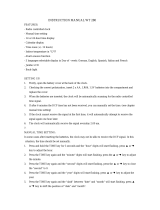
INSTRUCTION MANUAL WT189
FEATURES:
- Radio controlled clock
- Manual time setting
- 12-or 24-hour time display
- Calendar display
- Time zone (+/- 12 hours)
- Indoor temperature in °C/°F
- Alarm snooze function
- 5 languages selectable display in Day-of week: German, English, Spanish, Italian and French
- Jumbo LCD
- Back-light
SETTING UP:
1. Firstly, open the battery cover at the back of the clock.
2. Checking the correct polarization, insert 2 x AAA, LR3, 1.5V batteries into the compartment and
replace the cover.
3. When the batteries are inserted, the clock will be automatically scanning for the radio controlled
time signal.
4. If after 6 minutes the DCF time has not been received, you can manually set the time. (see chapter
manual time setting)
5. If the clock cannot receive the signal at the first time, it will automatically attempt to receive the
signal again one hour later.
6. The clock will automatically receive the signal everyday 2.00 am.
7. When the clock is scanning for signal, only the WAVE key is operational.
MANUAL TIMETING:
In some cases after inserting the batteries, the clock may not be able to receive the DCF signal. In this
situation, the time should be set manually.
1. Press and hold the TIME key for 3 seconds and the hour digits will start flashing, press or
key to adjust the hour.
2. Press the TIME key again and the minute digits will start flashing, press the or key to
adjust the minute.
3. Press the TIME key again and the second digits will start flashing, press the or key to clear
the second to 0.
4. Press the TIME key again and the year digits will start flashing, press or key to adjust the
year.
5. Press the TIME key again and the dash between date and month will start flashing, press
or key to shift the position of date and month.
6. Press the TIME key again and the month digits will start flashing, press the or key to
adjust the month.
7. Press the TIME key again and the date digits will start flashing, press the or key to adjust
the date.
8. Press the TIME key again and then press the or key to set the time zone, e.g. when the
country time is faster than DCF time for 1 hour, the zone should be set to +1.
9. Press the TIME key again and then press the or key to choose the language for the Day of
week.
10. Press the TIME key again to return to normal display.
ALARMTING:
1. Press the ALARM key.
2. Press and hold the ALARM key for 3 seconds and the minute digits of alarm time will start
flashing, press or key to adjust the minute.
3. Press the ALARM key again and the hour digits of alarm time will start flashing, press or
key to adjust the hour.
4. Press the ALARM key again to return to alarm time display.
5. Press the ALARM ON/OFF key once to activate alarm on function and twice to activate snooze
function. Press the ALARM ON/OFF key once more, the alarm on function will be inactivated.
6. Press TIME key to return to normal display mode.
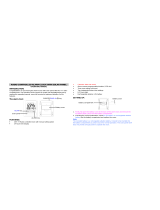
FUNCTION KEYS
SNOOZE/LIGHT KEY
-When the snooze alarm beeps, press the SNOOZE/LIGHT key to pause the alarm for 5 minutes and
the snooze function can be used repeatedly.
To stop snooze function, just press other keys once.
-Press the SNOOZE/LIGHT key to illuminate the LCD for 3 seconds.
C/F KEY
-In normal time display, press the C/F key to toggle between Celsius and Fahrenheit temperature
readings.
12/24 KEY
-In normal time display, press the 12/24 key to toggle between 12h and 24h display.
WAVE KEY
-In normal time display, press and hold the WAVE key for 3 seconds to activate the DCF scanning
function.
-If the clock is scanning for the DCF signal, press the WAVE key once to inactivate the DCF scanning
function.
Consideration of duty according to the battery law
Old batteries don’t belong to domestic waste because they could cause damages of health
and environment. End-user are committed by law to bring back needed batteries to distributors
and other collecting points.
  • Page 1 1
  • Page 2 2
  • Page 3 3

Technoline WT 189 User manual

Category
Table clocks
Type
User manual

Technoline WT 189: A Comprehensive Digital Clock with Radio-Controlled Precision

The Technoline WT 189 is an advanced digital clock designed to provide accurate timekeeping, weather information, and alarm functionality. Equipped with radio-controlled technology, it automatically synchronizes with the official time signal, ensuring precise timekeeping without manual adjustments.

Key Features:

  • Radio-controlled clock: Automatically sets and updates time based on official time signal.

  • Manual time setting: Allows for manual time adjustment when radio signal is unavailable.

  • 12/24-hour display: Choose between 12-hour or 24-hour time formats.

Ask a question and I''ll find the answer in the document

Finding information in a document is now easier with AI