Page is loading ...

EN
1
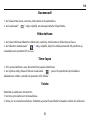
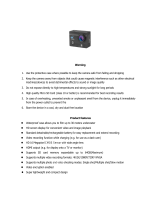
Warning
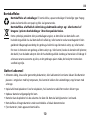
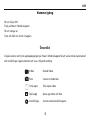
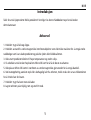
Introduction
1. Keep it safe from falling and dropping.
2. Keep it distance from any strong magnetic interference objects like electrical machines to avoid strong
radio waves that might be damaging the product and affect the sound or image quality.
3. Don’t expose the product directly to high temperatures and strong sunlight.
4. We recommend using high quality Micro SD Cards for the best results.
5. Don’t place your Micro SD card near strong magnetic objects to avoid data error.
6. In case of overheating, unwanted smoke or unpleasant smell from the device, unplug it immediately f
rom the power outlet to prevent hazardous fire.
7. Keep it safety from children while on charging.
8. Stored the device in a cool, dry and dust free location.
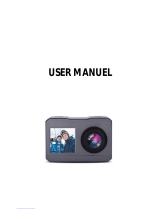
Thank you for purchasing this Rollei product! Please read this manual carefully before using this camera.

EN
2
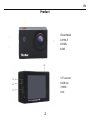
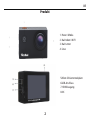
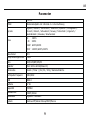
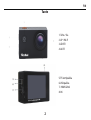
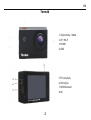
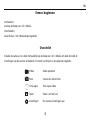
Product
5.TF card slot
6.USB slot
7.HDMI
8.OK
1.Power/Mode
2.UP/WI-FI
3.DOWN
4.LENS

EN
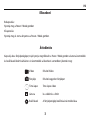
3
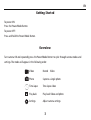
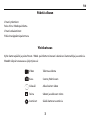
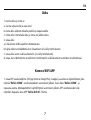
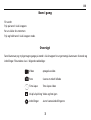
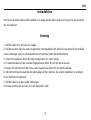
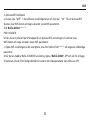
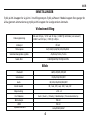
Getting Started
To power ON:
Press the Power/Mode Button.
To power OFF:
Press and hold the Power/Mode Button.
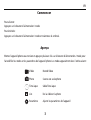
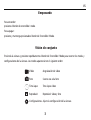
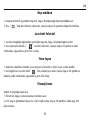
Overview
Turn camera ON and repeatedly press the Power/Mode Button to cycle through camera modes and
settings. The modes will appear in the following order:
Video Record Video
Capture a single photoPhoto
Time-lapse videoTime-lapse
Play back Video and photoPlay back
Adjust camera settingsSettings

EN
4
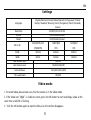
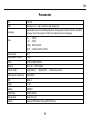
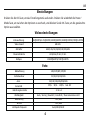
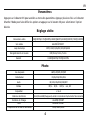
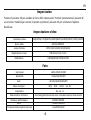
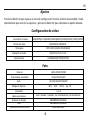
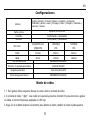
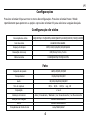
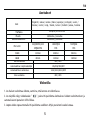
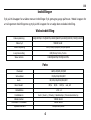
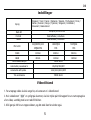
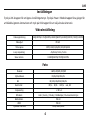
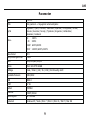
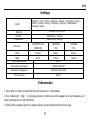
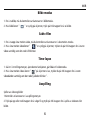
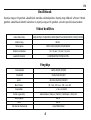
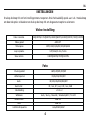
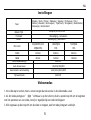
Video setting
Press the OK Button to enter the settings menu. Press the Power/Mode Button repeatedly to cycle through
the options and press the OK Button to select desired option.
Photo
Video Resolution 4K@30FPS/2.7K@30FPS/1080P@60FPS/1080P@30FPS/720P@120FPS
Video
sound ON/OFF
Time-lapse OFF/0.5S/1S/2S/5S/10S/30S/60S
Loop
Recording OFF/2min/3
min
/5
min
Slow motion 1080P@60FPS/720P@120FPS
Pixel
set 16M/12M/8M
/5M/2M
Self Timer 3S/5S/10S/20S/OFF
Auto
3S/10S/15S/20S/30S/OFF
Burst shot
3P/S、 5P/S、 10P/S、 OFF
Exposure -2 to +2
White balance
Auto/Sunny/Cloudy/Incandescent light/Fluorescent light
Image
Rotation
ON/OFF
WIFI
ON/OFF
Light source frequency
Auto/50HZ/60HZ
Settings

5
EN
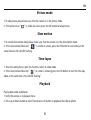
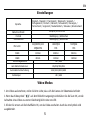
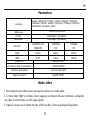
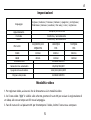
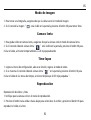
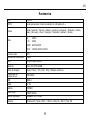
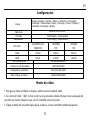
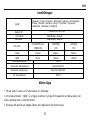
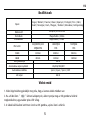
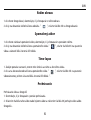
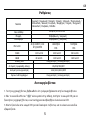
Settings
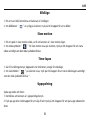
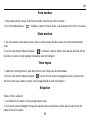
Video mode
1. To record video, please make sure, that the camera is in the video mode.
2. If the Video icon” ” is visible on screen, press the OK button to start recording a video, at the
same time a red LED is flashing.
3. Click the OK button again to stop the video, also the red icon disappears.
LED
indicator
light
ON/OFF
Auto Screen saver
10S/20S/30S/OFF
Auto shutdown 1min/3min/5min/OFF
Time watermark
ON/OFF
Language
English/German/French/Italian/Spanish/ Portuguese/ Finnish/
Danish/ Swedish/ Norway/ Czech/ Hungarian/ Dutch/ Slovakia/
Greece
Date-time
2018/01/01 12:00:00
Format Confirmation/cancel
Reset Confirmation/cancel
Micro SD
4K@30FPS/108
0P@60FPS
1080P@30
FPS
720P@60
FPS
32GB 120min 240min 320min
16GB 60min 120min 160min

6
EN
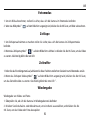
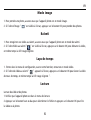
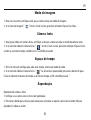
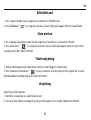
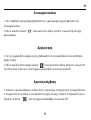
Picture mode
1. To take picture, please make sure, that the camera is in the picture mode.
2. If the picture icon ” ” is visible on screen, press the OK button to take pictures.
Slow motion
1. To record slow motion video, please make sure, that the camera is in the slow-motion mode.
2. If the slow motion Video icon” ” is visible on screen, press the OK button to start video, at the
same time also the red LED flashing.
Time-lapse
1. Enter the setting menu, open this function, return to video mode.
2. If the slow motion Video icon” ” on screen is showing, press the OK button to start the time-laps
video, at the same time is the red LED flashing”.
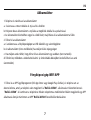
Playback
Playing back video and photos
1. Verify the camera is in playback menu
2. Press up or down button to select file and press OK button to playback the video or photo

7
EN
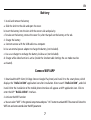
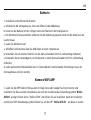
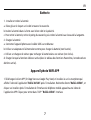
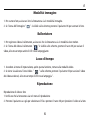
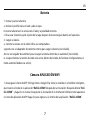
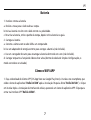
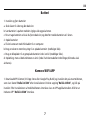
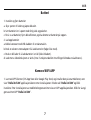
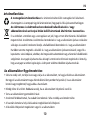
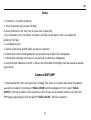
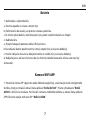
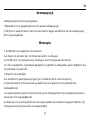
Battery
1. install and remove the battery
a. Slide the latch to the side and open the cover.
b. Insert the battery into the slot with the correct side and polarity.
c. To take out the battery, remove the cover fist, after that pull out the battery at the tab.
2. Charge the battery
a. Connect camera with the USB cable to a computer.
b. Use an external power adapter to charge the battery (not included).
c. Use a car charger to recharge the battery inside a car (not included).
d. Charge while video function is active (inside the function table Settings the car mode must be
ac-tivated).
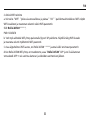
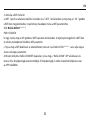
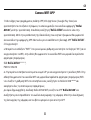
Camera WIFI APP
1. Download the APP client (iOS App Store or Google Play Store) and install it to the smart phone, which
displays the “Rollei AC540” application icon after installation. Direct search “Rollei AC540”, and click
install. After the installation of the mobile phone interface will appear an APP application icon. Click to
enter the APP "Rollei AC540" interface .
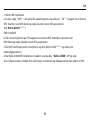
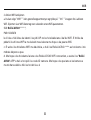
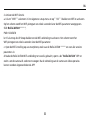
2. Activate the WIFI function
a. You can select "WIFI" in the general setup menu and press "OK" button to activate WiFi. The screen will show the
WIFI icon and some seconds later the WiFi parameter.

EN
8
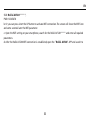
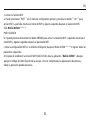
SSID: Rollei AC540******,
PWD:12345678
b. Or you can press short the UP button to activate WiFi connection. The screen will show the WIFI icon
and some seconds later the WiFi parameter.
c. Open the WiFi setting on your smartphone, search for the Rollei AC540***** and enter all required
parameters.
d. After the Rollei AC540 WiFi connection is established, open the “Rollei AC540
” APP and search to

EN
9
SSID: Rollei AC540******,
PWD:12345678
b. Or you can press short the UP button to activate WiFi connection. The screen will show the WIFI icon
and some seconds later the WiFi parameter.
c. Open the WiFi setting on your smartphone, search for the Rollei AC540***** and enter all required
parameters.
d. After the Rollei AC540 WiFi connection is established, open the “Rollei AC540” APP and search to
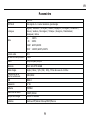
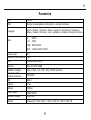
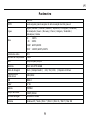
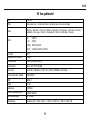
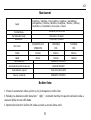
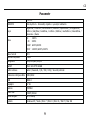
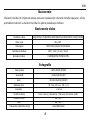
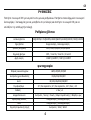
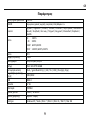
Parameter
LCD
2.0LTPS
LENS
146 degree A + high resolution wide Angle lens
Language
English/German/French/Italian/Spanish/ Portuguese/ Finnish/ Danish/ Swedish/
Norway/ Czech/ Hungarian/ Dutch/ Slovakia/ Greece in language
video
4K 30FPS
2.7K 30FPS
1080P 60FPS/30FPS
720P 120FPS/60FPS/30FPS
720P (1280*720) 120FPS
video format MP4
Compression
format
H.264
Photo
16M/12M/8M/5M/2M
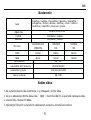
Memory
Micro SD UPTO 64GB
Picture
mode
Single/timer / (2S/5S/10S) / Continuous shot
L
ight source frequency
50Hz/60Hz
USB
USB2.0
Power
5V 1A
Battery
750MAH
Video time
1080P/ 90min
Charge time
About 3 hours
System
Windows XP/Vistaor Above/Win7/Mac os

EN
10
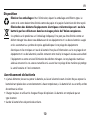
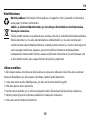
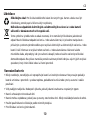
Disposal
Dispose of packaging: For disposal, separate packaging into different types. Cardboard
and board must be disposed of as paper and foil must be recycled.
Disposal of Waste Electrical and Electronic Equipment and/or Battery by
users in private households in the European Union.
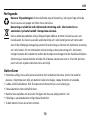
Battery warning
•
Never dismantle, crush, or pierce the battery, or allow the battery to short-circuit. Do not expose
battery being placed in high temperature environment, if battery leaks or bulges, stop continue
to use.
• Always charge using the charger. Risk of explosion if battery is replaced by an incorrect type.
• Keep the battery out of reach of children.
• Batteries may explode if exposed to naked fire. Never dispose of batteries in a fire.
• Disposed of used batteries observing local regulations.
• Before disposing the device, please remove the battery.
This symbol on the product or on the packaging indicates that this cannot be disposed
of as a household waste. You must dispose of your waste equipment and/or battery by
handling it over to the applicable take-back scheme for the recycling of electrical and
electronic equipment and/or battery. For more information about recycling of this
equipment and/or battery, please contact your city office, the shop where you purchased
help to conserve natural resources and ensure that it is recycled in a manner that protects
human health and environment.

EN
11
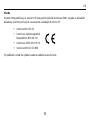
Conformity
The Manufacturer hereby declares that the CE marking was applied to the Rollei Actioncam 540
in accordance with the basic requirements and other relevant provisions of the following CE
Directives:
• 2011/65/EC RoHs Directive
• 2014/30/EU EMC Directive
• 2012/19/EC WEEE Directive
• 2014/53/EU RED-Directive
The EC Declaration of Conformity can be requested from the address specified on the Warranty card.
Page is loading ...
Page is loading ...
Page is loading ...
Page is loading ...
Page is loading ...
Page is loading ...
Page is loading ...
Page is loading ...
Page is loading ...
Page is loading ...
Page is loading ...
Page is loading ...
Page is loading ...
Page is loading ...
Page is loading ...
Page is loading ...
Page is loading ...
Page is loading ...
Page is loading ...
Page is loading ...
Page is loading ...
Page is loading ...
Page is loading ...
Page is loading ...
Page is loading ...
Page is loading ...
Page is loading ...
Page is loading ...
Page is loading ...
Page is loading ...
Page is loading ...
Page is loading ...
Page is loading ...
Page is loading ...
Page is loading ...
Page is loading ...
Page is loading ...
Page is loading ...
Page is loading ...
Page is loading ...
Page is loading ...
Page is loading ...
Page is loading ...
Page is loading ...
Page is loading ...
Page is loading ...
Page is loading ...
Page is loading ...
Page is loading ...
Page is loading ...
Page is loading ...
Page is loading ...
Page is loading ...
Page is loading ...
Page is loading ...
Page is loading ...

FIN
2
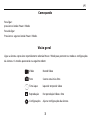
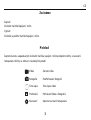
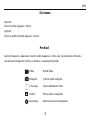
Tuote
5.TF-korttipaikka
6.USB-paikka
7. HDMI-lähtö
8.OK
Päästä alkuun
Virran kytkeminen:
Paina Virta / Mode-painiketta.
Virran katkaiseminen:
Pidä virtanäppäintä painettuna.
Yleiskatsaus
Kytke kamera päälle ja paina Power / Mode -painiketta toistuvasti selataksesi kameratiloja ja asetuksia.
Moodit näkyvät seuraavassa järjestyksessä:
1. Teho / tila
2.UP / WI-FI
3.LÄHTÖ
4.LAITE
Page is loading ...
Page is loading ...
Page is loading ...
Page is loading ...
Page is loading ...
Page is loading ...
Page is loading ...
Page is loading ...
Page is loading ...
Page is loading ...
Page is loading ...
Page is loading ...
Page is loading ...
Page is loading ...
Page is loading ...
Page is loading ...
Page is loading ...
Page is loading ...
Page is loading ...
Page is loading ...
Page is loading ...
Page is loading ...
Page is loading ...
Page is loading ...
Page is loading ...
Page is loading ...
Page is loading ...
Page is loading ...
Page is loading ...
Page is loading ...
Page is loading ...
Page is loading ...
Page is loading ...
Page is loading ...
Page is loading ...
Page is loading ...
Page is loading ...
Page is loading ...
Page is loading ...

NOR
9
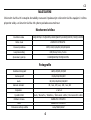
ʻO ka pākuhi
LCD
2.0LTPS
LENS
146 kekona A + kiʻekiʻe kiʻekiʻe i ka nānā aku i nā aniani Angle
ʻŌlelo
English / German / French / Italian / Spanish / Portuguese / Finnish / Danish /
Swedish / Nor-way / Czech / Hungarian / Dutch / Slovakia / Greece
Wikiō
4K 30FPS
2.7K 30FPS
1080P 60FPS/30FPS
720P 120FPS/60FPS/30FPS
720P (1280*720) 120FPS
Kiʻi wikiō MP4
Hōʻuluʻulu hoʻopilikia
H.264
Hoʻokaʻaʻike
16M/12M/8M/5M/2M
Hoʻomanaʻo
Micro SD UPTO 64GB
Ke kiʻi kiʻi
Hoʻokahi / hāmele / (2S / 5S / 10S) / Pālākiho hoʻomau
ʻO ke kumuʻike māmā
50Hz/60Hz
USB
USB2.0
Kaha
5V
1A
Kelepona
750MAH
ʻO ka manawa wikiō
1080P/ 90min
Ka manawa kau
No 3 hola
Pūnaehana
Windows XP / Vista / Win 7 / Win 8 / Win 10 / Win7 / Mac OS
Page is loading ...
Page is loading ...
Page is loading ...
Page is loading ...
Page is loading ...
Page is loading ...
Page is loading ...
Page is loading ...
Page is loading ...
Page is loading ...
Page is loading ...
Page is loading ...
Page is loading ...
Page is loading ...
Page is loading ...
Page is loading ...
Page is loading ...
Page is loading ...
Page is loading ...
Page is loading ...
Page is loading ...
Page is loading ...
Page is loading ...
Page is loading ...
Page is loading ...
Page is loading ...
Page is loading ...
Page is loading ...
Page is loading ...
Page is loading ...
Page is loading ...
Page is loading ...
Page is loading ...
Page is loading ...
Page is loading ...
Page is loading ...
Page is loading ...
Page is loading ...
Page is loading ...
Page is loading ...
Page is loading ...
Page is loading ...
Page is loading ...
Page is loading ...
Page is loading ...
Page is loading ...
Page is loading ...
Page is loading ...
Page is loading ...
Page is loading ...
Page is loading ...
Page is loading ...
Page is loading ...
Page is loading ...
Page is loading ...
Page is loading ...
Page is loading ...
Page is loading ...
Page is loading ...
-
 1
1
-
 2
2
-
 3
3
-
 4
4
-
 5
5
-
 6
6
-
 7
7
-
 8
8
-
 9
9
-
 10
10
-
 11
11
-
 12
12
-
 13
13
-
 14
14
-
 15
15
-
 16
16
-
 17
17
-
 18
18
-
 19
19
-
 20
20
-
 21
21
-
 22
22
-
 23
23
-
 24
24
-
 25
25
-
 26
26
-
 27
27
-
 28
28
-
 29
29
-
 30
30
-
 31
31
-
 32
32
-
 33
33
-
 34
34
-
 35
35
-
 36
36
-
 37
37
-
 38
38
-
 39
39
-
 40
40
-
 41
41
-
 42
42
-
 43
43
-
 44
44
-
 45
45
-
 46
46
-
 47
47
-
 48
48
-
 49
49
-
 50
50
-
 51
51
-
 52
52
-
 53
53
-
 54
54
-
 55
55
-
 56
56
-
 57
57
-
 58
58
-
 59
59
-
 60
60
-
 61
61
-
 62
62
-
 63
63
-
 64
64
-
 65
65
-
 66
66
-
 67
67
-
 68
68
-
 69
69
-
 70
70
-
 71
71
-
 72
72
-
 73
73
-
 74
74
-
 75
75
-
 76
76
-
 77
77
-
 78
78
-
 79
79
-
 80
80
-
 81
81
-
 82
82
-
 83
83
-
 84
84
-
 85
85
-
 86
86
-
 87
87
-
 88
88
-
 89
89
-
 90
90
-
 91
91
-
 92
92
-
 93
93
-
 94
94
-
 95
95
-
 96
96
-
 97
97
-
 98
98
-
 99
99
-
 100
100
-
 101
101
-
 102
102
-
 103
103
-
 104
104
-
 105
105
-
 106
106
-
 107
107
-
 108
108
-
 109
109
-
 110
110
-
 111
111
-
 112
112
-
 113
113
-
 114
114
-
 115
115
-
 116
116
-
 117
117
-
 118
118
-
 119
119
-
 120
120
-
 121
121
-
 122
122
-
 123
123
-
 124
124
-
 125
125
-
 126
126
-
 127
127
-
 128
128
-
 129
129
-
 130
130
-
 131
131
-
 132
132
-
 133
133
-
 134
134
-
 135
135
-
 136
136
-
 137
137
-
 138
138
-
 139
139
-
 140
140
-
 141
141
-
 142
142
-
 143
143
-
 144
144
-
 145
145
-
 146
146
-
 147
147
-
 148
148
-
 149
149
-
 150
150
-
 151
151
-
 152
152
-
 153
153
-
 154
154
-
 155
155
-
 156
156
-
 157
157
-
 158
158
-
 159
159
-
 160
160
-
 161
161
-
 162
162
-
 163
163
-
 164
164
-
 165
165
-
 166
166
-
 167
167
-
 168
168


Rollei Actioncam 540 User manual
- Type
- User manual
- This manual is also suitable for
Ask a question and I''ll find the answer in the document
Finding information in a document is now easier with AI
in other languages
- italiano: Rollei Actioncam 540 Manuale utente
- français: Rollei Actioncam 540 Manuel utilisateur
- español: Rollei Actioncam 540 Manual de usuario
- Deutsch: Rollei Actioncam 540 Benutzerhandbuch
- Nederlands: Rollei Actioncam 540 Handleiding
- português: Rollei Actioncam 540 Manual do usuário
- slovenčina: Rollei Actioncam 540 Používateľská príručka
- dansk: Rollei Actioncam 540 Brugermanual
- čeština: Rollei Actioncam 540 Uživatelský manuál
- svenska: Rollei Actioncam 540 Användarmanual
- suomi: Rollei Actioncam 540 Ohjekirja
Related papers
Other documents
-
 ACE CAM 4K Ultra HD Action Camera User manual
-
Philips VTR8060/93 User manual
-
Vivitar DVR922HD User manual
-
 TRANSTYLE T9 User manual
-
Pyle GDV485SL Owner's manual
-
PYLE Audio Serene Life SL-DV4K Owner's manual
-
-
AKASO V50 Elite User manual
-
National Geographic 4K Action Camera Owner's manual
-
Midland H9 Owner's manual

