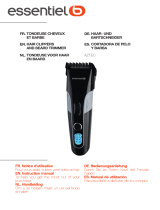
Remington HC5035 Owner's manual

Category
Hair trimmers & clippers
Type
Owner's manual
2
ENGLISH
Thank you for choosing Remington®. Our products are designed to meet the
highest standard of quality, functionality and design.
We hope you enjoy using your new Remington® product. Please read the
instructions for use carefully and keep in a safe place for future reference.
F IMPORTANT SAFETY INSTRUCTIONS
1 WARNING – TO REDUCE THE RISK OF BURNS, ELECTROCUTION, FIRE, OR
INJURY TO PERSONS:
2 This appliance can be used by children aged from 8 years and above and
persons with reduced physical, sensory or mental capabilities or lack of
experience and knowledge if they have been supervised/instructed and
understand the hazards involved. Children shall not play with the appliance.
Cleaning and user maintenance shall not be done by children unless they are
older than 8 and supervised.
3 Do not use this product if it is not working correctly, if it has been dropped or
damaged, or dropped in water.
4 Do not use accessories or attachments other than those we supply.
5 An appliance should never be left unattended when plugged in to a power
outlet, except when charging.
6 Keep the power plug and cord away from heated surfaces.
7 Make sure the power plug and cord do not get wet.
8 Do not plug or unplug the appliance with wet hands.
9 Do not use the product with a damaged cord. A replacement can be obtained
via our International Service Centres.
10 Do not twist or kink the cable, and don’t wrap it around the appliance.
11 Store the product at a temperature between 15°C and 35°C.
12 Do not immerse the appliance in liquid; do not use it near water in a
bath-tub, basin or other vessel; and don’t use it outdoors.
13 Suitable for cleaning under an open water tap.
3
ENGLISH
C KEY FEATURES
1 On / O Switch 6 Quick wash release button
2 Blade set 7 Charging indicator light
3 2 attachment guide combs (HC5400/HC5600)
3 -21mm and 24-42mm, 3mm adjustment 8 LED display (HC5800)
4 Adjustable stubble comb (HC5800) 9 Micro USB port
1-13mm, 2mm adjustment 10 Micro USB cable
5 1.5mm Stubble comb (HC5600) 11 Charging stand (HC5800)
12 Adaptor
GBDNLFEIDKSFINPSKCZ
HUN
PLRUTRROGRSLAE
HR
1
7
9
8
2
6
3
5
11
4
10
12
4
ENGLISH
C GETTING STARTED
, CHARGING YOUR APPLIANCE
• Beforeusingyourhairclipperforthersttime,chargefor16-20hours.
• Ensuretheproductisswitchedo.
• Connectthechargingadaptortotheproductandthentothemains.
• Iftheproductisnotgoingtobeusedforanextendedperiodtime(2–3
months), unplug it from the mains and store.
• Fullyrechargeyourproductwhenyouwouldliketouseitagain.
•
Allow 16 hours for a full charge on the HC5400 and 4.5 hours on the HC5600 and
HC5800.
• Topreservethelifeofyourbatteries,letthemrunoutevery6monthsthen
recharge for 16-20 hours.
O This appliance should be charged by approved safety isolating adaptors
PA-3215E (for HC5400 EU version) or PA-3215U (for HC5400 UK version) with the
output capacity of 3.2V dc; 1500mA; and should be charged by approved safety
isolating adaptors
PA-4515E (for HC5600, HC5800 EU version) or PA-4515U (for HC5600,HC5800 UK
version) with the output capacity of 4.5V dc; 1500mA .
, QUICK CHARGE (HC5600 & HC5800)
Quick charge
time
10 minutes 30 minutes 1 hour 2 hours
Run time 5 minutes 15 minutes 30 minutes 40 minutes
, CHARGING VIA CHARGING STAND (HC5800)
• Ensuretheproductisswitchedo.
• Connectthechargingadaptortothechargingstandandthentothemains.
• Allow4.5hoursforafullcharge.
, CHARGING VIA STANDARD ELECTRICAL SOCKET
• Ensuretheproductisswitchedo.
• Connectthechargingadaptortotheproductandthentothemains.
•
Allow 16 hours for a full charge on the HC5400 and 4.5 hours on the HC5600 and
HC5800
.
5
ENGLISH
, USB
• ConnectyourUSBcabletotheUSBportonyourpowersource.
• ConnecttheUSBcabletoyourappliance.
Note: charging may take longer when charging via USB.
, CORDED USE
• Connectthechargingadaptortotheproductthentothemains.
• Whenthecordisconnectedtothemains,adigitaldisplaywillbedisplayedon
the appliance (HC5800).
FCAUTION: Extended mains only use will result in the reduction of the battery
life.
F WARNING: The appliance can not be operated in corded mode while
connected to a PC via the USB port.
, CORDLESS USE
Whentheunitisswitchedonandfullycharged,theproductcanbeusedin
cordless mode for up to 60 minutes for the HC5400 and up to 120 minutes for the
HC5600 & HC5800.
F INSTRUCTIONS FOR USE
, BEFORE STARTING THE CUT
• Inspecttheclippermakingsurethatitisfreefromhairanddirt.
• Seatthepersonsothattheirheadisapproximatelyatyoureyelevel.
• Beforecutting,alwayscombthehairsoitistanglefreeanddry.
Comb position Adjustable
stubble comb
(HC5800)
Short comb Long comb
1 1mm 3mm 24mm
2 3mm 6mm 27mm
3 5mm 9mm 30mm
4 7mm 12mm 33mm
5 9mm 15mm 36mm
6 11mm 18mm 39mm
7 13mm 21mm 42mm
GBDNLFEIDKSFINPSKCZ
HUN
PLRUTRROGRSLAE
HR
6
, TO ATTACH A COMB
• Holdthecombwithitsteethupward.
• Slideitontoandalongtheclipperbladeuntilthefrontofthecombrmlysits
against the clipper blade.
, TO REMOVE THE COMB
• Holdingtheclipperwiththebladesfacingawayfromyou,rmlypushthecomb
upward and away from the blades.
, INSTRUCTIONS FOR CUTTING HAIR
For even cutting, allow the comb attachment/blade to cut its way through
 thehair.Donotforceitthroughquickly.Ifyouarecuttingforthersttime,start
with the maximum comb attachment.
, STEP 1 – Nape of the neck
• Setthecombto3mmor6mm.
• Holdtheclipperwiththebladeteethpointingupwards.Beginstartingatthe
centre of the head at the base of the neck.
• Slowlylifttheclipper,workingupwardsandoutwardsthroughthehair,
trimming just a little at a time.
, STEP 2 – Back of the head
• Withthecombsetat12mmor18mm,cutthehairatthebackofthehead.
, STEP 3 – Side of the head
• Setthecombto3mmor6mm,trimsideburns.Thenchangethesettingto9mm
and continue to cut the top of the head.
, STEP 4 – Top of the head
• Usethelongerlengthcombattachmentandsetitto24mmor27mmthencut
hair on top of the head against the direction in which the hair normally grows.
• Forlongerhairontop,usethelongerlengthcombattachment(24–42mm)to
achieve the desired style.
• Alwaysworkfromthebackofthehead.
, STEP 5 – The nishing touches
• Usetheclipperwithoutanattachmentcombforclosetrimmingaroundthe
base and sides of the neck.
• Toproduceacleanstraightlineatthesideburns,reversethehairclipper.Place
the reversed clipper at right angles to the head, tips of the blades lightly
touching the skin and then work downwards.
ENGLISH
7
, SHORT TAPERED STYLES – “FLAT TOPS” & SHORT CUTS
• Startingwiththelongestguidecombattached(24-42mm),cutfromtheback
of the neck to the crown. Hold the guide comb at against the head and slowly
move the clipper through the hair.
• Usethesameprocedurefromthelowersidetotheuppersideofthehead.
Then cut the hair against the direction in which it grows and level with the
sides.
• Togivea“attoplook,thehairontopoftheheadmustbecutoverthetopof
a at comb.
• Useacloserguidecombtotaperthehairdowntothenecklineasdesired.
, DUAL BOOST SYSTEM (HC5600)
• Thereare3settingsfortheDualBoostsystem:O,On,Boost.
• Iftheclipperissettoon,itwillrunatregularpower.
• Iftheclipperissettoboost,itwillprovidemaximumpower.
, AUTO BOOST SYSTEM (HC5800)
• Thereare3settingsfortheAutoBoostsystem:O,Auto,Boost
• IftheClipperissettoAuto,itwillrunatregularpowerunderlowload
conditions.
• Whenmorepowerisneeded,theclipperwillautomaticallysensethisand
provide maximum boost.
• ToactivatetheBoostsetting,depressthepowerbuttonfor2seconds.The
clipper will then constantly run at maximum power.
C CARE FOR YOUR HAIRCLIPPER
Yourclipperisttedwithhighqualityblades.Toensurelonglastingperformance
of your clipper, clean the blades and unit regularly. Always keep the attachment
guide comb on the trimmer blade.
, AFTER EACH USE
• Ensuretheclipperisswitchedoanddisconnectedfromthemainsbefore
cleaning.
• Brushtheaccumulatedhairfromtheblades.Donotsubmergetheclipperin
water.
• Tocleanunit,wipewithdampclothanddryimmediately.
, WASHABLE CLEANING
• TheQUICKWASHSYSTEMisdesignedtomaximisetheeciencyofwashable
cleaning.
ENGLISH
GBDNLFEIDKSFINPSKCZ
HUN
PLRUTRROGRSLAE
HR
8
• Pushthebuttonthatislocatedonthefrontofthehairclipper.Thebladeswill
slide out and the blade set can be easily cleaned under the tap.
• Oncethebladesarecleanedthebladesarelockedintoplacebypushingthe
blade set towards the hair clipper head and will snap into place.
• Donotruntheentireunitunderthetap,onlythebladesetismeanttobe
submerged in water.
Note: Ensure the clipper is turned o when cleaning.
, EVERY SIX MONTHS
• Atregularintervalsthebladesetshouldberemovedandcleaned.
• Removethe2screwsretainingthexedbladewithascrewdriver.Donot
remove blade set.
• Brushouthairsfrombetweenthebladeswithsoftcleaningbrush.Donot
remove the lubricating grease from the blades. It is not necessary to remove the
small moving blade from the unit.
• Ifthemovingbladehasbeenremovedthiscanbere-ttedbyslottingthe
coated blade holder over the pin in the centre of the interior product head. The
groove on the coated blade, just below the teeth, rests on a metal plate at the
 oppositesidetothescrewholes.Thexedbladeisttedwiththeraisedprole
 pointingoutwardsandxedwiththe2screws.
• Notethatifthebladesarenotcorrectlyalignedthencuttingeciencywillbe
impaired.
• Placeafewdropsofcutterorsewingmachineoilontotheblades.Wipeo
excess oil.
, CLEANING CAUTIONS
• Ensuretheapplianceisswitchedoandunplugfromthemainoutletbefore
cleaning.
• Onlytheattachmentguidecombsandtrimmerblademayberemovedfrom
the product for cleaning.
• Cleaningshouldbedonewithasoftbrush,suchasthebrushsuppliedwiththe
product.
• Donotrinseunderwater.
• Donotuseharshorcorrosivecleanersontheunitsortheirblades.
ENGLISH
9
BATTERY REMOVAL
• Thebatterymustberemovedfromtheappliancebeforeitisscrapped.
• Theappliancemustbedisconnectedfromthesupplymainswhenremoving
the battery.
• Ensurethattheclipperisdischargedofallpoweranddisconnectedfromthe
mains.
• Removethescrewcoverfrombackhousing.
• Usingasmallscrewdriver,remove(1)screwfromthebottomoftheclipper.
• Prythefrontpanelfromthefronthousingandexposetheinnerhousing.
• Usingasmallscrewdriver,remove(4)screwsfrominnerhousing
• PrythecoverofinnerhousingandexposethePCBandbatteries.
• Cutorbreakthewirestampsonthebothendofthebatteriesandremovethe
batteries.
• Thebatteryistobedisposedofsafely.
H ENVIRONMENTAL PROTECTION
To avoid environmental and health problems due to hazardous
substances in electrical and electronic goods, appliances marked with
this symbol must not be disposed of with unsorted municipal waste, but
recovered, reused or recycled.
ENGLISH
GBDNLFEIDKSFINPSKCZ
HUN
PLRUTRROGRSLAE
HR
168
Model No HC5400/HC5600/HC5800
Taşıma ve nakliye sırasında dikkat edilecek hususlar :
- Ürünü düşürmeyiniz
- Darbelere maruz kalmamasını sağlayınız
- Cihazı nakliye sırasında orijinal ambalajında taşıyınız.
Bakanlıkça tespit ve ilan edilen kullanım ömrü 7 yıldır.
ÜRETİCİ FİRMA BİLGİSİ: VARTA Consumer Batteries GmbH & Co. KGaA, Alfred-Krupp-Str. 9,
73479 Ellwangen, Germany.
Производитель: Spectrum Brands Shenzhen Ltd./Спектрум Брэндс
Шеньчжень
Лтд., Китай для Varta Consumer Batteries GmbH & Co. KGaA, Альфред-
Крупп Штрассе 9, Элльванген, 73479, Германия
Изделие использовать по назначению в соответствии с инструкцией по
эксплуатации
13/INT/ HC5400/5600/5800 T22-0001004 Version 04 /13
Remington® is a Registered Trade Mark of Spectrum Brands,Inc.,
or one of its subsidiaries
VARTA Consumer Batteries GmbH & Co. KGaA, Alfred-Krupp-Str. 9, 73479 Ellwangen,
Germany
www.remington-europe.com
© 2013 SBI
  • Page 1 1
  • Page 2 2
  • Page 3 3
  • Page 4 4
  • Page 5 5
  • Page 6 6
  • Page 7 7
  • Page 8 8
  • Page 9 9
  • Page 10 10
  • Page 11 11
  • Page 12 12
  • Page 13 13
  • Page 14 14
  • Page 15 15
  • Page 16 16
  • Page 17 17
  • Page 18 18
  • Page 19 19
  • Page 20 20
  • Page 21 21
  • Page 22 22
  • Page 23 23
  • Page 24 24
  • Page 25 25
  • Page 26 26
  • Page 27 27
  • Page 28 28
  • Page 29 29
  • Page 30 30
  • Page 31 31
  • Page 32 32
  • Page 33 33
  • Page 34 34
  • Page 35 35
  • Page 36 36
  • Page 37 37
  • Page 38 38
  • Page 39 39
  • Page 40 40
  • Page 41 41
  • Page 42 42
  • Page 43 43
  • Page 44 44
  • Page 45 45
  • Page 46 46
  • Page 47 47
  • Page 48 48
  • Page 49 49
  • Page 50 50
  • Page 51 51
  • Page 52 52
  • Page 53 53
  • Page 54 54
  • Page 55 55
  • Page 56 56
  • Page 57 57
  • Page 58 58
  • Page 59 59
  • Page 60 60
  • Page 61 61
  • Page 62 62
  • Page 63 63
  • Page 64 64
  • Page 65 65
  • Page 66 66
  • Page 67 67
  • Page 68 68
  • Page 69 69
  • Page 70 70
  • Page 71 71
  • Page 72 72
  • Page 73 73
  • Page 74 74
  • Page 75 75
  • Page 76 76
  • Page 77 77
  • Page 78 78
  • Page 79 79
  • Page 80 80
  • Page 81 81
  • Page 82 82
  • Page 83 83
  • Page 84 84
  • Page 85 85
  • Page 86 86
  • Page 87 87
  • Page 88 88
  • Page 89 89
  • Page 90 90
  • Page 91 91
  • Page 92 92
  • Page 93 93
  • Page 94 94
  • Page 95 95
  • Page 96 96
  • Page 97 97
  • Page 98 98
  • Page 99 99
  • Page 100 100
  • Page 101 101
  • Page 102 102
  • Page 103 103
  • Page 104 104
  • Page 105 105
  • Page 106 106
  • Page 107 107
  • Page 108 108
  • Page 109 109
  • Page 110 110
  • Page 111 111
  • Page 112 112
  • Page 113 113
  • Page 114 114
  • Page 115 115
  • Page 116 116
  • Page 117 117
  • Page 118 118
  • Page 119 119
  • Page 120 120
  • Page 121 121
  • Page 122 122
  • Page 123 123
  • Page 124 124
  • Page 125 125
  • Page 126 126
  • Page 127 127
  • Page 128 128
  • Page 129 129
  • Page 130 130
  • Page 131 131
  • Page 132 132
  • Page 133 133
  • Page 134 134
  • Page 135 135
  • Page 136 136
  • Page 137 137
  • Page 138 138
  • Page 139 139
  • Page 140 140
  • Page 141 141
  • Page 142 142
  • Page 143 143
  • Page 144 144
  • Page 145 145
  • Page 146 146
  • Page 147 147
  • Page 148 148
  • Page 149 149
  • Page 150 150
  • Page 151 151
  • Page 152 152
  • Page 153 153
  • Page 154 154
  • Page 155 155
  • Page 156 156
  • Page 157 157
  • Page 158 158
  • Page 159 159
  • Page 160 160
  • Page 161 161
  • Page 162 162
  • Page 163 163
  • Page 164 164
  • Page 165 165
  • Page 166 166
  • Page 167 167
  • Page 168 168

Remington HC5035 Owner's manual

Category
Hair trimmers & clippers
Type
Owner's manual

Ask a question and I''ll find the answer in the document

Finding information in a document is now easier with AI