Ruckus Wireless ZoneFlex 7372 How To Set Up
- Category
- Networking
- Type
- How To Set Up
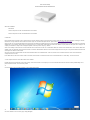
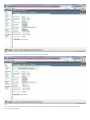
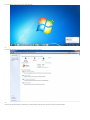
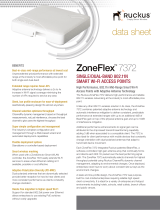
Ruckus Wireless ZoneFlex 7372 is a powerful access point with a built-in DHCP server, enabling it to function as both a router and an access point. Equipped with BeamFlex technology, it provides wide coverage and supports over 500 client logins. It can operate independently or as part of a larger network managed by Ruckus Zone Director. The device features dual-band radios, allowing for simultaneous 2.4GHz and 5GHz connections. For added versatility, it can be configured to work with or without an external DHCP server, making it suitable for various network setups.
Ruckus Wireless ZoneFlex 7372 is a powerful access point with a built-in DHCP server, enabling it to function as both a router and an access point. Equipped with BeamFlex technology, it provides wide coverage and supports over 500 client logins. It can operate independently or as part of a larger network managed by Ruckus Zone Director. The device features dual-band radios, allowing for simultaneous 2.4GHz and 5GHz connections. For added versatility, it can be configured to work with or without an external DHCP server, making it suitable for various network setups.


-
 1
1
-
 2
2
-
 3
3
-
 4
4
-
 5
5
-
 6
6
-
 7
7
-
 8
8
-
 9
9
-
 10
10
-
 11
11
-
 12
12
-
 13
13
-
 14
14
-
 15
15
-
 16
16
-
 17
17
-
 18
18
-
 19
19
-
 20
20
-
 21
21


Ruckus Wireless ZoneFlex 7372 How To Set Up
- Category
- Networking
- Type
- How To Set Up
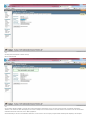
Ruckus Wireless ZoneFlex 7372 is a powerful access point with a built-in DHCP server, enabling it to function as both a router and an access point. Equipped with BeamFlex technology, it provides wide coverage and supports over 500 client logins. It can operate independently or as part of a larger network managed by Ruckus Zone Director. The device features dual-band radios, allowing for simultaneous 2.4GHz and 5GHz connections. For added versatility, it can be configured to work with or without an external DHCP server, making it suitable for various network setups.
Ask a question and I''ll find the answer in the document
Finding information in a document is now easier with AI
Related papers
-
Ruckus Wireless ZoneFlex 7372-E Quick Setup Manual
-
Ruckus Wireless ZoneFlex 7352 Quick Setup Manual
-
-
-
-
-
 Ruckus Wireless 901-7372-US50 Datasheet
-
Ruckus Wireless 902-0162-EU10 User manual
-
 Ruckus Wireless ZoneDirector Series Reference guide
-
Ruckus Wireless ZoneDirector 5000 User manual

