Page is loading ...


Accuracy when
going to press
The use of advanced technology and the high quality standard of our
instruments are the result of continuous development. This may result
in differences between this operating manual and your instrument. Al-
so, we cannot guarantee that there are absolutely no errors in this man-
ual. Therefore, we are sure you will understand that we cannot accept
any legal claims resulting from the data, figures or descriptions.
Warranty We guarantee the instrument described for 3 years from the date of
purchase.
The instrument warranty covers manufacturing faults that are discov-
ered within the warranty period. The warranty does not cover compo-
nents that are replaced during maintenance work, e.g. batteries.
The warranty claim extends to restoring the instrument to readiness for
use but not, however, to any further claim for damages. Improper han-
dling or unauthorized opening of the instrument invalidates any warran-
ty claim.
To ascertain the warranty liability, return the instrument and proof of
purchase together with the date of purchase freight paid or prepaid.
Copyright
© Weilheim 2004, WTW GmbH
Reproduction in whole - or even in part - is prohibited without the ex-
press written permission of WTW GmbH, Weilheim.
Printed in Germany.

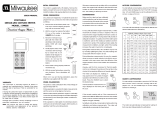
Oxi 315i List of contents
3
Contents
1 Overview . . . . . . . . . . . . . . . . . . . . . . . . . . . . . . . . . . . . . . 5
1.1 SETs of equipment . . . . . . . . . . . . . . . . . . . . . . . . . . . . . . 6
1.2 Keypad . . . . . . . . . . . . . . . . . . . . . . . . . . . . . . . . . . . . . . . 7
1.3 Display . . . . . . . . . . . . . . . . . . . . . . . . . . . . . . . . . . . . . . . 8
1.4 Jack field . . . . . . . . . . . . . . . . . . . . . . . . . . . . . . . . . . . . . 8
2 Safety . . . . . . . . . . . . . . . . . . . . . . . . . . . . . . . . . . . . . . . . 9
2.1 Authorized use . . . . . . . . . . . . . . . . . . . . . . . . . . . . . . . . . 9
2.2 General safety instructions . . . . . . . . . . . . . . . . . . . . . . . 10
3 Commissioning . . . . . . . . . . . . . . . . . . . . . . . . . . . . . . . 11
4 Operation . . . . . . . . . . . . . . . . . . . . . . . . . . . . . . . . . . . . 13
4.1 Switching on the measuring instrument . . . . . . . . . . . . . 13
4.2 Measuring . . . . . . . . . . . . . . . . . . . . . . . . . . . . . . . . . . . 14
4.2.1 Measuring the D. O. concentration . . . . . . . . . . 15
4.2.2 Measuring the D. O. saturation . . . . . . . . . . . . . 16
4.2.3 Measuring the D. O. partial pressure . . . . . . . . 16
4.2.4 Selecting the measuring range, AutoRange . . . 17
4.2.5 AutoRead AR (Drift control) . . . . . . . . . . . . . . . 18
4.3 Calibrating . . . . . . . . . . . . . . . . . . . . . . . . . . . . . . . . . . . 19
4.3.1 Starting the calibration . . . . . . . . . . . . . . . . . . . 20
4.4 Reset . . . . . . . . . . . . . . . . . . . . . . . . . . . . . . . . . . . . . . . 22
5 Maintenance, cleaning, disposal . . . . . . . . . . . . . . . . . 23
5.1 Maintenance . . . . . . . . . . . . . . . . . . . . . . . . . . . . . . . . . . 23
5.2 Cleaning . . . . . . . . . . . . . . . . . . . . . . . . . . . . . . . . . . . . . 24
5.3 Disposal . . . . . . . . . . . . . . . . . . . . . . . . . . . . . . . . . . . . . 24
6 What to do if... . . . . . . . . . . . . . . . . . . . . . . . . . . . . . . . . 25
7 Technical data . . . . . . . . . . . . . . . . . . . . . . . . . . . . . . . . 27
8 Lists . . . . . . . . . . . . . . . . . . . . . . . . . . . . . . . . . . . . . . . . . 31

List of contents Oxi 315i
4

Oxi 315i Overview
5
1 Overview
The compact precision Oxi 315i handheld meter enables you to carry
out oxygen measurements rapidly and reliably.
The Oxi 315i handheld meter provides the maximum degree of oper-
ating comfort, reliability and measuring certainty for all applications.
The proven OxiCal
®
calibration procedure and the special AutoRead
function support you in your work with the Oxihandheld meter.
Note
If you need further information or application notes, you can obtain the
following material from WTW:
Application reports
Primers
Safety datasheets.
You will find information on available literature in the WTW catalog or
via the Internet.
1 Keypad
2 Display
3 Jack field
6
7
1
9
2
7
O
°
C
m
g/l
ARng
TP
AR
CAL
M
O
1
2
3

Overview Oxi 315i
6
1.1 SETs of equipment
The measuring instrument is also available as part of individual SETs
of equipment.
You will find additional information on this and other accessories in the
WTW catalog or via the Internet.
Set (sample configuration):
1 Measuring instrument, Oxi 315i
2 Stand
3 – 50 ml ELY/G electrolyte solution for D.O. sensors
– 50 ml RL/G cleaning solution for D.O. sensors
– 3 WP 90/3 exchange membrane heads
– SF300 abrasive film for D.O. sensors
4 CellOx 325 D.O. sensor with calibration vessel
4
3
2
1

Oxi 315i Overview
7
1.2 Keypad
Key functions
RUN/ENTER
AR
CAL
M
Select the measuring mode <M>:
– D. O. concentration
– Oxygen saturation
– Oxygen partial pressure
Switch measuring instrument on/off
<ON/OFF>
Calibrate, select the calibration proce-
dure
<CAL>
Activate/deactivate the AutoRead
function
<AR>
Confirm entries,
start AutoRead
<RUN/ENTER>
M
CAL
AR
RUN/ENTER

Overview Oxi 315i
8
1.3 Display
1.4 Jack field
1 Oxygen sensor
mbar
°
F
RCL
Auto
Store
1/
cm
/
K
%
TDS
UpH Sal
mV/pH
S/
m
cm
cm
M
Lin
Tref25
Tref20
nLF
AutoCal DIN
AutoCal TEC
Time
Baud
Day.Month No.
Ident
Year
S
8
8 .
8
8
8
8
O
°
Sal
C
%
mg/l
LoBat
Cal
ARng
AR
TP
1
Status display
Meas. value display
Function and
temperature display
Sensor symbol
1

Oxi 315i Safety
9
2 Safety
This operating manual contains basic instructions that you must follow
during the commissioning, operation and maintenance of the measur-
ing instrument. Consequently, all responsible personnel must read this
operating manual carefully before working with the measuring system.
The operating manual must always be available within the vicinity of the
measuring system.
Target group The measuring instrument was developed for work in the field and in
the laboratory.
We assume that, as a result of their professional training and experi-
ence, the operators will know the necessary safety precautions to take
when handling chemicals.
Symbols
used
Warning
indicates instructions that must be followed to prevent damage to your
instrument.
Note
indicates notes that draw your attention to special features.
Note
indicates cross-references to other documents, e.g. application re-
ports, operating manuals of probes, etc.
2.1 Authorized use
The authorized use of the measuring instrument consists exclusively of
the measurement of the oxygen content in the field and laboratory.
The technical specifications as given in chapter 7 T
ECHNICAL DATA must
be observed. Only the operation and running of the measuring instru-
ment according to the instructions given in this operating manual is au-
thorized.
Any other use is considered to be unauthorized.

Safety Oxi 315i
10
2.2 General safety instructions
This instrument is built and inspected according to the relevant guide-
lines and norms for electronic measuring instruments (see chapter 7
T
ECHNICAL DATA).
It left the factory in a safe and secure technical condition.
Function and operating
safety
The smooth functioning and operational safety of the measuring instru-
ment can only be guaranteed if the generally applicable safety mea-
sures and the specific safety instructions in this operating manual are
followed during operation.
The smooth functioning and operational safety of the measuring instru-
ment can only be guaranteed under the environmental conditions that
are in specified in chapter 7 T
ECHNICAL DATA.
If the instrument was transported from a cold environment to a warm
environment, the formation of condensate can lead to the faulty func-
tioning of the instrument. In this event, wait until the temperature of the
instrument reaches room temperature before putting the instrument
back into operation.
Safe operation If safe operation is no longer possible, the instrument must be taken out
of service and secured against inadvertent operation!
Safe operation is no longer possible if the measuring instrument:
has been damaged in transport
has been stored under adverse conditions for a lengthy period of
time
is visibly damaged
no longer operates as described in this manual.
If you are in any doubt, please contact the supplier of the instrument.
Obligations of
the purchaser
The purchaser of the measuring instrument must ensure that the fol-
lowing laws and guidelines are observed when using dangerous sub-
stances:
EEC directives for protective labor legislation
National protective labor legislation
Safety regulations
Safety datasheets of the chemical manufacturers.

Oxi 315i Commissioning
11
3 Commissioning
Scope of delivery Handheld meter, Oxi 315i
Operating manual and short operating manual
4 batteries, 1.5 V Mignon type AA (in the instrument)
For details of scope of delivery of SETs, see chapter 1.1 SET
S OF
EQUIPMENT
and WTW catalog.

Commissioning Oxi 315i
12

Oxi 315i Operation
13
4 Operation
4.1 Switching on the measuring instrument
Note
The Oxi 315i handheld oxygen meter automatically recognizes the type
of D.O. sensor that is connected (CellOx 325 or
DurOx 325).
Warning
Only connect sensors to the measuring instrument that cannot return
any voltages or currents that are not allowed (> SELV and > current cir-
cuit with current limiting). Almost all sensors - in particular WTW sen-
sors - fulfill these conditions.
1 Connect the D. O. probe to the measuring instrument.
2 Press the <ON/OFF> key.
The display test appears briefly on the display.
The relative slope for the sensor type that was just connected
subsequently appears for approx. one second.
The measuring instrument then automatically switches to the
measuring mode that was last selected. The display shows the
relevant measured value.

Operation Oxi 315i
14
4.2 Measuring
You can measure the following parameters:
D. O. concentration
Oxygen saturation
Oxygen partial pressure
The Oxi meter is supplied with the following functions:
AutoRange (automatic switchover of the measurement range),
The AutoRead function (drift control) for checking the stability of the
measurement signal. This ensures the reproducibility of the measur-
ing signal. For details of how to switch the AutoRead function on/off,
see page 18.
Preparatory activities Perform the following preparatory activities when you want to measure:
Note
Incorrect calibration of D. O. probes will result in incorrect
measured values. Calibrate at regular intervals.
Temperature sensor The D. O. probe has an integrated temperature sensor that always
measures the current temperature of the test sample.
1 Connect the D. O. probe to the measuring instrument.
2 Calibrate or check the measuring instrument with the sensor.
How to calibrate is described in section 4.3 from page 19.
3 Immerse the D. O. probe in the test sample.
4 Select the measuring mode with <M>.

Oxi 315i Operation
15
4.2.1 Measuring the D. O. concentration
Note
A fixed salt content correction value of 30.0 is provided. How to switch
it on or off is described below.
You can measure the oxygen content without a salt content correction
as follows:
Switching on/off salt
content correction
Proceed as follows to switch on the salt content correction:
1 Perform the preparatory activities according to section 4.2.
2 Press the <M> key repeatedly until the D. O. concentration in
mg/l appears on the display.
ARng
%
LoBat
Cal
AR
8
°
F
Sal
mbar
S
1
RCL
Auto
Store
1/
cm
/
K
%
TDS
UpH Sal
mV/pH
S/
m
cm
cm
M
Lin
Tref25
Tref20
nLF
AutoCal DIN
AutoCal TEC
Time
Baud
Day.Month No.
Ident
Year
6
7
1
9
2
7
O
°
C
mg/l
TP
1 Perform the preparatory activities according to section 4.2
2 Switch on the salt content correction with <M> while pressing
the <RUN/ENTER> key. The SAL display indicator appears on
the display. The fixed value of 30.0 is taken into account in the
measurement.
3 Switch off the salt content correction with <M> while pressing
the <RUN/ENTER> key. The SAL display indicator is no longer
displayed.
cm
cm
M
%
LoBat
Cal
AR
8
°
F
mbar
S
1
RCL
Auto
Store
1/
cm
/
K
%
TDS
UpH Sal
mV/pH
S/
m
Lin
Tref25
Tref20
nLF
AutoCal DIN
AutoCal TEC
Time
Baud
Day.Month No.
Ident
Year
6
7
1
4
2
5
O
°
C
mg/l
ARng
TP
Sal

Operation Oxi 315i
16
4.2.2 Measuring the D. O. saturation
You can measure the D. O. saturation as follows:
4.2.3 Measuring the D. O. partial pressure
You can measure the D. O. partial pressure as follows:
1 Perform the preparatory activities according to section 4.2
2 Press the <M> key repeatedly until the saturation in % appears
on the display.
1 Perform the preparatory activities according to section 4.2
2 Press the <M> key repeatedly until the partial pressure in mbar
appears on the display.
mg/l
LoBat
Cal
AR
8
°
F
Sal
mbar
S
1
RCL
Auto
Store
1/
cm
/
K
%
TDS
UpH Sal
mV/pH
S/
m
cm
cm
M
Lin
Tref25
Tref20
nLF
AutoCal DIN
AutoCal TEC
Time
Baud
Day.Month No.
Ident
Year
6
7
1
9
2
8
O
°
C
ARng
TP
%

Oxi 315i Operation
17
4.2.4 Selecting the measuring range, AutoRange
Sensors You can use the DurOx or CellOx325 sensors. If the automatic recog-
nition function recognizes the DurOx sensor, the measurement is car-
ried out at a lower resolution. The CellOx325 sensor measures with a
resolution that is a factor of 10 higher.
AutoRange Each of the measuring parameters has 2 measuring ranges available.
AutoRange causes the Oxi meter to change to measuring range II if
measuring range I is exceeded, and also vice versa.
AutoRange is always switched on and is indicated on the display by
ARng:
Measuring ranges/
resolutions with
CellOx 325 oxygen
sensor
Measuring ranges/
resolutions with
DurOx 325 oxygen
sensor
%
LoBat
Cal
AR
8
°
F
Sal
mbar
S
1
RCL
Auto
Store
1/
cm
/
K
%
TDS
UpH Sal
mV/pH
S/
m
cm
cm
M
Lin
Tref25
Tref20
nLF
AutoCal DIN
AutoCal TEC
Time
Baud
Day.Month No.
Ident
Year
6
7
1
9
2
7
O
°
C
mg/l
ARng
TP
mg/l % mbar
Measuring
range I
Resolution
0 ... 19.99
0.01
0 ... 199.9
0.1
0 ... 199.9
0.1
Measuring
range II
Resolution
0 ... 90.0
0.1
0 ... 600
1
0 ... 1250
1
mg/l % mbar
Measuring
range I
Resolution
0 ... 19.9
0.1
0 ... 199
1
0 ... 199
1
Measuring
range II
Resolution
0 ... 90
1
0 ... 600
1
0 ... 1250
1

Operation Oxi 315i
18
4.2.5 AutoRead AR (Drift control)
The AutoRead (drift control) function checks the stability of the mea-
surement signal. The stability has a considerable effect on the repro-
ducibility of the measured value.
Criteria With identical measurement conditions, the following applies:
1 Select the measuring mode with <M>.
2 Activate the AutoRead function with <AR>. The current mea-
sured value is frozen (hold function).
3 Start AutoRead with <RUN/ENTER>.
The AR display indicator flashes until a stable measured value
is reached.
4 If necessary, start the next AutoRead measurement with
<RUN/ENTER>.
7
RCL
%
LoBat
Cal
8
°
F
Sal
mbar
S
1
Auto
Store
1/
cm
/
K
%
TDS
UpH Sal
mV/pH
S/
m
cm
cm
M
Lin
Tref25
Tref20
nLF
AutoCal DIN
AutoCal TEC
Time
Baud
Day.Month No.
Ident
Year
6
7
1
7
0
O
°
C
mg/l
TP
ARng
AR
Parameter Reproducibility Response time
D. O. concentra-
tion
Better than 0.05 mg/l > 10 seconds
Oxygen saturation
index
Better than 0.6 % > 10 seconds
Oxygen partial
pressure
Better than 0.6 mbar > 10 seconds

Oxi 315i Operation
19
4.3 Calibrating
Why calibrate? D. O. probes age. This changes the slope of the D. O. probe. Calibra-
tion determines the current slope of the probe and stores this value in
the instrument.
Thus, you should calibrate at regular intervals.
Separate calibration of
CellOx 325 and
DurOx 325
The Oxi 315i handheld meter enables the two sensor types, CellOx 325
and DurOx 325, to be calibrated separately from one another. The cal-
ibration of a specific sensor type does not affect the calibration of any
other type of sensor. When connecting a sensor, the calibration data
stored for the respective sensor type are automatically used.
Calibration procedure The calibration is performed in water vapor-saturated air.
Use the OxiCal
®
-SL air calibration vessel for calibration (accessory).
AutoRead The calibration procedure automatically activates the AutoRead func-
tion. The AR display indicator flashes. The calibration process is fin-
ished when AR stops flashing.
Sensor evaluation After the calibration, the measuring instrument evaluates the current
status of the sensor against the relative slope. The evaluation appears
on the display. The relative slope has no effect on the measuring accu-
racy. Low values indicate that the electrolyte will soon be depleted and
the probe will have to be regenerated.
Display Relative slope
S = 0.8 ... 1.25
S = 0.7 ... 0.8
S = 0.6 ... 0.7
Eliminate the error according to
chapter 6 W
HAT TO DO IF...
S < 0.6 or S > 1.25

Operation Oxi 315i
20
4.3.1 Starting the calibration
Proceed as follows to calibrate the instrument:
Note
The sponge in the air calibration vessel must be moist (not wet). Follow
the instructions in the OxiCal
®
-SL operating manual.
1 Connect the D. O. probe to the measuring instrument.
2 Keep the OxiCal
®
-SL air calibration vessel ready.
3 Put the D. O. probe into the air calibration vessel.
4 Press the <CAL> key. The calibration mode appears.
5 Press the <RUN/ENTER> key. AutoRead is active, AR flashes.
6 As soon as a stable value is reached, the AR display indicator
stops flashing. This indicates that the calibration is complete;
the relative slope that was determined and the sensor evalua-
tion appear on the display (see page 19).
8
AR
ARng
Lin
LoBat
°
F
Sal
mbar
%
mg/l
S
1
RCL
Auto
Store
1/
cm
/
K
%
TDS
UpH Sal
mV/pH
S/
m
cm
cm
M
Tref25
Tref20
nLF
AutoCal DIN
AutoCal TEC
Time
Baud
Day.Month No.
Ident
Year
6
7
1
A
L
C
O
°
C
Cal
TP
8
ARng
Lin
LoBat
°
F
Sal
mbar
%
mg/l
1
RCL
Auto
Store
1/
cm
/
K
%
TDS
UpH Sal
mV/pH
S/
m
cm
cm
M
Tref25
Tref20
nLF
AutoCal DIN
AutoCal TEC
Time
Baud
Day.Month No.
Ident
Year
6
7
1
8
8
0
O
°
C
Cal
TP
AR
S
/