Page is loading ...

AMD Radeon™ R7 240/R7 250 Graphics
User Guide
Part Number: 54241_enu_1.0

© 2014 Advanced Micro Devices Inc. All rights reserved.
Disclaimer
The information contained herein is for informational purposes only, and is subject to change without notice.
While every precaution has been taken in the preparation of this document, it may contain technical
inaccuracies, omissions and typographical errors, and AMD is under no obligation to update or otherwise
correct this information. Advanced Micro Devices, Inc. makes no representations or warranties with respect
to the accuracy or completeness of the contents of this document, and assumes no liability of any kind, including
the implied warranties of noninfringement, merchantability or fitness for particular purposes, with respect to
the operation or use of AMD hardware, software or other products described herein. No license, including
implied or arising by estoppel, to any intellectual property rights is granted by this document. Terms and
limitations applicable to the purchase or use of AMD’s products are as set forth in a signed agreement between
the parties or in AMD's Standard Terms and Conditions of Sale.
Trademarks
AMD, the AMD Arrow logo, AMD Athlon, AMD Catalyst, AMD CrossFire, AMD CrossFireX, AMD FirePro, AMD
Radeon, Catalyst Control Center, and combinations thereof are trademarks of Advanced Micro Devices, Inc.
HDMI is a licensed trademark of HDMI Licensing, LLC.
Pentium is a registered trademark of Intel Corporation or its subsidiaries in the United States and other
countries.
Linux is a registered trademark of Linus Torvalds.
Windows and Windows Vista are registered trademarks of the Microsoft Corporation in the United States and/
or other jurisdictions.
PCI Express and PCIe are registered trademarks of PCI-SIG.
Other product names used in this publication are for identification purposes only and may be trademarks of
their respective companies.
Dolby Laboratories, Inc.
Manufactured under license from Dolby Laboratories.
Rovi Corporation
This device is protected by U.S. patents and other intellectual property rights. The use of Rovi Corporation's
copy protection technology in the device must be authorized by Rovi Corporation and is intended for home
and other limited pay-per-view uses only, unless otherwise authorized in writing by Rovi Corporation.
Reverse engineering or disassembly is prohibited.
USE OF THIS PRODUCT IN ANY MANNER THAT COMPLIES WITH THE MPEG ACTUAL OR DE FACTO VIDEO
AND/OR AUDIO STANDARDS IS EXPRESSLY PROHIBITED WITHOUT ALL NECESSARY LICENSES UNDER
APPLICABLE PATENTS. SUCH LICENSES MAY BE ACQUIRED FROM VARIOUS THIRD PARTIES INCLUDING,
BUT NOT LIMITED TO, IN THE MPEG PATENT PORTFOLIO, WHICH LICENSE IS AVAILABLE FROM MPEG LA,
L.L.C., 6312 S. FIDDLERS GREEN CIRCLE, SUITE 400E, GREENWOOD VILLAGE, COLORADO 80111.
ii
AMD Radeon™ R7 240/R7 250 Graphics © 2014 Advanced Micro Devices, Inc.

Important Safety Instructions
Note: This product is for use only with compatible UL-listed personal computers that have installation
instructions detailing user installation of this class of product.
Read all instructions before beginning installation. All safety and installation instructions should be read
before the product is installed or operated.
Retain all instructions. Safety, installation, and operating instructions should be retained for future reference.
Heed all warnings. All warnings regarding the product and its operating instructions should be obeyed.
Use appropriate grounding.
Caution:
[Where applicable] For continued protection against the risk of electric shock and fire, install this accessory
only in products equipped with a three-wire grounding plug, a plug having a third (grounding) pin. This is
a safety feature. Do not remove the grounding pin of a three-pin plug.
Attach product securely. All product-securing screws or fasteners should be completely tightened in order to
provide continuous bonding between the product and the PC chassis, as appropriate.
iii
© 2014 Advanced Micro Devices, Inc. AMD Radeon™ R7 240/R7 250 Graphics

iv
AMD Radeon™ R7 240/R7 250 Graphics © 2014 Advanced Micro Devices, Inc.

Contents
Chapter 1 Getting Started . . . . . . . . . . . . . . . . . . . . . . . . . . . . . . . . . . . . . . . . . . . . . 1
1.1 System Requirements . . . . . . . . . . . . . . . . . . . . . . . . . . . . . . . . . . . . . . . . . . . . . . . . . . . . . . . . . . . . . . . . . . . . . . . . . . . . . . . . . . . . . . . . . . . . . . . . . . . . . . . . . . . . . . . . . . . . . . . . . . 1
1.1.1 Requirements for AMD CrossFire Technology . . . . . . . . . . . . . . . . . . . . . . . . . . . . . . . . . . . . . . . . . . . . . . . . . . . . . . . . . . . . . . . . . . . . . . . . . . . . .1
1.2 Recording the Serial and Part Numbers . . . . . . . . . . . . . . . . . . . . . . . . . . . . . . . . . . . . . . . . . . . . . . . . . . . . . . . . . . . . . . . . . . . . . . . . . . . . . . . . . . . . . . . . . . . . . . .2
Chapter 2 Hardware and Software Installation . . . . . . . . . . . . . . . . . . . . . . . . . . . . . 3
2.1 Installation Overview . . . . . . . . . . . . . . . . . . . . . . . . . . . . . . . . . . . . . . . . . . . . . . . . . . . . . . . . . . . . . . . . . . . . . . . . . . . . . . . . . . . . . . . . . . . . . . . . . . . . . . . . . . . . . . . . . . . . . . . . . .3
2.2 Installing the Graphics Card . . . . . . . . . . . . . . . . . . . . . . . . . . . . . . . . . . . . . . . . . . . . . . . . . . . . . . . . . . . . . . . . . . . . . . . . . . . . . . . . . . . . . . . . . . . . . . . . . . . . . . . . . . . . . . . .3
2.3 AMD Drivers and Software . . . . . . . . . . . . . . . . . . . . . . . . . . . . . . . . . . . . . . . . . . . . . . . . . . . . . . . . . . . . . . . . . . . . . . . . . . . . . . . . . . . . . . . . . . . . . . . . . . . . . . . . . . . . . . . . . 5
Chapter 3 Display Configuration . . . . . . . . . . . . . . . . . . . . . . . . . . . . . . . . . . . . . . . .7
3.1 Baseplate Connections . . . . . . . . . . . . . . . . . . . . . . . . . . . . . . . . . . . . . . . . . . . . . . . . . . . . . . . . . . . . . . . . . . . . . . . . . . . . . . . . . . . . . . . . . . . . . . . . . . . . . . . . . . . . . . . . . . . . . . . .7
3.2 Display Adapters (Optional Accessories) . . . . . . . . . . . . . . . . . . . . . . . . . . . . . . . . . . . . . . . . . . . . . . . . . . . . . . . . . . . . . . . . . . . . . . . . . . . . . . . . . . . . . . . . . . . . .8
3.3 Configuration Options . . . . . . . . . . . . . . . . . . . . . . . . . . . . . . . . . . . . . . . . . . . . . . . . . . . . . . . . . . . . . . . . . . . . . . . . . . . . . . . . . . . . . . . . . . . . . . . . . . . . . . . . . . . . . . . . . . . . . . . . 8
3.4 Using Adapters . . . . . . . . . . . . . . . . . . . . . . . . . . . . . . . . . . . . . . . . . . . . . . . . . . . . . . . . . . . . . . . . . . . . . . . . . . . . . . . . . . . . . . . . . . . . . . . . . . . . . . . . . . . . . . . . . . . . . . . . . . . . . . . . . . . 9
Chapter 4 AMD CrossFire Technology . . . . . . . . . . . . . . . . . . . . . . . . . . . . . . . . . . 11
4.1 AMD CrossFire Overview . . . . . . . . . . . . . . . . . . . . . . . . . . . . . . . . . . . . . . . . . . . . . . . . . . . . . . . . . . . . . . . . . . . . . . . . . . . . . . . . . . . . . . . . . . . . . . . . . . . . . . . . . . . . . . . . . 11
4.2 Installing AMD CrossFire Graphics Cards . . . . . . . . . . . . . . . . . . . . . . . . . . . . . . . . . . . . . . . . . . . . . . . . . . . . . . . . . . . . . . . . . . . . . . . . . . . . . . . . . . . . . . . . . 11
4.3 Enabling and Configuring AMD CrossFire . . . . . . . . . . . . . . . . . . . . . . . . . . . . . . . . . . . . . . . . . . . . . . . . . . . . . . . . . . . . . . . . . . . . . . . . . . . . . . . . . . . . . . . . . 15
Chapter 5 Using the Control Center Software . . . . . . . . . . . . . . . . . . . . . . . . . . . . .17
5.1 Control Center Overview . . . . . . . . . . . . . . . . . . . . . . . . . . . . . . . . . . . . . . . . . . . . . . . . . . . . . . . . . . . . . . . . . . . . . . . . . . . . . . . . . . . . . . . . . . . . . . . . . . . . . . . . . . . . . . . . . . 17
5.2 Starting the Control Center Software . . . . . . . . . . . . . . . . . . . . . . . . . . . . . . . . . . . . . . . . . . . . . . . . . . . . . . . . . . . . . . . . . . . . . . . . . . . . . . . . . . . . . . . . . . . . . . . . . 17
5.3 Using the Control Center Help System . . . . . . . . . . . . . . . . . . . . . . . . . . . . . . . . . . . . . . . . . . . . . . . . . . . . . . . . . . . . . . . . . . . . . . . . . . . . . . . . . . . . . . . . . . . . . . 18
Chapter 6 Reference . . . . . . . . . . . . . . . . . . . . . . . . . . . . . . . . . . . . . . . . . . . . . . . . 21
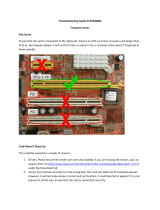
6.1 Troubleshooting . . . . . . . . . . . . . . . . . . . . . . . . . . . . . . . . . . . . . . . . . . . . . . . . . . . . . . . . . . . . . . . . . . . . . . . . . . . . . . . . . . . . . . . . . . . . . . . . . . . . . . . . . . . . . . . . . . . . . . . . . . . . . . . .21
6.1.1 Graphics Card Installation Troubleshooting . . . . . . . . . . . . . . . . . . . . . . . . . . . . . . . . . . . . . . . . . . . . . . . . . . . . . . . . . . . . . . . . . . . . . . . . . . . . . . 21
6.1.2 Troubleshooting AMD CrossFireX . . . . . . . . . . . . . . . . . . . . . . . . . . . . . . . . . . . . . . . . . . . . . . . . . . . . . . . . . . . . . . . . . . . . . . . . . . . . . . . . . . . . . . . . . . . . . 22
6.1.3 HDTV Adapter Troubleshooting . . . . . . . . . . . . . . . . . . . . . . . . . . . . . . . . . . . . . . . . . . . . . . . . . . . . . . . . . . . . . . . . . . . . . . . . . . . . . . . . . . . . . . . . . . . . . . . 23
6.2 Customer Care . . . . . . . . . . . . . . . . . . . . . . . . . . . . . . . . . . . . . . . . . . . . . . . . . . . . . . . . . . . . . . . . . . . . . . . . . . . . . . . . . . . . . . . . . . . . . . . . . . . . . . . . . . . . . . . . . . . . . . . . . . . . . . . . . . 25
6.2.1 Contact Information . . . . . . . . . . . . . . . . . . . . . . . . . . . . . . . . . . . . . . . . . . . . . . . . . . . . . . . . . . . . . . . . . . . . . . . . . . . . . . . . . . . . . . . . . . . . . . . . . . . . . . . . . . . . . . . . . . 25
6.2.2 Disclaimer . . . . . . . . . . . . . . . . . . . . . . . . . . . . . . . . . . . . . . . . . . . . . . . . . . . . . . . . . . . . . . . . . . . . . . . . . . . . . . . . . . . . . . . . . . . . . . . . . . . . . . . . . . . . . . . . . . . . . . . . . . . . . . . . 25
6.3 International Compliance Information . . . . . . . . . . . . . . . . . . . . . . . . . . . . . . . . . . . . . . . . . . . . . . . . . . . . . . . . . . . . . . . . . . . . . . . . . . . . . . . . . . . . . . . . . . . . . . 25
6.3.1 FCC Compliance Information (USA) . . . . . . . . . . . . . . . . . . . . . . . . . . . . . . . . . . . . . . . . . . . . . . . . . . . . . . . . . . . . . . . . . . . . . . . . . . . . . . . . . . . . . . . . . 26
©
2014 Advanced Micro Devices, Inc. AMD Radeon™ R7 240/R7 250 Graphics

6.3.2 Industry Canada Compliance Statement (Canada) . . . . . . . . . . . . . . . . . . . . . . . . . . . . . . . . . . . . . . . . . . . . . . . . . . . . . . . . . . . . . . . . . . . . . 27
6.3.3 CE Compliance Information (European Union) . . . . . . . . . . . . . . . . . . . . . . . . . . . . . . . . . . . . . . . . . . . . . . . . . . . . . . . . . . . . . . . . . . . . . . . . . 27
6.3.4 Electrical Safety . . . . . . . . . . . . . . . . . . . . . . . . . . . . . . . . . . . . . . . . . . . . . . . . . . . . . . . . . . . . . . . . . . . . . . . . . . . . . . . . . . . . . . . . . . . . . . . . . . . . . . . . . . . . . . . . . . . . . . . . 28
6.3.5 VCCI ITE Compliance Information (Japan) . . . . . . . . . . . . . . . . . . . . . . . . . . . . . . . . . . . . . . . . . . . . . . . . . . . . . . . . . . . . . . . . . . . . . . . . . . . . . . . . 28
6.3.6 KC Certification Information (Korea) . . . . . . . . . . . . . . . . . . . . . . . . . . . . . . . . . . . . . . . . . . . . . . . . . . . . . . . . . . . . . . . . . . . . . . . . . . . . . . . . . . . . . . . . . 29
6.3.7 BSMI Certification Information (Taiwan) . . . . . . . . . . . . . . . . . . . . . . . . . . . . . . . . . . . . . . . . . . . . . . . . . . . . . . . . . . . . . . . . . . . . . . . . . . . . . . . . . . . 30
6.3.8 C-Tick (Australia and New Zealand) . . . . . . . . . . . . . . . . . . . . . . . . . . . . . . . . . . . . . . . . . . . . . . . . . . . . . . . . . . . . . . . . . . . . . . . . . . . . . . . . . . . . . . . . . 31
6.3.9 Product Environmental Compliance . . . . . . . . . . . . . . . . . . . . . . . . . . . . . . . . . . . . . . . . . . . . . . . . . . . . . . . . . . . . . . . . . . . . . . . . . . . . . . . . . . . . . . . . . .31
6.3.10 Waste Electrical and Electronic Equipment (WEEE) Directive Compliance (European
Union) . . . . . . . . . . . . . . . . . . . . . . . . . . . . . . . . . . . . . . . . . . . . . . . . . . . . . . . . . . . . . . . . . . . . . . . . . . . . . . . . . . . . . . . . . . . . . . . . . . . . . . . . . . . . . . . . . . . . . . . . . . . . . . . . . . . . . . . .31
vi
AMD Radeon™ R7 240/R7 250 Graphics © 2014 Advanced Micro Devices, Inc.

Chapter 1
Getting Started
Before you begin installing your new AMD Radeon R7 240/R7 250 graphics card (P/N:
102-C552xx-xx, 102-C550xx-xx), please make sure you have the proper system
requirements and have completed the required preinstallation tasks as outlined in this
chapter.
1.1 System Requirements
Minimum requirements for installing a single AMD Radeon R7 240/R7 250 graphics
card:
•
AMD Athlon™ or Intel Pentium® 4 CPU.
•
PCI Express® based PC with one ×16 lane graphics slot available on the
motherboard.
•
2 GB RAM .
•
Windows® XP, Windows Vista®, Windows® 7, Windows® 8, Windows® 8.1 or
Linux® operating system (64-bit is highly recommended). Windows Vista ,
Windows 8, Windows 8.1, or Windows 7 is recommended for full feature
functionality.
•
A 350 watt or better power supply.
Certified power supplies are strongly recommended; for a list of certified power
supplies, see ati.amd.com/certifiedpsu.
•
Internet connection or CD-ROM/DVD-ROM drive for installation software.
•
Use of three or more displays with AMD Eyefinity technology requires
DisplayPort-capable displays or AMD Eyefinity validated dongles. For more
information, see Chapter 3 Display Configuration (p. 7).
1.1.1 Requirements for AMD CrossFire™ Technology
Minimum requirements for installing an additional graphics card for
AMD CrossFire™ configuration:
Note: AMD CrossFire configurations for AMD Radeon R7 240/R7 250 graphics cards
do not require a AMD CrossFire internal bridge interconnect.
•
AMD CrossFire certified motherboard. For an up-to-date listing of
AMD CrossFire certified motherboards, see support.amd.com/us/certified/
Pages/certified-components.aspx.
•
A second AMD Radeon R7 240/R7 250 graphics card.
©
2014 Advanced Micro Devices, Inc. AMD Radeon™ R7 240/R7 250 Graphics

•
A 475 watt or better power supply.
For an up-to-date listing of certified power supplies, see support.amd.com/us/
certified/power-supplies/Pages/listing.aspx.
•
Certified system cases with good airflow and cooling are recommended.
For more information, see Chapter 4 AMD CrossFire Technology (p. 11).
1.2 Recording the Serial and Part Numbers
Write down the serial number and part number before installing the graphics card.
The serial number and 102 part number on the graphics card are required for
registration and free support. They are located on a sticker on the back of the card.
The emphasized numbers in bold are required for registration and free support.
Figure 1–1 Sample Serial and Part Numbers
2 Getting Started
AMD Radeon™ R7 240/R7 250 Graphics © 2014 Advanced Micro Devices, Inc.

Chapter 2
Hardware and Software Installation
This chapter details how to install your graphics card in your system as well as where
to download associated software and drivers.
2.1 Installation Overview
Once you have determined that your system meets the minimum requirements,
perform the following tasks to install your new graphics card. Detailed installation
instructions are provided in the following sections.
1. If you are replacing an existing graphics card, uninstall the old graphics driver
and software.
Note: If you are using a motherboard containing an on-board graphics solution
and do not intend to use it as part of a multiple monitor configuration, disable
it.
2. Turn off and disconnect your computer system.
3. If needed, remove any old graphics card(s).
4. Install the new graphic card.
5. Reassemble and connect your computer system and display(s).
6. Start the computer system and install the new AMD Catalyst™ drivers and
configuration software.
7. Restart the computer system.
2.2 Installing the Graphics Card
1. Turn off the computer, monitor(s), and other peripheral devices.
2. Unplug the computer's power cord, and then disconnect all cables from the back
of the computer.
Caution:
Wait approximately 20 seconds after unplugging the power cord before
disconnecting a peripheral cable or removing a component from the
motherboard to avoid possible damage to the motherboard.
3. Remove the cover to the computer's case.
Note: If necessary, consult the computer manual for help in removing the
cover.
©
2014 Advanced Micro Devices, Inc. AMD Radeon™ R7 240/R7 250 Graphics

Caution:
Static electricity can seriously damage computer components. Discharge
your body's static electricity by touching the power supply or the metal
surface of the computer chassis before you touch any components inside the
computer's case to avoid damaging them.
4. Unscrew or unfasten and remove any existing graphics card from the computer,
if necessary.
5. Locate the appropriate bus slot and, if necessary, remove the corresponding
metal backplate cover(s). Make sure all internal cables are clear of the slot.
Note: If you cannot find a bus slot to match the card, you need a graphics card
with the correct bus to match the motherboard.
6. Align the graphics card with the slot and press it in firmly until the card is fully
seated.
7. If your card requires supplementary power and must be connected directly to
the power supply, locate the appropriate power connector cable(s) from the
power supply and connect it (or them) to the graphics card's supplementary
power connector(s).
Note: If applicable, before installing a card that requires a supplementary
power connection, make sure your existing power supply has such a
connection available.
Tip: The location of power connections may vary between models. They can
be located on either the side or back of the card.
Figure 2–1 Possible Power Connection Locations on the Graphics Card
1 Power supply
2 Graphics card
8. Fasten the graphics card securely to the back panel.
9. Make sure no internal cables are interfering with components inside the
computer (for example, a cooling fan), and then replace the computer cover.
4 Hardware and Software Installation
AMD Radeon™ R7 240/R7 250 Graphics © 2014 Advanced Micro Devices, Inc.

10. Reconnect any cables you have disconnected during installation, and then plug
in the computer's power cord.
11. Turn on the monitor, and then the computer.
If you have properly installed the graphics card, the computer should start normally.
Proceed to install the software and drivers for your AMD Radeon R7 240/R7 250
graphics card.
2.3 AMD Drivers and Software
Drivers are small but important programs that enable an operating system to
communicate with a piece of hardware, such as a graphics card.
When you install a new graphics card, you must also install the driver and
configuration software the card requires to function properly.
You also need to install (or reinstall) your AMD Radeon drivers when you have
reinstalled or upgraded your operating system or when you download updated
drivers.
The latest drivers are available from AMD's Web site at http://support.amd.com.
Note: When reinstalling drivers, always uninstall any previous drivers that are on
your system, even if they are for the same graphics card. Always start "fresh."
Hardware and Software Installation 5
© 2014 Advanced Micro Devices, Inc. AMD Radeon™ R7 240/R7 250 Graphics

6 Hardware and Software Installation
AMD Radeon™ R7 240/R7 250 Graphics © 2014 Advanced Micro Devices, Inc.

Chapter 3
Display Configuration
This section describes how to configure displays and lists available display
connections for your graphics card.
3.1 Baseplate Connections
The following figure shows display connections that are available for the AMD Radeon
R7 240/R7 250 series graphics cards.
Note: Available connections vary between models.
Figure 3–1 AMD Radeon R7 240/R7 250 Display Connections
1 HDMI™ connection. Carries video and audio signals to HDMI-compliant
devices.
2 DisplayPort connection. Carries video and audio signals to DisplayPort-
compliant devices.
3 Single-link DVI-I connection. Provides video digital signals and HDMI output
that is compatible with most HDMI-compliant devices.
4 VGA connection. Carries video analog signals.
5 Single-link DVI-D connection. Provides video digital signals and HDMI output
that is compatible with most HDMI-compliant devices.
© 2014 Advanced Micro Devices, Inc. AMD Radeon™ R7 240/R7 250 Graphics

3.2 Display Adapters (Optional Accessories)
The following table lists the options for connecting displays that are not directly
supported by the connection types available on the graphics card.
Adapter Description
DVI-to-VGA adapter
DVI-to-HDMI
If your graphics card includes a DisplayPort or Mini DisplayPort connection, you can
use the following types of DisplayPort-compliant adapters/dongles with your graphics
card:
•
Adapter—Uses DisplayPort signals to transmit audio and video information
between variants of the same connection type (for example, Mini DisplayPort to
standard DisplayPort).
•
Active dongle—Allows connection from a DisplayPort connection to a non-
DisplayPort display using DisplayPort signals.
•
Passive dongle—Allows connection from a DisplayPort connection to a non-
DisplayPort display using non-DisplayPort signals.
Adapters/donglges that are not provided with your graphics cards can also be used
as long as they are compatible with your graphics card and displays. They can be
purchased from AMD's Web site or through your local AMD resellers.
A list of compatible adpaters/dongles can be found at: http://support.amd.com/us/
eyefinity/Pages/eyefinity-dongles.aspx.
3.3 Configuration Options
The AMD Radeon R7 240/R7 250 graphics card provides hardware support for up to
six displays. More than one display can be connected to a DisplayPort connection using
a daisy chain configuration or a hub (via the DisplayPort v1.2 standard).
8 Display Configuration
AMD Radeon™ R7 240/R7 250 Graphics © 2014 Advanced Micro Devices, Inc.

The following table lists options for attaching displays to your graphics card. The types
of display configurations that can be used depend on the display connections that are
available on your graphics card.
For best graphics performance and quality, always use native connections, when
available.
Note: Adapters/donglges that are not provided with your graphics cards can also be
purchased from AMD's Web site or through your local AMD resellers.
Table 3–1 Display Configurations
Display Connections
CRT analog display
•
VGA connection
•
DVI-I/DVI-D connection and DVI-to-VGA adapter
LCD display
•
VGA connection and VGA cable
•
DVI-I/DVI-D connection and DVI cable
•
DVI-I/DVI-D connection and DVI-to-VGA adapter
•
DisplayPort connection and DisplayPort cable
•
DisplayPort connection and DisplayPort-to-DVI adapter
HDTV display
•
DVI-I/DVI-D connection and DVI cable
•
DisplayPort connection and DisplayPort-to-DVI adapter
HDMI HDTV
•
HDMI connection and HDMI cable
•
DVI-I/DVI-D connection and DVI-to-HDMI adapter and HDMI cable
•
DisplayPort connection and DisplayPort-to-HDMI adapter
Once displays are connected to the graphics card, you can control how they are
currently configured using the Control Center software application. Common
configuration tasks include:
•
Adding and removing displays
•
Rotating displays
•
Setting the main (primary) display
•
Duplicating and extending desktops
•
Arranging desktops
For more information, see Chapter 5 Using the Control Center Software (p. 17).
3.4 Using Adapters
The following procedure describes how to connect a display to your graphics card
using an adapter.
1. Turn off your computer and display.
2. Plug the adapter into the connection from your AMD Radeon graphics card and
tighten the thumbscrews (if there are any).
3. Connect your display's cable to the adapter and tighten the thumbscrews (if
there are any).
4. Turn on your display first, then your computer.
Display Configuration 9
© 2014 Advanced Micro Devices, Inc. AMD Radeon™ R7 240/R7 250 Graphics

Use the Control Center software application to configure the new display.
10 Display Configuration
AMD Radeon™ R7 240/R7 250 Graphics © 2014 Advanced Micro Devices, Inc.

Chapter 4
AMD CrossFire™ Technology
Note: AMD CrossFire™ Technology features are available only for systems installed
with more than one compatible AMD Radeon™ graphics cards.
4.1 AMD CrossFire™ Overview
AMD CrossFire technology is designed to enhance the graphics quality and
performance of 3D games and applications by combining the processing power of two
or more AMD Radeon graphics cards, essentially creating a multi-GPU performance
gaming platform. A typical AMD CrossFire setup involves two graphics cards.
For more information, visit the AMD CrossFire technology Web page at http://
sites.amd.com/us/game/technology/Pages/crossfirex.aspx.
4.2 Installing AMD CrossFire™ Graphics Cards
These instructions assume that a PCIe® graphics card has already been successfully
installed in the secondary slot (slot one), and that the primary slot (slot zero) is empty.
Note: Consult your system builder or OEM to ensure that your system has an
adequate power supply.
For an up-to-date listing of AMD CrossFire certified motherboards and power
supplies, see support.amd.com/us/certified/Pages/certified-components.aspx.
1. Make sure the computer, monitor, and other peripheral devices are off.
2. Unplug the computer power cord and disconnect the monitor cable from the
back panel of the computer.
Caution:
To avoid possible damage to the motherboard, wait approximately 20 seconds
after unplugging the power cord before disconnecting a peripheral or
removing a component from the motherboard.
3. Remove the computer cover.
If necessary, consult the computer manual for help removing the cover.
Caution:
Remember to discharge your body’s static electricity by touching the power
supply case or the metal surface of the computer chassis.
©
2014 Advanced Micro Devices, Inc. AMD Radeon™ R7 240/R7 250 Graphics

4. Remove any unneeded graphics cards from the computer.
Warning:
Some graphics cards can get hot while operating. Wait approximately five
minutes after turning off the computer before touching the card.
5. Locate the PCIe slots on the motherboard. If necessary, also remove the
corresponding back panel cover.
6. Align the new graphics card in the secondary PCIe slot next to the existing
graphics card and press firmly until the card is fully seated.
Tip: For optimal performance in a dual-GPU AMD CrossFire configuration,
make sure that each AMD Radeon R7 240/R7 250 graphics card is separated by
at least one empty expansion slot.
7. If needed, connect the power supply to the cards.
Tip: The location of power connections may vary between models. They can
be located on either the side or back of the card.
12 AMD CrossFire™ Technology
AMD Radeon™ R7 240/R7 250 Graphics © 2014 Advanced Micro Devices, Inc.

Figure 4–1 Connecting the Power Cables
1 Power supply
2 Existing card
3 New card
8. If your AMD CrossFire configuration requires an AMD CrossFire internal bridge
interconnect between cards, remove the protection tags from the ends of the
AMD CrossFire interconnect before using it to connect the cards.
Caution:
Always handle the AMD CrossFire bridge interconnect by the connector only.
Do not push or pull on the flexible cable.
AMD CrossFire™ Technology 13
© 2014 Advanced Micro Devices, Inc. AMD Radeon™ R7 240/R7 250 Graphics

Figure 4–2 AMD CrossFire™ Bridge Interconnect Protection Tag
Figure 4–3 AMD CrossFire™ Installation
1 AMD CrossFire graphics cards
2 Interconnect
9. Fasten the graphics cards securely to the back panel.
14 AMD CrossFire™ Technology
AMD Radeon™ R7 240/R7 250 Graphics © 2014 Advanced Micro Devices, Inc.
/