isconnecting Your Hard Driv
Your external hard drive is hot-swappable. It can be connected and disconnected without restarting your computer. To disconnect your drive at
any time, per
orm the
ollowing steps
You can also disconnect your hard drive at any time while your computer is powered o
Note: Please be careful to follow the correct
rocedure when disconnectin
our unit. Sim
l
un
lu
in
the unit without fi rst followin
the instructions below ma
result in dama
e to
our unit and/or loss of data.
or Win
ows Users:
. If
ou have fi les located on
our drive o
en in an
a
lications, close them
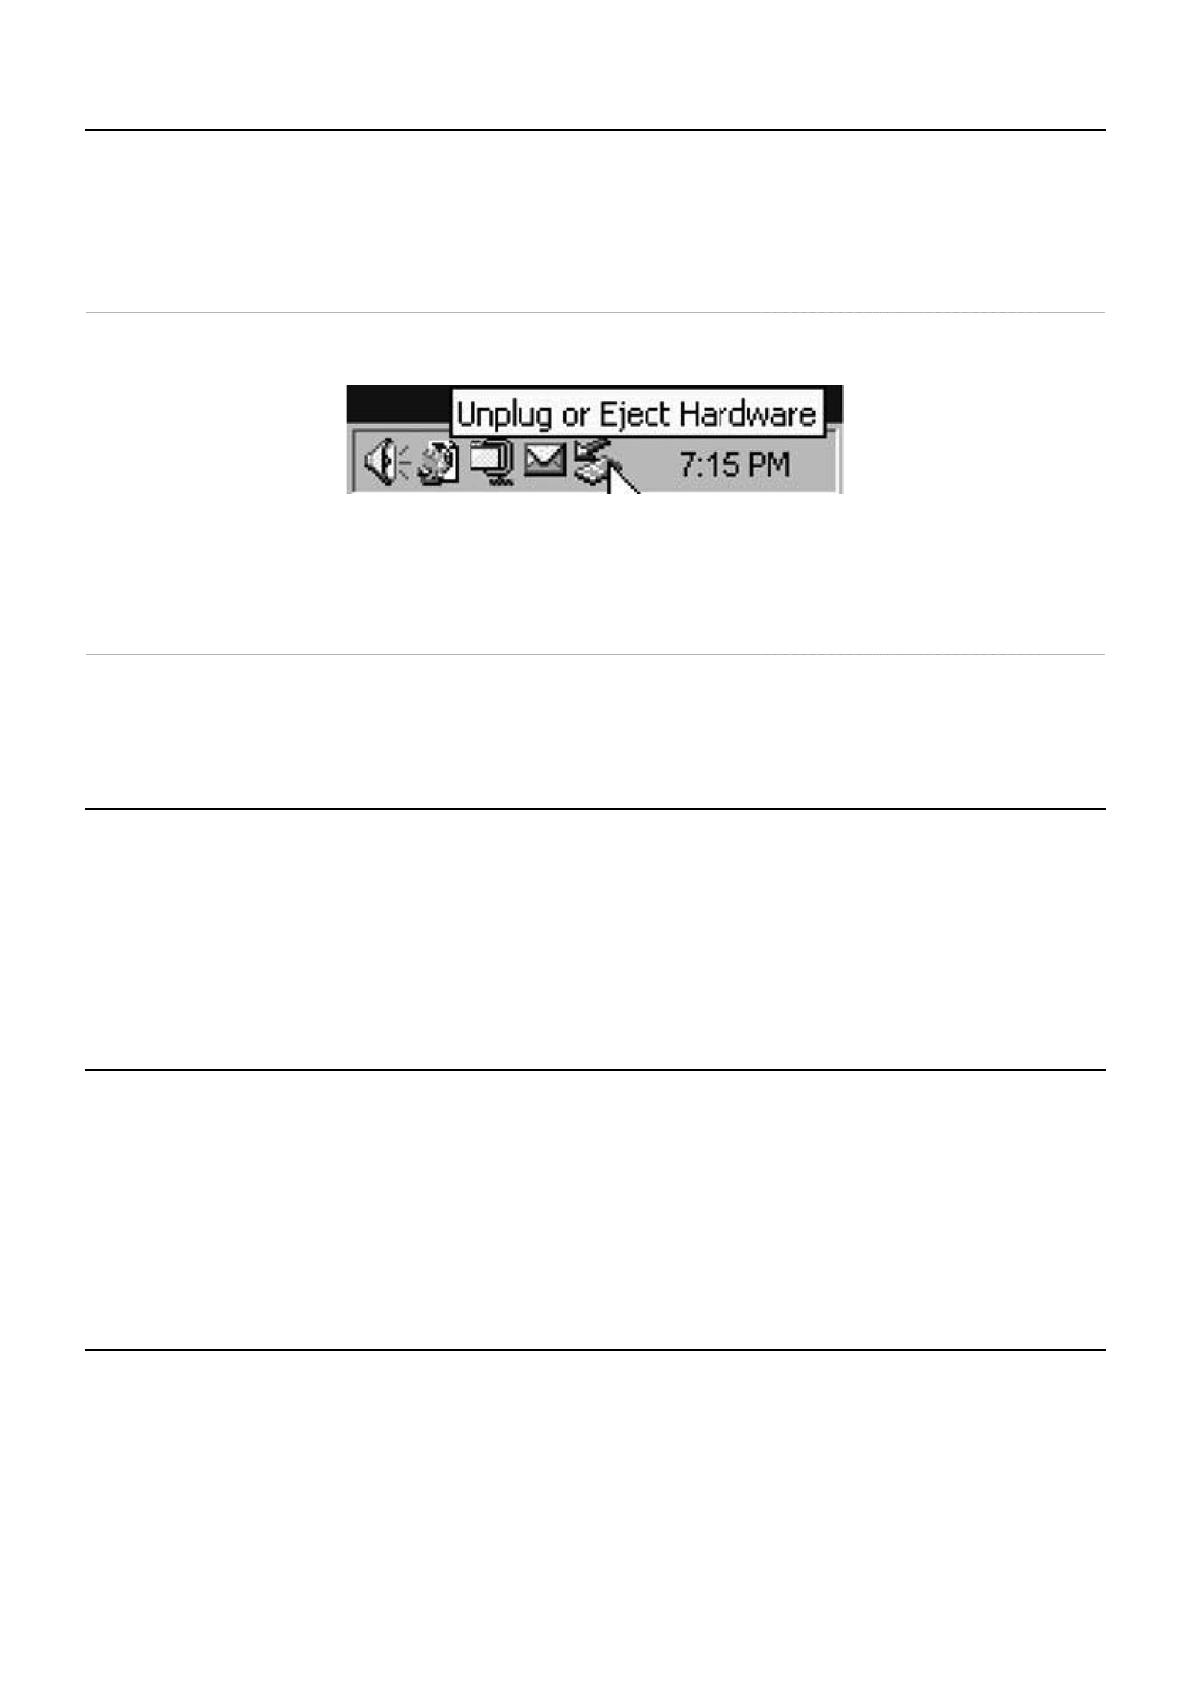
. Click the Un
lu
or E
ect Hardware button in the S
stem Tra
. Select your drive
rom the menu that appears.
. A
ter a moment, Windows will display a message that your hardware can be sa
ely removed.
or Mac
sers:
. If
ou have fi les located on
our drive o
en in an
a
lications, close them
. Locate the icon
or your drive on the desktop, and drag it to the trash
Tec
nica
Suppor
you are experiencing di
culty installing or using your Verbatim product, please visit the main Verbatim Technical Support website at
ww.verbatim-europe.com. From this page you can access our library o
user documentation, read answers to
requently asked questions, and
download available software u
dates. Althou
h most of our customers fi nd this content suffi cient to
ut them back on the ri
ht track, this
a
e
a
so
ists wa
s in w
ic
ou can contact t
e Ver
atim Tec
nica
Su
ort Team
irect
.
uro
e: For technical su
ort in Euro
e e-mail drivesu
ort@verbatim-euro
e.com or call 00 800 3883 2222 in the followin
countries: Austria,
el
ium, Denmark, Finland, France, German
, Hun
ar
, Ital
, Luxembur
, Monaco, Netherlands, Norwa
, Poland, Portu
al, Re
ublic of Ireland,
ain, Sweden, Switzerland and United Kin
dom. All other countries call +353 61 226586
imited Warranty Term
Verbatim Limited warrants this product to be
ree
rom de
ects in material and workmanship
or a period o
2 years
rom date o
purchase. This
arranty excludes batteries. I
this product is
ound to be de
ective within the warranty period, it will be replaced at no cost to you. You may return
t with your original cash register receipt to the place o
purchase or contact Verbatim
roduct replacement is your sole remedy under this warranty, and this warranty does not apply to normal wear or to damage resulting
rom
abnormal use, misuse, abuse, ne
lect or accident, or to an
incom
atibilit
or
oor
erformance due to the s
ecifi c com
uter software or
ar
ware use
. VERBATIM WILL NOT BE LIABLE FOR DATA LOSS OR ANY INCIDENTAL
CONSEQUENTIAL OR SPECIAL DAMAGES
HOWEVER
CAUSED, FOR BREACH OF WARRANTIES OR OTHERWISE. This warrant
ives
ou s
ecifi c le
al ri
hts and
ou ma
also have other ri
hts which
ar
from state to state or countr
to countr
.
CC Compliance
This equipment has been tested and
ound to comply with the limits
or a Class B digital device, pursuant to Part 15 o
the FCC Rules. These
limits are designed to provide reasonable protection against harm
ul inter
erence in a residential installation. This equipment generates, uses
and can radiate radio
requency energy and, i
not installed and used in accordance with the instructions, may cause harm
ul inter
erence to radio
communications. However, there is no guarantee that inter
erence will not occur in a particular installation. I
this equipment does cause harm
ul
nterference to radio or television rece
tion, which can be determined b
turnin
the e
ui
ment off and on, the user is encoura
ed to tr
to
correct the interference b
one or more of the followin
measures
• Reorient or relocate the receivin
antenna
• Increase the separation between the equipment and receiver.
• Connect the equipment into an outlet on a circuit di
erent
rom that to which the receiver is connected.
• Consult the dealer or an experienced radio/TV technician
or help.


