Page is loading ...

Batch no: WMI14932
Page 01 of 13
900 x 550 x 2000 (H)/WHITE
LOIRE 2 DOOR WARDROBE ASSEMBLY INSTRUCTIONS
PLEASE READ this sheet prior to assembly to familiarise yourself with the various stages of
construction.
Carefully open the pack supplied and check the contents against the parts and fittings check list.
Do not destroy any of the packaging until you are certain that you have all the necessary parts for
the assembly.
CAUTION: There are small components used in the constr
uction of this unit. These loose items
should be kept away from young children whilst ass
embling your unit to avoid the danger of
choking hazards.
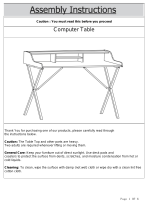
Thank you for purchasing the LOIRE 2 DOOR WARDROBE. Please read
the instructions carefully to ensure safe operation of the product.
Tools Required
revirdwercS pillihP
Allen Key

Page 02 of 13
Batch no: WMI14932
IMPORTANT - READ CAREFULLY - RETAIN THESE INSTRUCTIONS
FOR FUTURE REFERENCE.
INFORMATION
CARE INFORMATION
•
•
Never use scourers, abrasives or chemical cleaners.
To clean wipe with a sponge and warm soapy water. Do no
t use solvent based cleaners or
detergents as they can bleach or damage the product.
• Due to the size of this product we recommend that it is assembled in the room intended for
use.
• Whe
n you are ready to start, make sure that you have the right tools, plenty of space and a
clean, dry area for assembly.
• Unwrap all packaging materials and place the components on top of the carton box or on a
clean floor to prevent it from scratching.
WARNINGS
• This product should only be used on firm, level ground.
• Keep small parts out of reach of children.
• Make sure the legs re
main in contact with the gr
ound.
• Do not use power tools to construct this product.
• Do not tighten screws until fully assembled.
• Do not over tighten screws or bolts.
• Do not use this product if parts are missing, damaged or worn.
• Do not sit or stand on the product.
• When cleaning glass panels or mirrors use a damp cloth with washing up
liquid or soft soap if
necessary; do not use washing powders or any other substances containing
abrasives since
these substances scratch glass.
LOIRE 2 DOOR WARDROBE ASSEMBLY INSTRUCTIONS
• Check the pack and make sure you have all the parts listed.
• Ensure that this product is fully assembled as illustrated before use.
• Check all screws or bolts are tightened and inspect regularly.
• Tools not included.
•
It is essential that this unit is fixed to a wall with the fixings provided.
If in doubt please
consult a qualified tradesperson. Warning: Always ensure the area to be drilled is free fro
m
hidden electrical wires, water and gas pipes.
• We recommend the use of the wall strap provided for safety reasons. N.B.

Parts and Fittings Checklist
Please check the pack contents before assembling this product. If any components are
missing, please contact your retailer.
The fittings pack contains small items that should be kept away from small children.
Page 03 of 13
Batch no: WMI14932
LOIRE 2 DOOR WARDROBE ASSEMBLY INSTRUCTIONS
1.Top panel (1 pc)
4. Support rail (1pc)
5. Support rail (1pc)
3. Right side panel (1 pc)
6. Support rail (2pcs)
8. Support rail (1pc)
9. Support rail (1pc)
7. Support rail (1pc)
)cp1( liar troppuS .01 )cp1( lenap flehS .11
14. Back panel (2pcs)
13. Back panel (1pc)
12. Hanging rail (1pc)
16. Leg (4pcs)
18. Right door (1pc)
19. Drawer front (1pc)
(1pc)
20. Drawer back (1pc)
22. Right drawer side
25. Shelf panel (1pc)
24. Drawer support
(2pcs)

General Hints and Tips
Fittings
Code
Item
Quantity
Page 04 of 13
Batch no: WMI14932
A
Bolt ( M6 x 35mm )
Bolt ( M6 x 35mm )
6
Bolt ( M6 x 55mm )
Bolt ( M6 x 60mm )
Wood Dowel ( M8 x 30mm )
Screw ( M3 x 15mm )
Cam Bolt ( M7 x 35mm )
Cam ( 10mm x 13mm )
8
10
22
18
20
20
B
C
D
E
F
G
H
I
J
Screw ( M4 x 25mm )
Screw ( M3 x 15mm )
8
J
Bolt ( M4 x 25mm )
4
K
Knob
4
L
Support Pin ( M7 x 21mm )
4mm Allen Key
Spring Washer ( 1.5mm x 10mm )
Flat Washer ( 2mm x 19mm )
Rawl Plug ( M8 x 30mm )
Wall Screw ( M3 x 30mm )
4
1
8
8
2
2
2
2
M
N
O
P
Q
R
LOIRE 2 DOOR WARDROBE ASSEMBLY INSTRUCTIONS
the Cam Bolt. Once the Cam Bolt is inserted into the Cam, turn
secure.
180

Page 05 of 13
STEP 1
STEP 2
PARTS REQUIRED
PARTS REQUIRED
4. Support rail x 1
5. Support rail x 1
6. Support rail x 2
7. Support x 1
8. Support rail x 1
9. Support rail x 1
10. Support rail x 1
2.
3. Right side panel x 1
F. Cam Bolt x 16
Phillip Screwdriver x 1
D. Wood dowel x 22
2
3
Batch no: WMI14932
4
F
F
F
F
F
F
F
F
F
F
F
F
F
F
F
F
D
D
D
D
D
D
D
D
D
D
D
D
D
D
D
D
5
6
6
7
8
9
10
LOIRE 2 DOOR WARDROBE ASSEMBLY INSTRUCTIONS

STEP 3
STEP 4
PARTS REQUIRED
PARTS REQUIRED
3. Right side panel x 1
4. Support rail x 1
5. Support rail x 1
13. Back panel x 1
* Frame 3 + 4 + 5
G
G
3
4
5
3
13
Page 06 of 13
Batch no: WMI14932
G. Cam x 2
Phillip Screwdriver x 1
LOIRE 2 DOOR WARDROBE ASSEMBLY INSTRUCTIONS

STEP 5
STEP 6
PARTS REQUIRED
PARTS REQUIRED
G
G
G
G
G
G
6
14
14
7
8
10
9
6
Page 07 of 13
Batch no: WMI14932
6. Support rail x 2
7. Support rail x 1
8. Support rail x 1
9. Support rail x 1
10. Support rail x 1
14. Back panel x 2
G. Cam x 6
Phillip Screwdriver x 1
LOIRE 2 DOOR WARDROBE ASSEMBLY INSTRUCTIONS

STEP 7
STEP 8
PARTS REQUIRED
PARTS REQUIRED
Page 08 of 13
Batch no: WMI14932
G. Cam x 8
A. Bolt x 6
N. Allen key x 1
1. Top x 1
* Pre-assembled
* Pre-assembled
LOIRE 2 DOOR WARDROBE ASSEMBLY INSTRUCTIONS
1
G
G
G
G
A
N
G
G
G
G
2
1
1
2
3
4
5
6
6 9
7
10
8
Phillip Screwdriver x 1
4
5

STEP 9
PARTS REQUIRED
STEP 10
PARTS REQUIRED
L
K
B
N
N
C
X4
X10
15
16
16
2
3
15
7
16
16
16
Page 09 of 13
Batch no: WMI14932
15. Boom frame x 1
* Pre-assembled
* Frame 15 + 16
16. Leg x 4
B. Bolt x 8
K. Spring washer x 8
L. Flat washer x 8
N. Allen key x 1
C. Bolt x 10
N. Allen key x 1
8
LOIRE 2 DOOR WARDROBE ASSEMBLY INSTRUCTIONS

STEP 11
STEP 12
PARTS REQUIRED
PARTS REQUIRED
G
G
G
G
F
F
F
F
Page 10 of 13
Batch no: WMI14932
20. Drawer back x 1
22. Right drawer side x 1
24. Drawer support x 2
J. Screw x 4
Phillip Screwdriver x 1
* Pre-assembled
19. Drawer front x 1
F. Cam bolt x 4
G. Cam x 4
Phillip Screwdriver x 1
LOIRE 2 DOOR WARDROBE ASSEMBLY INSTRUCTIONS
X4
X4
21
24
20
21 22
24
20
22
23
19
19
J
J
J
J
J

STEP 13
STEP 14
PARTS REQUIRED
PARTS REQUIRED
Page 11 of 13
Batch no: WMI14932
18. Right door x 1
12. Hanging rail x 1
E. Screw x 18
Phillip Screwdriver x 1
LOIRE 2 DOOR WARDROBE ASSEMBLY INSTRUCTIONS
J
J
E
X4
X6
J. Screw x 4
Phillip Screwdriver x 1
12
2
3
17
2 3
2 3
17 18
18

STEP 15
STEP 16
PARTS REQUIRED
PARTS REQUIRED
Batch no: WMI14932
11. Shelf panel x 1
25. Shelf panel x 1
M. Support pin x 4
I. Knob x 2
H. Bolt x 2
Phillip Screwdriver x 1
I. Knob x 2
H. Bolt x 2
Phillip Screwdriver x 1
25
11
H
I
H
I
M
11
Page 12 of 13
LOIRE 2 DOOR WARDROBE ASSEMBLY INSTRUCTIONS
17 18
19
Insert the shelf support pins into the predrilled
holes suitable for the desired shelf height.

Page 13 of 13
STEP 17
PARTS REQUIRED
Batch no: WMI14932
Q
wall
R
P
O
O
Q
R
P
Always ensure the area to be drilled is free from
hidden electrical wires, water and gas pipes.
LOIRE 2 DOOR WARDROBE ASSEMBLY INSTRUCTIONS
R. Rawl plug x 2
Q. Wall screw x 2
P. Screw x 2
Phillip Screwdriver x 1
COMPLETED
/