Page is loading ...

Professional
Questions or concerns about your
cooker?
Before returning to the store...
Aroma’s customer service experts are happy
to help. Call us toll-free at 1-800-276-6286
Answers to many common questions and
even replacement parts can be found online.
Visit www.AromaCo.com/Support
Instruction Manual
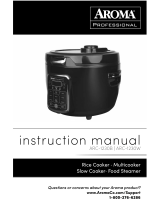
Digital Pressure Cooker
MTC-8016

Congratulations on your purchase of the Aroma® Professional 6 Quart Digital Pressure Cooker. In almost no time, you’ll be making delicious dishes at the touch of a
button! Whether long, medium or short grain rice, this cooker is specially calibrated to prepare all varieties of rice, including tough-to-cook whole grain brown rice, to uy
perfection.
In addition to rice, your new Aroma® Professional 6L Digital Pressure Cooker is ideal for healthy, one-pot meals. The convenient steam tray inserts directly over the rice,
allowing you to cook moist, fresh meats and vegetables at the same time in the same pot. Steaming foods locks in their natural avor and nutrients without added oil or
fat, for meals that are as nutritious and low-calorie as they are easy.
But it doesn’t end there. Your pressure cooker is also great for soups, stews, stocks, gumbos, jambalaya, breakfast frittata, dips and even cake! Other recipes are
available online at www.AromaCo.com or www.AromaTestKitchen.com.
This manual contains instructions for using your cooker and its convenient pre-programmed digital settings, as well as all of the accessories included. There are also
helpful measurement charts for cooking rice and steaming.
For more information on your Aroma® cooker, or for product service, recipes and other home appliance solutions, please visit us online at www.AromaCo.com.
Published By:
Aroma Housewares Co.
6469 Flanders Drive
San Diego, CA 92121
U.S.A.
1-800-276-6286
www.AromaCo.com
©2017 Aroma Housewares Company
All rights reserved.
www.AromaTestKitchen.com /AromaHousewares

1. Important:Readallinstructionscarefullybeforerstuse.
2. Do not touch hot surfaces. Use the handles or knobs.
3. Use only on a level, dry and heat-resistant surface.
4. To protect against re, electric shock and injury to persons, do not immerse
cord, plug or the appliance in water or any other liquid. See
instructions for cleaning.
5. Close supervision is necessary when the appliance is used by or near children.
6. Unplug from outlet when not in use and before cleaning. Allow unit to cool
before removing or replacing parts and before cleaning the appliance.
7. Do not operate any appliance with a damaged cord or plug or after the
appliance malfunctions or has been damaged in any manner. Contact Aroma®
customer service for examination, repair or adjustment.
8. The use of accessory attachments not recommended by Aroma®
Housewares may result in re, electrical shock or injury.
9. Do not use outdoors.
10. Do not let cord touch hot surfaces or hang over the edge of a counter or table.
11. NEVER ATTEMPT TO OPEN LID WHILE THE UNIT IS PRESSURE
COOKING. Do not open the pressure cooker until the unit has cooled and all
internal pressure has been released. If lid is dicult to turn, this indicates that
the cooker is still pressurized. Do not force it to open. Any pressure in the
cooker can be hazardous.
12. Do not place on or near a hot gas or electric burner or in a heated oven.
13. Do not use the appliance for other than its intended use.
14. Always check the pressure release devices for clogging before use.
15. Do not touch, cover or obstruct the steam vent on the top of the
pressure cooker as it is extremely hot and may cause scalding.
16. Use only with a 120V AC power outlet.
17. Always unplug from the plug gripping area. Never pull on the cord.
18. The pressure cooker should be operated on a separate electrical circuit from
other operating appliances. If the electrical circuit is overloaded with other
appliances, the pressure cooker may not operate properly.
Basic safety precautions should always be followed when using electrical appliances, including the following:
19. Always make sure the outside of the inner pot is dry prior to use. If the inner
pot is returned to the cooker when wet, it may damage or cause the product to
malfunction.
20. Food should not be left in the inner pot with the “Keep-Warm”
function on for more than 12 hours.
21. To disconnect, turn control to “OFF,” then remove the plug from the wall outlet.
22. To reduce the risk of electrical shock, cook only in the removable
inner pot provided.
23. Extreme caution must be used when moving a pressure cooker containing hot
food or liquids.
24. For household use only.
25. This appliance cooks under pressure. Improper use may result in scalding injury.
Make certain unit is properly closed before operating. Follow the instructions
in manual.
26. Do not ll the unit over 2/3 full. When cooking foods that expand during cooking
such as rice or dried vegetables, do not ll the unit over 1/2 full. Over lling may
cause a risk of clogging the vent pipe and developing excess pressure. Follow
the instructions in manual.
27. Be aware that certain foods, such as applesauce, cranberries, pearl barley,
oatmeal or other cereals, split peas, noodles, macaroni, rhubarb, or spaghetti
can foam, froth, and sputter, and clog the pressure release device (steam vent).
These foods should not be cooked in the pressure cooker.
28. Do not use this pressure cooker for pressure frying with oil.
29. To avoid spills and burns, do not carry pressure cooker by lid handle.
30. Do not wrap or tie cord around appliance.
31. Use only power cord provided.
32. WARNING: Spilled food can cause serious burns. Keep appliance and cord
away from children. Never drape cord over edge of counter, never use outlet
below counter, and never use with an extension cord.
33. Do not use for deep frying.
SAVE THESE INSTRUCTIONS
IMPORTANT SAFEGUARDS
1

THIS APPLIANCE IS FOR HOUSEHOLD USE ONLY.
IMPORTANT SAFEGUARDS (CONT.) / BEFORE FIRST USE
2
1. Read all instructions and important safeguards.
2. Remove all packaging materials and check that all items have been received in good condition.
3. Tear up all plastic bags and dispose of properly as they can pose a suocation or choking risk to children.
4. Wash all accessories in warm, soapy water. Rinse and dry thoroughly.
5. Remove the inner pot from cooker and clean with warm, soapy water. Rinse and dry thoroughly before returning to cooker.
6. Wipe body clean with a damp cloth.
NOTE
• Do not use harsh abrasive cleaners, scouring pads or products that are not considered safe to use on nonstick coatings.
• Any other servicing should be performed by Aroma® Housewares.
Polarized Plug
This appliance has a polarized plug (one blade is wider than the other); follow the instructions below:
To reduce the risk of electric shock, this plug is intended to t into a polarized outlet only one way. If the plug does not t fully into the outlet, reverse
the plug. If it still does not t, contact a qualied electrician. Do not attempt to modify the plug in any way.
A short power-supply cord is used to reduce the risk resulting from it being grabbed by children, becoming entangled in, or tripping over a longer cord.

3
Digital Controls
white
rice
Turns the cooker on or off.
Cooks delicious white rice automatically
Ideal for cooking brown
rice to perfection
Great for preparing all kinds of savory
or creamy soups
Ideal for making tender,
juicy meat dishes
Perfect for making homemade
chicken stock
Brings contents to a boil and
low simmer for savory rice
porridge
Perfect for cooking homemade
beans faster
Delicately steams fish and
other seafood
One press will CANCEL a
setting. A second press will set
the cooker to KEEP WARM
Activates selected function
Ideal for healthy sides and
main courses. Set the time
food needs to steam, it will
begin to countdown once
water reaches a boil and
switches to KEEP WARM
“Bakes” cakes and other treats
Sets to slow cook from 2 to 10 hours
and is great for homemade
roasts and stews
Allows you to select one of three pre-set
cooking times for selected function (rapid,
regular, extended).
Aroma’s patented technology
Sauté-Then-Simmer STS® will
sauté foods at a high heat and
automatically switch over to its simmer
mode once liquid is added
Sets up to 15 hours for rice ready when
it’s needed. Add rice and water in the
morning and set the timer for mealtime
at night
brown
rice
meat
poultry
slow
cook
(high/low)
adjust
STS®
delay
timer
soup
stew
porridge
beans
lentils
steam
cake
start
fish
keep
warm
cancel
start
Inner
Pot
Metal
Steam
Rack
Measuring
Cup
Bamboo
Spatula
Soup
Ladle
Plastic
Spatula
Pressure Release Valve
Lid
Handle
Control Panel
Digital Display
3
PARTS IDENTIFICATION
3

4
HELPFUL HINTS
• If you misplace the measuring cup, a ¾ standard US cup is an exact
replacement.
• To add more avor to rice, try substituting a favorite broth or stock. The ratio of
broth/stock to rice will be the same as water to rice.
• For approximate rice cooking times and suggested rice/water ratios, see the
“Rice/Water Measurement Table” on page 8.
• Since most vegetables only absorb a small amount of water, there is no need to
increase the amount of water with a larger serving of vegetables.
• Steaming times vary depending upon the cut being used.
• To ensure meat tastes its best, and to prevent possible illness, check that meat
is completely cooked prior to serving. If it is not, simply place more water in the
inner pot and repeat the cooking process until the meat is adequately cooked.
• Rinse rice prior to cooking to remove excess bran and starch. This will help
reduce browning and sticking to the bottom of the pot.
• Want perfect brown rice without the wait? Use the DELAY TIMER. Simply add
rice and water in the morning and set the DELAY TIMER for when rice will be
needed that night.
• DELAY TIMER can be used with WHITE RICE, BROWN RICE and
PORRIDGE.
• Refer to the steaming tables for meats and vegetables on page 14 for hints and
approximate steaming times. See the “Rice/Water Measurement Table” included
on page 8 for approximate rice cooking times.
• Before placing the inner pot into the cooker, check that the inner pot is dry and
free of debris. Adding the inner pot when wet may damage the cooker.
• CAKE will run for 50 minutes before switching to KEEP WARM. Adjust cook
time accordingly depending on the recipe being used.
• Cooking times are approximate. Altitude, humidity and outside temperature will
aect cooking time.
• Opening the lid during the cooking cycle causes a loss of heat and steam.
Cooking time may be prolonged if the lid is opened before the rice is nished.
• Brown rice requires a much longer cooking cycle than other rice varieties due to
the extra bran layers on the grains. BROWN RICE on this cooker allows extra
time and adjusted heat settings in order to cook the rice properly. If it appears
the cooker is not heating up immediately on BROWN RICE, this is due to a
low-heat soak cycle that preceeds the cooking cycle to produce better
brown rice results.
• Rice should not be left in the cooker on KEEP WARM for more than 12 hours.
• SOUP is also great for chili.
• SOUP is a programmed cooking setting that operates for a minimum of 2 hours
before switching to the KEEP WARM setting.

5
PRESSURE RELEASE
Quick Release
• To release steam, turn pressure regulator knob to VENTING. Floating valve will
drop down and lid may be opened. CAUTION: Keep hands and face away
from steam valve when using Quick Release. Quick Release is not suitable
for food with large liquid volume or with high starch content (porridge, congee,
sticky liquids, soups, stews, etc). Food contents may splatter out with steam.
Natural Release is to be used instead.
Natural Release
• When the cooker timer has elapsed, power o the cooker. The pressure
regulator knob must remain in sealing and allow the cooker to cool down
naturally until the oat valve has dropped down. This may take 10-15 minutes
for cooker to cool down.
• Putting a wet towel on the lid can speed up the cooling process.

6
TO COOK RICE
start
41 32
Using the provided measuring cup,
add desired amount of rice to the
inner pot.
Place the inner pot into the cooker. Fill with water to the line which
matches the number of cups of rice
beingcooked.Forporridge,llline
marked on inner pot.
Rinse rice to remove excess starch.
Drain.
Plug the cooker into an available
120V AC outlet.
start
8
start
7
start
5 6
Press to turn the cooker on.Close the lid securely. Make sure pressure release valve is
set to sealing position.
The following instructions also work for WHITE RICE, BROWN RICE and PORRIDGE.

7
start
TO COOK RICE (CON'T)
start
11
13
You can also use HOURS/MINUTES
toadjustthetimeinspecic
increments by pressing - or +.
After three beeps WHITE RICE will
activate and a "chasing" pattern will
appear in the digital display.
start
12
Oncecookingisnished,thecooker
will beep and automatically switch to
KEEP WARM.
When pressure reaches the preset
value, the countdown will begin.
start
9
Press WHITE RICE, BROWN RICE or
PORRIDGE depending upon the type
of rice being cooked.
start
After selecting your type of rice you
can also press ADJUST to change
cooking time to RAPID, REGULAR or
EXTENDED settings.
10
start
start
Whennishedserving,turnthe
cookerobypressingKEEPWARM/
CANCEL followed by pressing and
unplug the power cord.
14

8
RICE/WATER MEASUREMENT TABLE
1 Rice Cooker Cup = 3/4 U.S. Cup*
UNCOOKED RICE RICE WATER LINE
INSIDE POT
APPROX. COOKED
RICE YIELD COOKING TIMES
2 Rice Cooker Cups* Line 2 4 Rice Cooker Cups* WHITE RICE: 20-25 Min.
BROWN RICE: 34-39 Min.
4 Rice Cooker Cups* Line 4 8 Rice Cooker Cups* WHITE RICE: 24-29 Min.
BROWN RICE: 38-43 Min.
6 Rice Cooker Cups* Line 6 12 Rice Cooker Cups* WHITE RICE: 28-33 Min.
BROWN RICE: 42-47 Min.
8 Rice Cooker Cups* Line 8 16 Rice Cooker Cups* WHITE RICE: 32-37 Min.
BROWN RICE: 46-51 Min.
t
10 Rice Cooker Cups*Line 10 20 Rice Cooker Cups* WHITE RICE: 36-41 Min.
BROWN RICE: 50-55 Min.
White Rice PP13
PP20
PP15
PP20
PP15
2:00
6:00
PP10
PP15
PP45
PP50
n/a
Brown Rice
Soup/Stew
Meat
Poultry
Slow Cook (High)
Slow Cook (Low)
Fish
Porridge
Beans/Lentils
Steam
Cake
Default
Pressure Setting
Pressure Levels
Function

9
start
start
start
start
start
Press to turn the cooker on.
TO USE SAUTÉ-THEN-SIMMER (STS®)
Plug the power cord into an available
120V AC outlet.
Press STS® and then START to
activate the Sauté-then-Simmer
STS® mode.
1 32
After three beeps the display will
show a chasing pattern and inner
pot will begin to heat up.
4
Add other called for ingredients and
liquid to the inner pot.
Close the lid securely and allow the
cooker to cook.
87
Using a long-handled wooden
spoon, stir ingredients until sautéed/
browned to the desired level.
Add ingredients to be sautéed/
browned to the inner pot.
65

10
start
start
start
start
TO USE SAUTÉ-THEN-SIMMER (STS®) [CONT.]
Once the meal has cooked, the
cooker will beep and automatically
switch over to KEEP WARM.
10
Whennished,turnthecookero
by pressing KEEP WARM/CANCEL
followed by pressing and unplug
the power cord.
11
After a few minutes, the rice cooker
will automatically switch to simmer.
Make sure pressure release valve is
set to sealing position.
99
• STS® is for cooking rice, grains, and other meals with liquid that can be absorbed during the cooking
process. If there is too much liquid, the cooker will continue to cook until the liquid is gone.
NOTE

11
start
start
start
start
TO USE THE DELAY TIMER
start
start
start
118 109
Press WHITE RICE. Aftertimernishescountingdown
WHITE RICE will activate after three
beeps. A "chasing" pattern will
appear indicating that it is cooking.
Press -/+ to increase or decrease
duration of delay timer. Set the
desired start cooking delay time
between 30 minutes and 15 hours.
Press DELAY TIMER to activate
delay timer mode.
Follow steps 1 to 7 of “To Cook
Rice” beginning on page 6.
Whennished,turnthecookero
by pressing KEEP WARM/CANCEL
followed by pressing and unplug
the power cord.
Oncefoodisnishedcooking,the
cooker will beep and automatically
switch to KEEP WARM.
1312 • DELAY TIMER can also
be used with BROWN RICE
and PORRIDGE.
• RICE delay timer: 30 min - 15 hours.
NOTE

12
TO SLOW COOK
start
start
start
start
start
Select SLOW COOK (high) The
digitaldisplaywillshowaashing
2:00 to represent two hours of slow
cook time. Adjustable range is 2
hours to 5 hours.
Adjust cooking time in 30 minute
increments by pressing -/+ to
increase or decrease total cooking
time. After three beeps the cooker
will activate and count down.
Press to turn on the cooker.
start
41 32
Add inner pot containing food to be
slow cooked, close lid securely and
be sure power cord is plugged into
an available 120V AC outlet.
76
Whennished,turnthecookero
by pressing KEEP WARM/CANCEL
followed by pressing and unplug
the power cord.
Oncefoodisnishedcooking,the
cooker will beep and automatically
switch to KEEP WARM.
Make sure pressure release valve is
set to sealing position.
• In case of SLOW COOK
(low), the adjustable range
is 6 hours (default)
to 10 hours.
NOTE
5

13
• In case of SLOW COOK
(low), the adjustable range
is 6 hours (default)
to 10 hours.
start
start
start
start
TO STEAM
start
start
Set pressure release valve to
sealing. Select STEAM.
Press -/+ to increase or decrease
duration of steam time, then START.
Press to turn on the cooker. Close
lid securely and ensure power cord
is plugged into an available 120V AC
outlet.
start
41 32
Add water and steam rack containing
food to be steamed to inner pot.
655
When pressure reaches the set
value, countdown will begin.
Oncefoodisnishedcooking,the
cooker will beep and automatically
switch to KEEP WARM.
After three beeps the digitaldisplay
will show a chasing pattern
indicating cooking cycle has begun.
Make sure pressure release valve is
set to sealing position.
Whennished,turnthecookero
by pressing KEEP WARM/CANCEL
followed by pressing and unplug
the power cord.
7

14
STEAMING TABLES
• Altitude, humidity and outside temperature will aect cooking times.
• These steaming charts are for reference only. Actual cooking times
may vary.
NOTE
HELPFUL
HINTS
• Since most vegetables only absorb a small amount of water, there is
no need to increase the amount of water with a larger serving
of vegetables.
• Steaming times vary depending upon the cut of meat being used.
• To ensure meat tastes its best, and to prevent possible illness, check
that meat is completely cooked prior to serving. If it is not, simply
place more water in the inner pot and repeat the cooking process
until the meat is adequately cooked.
MEAT STEAMING TIME SAFE INTERNAL
TEMPERATURE
Fish 15 Minutes 145°
Chicken 20 Minutes 165°
Pork 20 Minutes 160°
Beef
Medium = 15 Minutes
Medium-Well = 18 Minutes
Well = 20 Minutes
160°
Meat Steaming Table
VEGETABLE STEAMING TIME
Asparagus 8-13 Minutes
Broccoli 8-13 Minutes
Cabbage 8-13 Minutes
Carrots 8-13 Minutes
Cauliower 8-13 Minutes
Corn 8-13 Minutes
Eggplant 8-13 Minutes
Green Beans 5-10 Minutes
Peas 7-12 Minutes
Spinach 5-10 Minutes
Squash 7-12 Minutes
Zucchini 7-12 Minutes
Vegetable Steaming Table
When steaming, Aroma® recommends using 2 cups of water with the provided measuring cup.

15
start
start
start
start
start
start
start
Press BEANS/LENTILS. Press -/+ to set the desired cooking
time, then press START to
begin cooking.
Press to turn on the cooker.
start
TO USE BEANS/LENTILS FUNCTION
41 32
Add inner pot containing food to
be cooked, close lid securely and
be sure pressure release valve is at
sealing position, and power cord is
plugged into an available
120V AC outlet. 65
When pressure reaches the set
value, countdown will begin. Once
foodisnishedcooking,thecooker
will beep and automatically switch to
KEEP WARM.
After three beeps a "chasing"
pattern will display on the screen
indicating the cooking cycle has
begun.
Whennished,turnthecookero
by pressing KEEP WARM/CANCEL
followed by pressing and unplug
the power cord.
7

16
start
start
start
start
start
delay
timer
functions
brown
rice
white
rice
keep warm
on/o
start
cancel
quick
rice
STS
grains
™
steam
wild rice
soup
sushi rice porridge
cake slow cook high
slow cook low
cook time
start
start
Press -/+ to adjust cooking time.
4
Add inner pot containing food to be
slow cooked, close lid securely and
be sure power cord is plugged into
an available 120V AC outlet.
Press SOUP/STEW to activate.Press to turn on the cooker.
1 32
TO USE THE SOUP/STEW FUNCTION
start
5 6 7
Oncericeisnished,thecookerwill
beep and automatically switch to
KEEP WARM.
Press START to begin the cooking
cycle.
Whennished,turnthecookero
by pressing KEEP WARM/CANCEL
followed by pressing and unplug
the power cord.
• Quick Release method is
not suitable for food in large
liquid volume or with high
starch content (e.g. porridge,
congee, sticky liquids, soup,
etc.). Food content may
splatter out with steam. Use
Natural Release instead.
NOTE

17
start
start
TO USE THE PORRIDGE FUNCTION
delay
timer
functions
brown
rice
white
rice
keep warm
on/o
start
cancel
quick
rice
STS
grains
™
steam
wild rice
soup
sushi rice porridge
cake slow cook high
slow cook low
cook time
start
start
Press -/+ to adjust cooking time.
4
Add inner pot containing porridge
to be cooked, close lid securely and
be sure to set the pressure release
valve to sealing position.
Press PORRIDGE to activate.Be sure that power cord is plugged
into an available 120V AC outlet and
then press to turn on the cooker.
1 32
start
start
start
start
5 6 7
Whenporridgeisnished,the
cooker will beep and automatically
switch to KEEP WARM.
Pressing START will begin the
cooking cycle.
Whennished,turnthecookero
by pressing KEEP WARM/CANCEL
followed by pressing and unplug
the power cord. Do not Quick Release
steam, use Natural Release (page 5).
• Quick Release method is
not suitable for food in large
liquid volume or with high
starch content (e.g. porridge,
congee, sticky liquids, soup,
etc.). Food content may
splatter out with steam. Use
Natural Release instead.
NOTE

18
start
start
Turnthecookerobypressing
KEEP WARM/CANCEL followed by
pressing and unplug the power
cord.
start
Make sure pressure release valve is
set to sealing position.
start
start
TO USE THE CAKE FUNCTION
start
4
Add inner pot containing cake mix,
close lid securely and be sure to set
the pressure release valve
to sealing position.
Press CAKE to activate. After 3 beeps a "chasing" pattern
will display on the screen indicating
the cooking cycle has begun.
Press to turn on the cooker.
1 32
5 6
• Spray inner pot with cooking
spray before adding cake
mix for easier releasing
of the cake.
NOTE
• To avoid overowing it is
recommended to use only 1
standard cake box
mix (15-16oz).
CAUTION
/