Panasonic PV-GS80 User manual

Category
Camcorders
Type
User manual

This manual is also suitable for

Spanish Quick Use Guide is included.
Guía para rápida consulta en español está incluida.
LSQT1121 C
For USA assistance, please call: 1-800-211-PANA(7262) or, contact us via the web at: http://www.panasonic.com/contactinfo
For Canadian assistance, please call: 1-800-561-5505 or visit us at www.panasonic.ca
Digital Video Camcorder
Operating Instructions
Model No.
PV-GS85
PV-GS80
Mini
Before connecting, operating or adjusting this product,
please read the instructions completely.
P PC
PV-GS85 PV-GS80
Video Light
¥
SD Card
Compatible
¥
USB
¥
S5660.book 1 ページ 2006年11月30日 木曜日 午後2時20分
2
LSQT1121
Things You Should Know
Thank you for choosing Panasonic!
You have purchased one of the most
sophisticated and reliable products on the
market today. Used properly, we’re sure it will
bring you and your family years of enjoyment.
Please take time to fill in the information on the
right.
The serial number is on the tag located on the
underside of your Camcorder. Be sure to retain
this manual as your convenient Camcorder
information source.
Safety Precautions
WARNING: TO PREVENT FIRE OR SHOCK HAZARD,
DO NOT EXPOSE THIS EQUIPMENT TO RAIN OR MOISTURE.
Your
Camcorder is designed to record and play back in Standard Play (SP) mode and Long Play
(LP) mode
It is recommended that only cassette tapes that have been tested and inspected for use in Camcorder
with the
mark be used.
The following mark and symbols are located on bottom of the unit.
Ò
Ò
CAUTION
CAUTION: TO REDUCE THE RISK OF ELECTRIC
SHOCK, DO NOT REMOVE SCREWS.
NO USER-SERVICEABLE PARTS
INSIDE.
REFER SERVICING TO QUALIFIED
SERVICE PERSONNEL.
RISK OF ELECTRIC SHOCK
DO NOT OPEN
The exclamation point within an
equilateral triangle is intended to alert
the user to the presence of important
operating and maintenance (servicing)
instructions in the literature
accompanying the appliance.
The lightning flash with arrowhead
symbol, within an equilateral triangle,
is intended to alert the user to the
presence of uninsulated “dangerous
voltage” within the product’s
enclosure that may be of sufficient
magnitude to constitute a risk of
electric shock to persons.
WARNING:
TO REDUCE THE RISK OF FIRE, ELECTRIC SHOCK OR PRODUCT DAMAGE,
DO NOT EXPOSE THIS APPARATUS TO RAIN, MOISTURE, DRIPPING OR SPLASHING AND
THAT NO OBJECTS FILLED WITH LIQUIDS, SUCH AS VASES, SHALL BE PLACED ON THE
APPARATUS.
USE ONLY THE RECOMMENDED ACCESSORIES.
DO NOT REMOVE THE COVER (OR BACK); THERE ARE NO USER SERVICEABLE PARTS
INSIDE. REFER SERVICING TO QUALIFIED SERVICE PERSONNEL.
CAUTION!
DO NOT INSTALL OR PLACE THIS UNIT IN A BOOKCASE, BUILT-IN CABINET OR IN
ANOTHER CONFINED SPACE. ENSURE THE UNIT IS WELL VENTILATED. TO PREVENT RISK
OF ELECTRIC SHOCK OR FIRE HAZARD DUE TO OVERHEATING, ENSURE THAT CURTAINS
AND ANY OTHER MATERIALS DO NOT OBSTRUCT THE VENTILATION VENTS.
Date of Purchase
Dealer Purchased From
Dealer Address
Dealer Phone No.
Model No.
Serial No.
S5660.book 2 ページ 2006年10月30日 月曜日 午後6時56分
3
LSQT1121
THE FOLLOWING APPLIES ONLY IN THE U.S.A.
AS WITH ANY SMALL OBJECT, SD CARDS CAN BE SWALLOWED BY YOUNG CHILDREN. DO
NOT ALLOW CHILDREN TO HANDLE THE SD CARD.
THE FOLLOWING APPLIES ONLY IN CANADA
FCC Note: This equipment has been tested and found to comply with the limits for a Class B digital
device, pursuant to Part 15 of the FCC Rules. These limits are designed to provide reasonable
protection against harmful interference in a residential installation. This equipment generates, uses,
and can radiate radio frequency energy and, if not installed and used in accordance with the
instructions, may cause harmful interference to radio communications. However, there is no
guarantee that interference will not occur in a particular installation. If this equipment does cause
harmful interference to radio or television reception, which can be determined by turning the
equipment off and on, the user is encouraged to try to correct the interference by one or more of the
following measures:
Reorient or relocate the receiving antenna.
Increase the separation between the equipment and receiver.
Connect the equipment into an outlet on a circuit different from that to which the receiver is
connected.
Consult the dealer or an experienced radio/TV technician for help.
FCC Caution: To assure continued compliance, follow the attached installation instructions and
use only shielded interface cables with ferrite core when connecting to computer or peripheral
devices.
Any changes or modifications not expressly approved by the party responsible for compliance
could void the user’s authority to operate this equipment.
Declaration of Conformity
Trade Name: Panasonic
Model No.: PV-GS85/PV-GS80
Responsible party: Panasonic Corporation of North America
One Panasonic Way, Secaucus, NJ 07094
Support Contact: Panasonic Consumer Electronics Company
1-800-211-PANA(7262)
This device complies with Part 15 of the FCC Rules. Operation is subject to the following two
conditions: (1)This device may not cause harmful interference, and (2) this device must accept
any interference received, including interference that may cause undesired operation.
WARNING
This Class B digital apparatus complies with Canadian ICES-003.
S5660.book 3 ページ 2006年10月30日 月曜日 午後6時56分
4
LSQT1121
IMPORTANT SAFETY INSTRUCTIONS
Read these operating instructions carefully before using the unit. Follow the safety instructions on the
unit and the applicable safety instructions listed below. Keep these operating instructions handy for
future reference.
1) Read these instructions.
2) Keep these instructions.
3) Heed all warnings.
4) Follow all instructions.
5) Do not use this apparatus near water.
6) Clean only with dry cloth.
7) Do not block any ventilation openings. Install in accordance with the manufacturer’s instructions.
8) Do not install near any heat sources such as radiators, heat registers, stoves, or other apparatus
(including amplifiers) that produce heat.
9) Do not defeat the safety purpose of the polarized or grounding-type plug. A polarized plug has two
blades with one wider than the other. A grounding-type plug has two blades and a third grounding
prong. The wide blade or the third prong are provided for your safety. If the provided plug does not
fit into your outlet, consult an electrician for replacement of the obsolete outlet.
10) Protect the power cord from being walked on or pinched particularly at plugs, convenience
receptacles, and the point where they exit from the apparatus.
11) Only use attachments/accessories specified by the manufacturer.
12) Use only with the cart, stand, tripod, bracket, or table specified by the
manufacturer, or sold with the apparatus. When a cart is used, use caution
when moving the cart/apparatus combination to avoid injury from tip-over.
13) Unplug this apparatus during lightning storms or when unused for long periods
of time.
14) Refer all servicing to qualified service personnel. Servicing is required when the apparatus has
been damaged in any way, such as power-supply cord or plug is damaged, liquid has been spilled
or objects have fallen into the apparatus, the apparatus has been exposed to rain or moisture, does
not operate normally, or has been dropped.
S5660.book 4 ページ 2006年10月30日 月曜日 午後6時56分
5
LSQT1121
Precautions
USE & LOCATION
TO AVOID SHOCK HAZARD ... Your
Camcorder and power supply should not be
exposed to rain or moisture. Do not connect the
power supply or operate your Camcorder if it
gets wet. Your Camcorder has been designed
for outdoor use, however it is not designed to
sustain direct exposure to water, rain, sleet,
snow, sand, dust, or a direct splashing from a
pool or even a cup of coffee. This action could
permanently damage the internal parts of your
Camcorder. Do not attempt to disassemble this
unit. There are no user serviceable parts inside.
Unplug your Camcorder from the power supply
before cleaning.
DO NOT AIM YOUR CAMCORDER AT THE
SUN OR OTHER BRIGHT OBJECTS
DO NOT LEAVE THE CAMCORDER WITH
THE EVF AIMED DIRECTLY AT THE SUN AS
THIS MAY CAUSE DAMAGE TO THE
INTERNAL PARTS OF THE EVF
DO NOT EXPOSE YOUR CAMCORDER TO
EXTENDED HIGH TEMPERATURE ... Such as,
in direct sunlight, inside a closed car, next to a
heater, etc... This action could permanently
damage the internal parts of your Camcorder.
AVOID SUDDEN CHANGES IN
TEMPERATURE ... If the unit is suddenly
moved from a cold place to a warm place,
moisture may form on the tape and inside the
unit.
DO NOT LEAVE YOUR CAMCORDER OR
THE POWER SUPPLY TURNED ON WHEN
NOT IN USE.
STORAGE OF YOUR CAMCORDER ... Store
and handle your Camcorder in a manner that
will not subject it to unnecessary movement
(avoid shaking and striking). Your Camcorder
contains a sensitive pick-up device which could
be damaged by improper handling or storage.
CARE
TO CLEAN YOUR CAMCORDER ... Do not use
strong or abrasive detergents when cleaning
your Camcorder body.
TO PROTECT THE LENS ... Do not touch the
surface of the lens with your hand. Use a
commercial Camcorder lens solution and lens
paper when cleaning the lens. Improper
cleaning can scratch the lens coating.
TO PROTECT THE FINISH OF YOUR
CAMCORDER ... Before handling your
Camcorder, make sure your hands and face are
free from any chemical products, such as
suntan lotion, as it may damage the finish.
-If you see this symbol-
WARNING
CAUTION
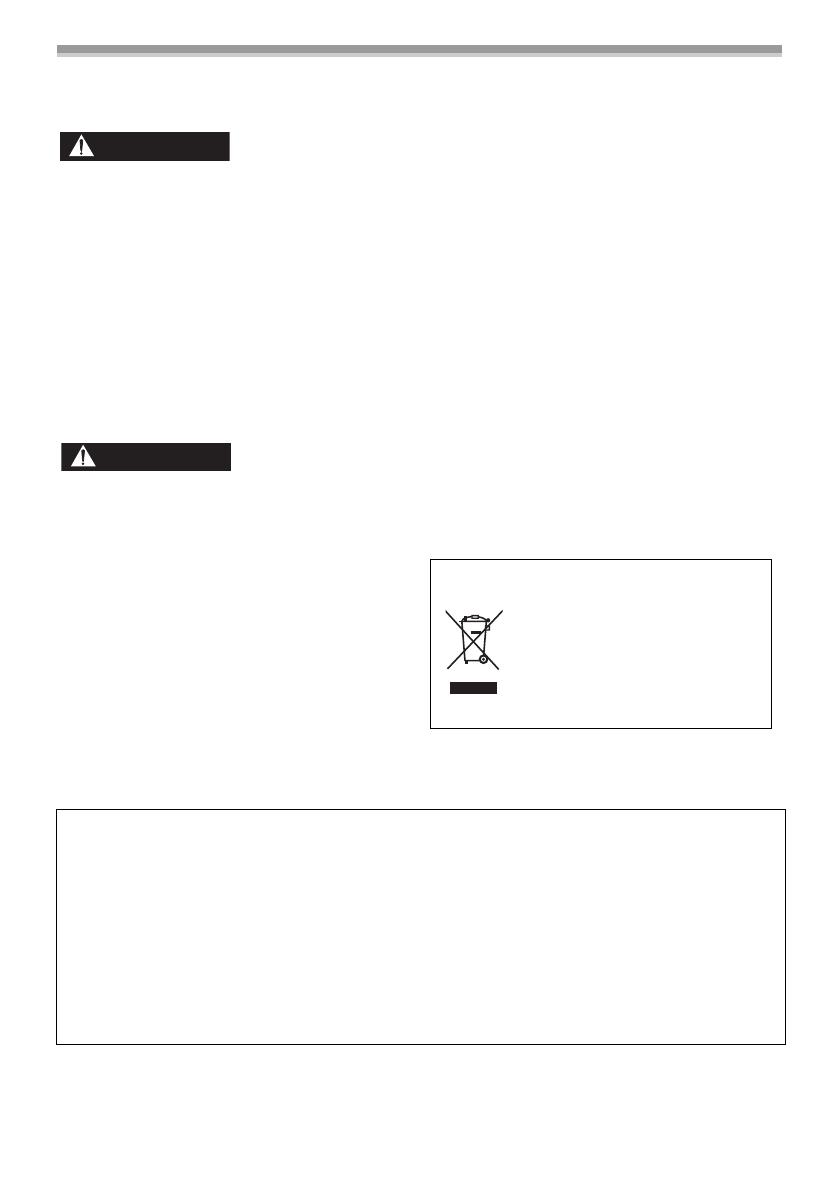
Information on Disposal in other
Countries outside the European Union
This symbol is only valid in the
European Union.
If you wish to discard this product,
please contact your local
authorities or dealer and ask for
the correct method of disposal.
Battery
1. Battery pack (Lithium ion battery pack)
Use the specified unit to recharge the battery pack.
Do not use the battery pack with equipment other than the specified unit.
Do not get dirt, sand, liquids, or other foreign matter on the terminals.
Do not touch the plug terminals (i and j) with metal objects.
Do not disassemble, remodel, heat or throw into fire.
If any electrolyte should come into contact with your hands or clothes, wash it off thoroughly with
water.
If any electrolyte should come into contact with your eyes, never rub the eyes. Rinse eyes
thoroughly with water, and then consult a doctor.
S5660.book 5 ページ 2006年10月30日 月曜日 午後6時56分
6
LSQT1121
Apparatus Claims of U.S. Patent Nos. 4,631,603, 4,577,216, and 4,819,098, licensed for limited
viewing.
This product incorporates copyright protection technology that is protected by method claims of certain
U.S. patents and other intellectual property rights owned by Macrovision Corporation and other rights
owners. Use of this copyright protection technology must be authorized by Macrovision Corporation,
and is intended for home and other limited viewing uses only unless otherwise authorized by
Macrovision Corporation. Reverse engineering or disassembly is prohibited.
Warning
Risk of fire, explosion and burns. Do not disassemble, heat above 60xC (140oF) or incinerate.
AC adaptor
This AC adaptor operates on AC between 110/120/220/240 V.
But
In the U.S.A. and Canada, the AC adaptor must be connected to a 120V AC power supply only.
When connecting to an AC supply outside of the U.S.A. or Canada, use a plug adaptor to suit the
AC outlet configuration.
When connecting to a supply of greater than AC 125V, ensure the cord you use is suited to the
voltage of the AC supply and the rated current of the AC adaptor.
Contact an electrical parts distributor for assistance in selecting a suitable AC plug adaptor or AC
cord set.
The socket outlet shall be installed near the equipment and easily accessible. The mains plug of the
power supply cord shall remain readily operable. To completely disconnect this apparatus from the
AC Mains, disconnect the power supply cord plug from AC receptacle.
Marking sign is located on bottom of the unit.
A lithium ion/polymer battery that is recyclable powers the product
you have purchased. Please call 1-800-8-BATTERY for information
on how to recycle this battery.
U.S.A./CANADA CONSUMERS: ATTENTION:
S5660.book 6 ページ 2006年10月31日 火曜日 午後7時13分
7
LSQT1121
Contents
Before using
Quick Guide..................................................... 9
Accessories ................................................... 11
Parts identification and handling.................... 11
Attaching the lens cap ................................... 13
How to remove the Sensor tag
(for U.S.A. only)........................................... 13
The grip belt................................................... 13
Power supply ................................................. 14
Charging time and recordable time................ 15
Turning the Camcorder on............................. 15
Setting date and time..................................... 16
Using the LCD monitor .................................. 17
Using the viewfinder ...................................... 17
Quick Start..................................................... 18
Inserting/removing a cassette........................ 19
Inserting/removing a card
(PV-GS85 only) ........................................... 20
Selecting a mode ........................................... 21
How to use the joystick.................................. 21
Help mode ..................................................... 23
Switching the language.................................. 23
Using the menu screen.................................. 23
Adjusting LCD monitor/viewfinder.................. 24
Recording with the built-in LED video light
(PV-GS85 only) ........................................... 25
Record mode
Check before recording ................................. 26
Recording on a tape ...................................... 27
Recording check............................................ 28
Blank search function .................................... 28
Recording still pictures on a card
while recording image onto a tape
(PV-GS85 only)........................................... 29
Recording a still picture on a tape
(Photoshot) (PV-GS80 only) ....................... 29
Recording still pictures onto a card
(Photoshot) (PV-GS85 only) ....................... 30
Zoom in/out function...................................... 31
Recording yourself ........................................ 32
Backlight compensation function................... 32
MagicPix function .......................................... 32
Soft skin mode............................................... 33
Fade in/fade out function ............................... 33
Wind noise reduction function ....................... 34
Self-timer recording (PV-GS85 only)............. 34
Wide/4:3 function........................................... 35
Optical image stabilizer function.................... 35
Guideline function.......................................... 35
Recording in various situations
(Scene mode) ............................................. 36
Recording in natural colors
(White balance)........................................... 37
Manual focus adjustment .............................. 38
Manual shutter speed/aperture adjustment... 38
S5660.book 7 ページ 2006年10月30日 月曜日 午後6時56分
8
LSQT1121
Playback mode
Playing back tape .......................................... 40
Frame-by-frame playback.............................. 41
Playback on TV.............................................. 41
Playing back card (PV-GS85 only) ................ 42
Deleting files recorded on a card
(PV-GS85 only) ........................................... 43
Formatting a card (PV-GS85 only) ................ 43
Protecting files on a card
(PV-GS85 only) ........................................... 44
Writing the printing data on a card
(DPOF setting) (PV-GS85 only).................. 44
Edit mode
Recording from a tape onto a card
(PV-GS85 only) ........................................... 45
Copying onto a DVD recorder or a VCR
(Dubbing) .................................................... 45
Using the DV Interface Cable for Recording
(Digital Dubbing) ......................................... 46
PC Connection with
the DV Interface Cable ................................ 47
With a PC
Connecting Computer and Camcorder ......... 48
Using on a Windows PC (PV-GS85 only)...... 48
Using as a Web camera (PV-GS85 only) ...... 49
Using on Macintosh ....................................... 52
To disconnect USB cable safely
(PV-GS85 only) ........................................... 53
If you no longer need the driver
(Uninstall) (PV-GS85 only).......................... 53
Notes ............................................................. 54
Menu
Menu list ........................................................ 56
Menus related to recording............................ 58
Menus related to playback ............................ 58
Other menus.................................................. 58
Others
Indications ..................................................... 59
Warning/alarm indications ............................. 60
Functions that cannot be
used simultaneously ................................... 61
Before requesting repair
(Problems and solutions) ............................ 62
Cautions for Use............................................ 65
Explanation of terms...................................... 69
Specifications ................................................ 70
Camcorder Accessory System ...................... 72
Camcorder Accessory Order Form
(For USA Customers) ................................. 73
Request for Service Notice (USA Only) ........ 74
Limited Warranty (For USA Customers)........ 75
Customer Services Directory......................... 76
Warranty (For Canadian Customers) ............ 77
Index.............................................................. 78
Spanish Quick Use Guide/
Guía española para el uso rápido............... 79
S5660.book 8 ページ 2006年10月30日 月曜日 午後6時56分
Before using
9
LSQT1121
Quick Guide
ª Charging the battery
1 Connect the AC Cable to the AC adaptor
and the AC Jack.
2 Put the battery on the battery mount by
aligning the mark, and then securely plug it
in.
ª
Attaching the battery
Push the battery against the battery holder and
slide it until it clicks.
ª
Inserting/removing a cassette
1 Slide the [OPEN/EJECT] lever and open the
cassette cover.
2 After the cassette holder is opened, insert/
remove the cassette.
3 Push the [PUSH] mark 1 in order to close
the cassette holder.
4 Only after the cassette holder is completely
housed, close the cassette cover.
ª
Inserting/removing a card
1
Open the card slot cover.
2 Insert/remove the card into/from the card
slot.
When inserting a card, face the label side 1
towards you and push it straight in with one
stroke as far as it goes.
When removing the card, open the card slot
cover and press the center of the card and
then pull it straight out.
3 Securely close the card slot cover.
ª
How to turn on the power
1 While pressing the button 1, set the
[OFF/ON] switch to [ON].
OPEN/
EJECT
PUSH
1
1
OFF
ON
1
S5660.book 9 ページ 2006年10月30日 月曜日 午後6時56分
Before using
10
LSQT1121
ª How to turn off the power
1 While pressing the button 1, set the
[OFF/ON] switch to [OFF].
ª
Recording on a tape
Set to Tape Recording Mode.
1 Press the recording start/stop button to
start recording.
2 Press the recording start/stop button again
to pause recording.
ª
Recording still pictures onto a card
(Photoshot)
(only for PV-GS85)
Set to Card Recording Mode.
1 Press the Photoshot button [ ].
ª
Playing back tape
Set to Tape Playback Mode.
1 Operate with joystick.
1/;: Playback/Pause
6: Rewind/Review playback (Reverts to
playback with the 1/; icon.)
5: Fast forward/Cue playback (Reverts to
playback with the 1/; icon.)
:Stop
ª
Playing back card (only for PV-GS85)
Set to Card Playback Mode.
1 Operate with joystick.
E: Plays back the previous picture.
D: Plays back the next picture.
1/: Slide show (Plays back the still pictures
on the card in order) start/pause
OFF
ON
1
PC
PC
P
C
PC
S5660.book 10 ページ 2006年10月30日 月曜日 午後6時56分
Before using
11
LSQT1121
Before using
Accessories
The following are the accessories supplied with
this product.
1) AC adaptor, DC Cable, AC Cable
-14-
2) Battery pack -14-
3) AV cable -45-
4) USB cable (PV-GS85 only) -48-
Parts identification and handling
ª Camcorder
(1) Built-in LED video light
(PV-GS85 only)
-25-
(2)
White balance sensor -37-
(3)
Grip belt -13-
(4)
Lens
(5) Microphone (built-in, stereo) -31-, -34-
(6)
Mode select switch
[AUTO/MANUAL/FOCUS]
-26-, -36-, -37-, -38-
(7)
Reset button [RESET] -64-
(8)
Audio-video output terminal [A/V] -45-
Use the supplied AV cable only.
1)
2)
4)
3)
K2CA2CA00025
K2KC4CB00020
K2GJ2DC00011
K1HA05CD0014
PV-DAC14D
CGR-DU06
(1)
(2)
(3)
(4)
(5)
(6) (7) (8)
S5660.book 11 ページ 2006年10月30日 月曜日 午後6時56分
Before using
12
LSQT1121
(9) Viewfinder -17-, -68-
(10)
Battery holder -14-
(11)
USB terminal [ ] (PV-GS85 only) -48-
(12)
DC input terminal [DC/C.C.IN] -14-
(13)
DV input/output terminal [DV] -46-
(14)
Battery release lever [BATTERY] -14-
(15)
Power switch [OFF/ON] -15-
(16)
Status indicator -15-
(17)
Menu button [MENU] -23-
(18)
Light Button [LIGHT] (PV-GS85 only) -25-
(19)
Joystick -21-
(20)
Mode dial -21-
(21)
Recording start/stop button -27-
(22)
LCD monitor -17-, -68-
(23) LCD monitor open part -17-
(24)
Speaker -40-
(25)
Card access lamp (PV-GS85 only) -20-
(26)
Card slot (PV-GS85 only) -20-
(27)
Card slot cover (PV-GS85 only) -20-
(28)
Cassette holder -19-
(29)
Accessory shoe
Accessories, such as a Video DC light
(optional), are attached here.
(30) Cassette eject lever [OPEN/EJECT] -19-
(31)
Cassette cover -19-
(32)
Zoom lever [W/T] -31-
Volume lever [s /VOLr] -40-
(33)
Photoshot button [ ] -29-
Due to limitations in LCD production
technology, there may be some tiny bright or
dark spots on the Viewfinder screen.
However, this is not a malfunction and does
not affect the recorded picture.
BATTERY
(9)
(10)
(11)
(12)
(13)
(15)
(16)
(17)
(18)
(19)
(20)
(21)
(14)
Due to limitations in LCD production
technology, there may be some tiny bright or
dark spots on the LCD monitor screen.
However, this is not a malfunction and does
not affect the recorded picture.
(22)
(23)
(24)
(25)
(26)
(27)
(28)
(30)
(31)
(32)
(33)
(29)
S5660.book 12 ページ 2006年10月30日 月曜日 午後6時56分
Before using
13
LSQT1121
(34) Tripod receptacle
This is a hole for attaching the Camcorder to
optional tripod. (Please carefully read the
operating instructions for how to attach the tripod
to the Camcorder.)
You cannot open the card slot cover when the
tripod is used. Insert the card first and then
attach the tripod.
Attaching the lens cap
Fit the lens cap to protect the surface of the lens.
The lens cap and the lens cap cord come pre-
attached to the grip belt.
When not using the lens cap, pull the lens cap
cord in the direction of the arrow. 1
When you are not recording, be sure to cover
the lens with the lens cap for protection.
2
When you remove the lens cap, press the knobs
firmly.
How to remove the Sensor tag
(for U.S.A. only)
1 Flip the grip belt.
2 Remove the Sensor tag and then fix the grip
belt.
The grip belt
Adjust the belt length so it fits your hand.
1 Adjust the belt length and the pad position.
1 Flip the belt.
2 Adjust the length.
3 Fix the belt.
(34)
2
1
S5660.book 13 ページ 2006年10月30日 月曜日 午後6時56分
Before using
14
LSQT1121
Power supply
ª Charging the battery
When this product is purchased, the battery is not
charged. Charge the battery before using this
product.
Battery charging time. (
-15-)
We recommend using Panasonic batteries.
(
-11-, -72-)
If you use other batteries, we cannot guarantee
the quality of this product.
If the DC Cable is connected to the AC adaptor,
then the battery will not get charged. Remove
the DC Cable from the AC adaptor.
1 Connect the AC Cable to the AC adaptor
and the AC Jack.
2 Put the battery on the battery mount by
aligning the mark, and then securely plug it
in.
ª
Charging lamp
Lights up:Charging
Goes off: Charging completed
Flashing: The battery is over discharged
(discharged excessively). In a while,
the lamp will light up and normal
charging will start.
When the battery temperature is
excessively high or low, the [CHARGE]
lamp flashes and the charging time will
be longer than normal.
ª
Connecting to the AC outlet
1
Connect the AC Cable to the AC adaptor
and the AC Jack.
2 Connect the DC Cable to the AC adaptor.
3 Connect the DC Cable to this product.
The output plug of the AC Cable is not
completely connected to the AC adaptor jack.
As shown in 1, there is a gap.
Do not use the power cord for other
equipment since the power cord is exclusively
designed for this Camcorder. Do not use the
power cord from other equipment for this
Camcorder.
ª
Attaching the battery
Push the battery against the battery holder and
slide it until it clicks.
ª
Removing the battery
While sliding the [BATTERY] lever, slide the
battery to remove it.
Hold the battery with your hand so it does not
fall.
Before removing the battery, be sure to set the
[OFF/ON] switch to [OFF].
CAUTION
Danger of explosion if battery is incorrectly
replaced. Replace only with the same or
equivalent type recommended by the
manufacturer. Dispose of used batteries
according to the manufacturer’s instructions.
1
BATTERY
S5660.book 14 ページ 2006年10月30日 月曜日 午後6時56分
Before using
15
LSQT1121
Charging time and recordable time
The times shown in the tables below are for when
the temperature is 25 oC (77 oF) and the humidity
is 60%. If the temperature is higher or lower than
25 oC (77 oF), the charging time will become
longer.
A Charging time
B Maximum continuously recordable time
C Actual recordable time
(The actual recordable time refers to the
recordable time on tape when repeatedly starting/
stopping recording, turning the unit on/off, moving
the zoom lever etc.)
“1 h 40 min” indicates 1 hour 40 minutes.
The battery CGR-DU06 is supplied.
The charging time and recordable time shown in
the table are approximations. The times indicate
the recordable time when the viewfinder is used.
The times in parentheses indicate the
recordable time when the LCD monitor is used.
We recommend the Battery Pack CGA-DU12
and CGA-DU21 for long recording time (2 hours
or more for continuous recording, 1 hour or
more for actual recording).
The actual time may become shorter than this.
The recordable time shown in the table are
approximations. The recordable time will
become shorter in the following cases:
When you use both the viewfinder and the
LCD monitor simultaneously while rotating the
LCD monitor frontward to record yourself, etc.
The batteries heat up after use or charging. The
main unit of the Camcorder being used will also
heat up. This is normal.
Along with the reduction of the battery capacity,
the display will change: # #
# # . If the battery
discharges, then ( ) will flash.
Turning the Camcorder on
When the Camcorder is turned on with the lens
cap fitted, the automatic white balance
adjustment (
-69-) may not function properly.
Please turn the Camcorder on after removing the
lens cap.
ª
How to turn on the power
1 While pressing the button 1, set the
[OFF/ON] switch to [ON].
The Status indicator lights red and the power
turns on.
In Tape Recording Mode or Card Recording
Mode, if the [OFF/ON] switch is set to [ON]
while the LCD monitor is closed and the
viewfinder is retracted, the power turns off.
ª
How to turn off the power
1 While pressing the button 1, set the
[OFF/ON] switch to [OFF].
Set the [OFF/ON] switch to [OFF] when not
using the Camcorder.
The Status indicator goes off when the power
turns off.
Supplied
battery/
CGR-DU06
(7.2 V/
640 mAh)
A 1 h 40 min
B 1 h 45 min
(1 h 25 min)
C 45 min
(40 min)
CGA-DU12
(7.2 V/
1150 mAh)
A 2 h 25 min
B 3 h 10 min
(2 h 40 min)
C 1 h 25 min
(1 h 10 min)
CGA-DU21
(7.2 V/
2040 mAh)
A 3 h 55 min
B 5 h 30 min
(4 h 30 min)
C 2 h 30 min
(2 h 05 min)
OFF
ON
1
OFF
ON
1
S5660.book 15 ページ 2006年11月15日 水曜日 午前11時32分
Before using
16
LSQT1121
ª How to turn the power on and off with
the LCD monitor/viewfinder
When the power switch is set to [ON], the power
can be turned on and off with the LCD monitor
and the viewfinder when the unit is in Tape
Recording Mode or Card Recording Mode.
1 Open the LCD monitor out or extend the
viewfinder to use. (
-17-)
The LCD monitor or viewfinder will be
activated.
2 Close the LCD monitor and retract the
viewfinder.
The power will not turn off unless the LCD
monitor is closed and the viewfinder is
retracted.
The Status indicator automatically goes off
and the power turns off. (If quick start is set to
[ON] (
-18-), the unit goes into quick start
standby mode and the Status indicator lights
green.)
The power does not turn off even if the
LCD monitor is closed and the viewfinder
is retracted while recording on a tape.
3 Open the LCD monitor or extend the
viewfinder to turn the power on and use the
Camcorder again.
The Status indicator lights red and the power
turns on.
Setting date and time
When the Camcorder is turned on for the first
time, [SET DATE AND TIME] will appear.
Select [YES] and press the center of the
joystick. Perform steps 2 and 3 below to set the
date/time.
If the screen shows the incorrect date/time, then
adjust it.
Set to Tape Recording Mode or Card
Recording Mode.
1 Set [BASIC] >> [CLOCK SET] >> [YES]. (-23-)
2 Move the joystick left or right in order to
select the item to be set. Then move the
joystick up or down to set the desired value.
The year will change as follows:
2000, 2001, ..., 2089, 2000, ...
The 12-hour clock is used.
3 Press the joystick to determine the setting.
The clock function starts at [00] seconds.
ª
About date/time
The date and time function are driven by a built-
in lithium battery.
Make sure to check the time before recording
because the built-in clock is not very accurate.
ª
Recharging the built-in lithium battery
If [0] or [--] appears when the Camcorder is
turned on, then the built-in lithium battery has
run down. Use the steps below to charge the
battery. When turning on the power for the first
time after charging, [SET DATE AND TIME] will
appear. Select [YES] and set the date and time.
Connect the AC adaptor to the Camcorder or
attach the battery to the Camcorder, and the
built-in lithium battery will be recharged. Leave
the Camcorder as is for approx. 24 hours, and
the battery will drive the date and time for
approx. 6 months. (Even if the [OFF/ON] switch
is set to [OFF], the battery is still being
recharged.)
OFF
ON
OF
F
ON
OFF
ON
S5660.book 16 ページ 2006年10月30日 月曜日 午後6時56分
Before using
17
LSQT1121
Using the LCD monitor
You can record the image while viewing it on the
opened LCD monitor.
1 Pull the LCD monitor out in the direction of
the arrow.
It can open up to 90o.
2 Adjust the angle of the LCD monitor
according to your preference.
It can rotate up to 180o 1 towards the lens or
90o 2 towards the viewfinder.
The brightness and color level of the LCD
monitor can be adjusted from the menu.
If it is forcibly opened or rotated, the Camcorder
may be damaged or fail.
If the LCD monitor is rotated by 180o towards
the lens and the viewfinder is extended (when
recording yourself), the LCD monitor and the
viewfinder simultaneously light.
Using the viewfinder
ª Extending the viewfinder
1 Pull out the viewfinder and extend it by
pinching the extension knob.
The viewfinder will be activated. (If the LCD
monitor is opened, the viewfinder will be
deactivated.)
ª
Adjusting the field of view
1 Adjust the focus by sliding the eyepiece
corrector knob.
You can adjust the brightness of the viewfinder
from the menu.
2 90o1 180o
12:30:45PM12:30:45PM12:30:45PM
OCT 15 2007OCT 15 2007OCT 15 2007
12:30:45PM
OCT 15 2007
S5660.book 17 ページ 2006年10月30日 月曜日 午後6時56分
Before using
18
LSQT1121
Quick Start
When Quick Start is ON the battery power is still
being consumed, even when the LCD Monitor
and the Viewfinder are closed.
The Camcorder will resume recording/pause
mode about 1.7 seconds after the LCD Monitor
and the Viewfinder are reopened.
Please note in Quick Start Mode approximately
half the pause recording power is being
consumed.
Using Quick Start Mode will reduce the battery
recording/playback time.
This is only activated in the following cases.
While using the battery
A tape or a card is inserted while Tape
Recording Mode is set.
A card is inserted while Card Recording
Mode is set.
While using the AC adaptor
Quick Start can be used even if a tape/card
is not inserted.
Set to Tape/Card Recording Mode.
1 Set [SETUP] >> [QUICK START] >> [ON].
(
-23-)
2 While the [OFF/ON] switch is still set to
[ON], close the LCD monitor and retract the
Viewfinder.
The Status indicator lights green and the unit
goes into quick start standby mode.
The Camcorder will not go into quick start
standby mode unless the LCD monitor is
closed and the viewfinder is retracted.
3 Open the LCD monitor or extend the
Viewfinder.
The Status indicator lights red and the
Camcorder is put into recording pause
approx. 1.7 seconds after it is turned on.
ª
To cancel Quick Start
1 Set [SETUP] >> [QUICK START] >> [OFF].
(
-23-)
If the [OFF/ON] switch is set to [OFF] while the
unit is in quick start standby mode, the power
turns off.
If the standby continues for approx. 30 minutes,
then the Status indicator will go off and the
Camcorder will be completely turned off.
In the following cases, quick start is canceled
and the power turns off.
When the Mode dial is moved.
When the battery or AC adaptor is removed.
When both the tape and card are removed
while using the battery in Tape Recording
Mode.
When the card is removed while using the
battery in Card Recording Mode.
When the Camcorder is quick-started with the
white balance on automatic, it may take some
time until the white balance is adjusted if the
scene being recorded has a light source
different from the scene last recorded. (When
the MagicPix function is used, however, the
white balance of the scene last recorded is
retained.)
If the power is turned on in quick start standby
mode, the zoom magnification becomes 1t and
the picture size may differ from what it was
before quick start standby.
If [POWER SAVE] (
-28-) is set to [5 MINUTES]
and the unit automatically goes into quick start
standby mode, set the [OFF/ON] switch to
[OFF], then to [ON] again. Also, close the LCD
monitor and retract the viewfinder and then
open the LCD monitor or extend the viewfinder
again.
OFF
ON
OFF
ON
S5660.book 18 ページ 2006年10月30日 月曜日 午後6時56分
Before using
19
LSQT1121
Inserting/removing a cassette
1 Fit the AC adaptor or the battery and turn on
the power.
2 Slide the [OPEN/EJECT] lever and open the
cassette cover.
When the cover is fully opened, the cassette
holder will come out.
3 After the cassette holder is opened, insert/
remove the cassette.
When inserting a cassette, orient it as shown
in the figure, and then securely insert it as far
as it goes.
When removing, pull it straight out.
4 Push the [PUSH] mark 1 in order to close
the cassette holder.
The cassette holder is housed.
5 Only after the cassette holder is completely
housed, close the cassette cover tightly.
When inserting a previously recorded cassette,
use the blank search function to find the position
where you want to continue recording. If you are
overwriting a previously recorded cassette, be
sure to find the position where you want to
continue recording.
When closing the cassette cover, do not get
anything, such as a cable, caught in the cover.
After use, be sure to rewind the cassette
completely, remove it and put it in a case. Store
the case in an upright position. (
-67-)
If the indicator of the condensation does not
display on the LCD screen and/or EVF and you
notice condensation on the lens or the main
unit, do not open the cassette cover otherwise
condensation may be formed on the heads or
the cassette tape. (
-65-)
ª
When the cassette holder does not
come out
Close the cassette cover completely, and then
open it again completely.
Check if the battery has run down.
Check if the cassette compartment cover is in
contact with grip belt as shown below. If so, be
sure the grip belt stays clear of the cover when
opening.
ª
When the cassette holder cannot be
housed
Set the [OFF/ON] switch to [OFF], then to [ON]
again.
Check if the battery has run down.
ª
Accidental erasure prevention
If the accidental erasure prevention slider 1 of a
cassette is opened (slide in the direction of the
[SAVE] arrow), the cassette cannot be recorded.
When recording, close the accidental erasure
prevention slider of the cassette (slide in the
direction of the [REC] arrow).
OPEN/
EJECT
PUSH
1
R E C
SAVE
1
S5660.book 19 ページ 2006年10月30日 月曜日 午後6時56分
Before using
20
LSQT1121
Inserting/removing a card
(PV-GS85 only)
Before inserting/removing a card, set the
[OFF/ON] switch to [OFF].
If the card is inserted or removed with the power
turned on, this Camcorder may malfunction or
the data recorded on the card may be lost.
1 Turn off the power 1.
Check that the Status indicator has gone off.
2 Open the card slot cover.
3 Insert/remove the card into/from the card
slot.
When inserting a card, face the label side 1
towards you and push it straight in with one
stroke as far as it goes.
When removing the card, press the center of
the card and then pull it straight out.
4 Securely close the card slot cover.
ª
Concerning the card
Do not format the card with another
Camcorder or any personal computer. This
operation may make the card unusable.
4 GB Memory Cards must be SDHC Memory
Cards.
Memory Cards greater than 4 GB without the
SDHC Logo are not compliant with the SD
specifications.
ª
Card access lamp
When the Camcorder accesses the card
(reading, recording, playback, erasing, etc.), the
access lamp lights up.
If the following operations are performed when
the access lamp is lit, then the card or the
recorded data may be damaged or the
Camcorder may malfunction.
Inserting or removing the card.
Operating the [OFF/ON] switch or the mode
dial.
Removing the battery or the AC adaptor.
ª
SD Card
The memory capacity indicated on the SD Card
label corresponds to the total amount of
capacity to protect and manage the copyright
and the capacity available as conventional
memory for a Camcorder, personal computer or
other equipment.
ª
Concerning the write protection
switch on the SD Card
The SD Card has a write protection switch on it.
If the switch is moved to [LOCK], you cannot
write to the card, erase the data on it, or format
it. If it is moved back, you can.
OFF
ON
1
1
This unit is compatible with both SD Memory
cards and SDHC Memory cards. You can
only use SDHC Memory cards on devices
that are compatible with them. You cannot
use SDHC Memory cards on devices that
are only compatible with SD Memory cards.
(When using a SDHC Memory card on
another device, be sure to read the operating
instructions for that device.)
S5660.book 20 ページ 2006年10月30日 月曜日 午後6時56分
  • Page 1 1
  • Page 2 2
  • Page 3 3
  • Page 4 4
  • Page 5 5
  • Page 6 6
  • Page 7 7
  • Page 8 8
  • Page 9 9
  • Page 10 10
  • Page 11 11
  • Page 12 12
  • Page 13 13
  • Page 14 14
  • Page 15 15
  • Page 16 16
  • Page 17 17
  • Page 18 18
  • Page 19 19
  • Page 20 20
  • Page 21 21
  • Page 22 22
  • Page 23 23
  • Page 24 24
  • Page 25 25
  • Page 26 26
  • Page 27 27
  • Page 28 28
  • Page 29 29
  • Page 30 30
  • Page 31 31
  • Page 32 32
  • Page 33 33
  • Page 34 34
  • Page 35 35
  • Page 36 36
  • Page 37 37
  • Page 38 38
  • Page 39 39
  • Page 40 40
  • Page 41 41
  • Page 42 42
  • Page 43 43
  • Page 44 44
  • Page 45 45
  • Page 46 46
  • Page 47 47
  • Page 48 48
  • Page 49 49
  • Page 50 50
  • Page 51 51
  • Page 52 52
  • Page 53 53
  • Page 54 54
  • Page 55 55
  • Page 56 56
  • Page 57 57
  • Page 58 58
  • Page 59 59
  • Page 60 60
  • Page 61 61
  • Page 62 62
  • Page 63 63
  • Page 64 64
  • Page 65 65
  • Page 66 66
  • Page 67 67
  • Page 68 68
  • Page 69 69
  • Page 70 70
  • Page 71 71
  • Page 72 72
  • Page 73 73
  • Page 74 74
  • Page 75 75
  • Page 76 76
  • Page 77 77
  • Page 78 78
  • Page 79 79
  • Page 80 80
  • Page 81 81
  • Page 82 82
  • Page 83 83
  • Page 84 84

Panasonic PV-GS80 User manual

Category
Camcorders
Type
User manual
This manual is also suitable for

Ask a question and I''ll find the answer in the document

Finding information in a document is now easier with AI