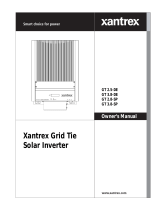
GT3.0

Xantrex GT3.0 User manual

  • Hello! I am an AI chatbot trained to assist you with the Xantrex GT3.0 User manual. I’ve already reviewed the document and can help you find the information you need or explain it in simple terms. Just ask your questions, and providing more details will help me assist you more effectively!
Xantrex Grid Tie
Solar Inverter
Owner’s Manual
GT3.0
Xantrex Grid Tie Solar Inverter
Owners Manual
About Xantrex
Xantrex Technology Inc. is a world-leading supplier of advanced power electronics and controls with products from
50 watt mobile units to one MW utility-scale systems for wind, solar, batteries, fuel cells, microturbines, and backup
power applications in both grid-connected and stand-alone systems. Xantrex products include inverters, battery
chargers, programmable power supplies, and variable speed drives that convert, supply, control, clean, and distribute
electrical power.
Trademarks
Xantrex Grid Tie Solar Inverter is a trademark of Xantrex International. Xantrex and Xanbus are registered
trademarks of Xantrex International.
Other trademarks, registered trademarks, and product names are the property of their respective owners and are used
herein for identification purposes only.
Notice of Copyright
Xantrex Grid Tie Solar Inverter Owner’s Manual © September 2004 Xantrex International. All rights reserved.
Disclaimer
UNLESS SPECIFICALLY AGREED TO IN WRITING, XANTREX TECHNOLOGY INC. (“XANTREX”)
(a) MAKES NO WARRANTY AS TO THE ACCURACY, SUFFICIENCY OR SUITABILITY OF ANY
TECHNICAL OR OTHER INFORMATION PROVIDED IN ITS MANUALS OR OTHER DOCUMENTATION.
(b) ASSUMES NO RESPONSIBILITY OR LIABILITY FOR LOSS OR DAMAGE, WHETHER DIRECT,
INDIRECT, CONSEQUENTIAL OR INCIDENTAL, WHICH MIGHT ARISE OUT OF THE USE OF SUCH
INFORMATION. THE USE OF ANY SUCH INFORMATION WILL BE ENTIRELY AT THE USER’S RISK.
Date and Revision
September 2004 Revision B
Part Number
975-0131-01-01
Contact Information
Telephone: 1 800 670 0707 (toll free North America)
1 360 925 5097 (direct)
Fax: 1 800 994 7828 (toll free North America)
1 360 925 5143 (direct)
Email: customerservice@xantrex.com
Web: www.xantrex.com
975-0131-01-01 iii
About This Manual
The purpose of this Owners Manual is to provide explanations and procedures for
installing, operating, maintaining, and troubleshooting the Xantrex Grid Tie Solar
Inverter.
Scope
The manual provides safety guidelines, detailed planning and setup information. It
provides procedures for installing the inverter and information about operating
and troubleshooting the unit. It does not provide details about particular brands of
photovoltaic (PV) panels. You need to consult individual PV manufacturers for
this information.
Audience
The manual is intended for anyone who needs to install and operate the GT
Inverter. Installers should be fully educated on the hazards of installing electrical
equipment. Certified electricians or technicians are recommended.
Organization
This manual is organized into 6 chapters and an appendix.
Chapter 1, Introduction, contains information about the features and functions
of the Xantrex Grid Tie Solar Inverter.
Chapter 2, Installation, provides information about planning for and installing
the GT Inverter. It contains information to help you plan wire routes, AC and DC
connections, and find a suitable location for installation. It also discusses
requirements for grounding the GT Inverter and your PVarray.
Chapter 3, Wiring the Inverter, provides procedures for making DC and AC
wiring connections, and grounding the GT Inverter and the PV array. Instructions
for wiring inverters in parallel are also provided.
Chapter 4, Starting the Inverter, contains information on starting up the Xantrex
Grid Tie Solar Inverter and performing a Functional Test.
Chapter 5, Monitoring the Inverter, contains information for understanding the
LCD screens and the LED indicators.
Chapter 6, Maintenance and Troubleshooting, contains information about how to
provide general maintenance for the Xantrex Grid Tie Solar Inverter. It also
provides information about troubleshooting the unit.
Appendix A, Specifications, contains information about the electrical and
environmental specifications of the Xantrex Grid Tie Solar Inverter.
About This Manual
iv 975-0131-01-01
Conventions Used
The following conventions are used in this guide.
Abbreviations and Acronyms
WARNING
Warnings identify conditions that could result in personal injury or loss of life.
CAUTION
Cautions identify conditions or practices that could result in damage to the unit or other
equipment.
Important:
These notes describe things which are important for you to know, but not as
serious as a caution or warning.
AC Alternating Current
CSA Canadian Standards Association
DC Direct Current
GT Grid Tie
GUI Graphical User Interface
LCD Liquid Crystal Display
LED Light Emitting Diode
MPPT Maximum Power Point Tracking
PC Personal Computer
PV Photovoltaic
PVGFP PV Ground Fault Protection
PWM Pulse Width Modulation
STC Standard Test Condition
UL Underwriters Laboratories
Vac Volts AC
Vdc Volts DC
V
MP
Voltage at Maximum Power
V
OC
Open Circuit Voltage
About This Manual
975-0131-01-01 v
Related Information
You can find more information about Xantrex Technology Inc. as well as its
products and services at www.xantrex.com
Other useful documentation on photovoltaic systems includes:
•“A Guide to Photovoltaic (PV) System Design and Installation, California
Energy Commission (CEC), publication #500-01-020, June 2001 (available at
www.energy.ca.gov).
•“California Interconnection Guidebook: a Guide to Interconnecting
Customer-owned Electric Generation Equipment to the Electric Utility
Distribution System using Californias Electric Rule 21, California Energy
Commission (CEC), publication #500-03-083, September 2003 (available at
www.energy.ca.gov).
vi
975-0131-01-01 vii
Important Safety Instructions
SAVE THESE INSTRUCTIONSThis manual contains important instructions that shall be followed
during the installation and maintenance of the Xantrex Grid Tie Solar Inverter.
1. Before installing and using the GT Inverter, read all instructions and cautionary markings on the
inverter, wiring box, and all appropriate sections of this guide.
2. To reduce risk of fire hazard, do not cover or obstruct the heat sink.
3. Observe the clearance recommendations as described on page 218. Do not install the GT Inverter in a
zero-clearance or non-ventilated compartment. Overheating may result.
4. Use only accessories recommended or sold by the manufacturer. Doing otherwise may result in a risk
of fire, electric shock, or injury to persons.
5. To avoid a risk of fire and electric shock, make sure that existing wiring is in good condition and that
wire is not undersized. Do not operate the GT Inverter with damaged or substandard wiring.
6. Do not operate the GT Inverter if it has received a sharp blow, been dropped, or otherwise damaged in
any way. If the GT Inverter is damaged, see the Warranty section.
7. Do not disassemble the GT Inverter. It contains no user-serviceable parts. See Warranty for instructions
on obtaining service. Attempting to service the GT Inverter yourself may result in a risk of electrical
shock or fire and will void the factory warranty.
8. To reduce the risk of electrical shock, disconnect both AC and DC power from the GT Inverter before
attempting any maintenance or cleaning or working on any circuits connected to the inverter. Turning
off controls will not reduce this risk. Internal capacitors remain charged for 5 minutes after
disconnecting all sources of power.
9. The GT Inverter must be provided with an equipment-grounding conductor connected to the AC
ground.
Safety
viii 975-0131-01-01
Regulatory Compliance
The GT Inverter has complete on-board over-current, over-temperature and anti-islanding protection, and
meets U.S., Canadian and international safety operating standards and code requirements:
UL 1741 Standard for Inverters, Converters, and Controllers for Use in Independent Power Systems
CSA C22.2 No. 107.1-01 General Use Power Supplies
IEEE C62.41 Recommended Practice on Surge Voltages in Low-Voltage AC Power Circuits (Location
Category B3).
To locate the firmware version number
The firmware version number for the protection processor is visible on a screen that appears when the unit
starts up or is powered up after switching the AC/DC Disconnect switch to on. The screen reads:
The number appearing after ROM is the firmware version number for the protection processor.
FCC Information to the User
This equipment has been tested and found to comply with the limits for a Class B digital device, pursuant
to part 15 of the FCC Rules. These limits are designed to provide reasonable protection against harmful
interference in a residential installation. This equipment generates, uses and can radiate radio frequency
energy and, if not installed and used in accordance with the instructions, may cause harmful interference to
radio communications. However, there is no guarantee that interference will not occur in a particular
installation. If this equipment does cause harmful interference to radio or television reception, which can
be determined by turning the equipment off and on, the user is encouraged to try to correct the interference
by one or more of the following measures:
Reorient or relocate the receiving antenna.
Increase the separation between the equipment and the receiver.
Connect the equipment into an outlet on a circuit different from that to which the receiver is connected.
Consult the dealer or an experienced radio/TV technician for help.
Safety
975-0131-01-01 ix
Verification and Commissioning Test
Purpose
This procedure is designed to verify correct operation of the Xantrex Grid Tie Solar Inverter both on initial
operation and periodically through its life as required by the utilities.
Commissioning Test
Follow the startup and monitoring procedures as documented in Chapters 4 and 5.
When operation of the inverter has been verified and the unit is producing power, run the Non-Islanding
test as described in this procedure.
Verification Test
Periodically run the Non-Islanding test. The inverter must respond within the 2-second limit for
compliance and then hold off on producing power for the required delay (default value of 5 minutes).
Non-Islanding Test
This test requires that the AC circuit for the inverter be switched off. This can be accomplished by
switching the breaker on the main panel that feeds the inverter(s). As an alternate, the disconnect for the
home or business may be used as well. Have someone watch the front panel of the inverter. Within 2
seconds of switching the breaker, the green light on the front of the inverter must go out. The display will
respond with an AC Fault display, indicating that the AC is out of the operating range.
Re-energize the breaker to the inverter. The unit will respond by beginning its countdown. The green light
will be off during this time. Five minutes after applying AC (default value), the green light will turn on and
the inverter will begin to push power to the grid. The display will then return to its on-line display showing
the power being produced along with the total kWh produced to date.
Note: The default voltage, frequency and reconnect delay values as defined by UL1741 and CSA 107.1-01
are programmed into the unit at time of shipment from the factory. No changes to these settings can be
made in the field by the user. Only authorized personnel with the utilitys permission may change these
settings. Contact Xantrex Technology to gain permission and the procedure/equipment to make these
changes.
x
975-0131-01-01 xi
Important Safety Instructions
Regulatory Compliance - - - - - - - - - - - - - - - - - - - - - - - - - - - - - - - - - - - - - - - - - - - - - - - - - - viii
FCC Information to the User - - - - - - - - - - - - - - - - - - - - - - - - - - - - - - - - - - - - - - - - - - - - - - - viii
Verification and Commissioning Test - - - - - - - - - - - - - - - - - - - - - - - - - - - - - - - - - - - - - - - - - - ix
1
Introduction
About the Xantrex Grid Tie Solar Inverter- - - - - - - - - - - - - - - - - - - - - - - - - - - - - - - - - - - - - 12
Standard Features - - - - - - - - - - - - - - - - - - - - - - - - - - - - - - - - - - - - - - - - - - - - - - - - - - - - 13
Optional Features - - - - - - - - - - - - - - - - - - - - - - - - - - - - - - - - - - - - - - - - - - - - - - - - - - - - 14
Safety and Standards - - - - - - - - - - - - - - - - - - - - - - - - - - - - - - - - - - - - - - - - - - - - - - - - - 15
Removable Components- - - - - - - - - - - - - - - - - - - - - - - - - - - - - - - - - - - - - - - - - - - - - - - - - 16
Wiring Box (standard on North American models) - - - - - - - - - - - - - - - - - - - - - - - - - - - - - 16
Optional Heat Sink Cover and Fan - - - - - - - - - - - - - - - - - - - - - - - - - - - - - - - - - - - - - - - - 17
Model Configurations - - - - - - - - - - - - - - - - - - - - - - - - - - - - - - - - - - - - - - - - - - - - - - - - - - 18
2
Installation
Installation Options - - - - - - - - - - - - - - - - - - - - - - - - - - - - - - - - - - - - - - - - - - - - - - - - - - - - 22
Single Inverter Installation - - - - - - - - - - - - - - - - - - - - - - - - - - - - - - - - - - - - - - - - - - - - - - 22
Multiple Inverter Installations - - - - - - - - - - - - - - - - - - - - - - - - - - - - - - - - - - - - - - - - - - - 22
Planning the Installation - - - - - - - - - - - - - - - - - - - - - - - - - - - - - - - - - - - - - - - - - - - - - - - - - 22
Inverter Location - - - - - - - - - - - - - - - - - - - - - - - - - - - - - - - - - - - - - - - - - - - - - - - - - - - - 24
PV Array Requirements - - - - - - - - - - - - - - - - - - - - - - - - - - - - - - - - - - - - - - - - - - - - - - - 25
Grounding Requirements - - - - - - - - - - - - - - - - - - - - - - - - - - - - - - - - - - - - - - - - - - - - - - - 28
Routing the Wires - - - - - - - - - - - - - - - - - - - - - - - - - - - - - - - - - - - - - - - - - - - - - - - - - - 211
Preparing for the Installation - - - - - - - - - - - - - - - - - - - - - - - - - - - - - - - - - - - - - - - - - - - - - - 213
Wiring - - - - - - - - - - - - - - - - - - - - - - - - - - - - - - - - - - - - - - - - - - - - - - - - - - - - - - - - - - 213
Circuit Breakers and Disconnect Switch - - - - - - - - - - - - - - - - - - - - - - - - - - - - - - - - - - - 213
Other Materials Needed - - - - - - - - - - - - - - - - - - - - - - - - - - - - - - - - - - - - - - - - - - - - - - 214
Equipment Needed - - - - - - - - - - - - - - - - - - - - - - - - - - - - - - - - - - - - - - - - - - - - - - - - - - 214
Mounting the Inverter - - - - - - - - - - - - - - - - - - - - - - - - - - - - - - - - - - - - - - - - - - - - - - - - - - 215
Overview - - - - - - - - - - - - - - - - - - - - - - - - - - - - - - - - - - - - - - - - - - - - - - - - - - - - - - - - 215
Preparing to Mount the Unit - - - - - - - - - - - - - - - - - - - - - - - - - - - - - - - - - - - - - - - - - - - - 216
Installing the Mounting Bracket - - - - - - - - - - - - - - - - - - - - - - - - - - - - - - - - - - - - - - - - - 217
Mounting the Inverter on the Bracket - - - - - - - - - - - - - - - - - - - - - - - - - - - - - - - - - - - - - 222
Installing Accessories- - - - - - - - - - - - - - - - - - - - - - - - - - - - - - - - - - - - - - - - - - - - - - - - - - - 223
Contents
Contents
xii 975-0131-01-01
3
Wiring the Inverter
Accessing the Wiring Terminals - - - - - - - - - - - - - - - - - - - - - - - - - - - - - - - - - - - - - - - - - - - - 32
Connecting the DC Wiring- - - - - - - - - - - - - - - - - - - - - - - - - - - - - - - - - - - - - - - - - - - - - - - - 34
Connecting the AC Wiring- - - - - - - - - - - - - - - - - - - - - - - - - - - - - - - - - - - - - - - - - - - - - - - - 37
Connecting Inverters in Parallel - - - - - - - - - - - - - - - - - - - - - - - - - - - - - - - - - - - - - - - - - - - 310
DC and AC Wiring for Inverters in Parallel - - - - - - - - - - - - - - - - - - - - - - - - - - - - - - - - - -310
Communications Wiring for Inverters in Parallel- - - - - - - - - - - - - - - - - - - - - - - - - - - - - - - - 312
Xanbus Network Technology - - - - - - - - - - - - - - - - - - - - - - - - - - - - - - - - - - - - - - - - - - -312
Guidelines for Routing the Network Cables - - - - - - - - - - - - - - - - - - - - - - - - - - - - - - - - - -315
Connect the Communications Cable between Inverters in Parallel - - - - - - - - - - - - - - - - - - -316
4
Starting the Inverter
Startup Procedure- - - - - - - - - - - - - - - - - - - - - - - - - - - - - - - - - - - - - - - - - - - - - - - - - - - - - - 42
Checking the PV Array DC Voltage - - - - - - - - - - - - - - - - - - - - - - - - - - - - - - - - - - - - - - - 42
Checking the AC Utility Voltage - - - - - - - - - - - - - - - - - - - - - - - - - - - - - - - - - - - - - - - - - 42
Replacing the Wiring Box Cover - - - - - - - - - - - - - - - - - - - - - - - - - - - - - - - - - - - - - - - - - - - 43
Starting up the GT Inverter - - - - - - - - - - - - - - - - - - - - - - - - - - - - - - - - - - - - - - - - - - - - - 44
5
Monitoring the Inverter
Monitoring the Front Panel Display- - - - - - - - - - - - - - - - - - - - - - - - - - - - - - - - - - - - - - - - - - 52
Front Panel Display Screens and What They Mean - - - - - - - - - - - - - - - - - - - - - - - - - - - - - - - 53
Startup Mode - - - - - - - - - - - - - - - - - - - - - - - - - - - - - - - - - - - - - - - - - - - - - - - - - - - - - - 53
Normal Operation Mode - - - - - - - - - - - - - - - - - - - - - - - - - - - - - - - - - - - - - - - - - - - - - - 53
Offline Mode - - - - - - - - - - - - - - - - - - - - - - - - - - - - - - - - - - - - - - - - - - - - - - - - - - - - - - 55
Fault Mode - - - - - - - - - - - - - - - - - - - - - - - - - - - - - - - - - - - - - - - - - - - - - - - - - - - - - - - - 56
Special Screens - - - - - - - - - - - - - - - - - - - - - - - - - - - - - - - - - - - - - - - - - - - - - - - - - - - - - 58
Custom Screens - - - - - - - - - - - - - - - - - - - - - - - - - - - - - - - - - - - - - - - - - - - - - - - - - - - - 59
Status Indicator Lights- - - - - - - - - - - - - - - - - - - - - - - - - - - - - - - - - - - - - - - - - - - - - - - - - - - 59
6
Maintenance and Troubleshooting
Factors Affecting GT Inverter Performance - - - - - - - - - - - - - - - - - - - - - - - - - - - - - - - - - - - - 62
PV Array Factors - - - - - - - - - - - - - - - - - - - - - - - - - - - - - - - - - - - - - - - - - - - - - - - - - - - 62
Other Factors - - - - - - - - - - - - - - - - - - - - - - - - - - - - - - - - - - - - - - - - - - - - - - - - - - - - - - 63
Performing General Maintenance - - - - - - - - - - - - - - - - - - - - - - - - - - - - - - - - - - - - - - - - - - - 63
Replacing Parts - - - - - - - - - - - - - - - - - - - - - - - - - - - - - - - - - - - - - - - - - - - - - - - - - - - - - - - 63
Replacing the Ground Fault Protection Fuse - - - - - - - - - - - - - - - - - - - - - - - - - - - - - - - - - 64
Replacing the Inverter - - - - - - - - - - - - - - - - - - - - - - - - - - - - - - - - - - - - - - - - - - - - - - - - 65
Identifying Error/Fault Conditions and Solutions- - - - - - - - - - - - - - - - - - - - - - - - - - - - - - - - - 68
Contents
975-0131-01-01 xiii
A
Specifications
Electrical Specifications - - - - - - - - - - - - - - - - - - - - - - - - - - - - - - - - - - - - - - - - - - - - - - - - - A2
Input - - - - - - - - - - - - - - - - - - - - - - - - - - - - - - - - - - - - - - - - - - - - - - - - - - - - - - - - - - - -A2
Output - - - - - - - - - - - - - - - - - - - - - - - - - - - - - - - - - - - - - - - - - - - - - - - - - - - - - - - - - - -A2
Adjustable disconnect settings - - - - - - - - - - - - - - - - - - - - - - - - - - - - - - - - - - - - - - - - - - -A3
Efficiency - - - - - - - - - - - - - - - - - - - - - - - - - - - - - - - - - - - - - - - - - - - - - - - - - - - - - - - - -A4
Environmental Specifications - - - - - - - - - - - - - - - - - - - - - - - - - - - - - - - - - - - - - - - - - - - - - A5
User Display - - - - - - - - - - - - - - - - - - - - - - - - - - - - - - - - - - - - - - - - - - - - - - - - - - - - - - -A5
Mechanical Specifications - - - - - - - - - - - - - - - - - - - - - - - - - - - - - - - - - - - - - - - - - - - - - - - A5
Accessories - - - - - - - - - - - - - - - - - - - - - - - - - - - - - - - - - - - - - - - - - - - - - - - - - - - - - - - - - A6
Warranty and Return Information
Warranty - - - - - - - - - - - - - - - - - - - - - - - - - - - - - - - - - - - - - - - - - - - - - - - - - - - - - - - - - WA1
Disclaimer - - - - - - - - - - - - - - - - - - - - - - - - - - - - - - - - - - - - - - - - - - - - - - - - - - - - - - - - WA2
Return Material Authorization Policy - - - - - - - - - - - - - - - - - - - - - - - - - - - - - - - - - - - - - - WA3
Return Procedure- - - - - - - - - - - - - - - - - - - - - - - - - - - - - - - - - - - - - - - - - - - - - - - - - - - - WA3
Out of Warranty Service- - - - - - - - - - - - - - - - - - - - - - - - - - - - - - - - - - - - - - - - - - - - - - - WA3
Information About Your System - - - - - - - - - - - - - - - - - - - - - - - - - - - - - - - - - - - - - - - - - WA4
Index
xiv
975-0131-01-01 xv
Figure 1-1 Basic System Overview - - - - - - - - - - - - - - - - - - - - - - - - - - - - - - - - - - - - - - - - - - - - 12
Figure 1-2 Main Features of the GT Inverter- - - - - - - - - - - - - - - - - - - - - - - - - - - - - - - - - - - - - - 14
Figure 1-3 Safety and Data Label Locations - - - - - - - - - - - - - - - - - - - - - - - - - - - - - - - - - - - - - - 15
Figure 1-4 Wiring Box for the GT Inverter - - - - - - - - - - - - - - - - - - - - - - - - - - - - - - - - - - - - - - - 16
Figure 1-5 Optional Heat Sink Cover and Fan Assembly for the GT Inverter - - - - - - - - - - - - - - - - 17
Figure 2-1 Installation Options Overview- - - - - - - - - - - - - - - - - - - - - - - - - - - - - - - - - - - - - - - - 23
Figure 2-2 Basic Grounding Overview- - - - - - - - - - - - - - - - - - - - - - - - - - - - - - - - - - - - - - - - - - 29
Figure 2-3 Long Distance Grounding Overview - - - - - - - - - - - - - - - - - - - - - - - - - - - - - - - - - - 210
Figure 2-4 Grounding With Extra Lightning Protection Overview - - - - - - - - - - - - - - - - - - - - - - 211
Figure 2-5 Knockout Locations on Bottom of Wiring Box - - - - - - - - - - - - - - - - - - - - - - - - - - - 212
Figure 2-6 Installation Overview- - - - - - - - - - - - - - - - - - - - - - - - - - - - - - - - - - - - - - - - - - - - - 215
Figure 2-7 Dimensions of GT Inverter and Knockout Locations- - - - - - - - - - - - - - - - - - - - - - - - 217
Figure 2-8 Mounting Bracket and GT Inverter - - - - - - - - - - - - - - - - - - - - - - - - - - - - - - - - - - - 218
Figure 2-9 Examples of Mounting on a Pole or Rails - - - - - - - - - - - - - - - - - - - - - - - - - - - - - - - 220
Figure 2-10 Installing the Mounting Bracket using Plywood Support - - - - - - - - - - - - - - - - - - - - - 221
Figure 2-11 Proper Placement of the Inverter on the Mounting Bracket - - - - - - - - - - - - - - - - - - - 222
Figure 2-12 Attaching the fan assembly- - - - - - - - - - - - - - - - - - - - - - - - - - - - - - - - - - - - - - - - - 224
Figure 2-13 Location of Fan Connector - - - - - - - - - - - - - - - - - - - - - - - - - - - - - - - - - - - - - - - - - 225
Figure 3-1 Removing the Wiring Box Cover- - - - - - - - - - - - - - - - - - - - - - - - - - - - - - - - - - - - - - 32
Figure 3-2 AC and DC Terminal Block Location in the Wiring Box- - - - - - - - - - - - - - - - - - - - - - 33
Figure 3-3 AC/DC Disconnect Switch Positions - - - - - - - - - - - - - - - - - - - - - - - - - - - - - - - - - - - 34
Figure 3-4 DC Connections for Grounded PV Array - - - - - - - - - - - - - - - - - - - - - - - - - - - - - - - - 36
Figure 3-5 AC Connections from GT Inverter to Utility Service Panel - - - - - - - - - - - - - - - - - - - - 39
Figure 3-6 Parallel GT Inverter DC and AC Wiring - - - - - - - - - - - - - - - - - - - - - - - - - - - - - - - - 311
Figure 3-7 Daisy Chain Layout- - - - - - - - - - - - - - - - - - - - - - - - - - - - - - - - - - - - - - - - - - - - - - 312
Figure 3-8 Male Network Terminator - - - - - - - - - - - - - - - - - - - - - - - - - - - - - - - - - - - - - - - - - 313
Figure 3-9 Xanbus RJ45 Ports in the GT Inverter Wiring Box - - - - - - - - - - - - - - - - - - - - - - - - - 313
Figure 3-10 RJ45 Connector - - - - - - - - - - - - - - - - - - - - - - - - - - - - - - - - - - - - - - - - - - - - - - - - 314
Figure 3-11 Communications Wiring for GT Inverters in Parallel - - - - - - - - - - - - - - - - - - - - - - - 317
Figure 4-1 AC/DC Disconnect Switch Positions - - - - - - - - - - - - - - - - - - - - - - - - - - - - - - - - - - - 44
Figure 5-1 Front Panel LCD Location - - - - - - - - - - - - - - - - - - - - - - - - - - - - - - - - - - - - - - - - - - 52
Figure 5-2 Location of Status Indicator Lights - - - - - - - - - - - - - - - - - - - - - - - - - - - - - - - - - - - 510
Figure 6-1 Location of Fuse, Front Panel Cover Removed - - - - - - - - - - - - - - - - - - - - - - - - - - - - 65
Figure 6-2 Inverter and Wiring Box Sections - - - - - - - - - - - - - - - - - - - - - - - - - - - - - - - - - - - - - 67
Figure A-1 Output Power vs. Ambient Temperature - - - - - - - - - - - - - - - - - - - - - - - - - - - - - - - - -A3
Figure A-2 Typical Efficiency- - - - - - - - - - - - - - - - - - - - - - - - - - - - - - - - - - - - - - - - - - - - - - - -A4
Figures
xvi
975-0131-01-01 xvii
Table 1-1 GT Inverter Models- - - - - - - - - - - - - - - - - - - - - - - - - - - - - - - - - - - - - - - - - - - - - - - 18
Table 2-1 MPPT Operational Window - - - - - - - - - - - - - - - - - - - - - - - - - - - - - - - - - - - - - - - - - 26
Table 2-2 Inverter Clearance Requirements - - - - - - - - - - - - - - - - - - - - - - - - - - - - - - - - - - - - - 218
Table 3-1 Torque Values for Wires* - - - - - - - - - - - - - - - - - - - - - - - - - - - - - - - - - - - - - - - - - - 35
Table 3-2 T568A Standard Wiring- - - - - - - - - - - - - - - - - - - - - - - - - - - - - - - - - - - - - - - - - - - 314
Table 3-3 Network Components and Part Numbers- - - - - - - - - - - - - - - - - - - - - - - - - - - - - - - - 315
Table 5-1 Startup Screens on GT Inverter Front Panel Display - - - - - - - - - - - - - - - - - - - - - - - - - 53
Table 5-2 Normal Operation Default Screen - - - - - - - - - - - - - - - - - - - - - - - - - - - - - - - - - - - - - 54
Table 5-3 Normal Operation Screens for All GT Inverter Units - - - - - - - - - - - - - - - - - - - - - - - - 54
Table 5-4 Additional Normal Operation Screens for Each GT Inverter Unit
in a Multiple Unit System- - - - - - - - - - - - - - - - - - - - - - - - - - - - - - - - - - - - - - - - - - - 55
Table 5-5 Offline Mode Default Display- - - - - - - - - - - - - - - - - - - - - - - - - - - - - - - - - - - - - - - - 55
Table 5-6 Offline Mode Screens for All GT Inverter Units- - - - - - - - - - - - - - - - - - - - - - - - - - - - 56
Table 5-7 Additional Offline Mode Screens for Each GT Inverter Unit in a Multiple Unit System - 56
Table 5-8 Fault Message Screens- - - - - - - - - - - - - - - - - - - - - - - - - - - - - - - - - - - - - - - - - - - - - 57
Table 5-9 Additional Fault Mode Screens - - - - - - - - - - - - - - - - - - - - - - - - - - - - - - - - - - - - - - - 58
Table 5-10 Special Message Screens - - - - - - - - - - - - - - - - - - - - - - - - - - - - - - - - - - - - - - - - - - - 58
Table 5-11 Status Indicator LEDs - - - - - - - - - - - - - - - - - - - - - - - - - - - - - - - - - - - - - - - - - - - - - 59
Table 6-1 Troubleshooting the GT Inverter - - - - - - - - - - - - - - - - - - - - - - - - - - - - - - - - - - - - - - 68
Tables
xviii
/