Page is loading ...

GeoMax ZEL400HV
English, Deutsch, Français,
Español, Italiano, Nederlands

14
13
8
17
19
18 20 2324 22 21
16 15
11
9, 10
4a
5
12
7
3, 4
6
1
2

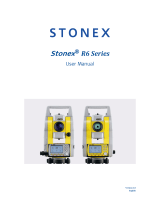
GeoMax ZEL400HV
User manual
Version 1.0

ZEL400HV | 2Introduction
Introduction
Purchase Congratulations on the purchase of a new Rotating Laser from GeoMax AG.
This manual contains important safety directions as well as instructions for
setting up the product and operating it. Refer to "6 Safety Directions" for
further information. Read carefully through the User Manual before you switch
on the product.
Product
identification
The type and serial number of your product are indicated on the type plate.
Enter the type and serial number in your manual and always refer to this infor-
mation when you need to contact your agency or GeoMax authorized service
workshop.
)There are drawings on the first page of the user manual. Unfold that page while
reading through the user manual. The letters and numbers in ( ) always refer
to these drawings.
Type: ZEL400HV
Serial No.: _______________

Introduction ZEL400HV | 3
Symbols used in
this manual
The symbols used in this manual have the following meanings:
Trademarks All trademarks are the property of their respective owners.
Type Description
Danger Indicates an imminently hazardous situation which, if not
avoided, will result in death or serious injury.
Warning Indicates a potentially hazardous situation or an unintended
use which, if not avoided, could result in death or serious
injury.
Caution Indicates a potentially hazardous situation or an unintended
use which, if not avoided, may result in minor or moderate
injury and/or appreciable material, financial and environ-
mental damage.
)Important paragraphs which must be adhered to in practice
as they enable the product to be used in a technically
correct and efficient manner.

ZEL400HV | 4Table of Contents
Table of Contents
In this manual Chapter Page
1 General Information 6
2 Basic Operation 8
2.1 Auto/Man Key 8
2.2 Tilt Key 9
2.3 Horizontal Setup 9
2.4 Vertical Setup 10
2.5 Squaring 10
2.6 Rotation Speed 11
2.7 Using the Laser Chalk Line 11
2.8 Using the Scanning 12
2.9 Power 13
3 Accessories 15
3.1 ZDR300 Detector/Remote Control 15
3.2 Mounts 18
3.3 Other Accessories 19

Table of Contents ZEL400HV | 5
4 Checking and Adjusting 20
4.1 Horizontal Checking/Calibration (X and Y Axis) 21
4.2 Vertical Checking/Calibration (Z Axis) 23
5 Care and Transport 25
5.1 Transport 25
5.2 Storage 26
5.3 Cleaning and Drying 27
6Safety Directions 28
6.1 General Introduction 28
6.2 Intended Use 28
6.3 Limits of Use 29
6.4 Responsibilities 30
6.5 Hazards of Use 31
6.6 Laser Classification 35
6.7 Electromagnetic Compatibility EMC 40
6.8 FCC Statement, Applicable in U.S. 41
7Technical Data 45
7.1 ZEL400HV Technical Data 45
7.2 ZDR300 Technical Data 46
8 International Limited Warranty 47

ZEL400HV | 6General Information
1 General Information
Description The ZEL400HV is an automatic visible laser that can be used for levelling,
vertical alignment, plumbing and squaring.
Applications include installing suspended ceilings, technical flooring, partitions
and a variety of outdoor alignment work.
The ZEL400HV laser has these advanced features:
• Automatic self-levelling in both horizontal and vertical modes
• Choice of beams: rotating plane, scanning, chalk line, single point or
constant squaring
• Square shot that's left/right adjustable

General Information ZEL400HV | 7
Laser parts over-
view
Keypad func-
tions Overview
1. Rotating head
2. Plumb or square laser beam
aperture
3. Laser beam aperture
4. Laser chalk line aperture
4a. Handle to switch between
rotation/chalk line mode
5. Arrow (align with 90° index
mark)
6. 90° index mark (one of four)
7. Retractable foot for vertical setup
8. Adjustable feet for vertical setup
9. Batteries (rechargeable or alka-
line)
10. Jack for battery charger (on
rechargeable models)
11. 5/8" mount
12. Protection Cap
13. Vial for vertical setup
14. Decrease rotation speed,
decrease scan area
15. Increase rotation speed, increase
scan area
16. Moving the square shot to the
right
17. Moving the square shot to the left
18. Capture window for remote
control
19. Manual mode light
20. Manual/Automatic
21. Tilt light
22. Tilt
23. Battery low light
24. On/Off

ZEL400HV | 8Basic Operation
2 Basic Operation
)An overview of laser and keypad functions can be found on page 7.
The laser performs a self-test when switched on. The beam blinks while the
laser is self-levelling. After the laser is leveled, the head will start to rotate.
2.1 Auto/Man Key
Auto: Automatic levelling - the default mode when the laser is switched on.
Man: Manual use.
The ZEL400HV laser is always in the automatic self-levelling mode (Auto) when
switched on. Once the instrument has self-levelled, the laser head will start to
rotate.
You can choose to have constant rotation by using the manual mode. This way,
the beam will rotate even if the instrument is not leveled (necessary when
working on inclined planes).
For safety, a red light will blink above the Auto/Man button to advise the user
that the laser is in manual mode.

Basic Operation ZEL400HV | 9
2.2 Tilt Key
Tilt Mode Tilt: Tilt Mode. This will work only when selected.
This feature stops the laser automatically if the laser is disturbed or moved,
preventing inaccurate readings. Use this feature only in automatic mode, not
in manual mode.
Push the Tilt key (22) after switching the instrument on. The Tilt feature is
available 30 seconds after the instrument has self-levelled.
The red light above Tilt key will blink when operating in this mode. If the laser
is disturbed, the head will stop rotating and the red light will be on continu-
ously. Turn the laser off, wait 5 seconds and switch it on again (check that the
beam is at its original reference).
2.3 Horizontal Setup
Horizontal setup,
step by step
1. The ZEL400HV can be used directly on the ground, on the wall mount or
on a tripod with a 5/8" screw.
2. Press the On/Off key (24) to switch the laser on. It will automatically self-
level.
3. To select the Manual mode, press key (20).
4. To select the Tilt mode, press the key (22). This feature is available 30
seconds after the laser has self-levelled.

ZEL400HV | 10Basic Operation
5. If you wish to move the laser beam to a specific point, briefly press key
(16) or (17).
6. To adjust the rotation speed, press key (14) or (15) continuously according
to the direction you wish. To stop the rotation, press once the opposite key.
7. To turn the laser off, press key (24).
2.4 Vertical Setup
Vertical setup,
step by step
No accessories are needed for this position. The ZEL400HV can be used directly
on the ground. However, it can be used on the mount for a better setup.
1. Flip up the retractable foot (7). Place the instrument in vertical position,
resting on this foot. Use the adjustable feet (8) to rough level the laser to
adjust the top bubble vial (13).
2. Switch the instrument on. Once the instrument is leveled, the head will
start rotating.
2.5 Squaring
Squaring, step by
step
1. Put the laser on the ground and repeat the steps 1 and 2 for vertical use.
2. Stop the head rotation by pressing key (14) or (15).
3. To position the rotating vertical plane perpendicular to a reference line:
Coincide the arrow (5) located below the beam aperture with the index (6)
located above the retractable foot (there is also an index mark on the foot).

Basic Operation ZEL400HV | 11
Move the laser so that the beam is over the reference point on the ground,
keeping the arrow and index aligned.
Align the beam projecting from the top of the head to your second refer-
ence point with key (16) or (17) on the laser or with the ZDR300. (This
beam is 90°, or square, to the other vertical plane beam.)
4. Start the head rotation using keys (14) or (15) to change speed or use the
chalk line.
)It is important to check while you're using the laser that it has not been moved
and that your setting is still accurate.
2.6 Rotation Speed
Your laser is equipped with a visible laser diode.
It may be necessary to adjust the rotation speed according to the ambient light
conditions using keys (14) and (15). The laser beam is more visible in slow
motion. It is possible to stop the rotation and point the beam manually to view
the beam over long distances.
2.7 Using the Laser Chalk Line
Ideal for viewing at short distances. To use the laser chalk line feature, hold
the head and lift the handle (4a) on the laser head upwards so that the beam
comes out the laser line aperture (4). This gives a precise and stable laser line

ZEL400HV | 12Basic Operation
for working directly on your reference plane. You can move the line by rotating
the head manually or by using the ZDR300 in remote control mode.
)The ZDR300 detector will not work with the chalk line feature.
2.8 Using the Scanning
Allows you to see the beam easier when the laser is further away. To use the
scanning, turn the laser on. The laser should be in 'point' mode.
If it is in chalk line, bring the lid on the laser head downwards so that the beam
comes out the beam aperture (3).
To put the laser on scan mode, use the keypad or the ZDR300 in remote
control mode.
To scan, simultaneously press (14) and (17) on the laser.
The beam will blink until it has self-leveled, and then will start scanning. Use
(16) or (17) to aim the scan.
Use (15) to increase and (14) to decrease (10° to 35°). To turn the scanning
off, simultaneously press (14) and (17) again.

Basic Operation ZEL400HV | 13
2.9 Power
Installing alka-
line batteries
1. To install alkaline batteries in your ZEL400HV laser, use a coin to unscrew
the battery cap located at the bottom of the instrument.
2. Remove the battery pack.
3. Insert two alkaline batteries (D or LR20) in the pack, matching the polarity
(" +" or " -" ) as indicated at the bottom of the pack.
4. Put the battery back into its place and tighten the screw. Your ZEL400HV
is ready for use.
To replace batteries
1. When battery power is low, the laser head will stop rotating, the laser
beam will blink, and the low battery light (23) will come on.
2. Replace both batteries at the same time.

ZEL400HV | 14Basic Operation
Using recharge-
able batteries
If your ZEL400HV is equipped with an optional rechargeable battery, you must
recharge it for 8 hours before first use.
1. Insert the re-charger plug into the jack located on the battery pack (10).
2. Plug the charger into an electrical outlet (110 volts or 220 volts).
3. Charge for 8 hours.
Later recharges
The ZEL400HV can be charged while working. If electricity is available on the
job site, simply plug in the charger and keep on working. You can also remove
the battery pack to charge it, and replace with the alkaline battery compart-
ment to keep on working.

Accessories ZEL400HV | 15
3 Accessories
3.1 ZDR300 Detector/Remote Control
Description
Detector Mode Remote Control Mode Scanning Mode
1On Off Off
2 Coarse/Fine Move square shot right Decrease scan length
3 Sound On/Off Move square shot left Increase scan length
4LCD display
5 Battery location
ZDR300
1
5
2
3
4
98
7
6
11
10
12
13
18
15
1617
14

ZEL400HV | 16Accessories
LCD Display
)• A detector is recommended when it's difficult to see the laser beam
(outdoors, bright light).
• Before using the ZDR300 detector mode, it is very important to set laser
on "laser point" mode (turning the top cover). The receiver cannot detect
the beam in chalk line mode.
6 Slots for bracket
7 Capture window
8Magnet
9 Bubble vial
10 Decrease rotation speed Aim scan left
11 Increase rotation speed Aim scan right
12 Scan On/Off
13 Lower the detector
14 Raise the detector
15 Level
16 Sound On/Off
17 Battery level
18 Coarse/Fine mode
Detector Mode Remote Control Mode Scanning Mode

Accessories ZEL400HV | 17
Using the
ZDR300 in
detector mode
1. Press the On/Off button to turn the detector on.
2. Press button (2) (Fine/Coarse) to select the detection mode. A symbol
appears either on the right or left side of the LCD, displaying which mode
was selected.
3. Press the Sound button (3) to select level of sound (mute, normal, high).
Default mode is mute, indicated with no symbol. The sound symbol will
blink when you select normal loudness, and be constant in high mode.
4. Turn the capture window (7) towards the laser beam and move the
detector up or down, following the indication on the LCD. A down arrow
indicates the detector should be lowered. An arrow facing up indicates the
detector should be raised. When a horizontal line appears on the display,
the detector is at the same level as the laser beam.
5. Use the two marks on the side of the ZDR300 to draw your level.
6. You can also view the same information on the LCD on the back of the
detector.
7. Press the On/Off button to turn the detector off. Automatic switch-off will
occur after 10 minutes if not used.
8. The detector has a magnetic attachment (8) for use on ceiling grids or
partition rails. To use the detector with a rod, slide the rod bracket into the
slots (6).
9. Keep the capture window (7) clean, using a soft cloth and glass cleaner.

ZEL400HV | 18Accessories
Using the
ZDR300 in
remote control
mode
The ZDR300 can be used to stop or start rotation, increase or decrease rotation
speed, and move the square shot or stationary point left or right. It also
controls scanning and calibration.
To use it as a remote control, press any key (except On/Off).
If in detection mode, press On/Off to change to the remote control functions.
To change the
battery
To install a new 9V (LR6) battery, open the compartment on the back of the
detector. First raise the left side of the cover, then the right side, and lift out.
Follow the polarity indications inside (- is next to the side wall of the detector).
3.2 Mounts
Universal Mount The universal mount can be used as a wall mount and for vertical setups on a
tripod. It features sturdy, all metal construction, with a spring-activated mech-
anism that allows you to easily change height for quick set-ups. Also, it has a
fine adjustment screw on the bottom for precise positioning.
• As a wall mount, it can be attached to a grid for suspended ceiling setup.
• The GeoMax wall mount can also be used on its side and attached to a
tripod (5/8") to hold the laser in the vertical position.
Grade Mounts Adjustable grade mounts are used to lay out inclined planes, such as cathedral
ceilings. The ZEL400HV must be in manual mode when using grade mounts.
/