9Printer overview
Printer overview
Basic printing
Printing ideas
Maintenance
Troubleshooting
Notices
Index
Lexmark Z54
Using this
Guide...
www.lexmark.com
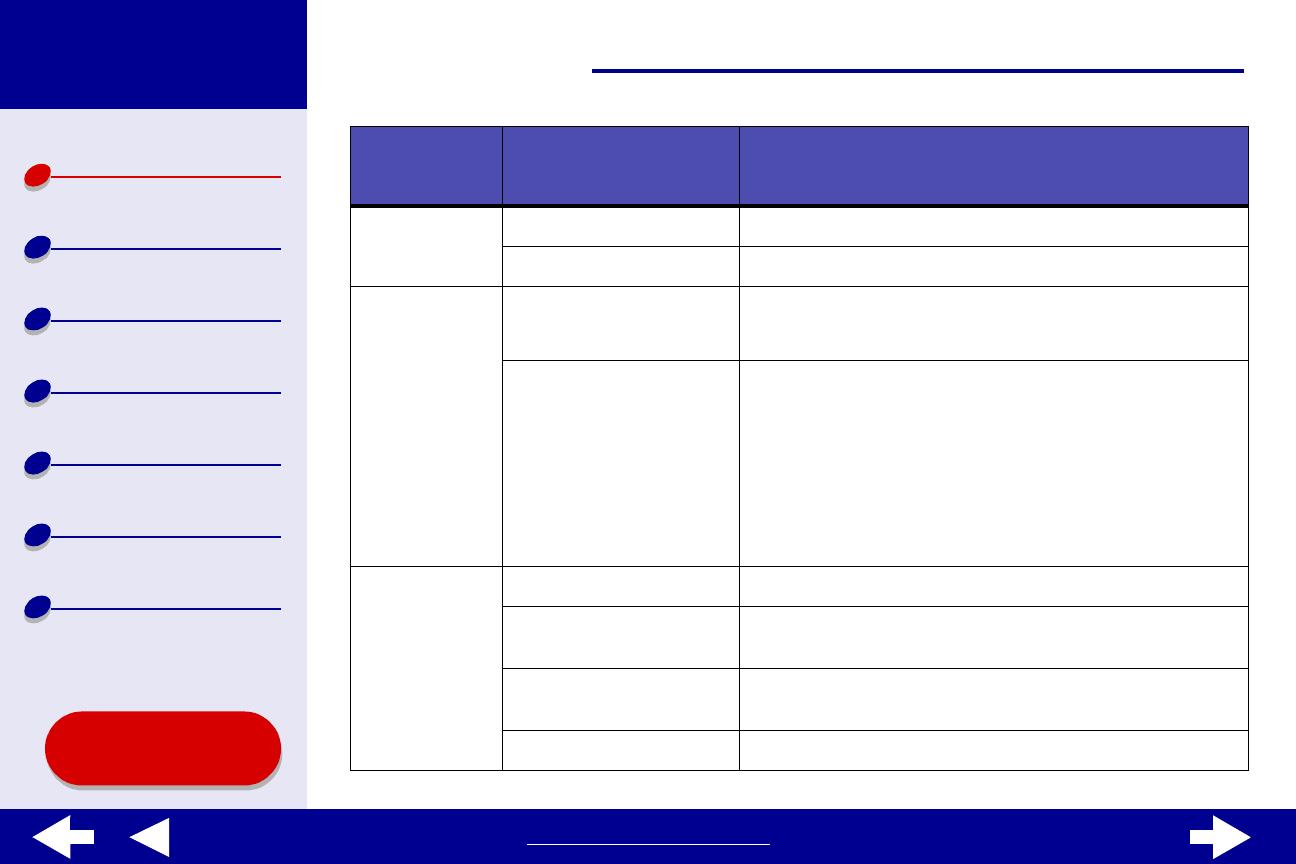
Advanced
Layout
Print Last Page First Print your document in reverse page order.
Mirror Print your document as a mirror image.
Quality &
Media
Paper Type Choose the paper type for your document.
Print Quality Choose a print quality. You can choose from Quick
Print, Normal, Better, or Best.
Note: Normal print quality is recommended for most
documents. Higher print quality settings result
in better quality documents for some paper
types, but take longer to print. For more
information about the appropriate print quality
for your document, see Printing ideas.
Printer
Services
Lexmark Z54 Utility Open the Lexmark Z54 Utility.
Troubleshooting View troubleshooting information in the printer software
Help.
Order Supplies View supplies information or order supplies on the
Lexmark Web site.
Software Version View printer software version information.
From the
pop-up menu,
choose:
Select: When you want to:


