Oregon ATC9K User manual

Category
Action sports cameras
Type
User manual

This manual is also suitable for

Dear Customer,
Thank you for purchasing the ATC9K by Oregon Scientic.
At Oregon Scientic, we understand that
adventure sports enthusiasts as well as everyday enthusiasts
take great pride and satisfaction in recording and viewing
rst person footage captured by our hands free action cam.
For this reason, the ATC9K was designed and engineered with
extreme precision, in order to allow you to take the adventure
home with you. Review the following pages for technical
information, tips and troubleshooting which will allow you to
maximize your experience with the ATC9K.
PLAY HARD, RECORD EVERYTHING!
OREGON SCIENTIFIC and associated trademarks and trade dress are owned by
OREGON SCIENTIFIC, Inc.
© 2010 OREGON SCIENTIFIC, Inc. All Rights Reserved.
UK
Oregon Scientic ATC9K
I . Quick Start .................................................................................... 1
II . Camera Precautions ................................................................... 1
III . Technical Specications ............................................................ 3
IV . Computer System Requirements ............................................. 3
V . Package Contents ........................................................................ 4
VI . Product Appearance .................................................................. 5
VII . Camera Operations ................................................................. 6
VIII . Using the Remote Control ..................................................... 7
IX . LCD Screen Display .................................................................. 7
X . Camera Settings .......................................................................... 8
XI . Power Supply ........................................................................... 12
XII . MicroSD Card Insertion / Removal ...................................... 13
XIII . Connecting to a Computer ................................................... 13
XIV. Connecting to a Monitor ....................................................... 20
XV . Troubleshooting ...................................................................... 22
- 1 -
I) Quick Start
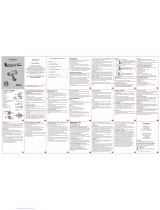
Turning the ATC9K On
Press the On/Off Button .
A start up screen will be shown on the LCD.
II) Camera Precautions
Notice the following guidelines when using your camera
• The ATC9K is shock resistant, not shock proof.
• For your safety, do not press the buttons on the camera during sports activities.
• Do not place the camera in areas prone to dust or damp for extended periods
of time. This may cause a re or an electrical shock.
• Do not leave the camera in places exposed to extremely high temperatures,
such as under direct sunlight, for extended periods of time. This may affect
the camera housing and internal components.
• Clean the lens with a soft cloth to remove ngerprints or dust.
• If the rechargeable battery is mishandled, it can burst, cause a re or even
chemical burns. Observe the following cautions.
• Do not disassemble.
• Do not crush and do not expose the rechargeable battery to any shock or force
such as hammering, dropping or stepping on it.
• Do not short circuit and do not allow metal objects to come into contact with
the battery terminals.
Do not expose to extreme temperatures below C (32°F) or above 40°C (104°F).
• Do not incinerate or dispose of in re.
• Do not handle the damaged or leaking rechargeable battery.
• Be sure to charge the rechargeable battery using a genuine ATC9K battery
charger or charge it via the main unit.
• Keep the rechargeable battery out of the reach of small children.
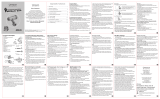
Shooting Photos
1. Aim the ATC9K at what you would like to take a picture.
2. Press the Photo capture button at the top of the camera.
3. The LCD display will be frozen for a while, indicates that the scene had been
captured.
Recording Video Footage
1. Aim the ATC9K at what you would like to record.
2. To start recording press the Movie shutter button at the top of the camera.
3. Press the movie shutter button again to stop recording. An animation showing
a circular motion will appear, which indicates the footage is being saved.
- 2 -
UK
• Keep the rechargeable battery dry.
• Replace only with the same type recommended by Oregon Scientic.
Dispose of used the rechargeable battery promptly as described in the instructions.
• Turn the camera off before removing the rechargeable battery or the microSD
card. The card and the data may be damaged if the microSD card is inserted
or removed while the camera is still on.
• Remove the rechargeable battery and the microSD card before storing the
camera for long periods of time. Keep it in a well-ventilated place to prevent
mould.
• Under the following circumstances, have the camera repaired by qualied
personnel:
a) The plug is damaged or worn.
b) The device has been dropped and/or the housing has been damaged.
c) Liquid has entered the camera.
Disclaimer:
Oregon Scientic will not, under any circumstances, be responsible for injuries or
property damage incurred during participation of any high-risk sports or
activities not endorsed or recommended by Oregon Scientic. Should the camera
malfunction under these circumstances, it will not be covered under warranty.
The warranty covers manufacturing defects only.
Notes on copyright:
Users are asked to note that the transfer of memory containing photos or data
protected under copyright laws is only permissible within the restrictions imposed.
Users assume all responsibility in the event that copyrights are violated by the use
of this camera.
Waterproof Feature
The ATC9K camera is waterproof up to 20m (60ft). Oregon Scientic will not
assume any responsibility for camera malfunction caused by liquid entering the
camera as a result of misuse by the user.
Liquid may get inside the camera if the battery cover is not firmly
closed
If the camera gets wet, wipe the liquid off as soon as possible with a dry cloth.
• Other camera accessories may not be waterproof.
Don’t use the camera in extreme temperatures as this may cause the
camera to malfunction.
- 3 -
III) Technical Specifications
• Sensor resolution 5M pixels CMOS.
• Supports Micro SD/SDHC Class 4 card or above and compatible up to 32GB
(not included).
• Movie storage:
1080p = 1920x1080 pixels (16:9), 30 fps, ~12 Mbit/s data rate, approximately
9 minutes of video per 1G Byte
720p = 1280x720 pixels (16:9), 60 fps, ~12 Mbit/s data rate, approximately
10 minutes of video per 1G Byte
720p = 1280x720 pixels (16:9), 30 fps, ~8 Mbit/s data rate, approximately 15
minutes of video per 1G Byte
WVGA = 848x480 pixels (16:9), 60 fps, ~8Mbit/s data rate, approximately 15
minutes of video per 1G Byte
The recording durations will be varied which depends on the recording objects
and environment.
• 320 x 240 Color LCD screen
• Focusing range 3m~innity
• Movie images MOV
• USB Interface (2.0)
• Monitor Interface HDMI (1.3)
• Rechargeable battery (included)
• Dimensions 40mm diameter. x 103mm length
• Operation system WinXP/Vista /7 or Apple Mac X 10.6 or above
IV) Computer System Requirements
Minimum System Requirements
Windows Environment: 3.0 Ghz Intel Pentium D (dual-core) or faster
• Mac Environment: Dual 2.0 GHz PowerMac G5 or faster; 2.0 GHz Intel Core
Duo or faster
• Windows XP (Service Pack 2 or later), Windows Vista, Windows7 or Apple
Mac X 10.6 or above
• 2GB RAM
• 1G Free hard disk space
• 1GB or greater video card
• Quicktime 7
• 1024x768 resolution video support (32 bit)
• 16 bit Windows compatible sound device
* In some cases, the frame rate may be automatically reduced to maximize the
memory usage.
- 4 -
UK
7
6
19
(Items sold separately)
18
V) Package Contents
Thank you for purchasing the ATC9K Action Camera, this package should contain
the:
1. Main Camera Unit with Camera Grip
2. Carrying Bag
3. Software Installation CD
4. Remote Control
5. Rechargeable Battery
6. Long Silicon Strap
7. Long Velcro Strap
8. Helmet Grip
9. Handlebar Mount
10.Base Mount and Tripod Mount
11.Rubberized Patch
12.Velcro Patch
13.USB Cable
14.HDMI Cable
15.User Manual
16.Screw
17.Nut
Items sold separately
18.GPS Module
19.External Battery Charger
12
14
15
16
8
5
1
2
4
10
9
13
3
17
11
- 5 -
VI) Product Appearance
Main Unit
1 Play/Pause button Play/Pause/Conrm
2 Left button Left
3 Menu button Settings menu
4 Right button Right
5 Power On-Off Power on/off unit
6 Movie Shutter button Record start/stop
7 Photo Capture button Take photo
8 USB Connection Connect to the computer
9 HDMI Connection Connect to the TV
10 microSD card slot Insert microSD card
11 Battery Compartment Insert rechargeable battery
12 GPS Module slot Insert GPS Module
1
2
3
4
5
6
Remote Control Unit
1 Play/Pause button Play/Pause/Conrm
2 Left button Left
3 Right button Right
4 Menu button Settings menu
5 Movie Shutter button Record/Stop button
6 Photo Capture button Take photo
8
11
10
9
12
7 6
54123
8
11
10
9
12
7 6
54123
- 6 -
UK
VII) Camera Operations
Turning the Camera On
Press the On/Off button . A start up screen will be shown
on the LCD screen.
Turning on for the first time
1. The system will ask you to set the Date/Time/Timezone when the
camera is turned on for the rst time or the rechargeable battery is
reinstalled.
2. Press
to select your options. Press to conrm your
selections.
Recording Videos
1. Aim at what you want to record.
2. To start recording press the “Movie shutter button”
at the top of the camera.
3. The Laser Pointer at the front of the camera will be turned on for a more accurate
adjustment of the target. Users can set the turn on time of the Laser Pointer
in User Settings. (Do Not look directly to the Laser Pointer or aim at others’
eyes)
4. The Laser Pointer will be turned off according to the user selected time. Then
the camera will start recording (one sound effect with red LED light ashing).
The Movie shutter icon will blink on the top left corner of the screen while the
time elapsed will be shown at the bottom of the screen.
5. To stop recording press the “Movie shutter button” at the top of the camera
again.
Taking Photos
1. Aim at what you want to capture.
2. Press the “Photo capture button” at the top of the camera.
3. A shutter sound and the red LED will blink once to
indicate that a photo was taken. A preview will be shown
on the LCD screen briey.
Playback
1. Press the “Play/Pause” , then the screen will switch to playback mode.
2. Press “Left” and “Right” button to select the video or photo that you
want to playback.
- 7 -
3. During video playback, press “Play/Pause , to pause or resume playback,
press “Left” and “Right” button to activate fast
forward and fast reverse.
4. To exit the playback mode, press “Movie shutter” button
or “Photo Capture” button .
Delete a Video or Photo
1. Press the “Menu” button during playback mode,
select the video or le you want to delete with “Left” and
“Right” button .
2. Then press “Play/Pause” to conrm deletion after the
dialogue box pops up.
VIII) Using the Remote Control
1. Ensure you are pointing the remote control sensor towards the front of the
camera. Press either the “Movie shutter” button or “Photo Capture”
button .
2. The red LED will ash to show recording or photo capturing has started.
3. The buttons on the remote control carries the same functions as those found on
the back of the camera.
IX) LCD Screen Display
No SD Card Inserted
(Remove Red Line if inserted)
Privacy Mode On
(disappear when Off)
Video Resolution
EV
Video/Photo Quality
Photo Resolution
Night Mode On
(disappear when Off)
Cont’ Shots On
(disappear when Off)
White Balance Setting
Battery
(4 states)
Lapse Time (when recording and playback)
Remaining Time (when viewing)
G Sensor On
(disappear when Off)
GPS On
(disappear when Off or no
module)
- 8 -
UK
X) Camera Settings
There are 5 main camera settings which are Video, Photo, G-Sensor, GPS and
General Settings. The GPS setting is activated only when the GPS module (sold
separately) is attached onto the camera.
1. To enter into Settings, press “Menu” button in the live
view mode.
2. You can scroll through these categories by pressing “Left”
and “Right” buttons .
3. To enter the category, press “Play/Pause” button
.
4. To select a setting, press “Play/Pause” button
.
5. To select options under a setting, press “Left” and “Right”
buttons .
6. To conrm an option, press “Play/Pause” button .
7. To exit settings, press “Menu” button
again.
Display the video resolution setting.
Display the photo resolution setting.
Display the EV value.
Display the quality setting of the videos & photos.
Indicate that there is no microSD card inserted. The red line will disappear when a
microSD card is inserted.
Privacy Mode is on. It will disappear when it is disabled in the user settings.
GPS function is on. It will disappear when the camera is not equipped with the
GPS module or it is disabled in the user settings.
G-Sensor function is on. It will disappear when it is disabled in the user settings.
Continuous shots function is on. It will disappear when it is disabled in the user
settings.
Self timer function is on. It will disappear when it is disabled in the user settings.
Night Mode is on. It will disappear when it is disabled in the user settings.
Display the white balance setting.
Display the battery status.
GPS function is on but the GPS module is either searching or establishing connections
with satellites. The process will take minutes to complete but the duration depends
on the surroundings of your location as well as weather conditions.
- 9 -
Video Settings
1. Resolution
You can set your video resolution here.
2. Quality
You can select Fine, Good or Normal.
3. EV
The Exposure values range from +2.0 to -2.0. You can set the appropriate value
to suit your shooting environment.
4. White B. (White Balance)
Based on different surroundings, you can select Auto, Daylight, Cloudy,
Fluorescent and Tungsten to adapt a correct color tone of the video.
5. Contrast
According to your preference, you can adjust the contrast level with Standard,
Soft, Hard.
6. Sharpness
According to your preference, you can adjust the sharpness with Standard, Soft,
Hard.
7. Effect
You can add effects to the video too. Just select Vivid, Negative, Black and
White, Sepia or Art.
8. Duration
To record a video with a time limit, select a duration here.
Photo Settings
1. Resolution
You can set your photo resolution here with either 3megapixels or 5megapixels.
2. Quality
You can select Fine, Good or Normal.
3. Night Mode
You can turn it on in order to have a boost of exposure during the night.
4. EV
The Exposure values range from +2.0 to -2.0. You can set the appropriate value
to suit your shooting environment.
Full HD/30 1920x1080, 30 fps
HD/60 1280x720, 60 fps
HD/30 1280x720, 30 fps
WVGA 848x480, 60 fps
- 10 -
UK
5. White B. (White Balance)
According to different environment, you can select Auto, Daylight, Cloudy,
Fluorescent and Tungsten to adapt a correct color tone of the photo.
6. Contrast
According to your preference, you can adjust contrast level with Standard,
Soft, Hard.
7. Sharpness
According to your preference, you can adjust sharpness with Standard, Soft,
Hard.
8. Effect
You can add effects to the video too. Just select Vivid, Negative, Black and
White, Sepia or Art.
9. Timer
You can set a countdown time before the shutter captures automatically.
10. Cont’ Shots (Continuous Shots)
You can set the camera to either take 3 or 5 continuous shouts with this setting.
G-Sensor Settings
1. Operate
You can turn on or off the G-Sensor here. Power consumption can be reduced
by turning off the G-Sensor.
2. Data Display
You can display G-Sensor related data on the videos and photos via HDMI
output by turning on this setting.
GPS Settings
GPS Module is sold separately. Please refer to the corresponding manual for
these settings.
General Settings
1. Laser Pt. (Laser Pointer)
This setting allows you to have either 5 or 10 seconds to adjust the direction of
the camera using the laser pointer before the capturing of videos after you
press the “Movie Shutter” button .
2. Volume
You can adjust the sound volume here.
3. Privacy
With Privacy mode on, all LED and Audio indicators will be turned off.
- 11 -
4. Time Stamp
Date and time will be stamped on the videos and photos with this setting being
turned on.
5. LCD Sleep
This setting controls the sleep time of the LCD screen. While the LCD is
sleeping, power consumption is reduced.
6. Auto Off
Sometimes you may want the camera to turn off automatically during idle.
Set your preference here to do so.
7. Date
Set your date here.
8. Time
Set your time here.
9. Timezone
Set your timezone here.
10. Language
Set your system language here.
11. Light Freq. (Light Frequency)
In order to avoid ickering in the video while shooting indoors, you need to adjust
this setting to match the frequency of light source with that of the shutter.
12. Format
You can format the microSD card inserted in the camera with this setting.
13. Factory Set. (Factory Settings)
Restore back to the factory default settings.
14. Version
Display the current system version.
Firmware update
1. Visit Oregon Scientic website atc.oregonscientic.com/ to download the latest
rmware.
2. Unzip the package and copy the
unzipped le to the root folder of
the microSD card.
3. Insert the microSD card to the
ATC9K and turn it on.
4. To conrm the update, press .
The camera will be switched off.
5. Press to restart the camera.
- 12 -
UK
XI) Power Supply
Battery Replacement
1. Unlock the rear of the unit by lifting the latch.
2. Insert the rechargeable battery into the battery slot as
indicated until it clicks in place.
3. If you want to release the rechargeable
battery, turn the battery hinge downwards until it
comes out from the slot.
4. Close the battery door rmly before closing the latch.
NOTE: When the battery is low, the battery low icon
will appear on the LCD screen
and the red LED will light up.
Recharge the Battery by External Charger (sold separately)
1. Plug the charger to the power supply and slot the battery into the
charger as indicated on the charger.
2. The LED on the charger will light up as the battery starts to recharge.
3. The LED will be turned off when the battery is fully charged.
Recharge the Battery via USB
1. Turn the camera off, then plug the camera with the
rechargeable battery to a computer with the USB
cable provided.
2. The red LED will light up to show the battery is
charging.
3. The red LED will be turned off when the
battery is fully charged.
NOTE: The rechargeable battery will be fully charged in 2-3 hours.
- 13 -
XII) MicroSD Card Insertion / Removal
Insert
1. Turn the camera off.
2. Unlock the end latch to open the camera.
3. Ensure the microSD card terminals are facing down,
then insert it carefully and completely until it clicks
in place.
4. Close the camera and lock the latch.
Remove
1. Turn the camera off.
2. Unlock the end latch to open the camera.
3. Push the card until it clicks, then pull the card out.
4. Close the camera and lock the latch.
NOTE:
- Ensure the card is inserted correctly.
- Do not touch the connect terminals on the back of the microSD card.
- The card may be damaged if it is not fully inserted.
- The card and the data may be damaged if the microSD card is inserted or removed while
the camera is on.
- Do not touch the at cable as this may seriously affect the camera performance and
functions.
- The camera supports microSD/SDHC Class 4 cards or above and compatible up to
32GB. MicroSD cards with lower classes may cause performance drop during recording.
XIII) Connecting to a Computer
You can upload your recorded video footages and
photos to a PC by connecting the ATC9K to your PC using the PC Application.
You may download the latest version in atc.oregonscientic.com.
1. Turn the ATC9K on.
2. Connect the ATC9K to a PC via the USB cable.
3. The ATC9K will be connected as a USB Mass Stor-
age Device.
4. You can then manage your videos and photos by
launching the PC application.
- 14 -
UK
User Profile
1. To start, choose your own account to login with your password or simply create a
new account if you are using the PC application for the rst time.
You can always access your prole information by
clicking the top-right icon after you login to the
application.
2. User accounts and proles are password protected.
A password hint question and answer elds will
be added in case users forget their passwords.
Import Videos and Photos
1. After the users log into their accounts the PC
program will ask the users automatically whether
they would like to import videos and photos onto the
computer if the camera is on and is connected to the
PC via USB.
2. Users will have to option to either keep or delete the source les after
importing.
(1) (2)
- 15 -
Video and Photo Viewer
1. The Viewer will display both videos and photos.
2. When the viewer is showing video les, the following screen will be shown:
I. A video player
II. A video timeline with a dragger which you can manually drag the position
o reveal certain instances of the video.
III. A volume control slider. The audio will be muted when the speaker icon
under the volume slider is pressed . The icon will be changed as
indicated.
IV. Video control buttons – Start of the video, Fast Reverse,
Play, Fast Forward and end of the video.
V. Multiple clicks on Fast Reverse and Fast Forward triggers x2,
x4, x8 speeds of reverse and forward.
VI. A timer showing the video duration and lapsed time.
VII. A line showing the title of the video.
VIII. An information icon which shows the general
information of the video when it’s been clicked.
Users are able to edit the title and description of the
video. Moreover, users are able to import KML to the
corresponding video which is imported from the
local drive instead of the camera.
IX. A full screen button .
X. A snapshot button .
- 16 -
UK
3. When the viewer is operated for photo les, the
following will be shown:
I. A photo viewer
II. The name of the photo.
III. An information icon which shows the general information of the photo
when it has been clicked. Users are able to edit the title and description of the
photo. Moreover, users are able to import KML to corresponding photo which
is imported from local drive instead of the camera.
IV. The index of the photo
V. A previous button
VI. A next button
VII. A full screen button .
VIII. A rotation button which users can rotate photos in 0, 90, 180 and 270
degrees. The changes in rotation will save as settings but will not affect the
original le.
Google Map
1. If the GPS module (Sold Separately) is inserted to the camera
and the GPS module is turned ON, the camera
will sync the GPS data on to a .MAP le. This part of
operation will be covered in the corresponding user manual.
2. If the GPS module is not inserted, the Google Maps
functions will not be activated. However, you can
always import your own KML to activate the GPS
information in Google Maps.
3. The Google Maps function requires an internet
connection. If the connection is barred or disconnected, the
Google Maps function will not be operational until
the internet connection is restored.
- 17 -
File Management
1. Within the File Management, videos and photos are displayed separately
into 2 lists.
2. All videos and photos imported will be displayed within the “Library” tab.
3. The videos and photos that were imported last time (no matter the les are
assigned to album or not) are displayed in the “Last Import” tab.
4. Users are able to create , delete and rename (rollover and click in
front of the album name) albums.
5. Same les can fall into different albums.
6. Files deleted via the “Library” and “Last Import” tabs are deleted physically
while les deleted via other album tabs are just tags removal but not
physically deleted.
7. Users can import manually by clicking the arrow icon and either import
from the camera or from local drives.
8. The search icon triggers the search function with the following criteria:
I. Keyword search of title
Multiple keywords are allowed with their entries separated by commas.
II. Keyword search of description
Multiple keywords are allowed with their entries separated by commas.
III. Filename
Multiple keywords are allowed with their entries separated by commas.
IV. Video Duration
With options: Any durations; Less than/More than 0.5min; 1min; 2min; 5min;
10min; 20min; 30min (if user chooses “Any durations”, the second pulldown
menu won’t be shown.)
- 18 -
UK
V. Album
With options: all, library and albums that the user created.
VI. Date
With options: anytime, past 24 hours, past week, past month, past year,
specic date (if user is not choosing a specic date, the second and third
pulldown menu won’t be shown.)
9. Video File Listing shows:
I. The total number of videos and le size of an individual tab.
II. A pulldown menu for users to sort the les by title,
lename, le size, duration and date (time).
III. Thumbnails of the rst frames of every individual video
for you to playback
IV. Details of the videos.
V. An edit info icon to edit the title and descriptions of videos.
VI. A trash icon to delete les or remove tags.
VII. Multiple item selections are allowed by ctrl-click or shift-click.
VIII. You can drag and drop from lists to albums on the left hand side.
10. Photo File Listing shows:
I. The total number of photos and le size of an individual tab.
  • Page 1 1
  • Page 2 2
  • Page 3 3
  • Page 4 4
  • Page 5 5
  • Page 6 6
  • Page 7 7
  • Page 8 8
  • Page 9 9
  • Page 10 10
  • Page 11 11
  • Page 12 12
  • Page 13 13
  • Page 14 14
  • Page 15 15
  • Page 16 16
  • Page 17 17
  • Page 18 18
  • Page 19 19
  • Page 20 20
  • Page 21 21
  • Page 22 22
  • Page 23 23
  • Page 24 24
  • Page 25 25
  • Page 26 26

Oregon ATC9K User manual

Category
Action sports cameras
Type
User manual
This manual is also suitable for

Ask a question and I''ll find the answer in the document

Finding information in a document is now easier with AI