Page is loading ...

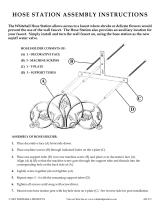
A - Wall Mailbox - 1
B - Screws - 2
© 2007 WHITEHALL PRODUCTS Visit our Web Site at: www.whitehallproducts.com Rev. 4/07 AW-366
WHITEHALL MAILBOX WALL STYLE MOUNTING INSTRUCTIONS
1) Position the mail box (A) on desired location with lid open.
(to assure clearance when lid is open).
2) Mark the wall at the top, center of the mailbox door (B) using a piece
of tape. (See Figure 1)
3) Measure down 6.75 inches and place a mark on the wall.
(use a level to make sure the mark is at the center line of the mailbox
located in step 2)
4) Draw a horizontal line through the mark on the wall, again using
a level to ensure a straight line. Measuring out 5 inches on both sides
of center mark, place pilot hole marks on level line with center mark.
(See Figure 2)
6) Drill pilot holes for each for each screw location and insert
masonry anchors if needed.
5) Install the screws (B) included with this mailbox in each hole
location leaving approximately 1/2” of the end of each screw
head exposed.
6) Align the large openings of the keyholes on the back panel of the
mailbox over the exposed screw heads and lower the mailbox
to secure the screws onto the keyhole slots.
Cleaning Instructions:
Whitehall Mailboxes and Accessories are made of cast aluminum with tough finishes to withstand
exposure to the elements. To clean your Whitehall Mailbox, use a non-abrasive detergent and water
with a cloth, sponge, or soft brush. Polishing cannot brighten the bronze color finish. The painted
finish will weather naturally and maintain its beauty for many years without special attention.
TAPE
Figure 1
TAPE
Figure 2
CENTER
MARK
PILOT HOLE MARKS
(5” each way from center)
6.75”
/


