Page is loading ...

88051850 04/12
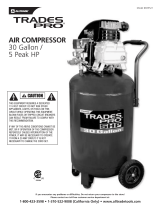
60 GALLON COMPRESSOR
CALIFORNIA PROPOSITION 65
WARNING: You can create dust
when you cut, sand, drill or grind
materials such as wood, paint,
metal, concrete, cement, or other
masonry. This dust often
contains chemicals known to
cause cancer, birth defects, or
other reproductive harm. Wear
protective gear.
WARNING: This product or its
power cord may contain
chemicals, including lead,
known to the State of California
to cause cancer and birth
defects or other reproductive
harm. Wash hands after
handling.
CAUTION:
FOR YOUR OWN SAFETY READ
INSTRUCTION MANUAL
COMPLETELY AND CAREFULLY
BEFORE OPERATING THIS
COMPRESSOR.
Failure to follow all instructions
as listed below may result in
electrical shock, fire, and/or
serious personal injury.
Breathable Air Warning:
This compressor/pump is not
equipped and should not be
used “as is” to supply
breathing quality air. For any
application of air for human
consumption, the air
compressor/pump will need
to be fitted with suitable in-
line safety and alarm
equipment. This additional
equipment is necessary to
properly filter and purify the
air to meet minimal
specifications for Grade D
breathing as described in
Compressed Gas Association
Commodity Specification G
7.1 - 1966, OSHA 29 CFR
1910. 134, and/or Canadian
Standards Associations
(CSA).
SPECIFICATIONS:
Tank Size: 60 gallons
CFM: 11.5 @ 40PSI;
10.2 @ 90 PSI
Horsepower (Running): 3HP
Max Pressure: 135 PSI
Thermal overload protection
ASSEMBLY
INSTRUCTIONS
Do not operate the
compressor without lubricant
or with low lubricant levels. It
could cause damage to the
compressor.
1) Check the oil level. Add
additional oil if needed. If
using for the first time, pour
supplied oil into oil tank until
the oil reaches the red dot on
the oil level sight glass. Do
not over fill.
2) Install oil fill plug before
starting.
3) Close the tank valve on the
bottom of the air tank by
turning the valve clockwise.
4) A shut off valve (ideally ¾”
) should be installed on the
discharge port of the tank.
Use Teflon tape on the
threads to ensure an airtight
connection between the tank
and the plumbing or hose
coupler. Do not over tighten
the fittings.
Model: 51850, 52332
feedback@natitools.com

2
5) Attach the supplied air filter
to the air intake port on the
pump head.
6) Attach the air hose and any
desired accessories (not
included). Use Teflon tape on
the threads to ensure an airtight
connection. Do not over tighten
the fittings. Note:
Vibrationisolator pads are
recommended prior to bolting to
the floor. Only mount the
compressor to a concrete floor
or concrete pad.
OPERATING INSTRUCTIONS
Start Up
1) Turn the ON/OFF switch to
the off position.
2) Check the air compressor
visually for any damage or
obstruction.
3) Close the drain valve.
4) Plug the power cord into the
proper receptacle. (if required)
5) Turn the ON/OFF switch to
the ON position and the
compressor should start and
build air pressure in the tank to
cut-out pressure and then shut
off automatically.
6) Adjust the air regulator to a
PSI setting that is
recommended for the
application at hand. (not
included)
7) The air compressor is ready
for use.
Shut Down
1) Turn the ON/OFF switch to the
OFF position.
2) Unplug the power cord from
the receptacle.
3) Set the outlet pressure to zero
on the regulator.
4) Remove any air tools or
accessories.
5) Open the drain valve allowing
air to bleed from the tank. After
all of the air has bled from the
tank, close the drain valve to
prevent debris buildup in the
valve.
Water that remains in the tank
during storage will corrode and
weaken the air tank which could
cause the tank to rupture. To
avoid serous injury, ensure the
tank is drained properly after
each use or daily.
Check the tank safety valve and
air filter before each use.
CHANGING THE OIL
1) Place oil drain pan below the
oil drain plug.
2) Remove dipstick to allow the
air to enter the crankcase.
3) Remove oil drain plug.
4) Allow oil to drain completely.
5) Clean and replace oil drain
plug.
6) Refill crankcase with SAE 20
or SAE 30 weight non-
detergent oil to the red dot on
the oil level sight glass. Be
careful not to overfill the tank.
feedback@natitools.com
/


