Brandt SF-84V Owner's manual
- Category
- Tumble dryers
- Type
- Owner's manual
This manual is also suitable for
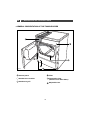
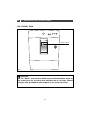
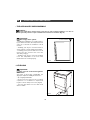
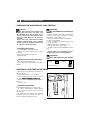
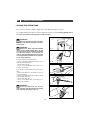
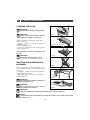
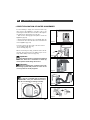
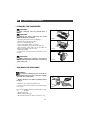
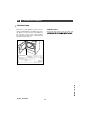
Brandt SF-84V is a domestic tumble dryer with steam function, equipped with a steam tank that can be filled with demineralised water or filtered water from the recovery tank. It's designed for drying textiles suitable for tumble drying, and is not intended for commercial or industrial purposes. It features a filter to trap lint and other particles, and a condenser to collect moisture from the air. The adjustable feet allow for leveling on uneven surfaces, and it should be installed in a well-ventilated area with a temperature below 30°C during drying.
Brandt SF-84V is a domestic tumble dryer with steam function, equipped with a steam tank that can be filled with demineralised water or filtered water from the recovery tank. It's designed for drying textiles suitable for tumble drying, and is not intended for commercial or industrial purposes. It features a filter to trap lint and other particles, and a condenser to collect moisture from the air. The adjustable feet allow for leveling on uneven surfaces, and it should be installed in a well-ventilated area with a temperature below 30°C during drying.


-
 1
1
-
 2
2
-
 3
3
-
 4
4
-
 5
5
-
 6
6
-
 7
7
-
 8
8
-
 9
9
-
 10
10
-
 11
11
-
 12
12
-
 13
13
-
 14
14
-
 15
15
-
 16
16
-
 17
17
-
 18
18
-
 19
19
-
 20
20
-
 21
21
-
 22
22
-
 23
23
-
 24
24
-
 25
25
-
 26
26
-
 27
27


Brandt SF-84V Owner's manual
- Category
- Tumble dryers
- Type
- Owner's manual
- This manual is also suitable for
Brandt SF-84V is a domestic tumble dryer with steam function, equipped with a steam tank that can be filled with demineralised water or filtered water from the recovery tank. It's designed for drying textiles suitable for tumble drying, and is not intended for commercial or industrial purposes. It features a filter to trap lint and other particles, and a condenser to collect moisture from the air. The adjustable feet allow for leveling on uneven surfaces, and it should be installed in a well-ventilated area with a temperature below 30°C during drying.
Ask a question and I''ll find the answer in the document
Finding information in a document is now easier with AI
Related papers
-
Groupe Brandt FTD800W Owner's manual
-
-
-
-
-
-
-
-
Groupe Brandt ETE6730K Owner's manual
-
Other documents
-
-
-
 De Dietrich BWD35T Owner's manual
-
Electrolux EDC3150 User manual
-
Asko T410HD.W User manual
-
-
-
Haier HD80-256A User manual
-
Haier HD90-A636 User manual
-
Haier HD90-A3979 User manual
