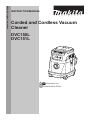
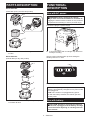
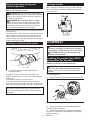
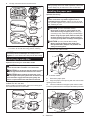
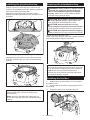
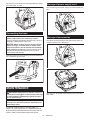
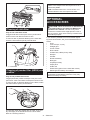
Makita DVC150L is a versatile vacuum cleaner designed for both wet and dry applications, making it ideal for a wide range of cleaning tasks. With its powerful 36V DC motor, it delivers strong suction to effectively pick up dust, debris, and liquids. The vacuum cleaner features a large 15L capacity tank, allowing you to clean larger areas without frequent emptying. Additionally, it comes with a variety of attachments, including a crevice nozzle, brush nozzle, and upholstery nozzle, providing you with the flexibility to clean different surfaces and reach tight spaces.
Makita DVC150L is a versatile vacuum cleaner designed for both wet and dry applications, making it ideal for a wide range of cleaning tasks. With its powerful 36V DC motor, it delivers strong suction to effectively pick up dust, debris, and liquids. The vacuum cleaner features a large 15L capacity tank, allowing you to clean larger areas without frequent emptying. Additionally, it comes with a variety of attachments, including a crevice nozzle, brush nozzle, and upholstery nozzle, providing you with the flexibility to clean different surfaces and reach tight spaces.


-
 1
1
-
 2
2
-
 3
3
-
 4
4
-
 5
5
-
 6
6
-
 7
7
-
 8
8
-
 9
9
-
 10
10
-
 11
11
-
 12
12
-
 13
13
-
 14
14
-
 15
15
-
 16
16


Makita DVC150L is a versatile vacuum cleaner designed for both wet and dry applications, making it ideal for a wide range of cleaning tasks. With its powerful 36V DC motor, it delivers strong suction to effectively pick up dust, debris, and liquids. The vacuum cleaner features a large 15L capacity tank, allowing you to clean larger areas without frequent emptying. Additionally, it comes with a variety of attachments, including a crevice nozzle, brush nozzle, and upholstery nozzle, providing you with the flexibility to clean different surfaces and reach tight spaces.
Ask a question and I''ll find the answer in the document
Finding information in a document is now easier with AI
Related papers
Other documents
-
Sanitaire SC684 User manual
-
Osmo ProVacuum User manual
-
Greenworks 4700802 24-48v vacuum cleaner Owner's manual
-
Sanyo SC-34A User manual
-
Dolmar DUB184 Owner's manual
-
Buffalo BFC12 Owner's manual
-
Dolmar AG3751 Owner's manual
-
Hitachi R7D User manual
-
 Airflo AFV30 User manual
-
King Canada 8521AV User manual
