Page is loading ...

INSTRUCTION MANUAL
ML648B
Contents
Warnings and Precautions ............................................................................... 2
Important Safety Instructions ............................................................................ 3
In the Box, Features, & Powering the Unit ....................................................... 4
Loading Music, Movies, or Photos onto the Unit .............................................. 5
Loading Music, Movies, or Photos onto the Unit .............................................. 6
Playing Music on the Unit & Playing Movies on the Unit ............................... 6-7
Viewing Photos on the Unit .............................................................................. 7
Location of Controls& Control Defi nitions ...................................................... 8-9
Frequently Asked Questions...................................................................... 10-11
Service Information......................................................................................... 12
2
This symbol, located on back or bottom of the unit, is
intended to alert the user to the presence of uninsulated
“dangerous voltage” within the product’s enclosure that
may be of suffi cient magnitude to constitute a risk of
electric shock to persons.
This symbol, located on back or bottom of the unit, is
intended to alert the user to the presence of important
operating and maintenance (servicing) instructions in
the literature accompanying the appliance.
CAUTION: TO PREVENT ELECTRIC SHOCK,
MATCH WIDE BLADE OF PLUG TO WIDE SLOT,
FULLY INSERT.
To reduce the risk of electric shock, do not remove
cover (or back). There are no user-serviceable parts
inside. Please refer any servicing to qualifi ed service
personnel.
WARNING: Changes or modifi cations to this unit
not expressly approved by the party responsible for
compliance could void the user’s authority to operate
the equipment.
WARNING: Lithium ion batteries, like all
rechargeable batteries are recyclable and should be
recycled or disposed of in normal household waste.
Contact your local government for disposal or
recycling practices in your area. They should never be
incinerated since they might explode.
NOTE: This equipment has been tested and found to
comply with the limits for a Class B digital device,
pursuant to Part 15 of the FCC Rules. These limits
are designed to provide reasonable protection against
harmful interference in a residential installation. This
equipment generates, uses, and can radiate radio
frequency energy and, if not installed and used in
accordance with the instructions, may cause harmful
interference to radio communications. However, there
is no guarantee that interference will not occur in a
particular installation. If this equipment does cause
harmful interference to radio or television reception,
which can be determined by turning the equipment
off and on, the user is encouraged to try to correct the
interference by one or more of the following measures:
• Reorient or relocate the receiving antenna.
• Increase the separation between the equipment and
receiver.
• Connect the equipment into an outlet on a circuit
different from that to which the receiver is
connected.
• Consult the dealer or an experienced radio/TV
technician for help.
Warnings and Precautions
TO PREVENT FIRE OR SHOCK HAZARDS, DO NOT EXPOSE THIS UNIT TO
RAIN OR MOISTURE.
1. Read Instructions - All the safety and operating instruction should be read
before the product is operated.
2. Retain Instructions - The safety and operating instruction should be
retained for future reference.
3. Heed Warnings - All warning on the product and in the operating
instructions should be adhered to.
4. Follow instructions - All operating and use instructions should be
followed.
5. Cleaning - Unplug this product from the wall outlet before cleaning. Do
not use liquid cleaners or aerosol cleaners. Use a damp cloth for cleaning.
6. Attachments - Do not use attachments not recommended by the product
manufacturer as they may cause hazards.
7. Water and Moisture - Do not use this product near water - for example,
near a bath tub, wash bowl, kitchen sink, or laundry tub; in a wet basement,
or near a swimming pool, and the like.
8. Accessories - Do not place this product on an unstable cart, stand tripod,
bracket, or table. The product may fall, causing serious injury to a child
or adult, and serious damage to the product. Use only with a cart, stand,
tripod, bracket, or table recommended by the manufacturer, or sold with
the product. Any mounting of the product should follow the manufacturer’s
instructions, and should use a mounting accessory recommended by the
manufacturer.
9. A product and cart combination should be moved with care. Quick stops,
excessive force, and uneven surfaces may cause the appliance and cart
combination to overturn.
10. Ventilation - Slots and openings in the cabinet are provided for
ventilation and to ensure reliable operation of the product and to protect it
from overheating, and these openings must not be blocked or covered. The
openings should never be blocked by placing the product on a bed, sofa,
rug, or other similar surface. This product should not be placed in a built-in
installation such as a bookcase or rack unless proper ventilation is provided
or the manufacturer’s instruction have been adhered to.
11. Power Sources - This product should be operated only from the type of
power source indicated on the marking label. If you are not sure of the type
of power supply to your home, consult your product dealer or local power
company. For products intended to operate from battery power, or other
sources, refer to the operating instruction.
12. Grounding or Polarization - This product may be equipped with a
polarized alternating-current line plug (a plug having one blade wider than
the other). This plug will fi t into the power outlet only one way. This is a
safety feature. If you are unable to insert the plug fully into the outlet, try
reversing the plug. If the plug should still fail to fi t, contact your electrician
to replace your obsolete outlet. Do not defeat the safety purpose of the
polarizes plug.
Alternate Warnings - This product is equipped with a three-wire grounding-
type plug, a plug having a third (grounding) pin. This plug will only fi t into
a grounding-type power outlet. This is a safety feature. If you are unable
to insert the plug into the outlet, contact your electrician to replace your
obsolete outlet. Do not defeat the safety purpose of the grounding-type
plug.
13. Power-Cord Protection - Power supply cords should be routed so that
they are not likely to be walked on or pinched by items placed upon or
against them, paying particular attention to cords at plugs, convenience
receptacles, and point where they exit from the product.
14. Protective Attachment Plug - The product is equipped with an
attachment plug having overload protection. This is a safety feature. See
Instruction Manual for replacement or resetting of protective device. If
replacement of the plug is required, be sure the service technician has
used a replacement plug specifi ed by the manufacturer that has the same
overload protection as the original plug.
15. Outdoor Antenna Grounding - If an outside antenna is connected to
the receiver, be sure the antenna system is grounded so as to provide some
protection against voltage surges and built-up static charges. Article 810 of
the National Electrical Code, ANSI/NFPA 70, provides information with
regard to proper grounding of the mast and supporting structure, grounding
of the mast and supporting structure, grounding of the lead-in wire to an
antenna-discharge unit, size of grounding conductors, location of antenna-
discharge unit, connection to grounding electrodes, and requirements for the
grounding electrode.
See fi gure:
16. Lightning - For added protection for this product during a lightning
storm, or when it is left unattended and unused for long periods of time,
unplug it from the wall outlet and disconnect the antenna or cable system.
This will prevent damage to the product due to lightning and power-line
surges.
17. Power Lines - An outside antenna system should not be located in the
vicinity of overhead power lines or other electric light or power circuits,
or where it can fall into such power lines or circuits. When installing
an outside antenna system, extreme care should be taken to keep from
touching such power lines or circuits as contact with them might be fatal.
18. Overloading - Do not overload wall outlets, extension cords, or integral
convenience receptacles as this can result in a risk of fi re or electric shock.
19. Object and Liquid Entry - Never push objects of any kind into this
product through openings as they may touch dangerous voltage points or
short-out parts that could result in a fi re or electric shock. Never spill liquid
of any kind on the product.
20. Servicing - Do not attempt to service this product yourself as opening
or removing covers may expose you to dangerous voltage or other hazards.
Refer all servicing to qualifi ed service personnel.
21. Damage Requiring Service - Unplug this product from the wall outlet
and refer servicing to qualifi ed service personnel under the following
conditions:
a) When the power-supply cord or plug is damaged,
b) If liquid has been spilled, or objects have fallen into the product,
c) If the product has been exposed to rain or water,
d) If the product does not operate normally by following the operating
instructions. Adjust only those controls that are covered by the operating
instructions as an improper adjustment of other controls may result in
damage and will often require extensive work by a qualifi ed technician to
restore the product to its normal operation.
e) If the product has been dropped or damaged in any way, and
f) When the product exhibits a distinct change in performance - this
indicates a need for service.
22. Replacement Parts - When replacement parts are required, be sure the
service technician has used replacement parts specifi ed by the manufacturer
or have the same characteristics as the original part. Unauthorized
substitutions may result in fi re, electric shock, or other hazards.
23. Safety Check - Upon completion of any service or repairs to this
product, ask the service technician to perform safety checks to determine
that the product is in proper operating condition.
24. Wall or Ceiling Mounting - The product should be mounted to a wall or
ceiling only as recommended by the manufacturer.
25. Heat - The product should be situated away from heat sources such as
radiators, heat registers, stoves, or other products (including amplifi ers)
that produce heat.
Important Safety Instructions
3
Service Information
Address 2116 Carr Street, St. Louis MO, 63106
Phone 1-314-621-2881
Fax 1-314-588-1805
Email [email protected]
Website www.gpx.com
To download this Instruction Man-
ual in English, Spanish, or French
visit the Support section at
www.gpx.com.
Para descargar este manual de
instrucción en inglés, español, o
francés visite la sección de la ayu-
da en www.gpx.com.
Pour télécharger ce manuel
d’instruction en anglais, espagnol,
ou le Français visitez la section de
soutien à www.gpx.com.
©
2007
DPI, Inc. All trademarks appearing herein are the property of their respective owners. All products subject to change without notice.
4
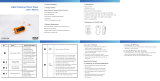
In the Box
• ML648B
• USB Cord
• One set of Earbuds
• Documentation
Features
• Digital Video Player with 2GB* Installed Flash
Memory
• Virtual Hard Drive - USB Mass Storage
• The amount of memory your OS reports may
vary from the stated memory of this device
• Audio Support mp3 / WMA™ / WMA™ DRM
Playback with WAV audio fi les
• Video Support
• Photo Support
• JPEG Image Playback
• Playback Features
• Play / Pause / Stop
• Skip / Search
• Digital Volume Control
• Repeat 1 / Repeat ALL / Random
• Auto Power OFF
• HOLD Feature
• 1.5” Color Display
• USB Connection, USB Cable, included
• Supports USB 2.0 High Speed
• Stereo Headphone Jack
• Built-In Rechargeable Battery
• USB Cable
• 1-set of Stereo Earbuds
• System Requirements
• Windows™ XP
• On-Line WMA™ music downloads with DRM
require Windows™ & Windows Media Player™
10
Powering the Unit
Plug the unit into a computer via the included USB cable to charge and sync the unit.
If you are using Windows Vista with Windows Media Player 11 , you will need to
follow these instructions.
Note: You will be able to download purchased/subscribed songs to the unit.
1. Start Windows Media Player 11 and then connect your unit to your computer. If
you have not set up synchronization between your computer and this device, the
Device Setup Wizard starts.
2. In Device Setup - Confi gure Sync, write a name for your mp3 player.
3. Click Finish. The window closes and the Sync feature is displayed.
4. From the left pane of this Sync feature, you can select from Pictures, Music, and
Video.
5. After selecting a category, select the songs, pictures, or video from the center pane.
6. Drag these songs, pictures, or video into the Sync List, which is the right pane of
the Sync feature.
7. Click the Start Sync button on the Sync List pane.
8. Repeat steps 4-7 for any other items that you want to copy to your unit.
If you are using g Windows XP with Windows Media Player 10 , you will need to
follow these instructions.
Note: You will be able to download purchased/subscribed songs to the unit.
1. Start Windows Media Player 10 and then connect your unit to your computer. If
you have not set up synchronization between your computer and this device, the
Device Setup Wizard starts.
2. In the Device Setup Wizard, select Manual.
3. Click Finish. The wizard closes and the Sync feature in the Player is displayed.
4. Select the Library option. On the left pane select Sync List.
5. From the left pane you can select All Music or My Playlists and you will see the
songs located within these folders in the center pane.
6. Select the songs from the center pane, and drag them to the Sync List.
7. Click the Start Sync button on the Sync List pane.
8. Repeat steps 4-7 for any other items that you want to copy to your unit.
5
Loading Music, Movies, or Photos onto the Unit

If you are using Windows 2000 , Windows 98SE , and Windows ME with
Windows Media Player 9, you will need to follow these instructions.
Note: You will not be able to transfer purchased/subscribed songs to this unit using
Windows Media Player 9. You need Windows XP with Windows Media Player 10
to do so. However, you will be able to download regular MP3/WMA songs.
1. Start Windows Media Player 9 and then connect your unit to your computer.
2. Click Copy to CD or Device.
3. In the Items to Copy pane, in the drop-down list, select the playlist, category, or
other collection that you want to copy.
4. Check the box next to any fi le you want to transfer to your mp3 player.
5. In the Items on Device pane, in the drop-down list, click the device to where you
want your music fi les transferred.
6. Click the Copy button.
7. Repeat steps 2-5 for any other items that you want to copy to your unit.
Loading Music, Movies, or Photos onto the Unit
6
Playing Music on the Unit
1. Press the Power Button to turn the unit on.
2. Press the Volume Button to navigate the main menu and highlight the Music
option.
3. Press the Play/Pause Button select the Music option.
4. Press the Play/Pause Button to begin playing or pause music that has been loaded
onto the unit.
5. Press the Skip/Search Buttons to skip from one audio track to the next or previous
audio track.
Press and hold the Skip/Search Buttons to search through an individual audio
track.
6. Press the Volume Buttons to increase or decrease the volume of audio output
through the connected earbuds or headphones.
7. Press the Mode Button to access Equalizer settings, SRS WOW Mode, and
alternate Play Modes.
8. To return to the main menu, press and hold the Mode Button.
7
Playing Movies on the Unit
1. Press the Power Button to turn the unit on.
2. Press the Volume Button to navigate the main menu and highlight the Movie
option.
3. Press the Play/Pause Button select the Movie option.
4. Press the Play/Pause Button to begin playing or pause music that has been loaded
onto the unit.
5. Press the Skip/Search Buttons to skip from one video to the next or previous
video.
Press and hold the Skip/Search Buttons to search through an individual video.
6. Press the Volume Buttons to increase or decrease the volume of audio output
through the connected earbuds or headphones.
7. In stop mode, press the Mode Button to access the Local Folder and alternate
Play Modes.
8. To return to the main menu, press and hold the Mode Button.
Viewing Photos on the Unit
1. Press the Power Button to turn the unit on.
2. Press the Volume Button to navigate the main menu and highlight the Picture
option.
3. Press the Play/Pause Button select the Picture option.
4. Press the Mode Button to access the Local Folder and Play Set. Select Manual
Play or Auto Play
5. Press the Play/Pause Button to begin playing photos on the unit.
6. Press the Skip/Search Buttons to skip from one photo to the next or previous
photo.
Settings
The settings menu allows the user to access and adjust LCD Set, Language, Online
Device, Memory Info, Firmware Vers., Remove MTP Info, and Default.
Warning: If “Remove MTP Info” is selected, all of the songs on the unit will need to
be deleted, and the unit will have to re-sync with a computer in order to play audio.
Location of Controls
8
2
1
3
4
9
8
7
6
10
5
Control Defi nitions
9
1 Volume Buttons
Press the Volume Buttons to navigate through the unit’s menus.
Press the Volume Buttons to increase or decrease the audio output from the unit and through
the connected earbuds or headphones.
2 Skip/Search Buttons
Press the Skip/Search Buttons to skip from one track, movie, or photo to the next or previous
track, movie, or photo.
Press and hold the Skip/Search Button to search through an individual audio track or movie.
3 Play/Pause Button
Press the Play/Pause Button to play or pause the unit.
4 Mode Button
Press the Mode Button to access function specifi c menus when in Photo, Music, or Movie
modes.
Press and hold the Mode Button to return to the main menu.
5 Lanyard Connection
Use the Lanyard Connection to connect a lanyard or key chain to the unit.
6 Hold Button
Adjust the Hold Button to the lock position to lock the keys so they will not accidentally be
pressed.
Adjust the Hold Button to the unlock position to unlock the keys for normal use.
Please note, the Hold Button must be in the unlocked position in order to power the unit on.
7 Power Button
Press the Power Button to turn the unit off and on.
8 Mini-USB Connection
Use the Mini-USB Connection to connect the unit to a computer for charging and syncing.
9 Headphone Jack
Use the Headphone Jack to connect a set of headphones or earbuds to the unit.
10 Reset Button
Press the Reset Button using a paperclip or like object to reset the unit to its original default
settings. If problems are experienced while using the unit, pressing the Reset Button is the
best way to correct the issue.
10
Frequently Asked Questions
What measures should be taken if the mp3 player is not being recognized by the
computer?
1. Try running Windows Update to see if there are any Service Packs they have available. This
can be done by clicking on the start menu. Open the Control Panel. Then, open Windows
Update. Also, try simply entering in the URL:
www.windowsupdate.com
2. Scan for hardware changes. To do so, open Device Manager. This can be found by right-
clicking on My Computer. Choose Properties from the menu that appears. In this System
Properties menu, click on the Hardware tab. From this Hardware tab, click on Device
Manager. Within Device Manager, there should be a listing for Portable Devices. If there
isn’t a listing for Portable Devices or the listing it shows is highlighted with a question mark,
right-click on Universal Serial Bus Controllers and select Scan for hardware changes.
3. If no devices connected to a USB port can be recognized, try connecting the mp3 player to
a different USB port. If all the USB ports are unable to recognize the device, try shutting
down your computer and removing the power cord from your tower. If you have a laptop,
disengage the laptop’s battery. Let the computer sit for thirty minutes to an hour before
reconnecting the power. The voltage level that your USB ports receive can sometimes be less
than the threshold voltage required to activate and communicate with your mp3 player. This
process should return the power levels back to their original default setting.
What if I have mp3’s or wma’s stored in my computer, but they do not appear in the WMP
library?
If you are using Windows Media Player 9 or 10, use the following instructions.
1. In the File menu, fi nd Add to Library.
2. Within Add to Library, select Add Folder.
3. Select the folder containing the music fi les you would like to add to WMP’s library.
4. Press OK and the music fi les located in that particular folder will be added to WMP’s library
and sync list.
If you are using Windows Media Player 11, use the following instructions.
1. Move your cursor to the Library tab at the top of the page.
2. Left-click on the Library tab until a menu appears.
3. From this menu, select Add to Library.
4. A prompt will appear on your screen. Make sure that on the Select the folders to monitor
screen “My folders and those of others that I can access” is selected.
5. Under the Select the folders to monitor screen, select Advanced Options.
6. Within Advanced Options, select Add.
7. Select the folder where your music kept and select OK. The music fi les located in that
particular folder will be added to WMP’s library.
11
Software
To install the included software, connect the unit to a computer.
Press the Power Button to switch the unit to MSC transfer mode.
Access the unit’s fi les under “My Computer”.
Double click on the Setup.exe icon.
This will install the MP3 Player’s software onto the connected computer.
Media Manager
Use the Media Manager to play and view music, voice, and picture fi les. The Media
Manager can also be used to upload fi les onto the unit from a connected computer.
AMV Converter
Use the AMV Converter to convert video fi les to an AMV format that can be viewed
on the unit.
AMV Player
Use the AMV Player to play AMV fi les on a computer after the fi les have been con-
verted using the AMV Converter.
MP3 Player Upgrade Tool
Use the MP3 Player Upgrade Tool to install downloaded fi rmware onto a unit.
MP3 Player Disk Manager
Use the MP3 Player Disk Manager to format the connected MP3 Players memory.
Applications
/