Page is loading ...

K E E P T H I S I N S T RUC T ION BOOKLE T FOR FUTURE REFERENCE

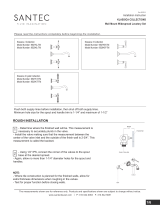
PH9707
PH9708
PH9711
PH9710
0 1
* Please specify the finish when ordering the part.
Part Description Part #
1
4
5
6
7
8
10
11
1 2
3 4
5
6 7
8
9
17
10 11 12 13 14 15 16
WILL NEED TO
CUT EXCESS see
pg. 03.D

0 2
1
2 3 4 5 6 7

#2
0 3
#4
#11
#10
Place #3 Plate up against wall over
valve.
-Slide #6 diverter ring over #4 all
thread extension.
Thread #7 ON/OFF handle to #4 all
thread extension
-Measure distance between front of
#6 diverter ring and back of #7 ON/
OFF handle
R ON/OFF handle and cut
required amount of thread from #4
required to attach #7 ON/OFF
handle flush to #3 plate.
-Cut #5 diverter broach extension
approximately 1/4" past #4 all thread
extension to allow #7 ON/OFF
handle to attach
#2
#5
#4
#3
#6
#12#11
#7
#5
#14
#10
n #15
#16
#9

Cartridgege CleaningCleaning
After years of use, impurities and lime scale
can restrict the water flow. To clean the
cartridge, please follow these instructions:
1- Remove the handle screw, handle trim,
trim plate screws, and plate.
2- Shut off the water line by turning the
check valve shut off mechanism clockwise.
Make sure that the both hot and cold sides
are closed.
cartridge using a 30mm wrench.3- Remove the
filter under running water or soak it with vinegar or a descaling agent.4- Wash the
the cartridge
making sure that the blue lines on the cartridge are aligned.5- Reassemble
check valve shut-off mechanism, turn on the water, and check water flow.6- Open the
flow is normal, reassemble the trims..
7- If the water
IF THE ACTUAL WATER TEMPERATURE IS DIFFERENT FROM THE DIAL :
1- Remove the thermostatic handle with the provided Allen key
2- Turn the water on through the volume control and measure the
actual water temperature with a regular thermometer.
3- Turn the dial until the thermometer shows 100F.
4- Remove the dial handle from the valve.
5- Align the 100F with the center mark
of the valve cylinder, replace screw and tighten.
6- Insert the handle into the cartridge
7- Tighten the handle screw with provided Allen key.
0 4
trim

L IFET I ME L IMITE D W ARRANTY
L ENGTH O F W A RRAN TY & WHO IS C OVE RED BY O U R W ARRANTY
WHA T IS C OVERED BY OUR W A RRANTY
E X C LUSIO NS AND L I MITATIONS OF W ARRANTY
1 .
2.
3.
1.
2.
3.
4.
5.
6.
7.
9.
8.
Finishes:
Cartridges:
Parts:
Drains
Crystals and/or glass
This warranty does not cover:
changes in the nish or in the product due to normal wear or again and does not
cover any product or parts which have been altered or used in a manner not typical
for the product.
SANTEC

Living nishes are unique, are intended to change over time and are exluded from the
nish warranty. Any product outdoors or in a marine environment are excluded from the
nish warranty.
/
