
CONTENTS
GETTING STARTED ................................................................................................................................................. 2
BELT PACK RECEIVER SETUP .................................................................................................................................. 3
BELT PACK TRANSMITTER SETUP .......................................................................................................................... 4
BASE STATION TRANSMITTER SETUP .................................................................................................................... 5
ASSISTIVE LISTENING SYSTEM OPERATION .......................................................................................................... 6
QUICK SETUP INSTRUCTIONS ................................................................................................................................ 6
ASSISTIVE LISTENING PACKAGES & ACCESSORIES ............................................................................................... 7
HAVING TROUBLE W/ YOUR SYSTEM? ................................................................................................................... 8
SYSTEM TECHNICAL SPECIFICATIONS .................................................................................................................... 8
HAVING TROUBLE W/ YOUR SOUND SYSTEM?
CONDITION POSSIBLE CAUSE
No Sound • power supply turned off on the transmitter and/or receiver
• transmitter and receiver are set to different frequencies
• transmitter output is not connected to mixer or amplifier input
• receiver is too far from transmitter
• metal object near transmitter or obstructions between transmitter & receiver
Sound Interference • adjust the antenna location
• when using 2 or more transmitters use different frequency setting for each
• interference from other wireless microphone, TV, radio, etc.
Distortion • transmitter volume level too high or to low
• interference from other wireless microphone, TV, radio, etc.
Anchor Audio, Inc.
Portable Sound Systems • Torrance, California
100-0158-000/A - 5/07
Anchor Assistive
Listening Systems
16 Channel UHF Monitor
Anchor Audio Customer Service
888-444-6077
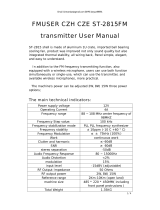
SYSTEM TECHNICAL SPECIFICATIONS
AL-TX – Base Station Transmitter
System Range Up to 200’ line of sight
Frequency Range UHF 682– 698MHz or 863 – 865MHz
RF Power Output 682 – 998MHz @ 100 mW
863 – 865MHz @ 10 mW
Frequency Stability ± 0.005%
Maximum Deviation ± 48 KHz w/ limiting compressor
Spurious Emission > 60 dB below carrier frequency
T.H.D. < 1% @ 1KHz
Power Supply DC 12 ~ 18 V
Tone Key 32.768 KHz
Current Consumption 85 mA ± 10 mA (10 mW)
Dimensions
(WHD)
8.3 x 1.7 x 7.1” / 211 x 44 x 180 mm
WB-6000 – BELT PACK TRANSMITTER
RF Power Output 10mW
Oscillator PLL synthesized
Maximum Deviation +/- 48 KHz
Spurious Emission > 60 dB below carrier frequency
Tone Key 32.768 KHz
Power Supply DC 3V (2 x 1.5 V AA Batteries)
Current Consumption 65 mA +/- 5 mA
Dimensions
(WHD)
3.86 x 2.60 x 1.02” / 98 x 66 x 26mm
(Specifications subject to change without notice.)
AL-WB – Belt Pack Receiver
System Range Up to 200’ line of sight
Frequency Range UHF 682– 698MHz or 863 – 865MHz
Oscillator PLL synthesized
Receiving Mode Single channel diversity
Frequency Stability ± 0.005%
Receiving Sensitivity @ 5dBuV over 80 dB S/N ratio
Image & Spurious Rej. 80 dB min
Selectivity > 50 dB
Modulation Mode FM
IF Frequency 1st 56 MHz / 2nd 10.7 MHz
Dynamic Range > 96 dB
S/N Ratio > 94 dB @ 15KHz deviation &
60 dBuV antenna input
AF Response:
Headphone 100 Hz – 10 KHz (± 3 dB)
Line 40 Hz – 15 KHz (± 3 dB)
T.H.D. < 1% @ 1KHz
Power Supply DC 3V
(2 x 1.5 V AA batteries)
Audio Output:
Headphone Stereo 20 mW
Line Stereo Level -10 dB
Current Consumption 130 mA ± 10 mA
Dimensions
(WHD)
3 x 4.2 x 1.1” / 76 x 106 x 29 mm
Visit Our Website – www.anchoraudio.com – For The Latest Product Information
OWNER’S MANUAL

72
A MESSAGE FROM THE OWNER
Thank you for choosing an Anchor Audio wireless Assistive Listening system. Our products incorporate state-of-the-art
design and the finest quality of materials and workmanship. We’re proud of our products and appreciate the confi-
dence which you have shown by selecting an Anchor system.
I hope you’ll take a few minutes to review this user’s manual. We’ve incorporated several unique features into our
products, and your knowledge of how to use them will enhance the performance and your enjoyment of the system.
David Jacobs, President
on behalf of all Anchor Employees
GETTING STARTED
Please check your new unit carefully for any damage which may have occurred during shipment. Each Anchor product
is carefully inspected at the factory and packed in specially designed boxes for safe transport.
Notify the freight carrier immediately of any damage to the shipping box or product. Repack the unit in the original
box and wait for inspection by the carrier’s claim agent. Notify your dealer of the pending freight claim.
NOTE: All damage claims must be made with freight carrier!
RETURNING SYSTEMS FOR SERVICE OR REPAIR
For service or repair, please contact the dealer where system was purchased or Anchor Audio Customer Service
(888/444-6077 or 310/784-2300) to obtain a RA
(Return Authorization)
number. All shipments to Anchor Audio must
include RA number and be shipped prepaid. C.O.D. shipments will be refused and returned at your expense.
Customers outside the USA must contact dealer where system was purchased for service or repair instructions.
IMPORTANT: Save the shipping box & packing materials,
they were specially designed to ship your unit!
WARRANTY REGISTRATION
Please go to our company website
(www.anchoraudio.com)
and select “Warranty Registration”. Completing this online
registration form will activate your two-year limited warranty on receivers & transmitters and 90-day limited warranty
on headphones.
ACCESSORIES FOR ASSISTIVE LISTENING SYSTEMS
Base Station Transmitter ..............................AL-TX
Body Pack Receiver ....................................AL-WB
• Includes in-ear headphones
Body Pack Transmitter .......................... WB-6000
Headband Microphone ........................... HBM-60
Wireless Microphone ...................... UHF-6400HH
• Includes handheld microphone/transmitter
• Includes base station receiver
ASSISTIVE LISTENING PACKAGES & ACCESSORIES
TOUR GUIDE SYSTEM ....................TOUR-60
Description: One speaker/Six listener
system, expandable and portable.
System Includes:
1 - Belt Pack Transmitter
1 - Headband Microphone
6 - Belt Pack Receivers
6 - In-Ear Headphones
14 - “AA” Batteries
4-USER BASIC SYSTEM ..................... ALB-40
Description: One source/Four listener
system, expandable and portable.
System Includes:
1 - Base Station Transmitter
4 - Belt Pack Receivers
4 - In-Ear Headphones
8 - “AA” Batteries
Rackmount Kit & RCA Cable
4-USER DELUXE SYSTEM .................. ALD-40
Description: One source/Four listener
system w/ wireless handheld microphone,
expandable and portable.
System Includes:
1 - ALB-40 Basic System
1 - UHF-6400/HH System:
1 - 64 Ch Base Station Receiver
1 - 64 Ch Handheld Mic/Transmitter
2 - “AA” Batteries
Rackmount Kit & RCA Cable
NOTE: Visit www.anchoraudio.com for the latest products & accessories.

BELT PACK RECEIVER SETUP
Model: AL-WB
Belt pack receiver for use with Anchor Audio 16 channel base station transmitter, handheld microphone or belt pack
transmitter. The receiver operates in the UHF band frequency and is powered by two DC 1.5V “AA” size batteries.
BELT PACK SETUP
1. INSERT BATTERIES: Open battery compartment by sliding latch down and insert two “AA” batteries.
2. SET CHANNEL: Using the included screwdriver turn the Channel Selection Dial to the same channel as the
transmitter, close compartment door.
NOTE: Transmitter & receiver MUST be set to the same channel to operate.
3. CONNECT HEADPHONES: Insert the stereo headphone plug into the Stereo Earphone Jack.
NOTE: For stereo audio output equipment, insert plug into the Stereo Recording Jack.
4. POWER ON: Slide the Power Switch to the “ON” position to power up the receiver.
5. VOLUME LEVEL: Adjust the volume to a comfortable listening level by turning the Volume Control knob.
3
BELT PACK RECEIVER POWER LED
Power On: Flash red once and fade Red Light On: Batteries need charging
Green Light On: Receiver is getting signal Red Light Flashing: Batteries are charging
ASSISTIVE LISTENING SYSTEM OPERATION
DIVERSITY WIRELESS BY ANCHOR AUDIO
Anchor Audio Assistive Listening Systems are 16 channel UHF diversity wireless systems. Diversity wireless technology
utilizes two independent antennae to receive signals. The diversity feature means the receiver will process the stronger
of the two antenna signals, effectively minimizing dropouts and interference from other sources.
CHANNEL SELECTION
Before you can use your wireless system, you will need to select a wireless frequency and set the receivers and trans-
mitters you are using to that channel.
1. Choose from any of the available wireless channels: 1 thru 16
2. Set each receiver and transmitter to the channel you have chosen
NOTE: To operate the transmitter & receiver must be set to the same channel.
QUICK SYSTEM SETUP INSTRUCTIONS
TOUR GUIDE SYSTEM/TOUR-60
1. Select a wireless channel
2. Set transmitter channel
(page 4)
3. Set receivers to same channel
(page 3)
4. Adjust volume on receivers to desired level
(page 3)
4-USER BASIC SYSTEM/ALB-40
1. Select a wireless channel
2. Set transmitter channel
(page 5)
3. Set receivers to same channel
(page 3)
4. Connect input source to transmitter - microphone,
stereo system, etc.
(page 5)
5. Set output levels on transmitter
(page 5)
6. Adjust volume on receivers to desired level
(page 3)
4-USER DELUXE SYSTEM/ALD-40
1. Select a wireless channel
2. Set transmitter channel
(page 5)
3. Set receivers to same channel
(page 3)
4. Setup UHF-6400 wireless microphone
(UHF-6400 User Manual)
5. Connect input source to transmitter -
microphone, stereo system, etc.
(page 5)
6. Set output levels on transmitter
(page 5)
7. Adjust volume on receivers to desired level
(page 3)
6
BODY PACK RECEIVER
Model: AL-WB
STEREO
RECORDING
JACK
CHANNEL
SELECTION DIAL
CHARGING
INPUT JACK
(ON SIDE)
BATTERY
COMPARTMENT
BATTERY
COMPARTMENT
LATCH
STEREO
EARPHONE
JACK
VOLUME CONTROL
POWER SWITCH
POWER LED

BELT PACK TRANSMITTER SETUP
Model: WB-6000
Belt pack transmitter for use with Anchor Audio 16 channel belt
pack receivers. The transmitter operates in the UHF band frequen-
cy and is powered by two DC 1.5V “AA” size batteries.
BELT PACK SETUP
1. INSERT BATTERIES: Open battery compartment by gently
push/sliding door. Insert two “AA” batteries.
2. SET CHANNEL: Using the included screwdriver turn the
Channel Selection Dial to the same channel as the receiver.
NOTE: The transmitter and receiver MUST be set
to the same channel to operate correctly.
3. CONNECT MICROPHONE: Insert the headband micro-
phone plug into the jack labeled INPUT located on top of
the transmitter.
4. POWER ON: Slide transmitter power switch to “ON”. The
red LED will flash when the mic is turned on, if the LED
stays on, the batteries are low and need to be replaced.
NOTE: If you experience ongoing interference with
your wireless system, the selected frequency may
be incompatible w/ other systems in the area!
Try different channels to find a clear frequency!
5
CHANNEL
SELECTION DIAL
BASE STATION TRANSMITTER SETUP
The Base station transmitter is for use with Anchor Audio 16 channel belt pack receivers. The transmitter operates in the UHF band frequency on 16 channels and is
powered by an included AC power adapter.
BASE STATION SETUP
1. CONNECT ANTENNA: Attach the UHF antenna to the Antenna Socket
labeled RF OUT on the rear panel.
2. CONNECT POWER: Plug the AC adapter into the DC Input Jack on the rear
panel. Then plug the AC adapter into a power outlet.
3. SETUP INPUT SOURCE: Connect a wired microphone to the Microphone
Input Jack on the rear panel. Adjust the MIC Volume Control knob on
the front panel to set level. Use the RCA Input Jack on the rear panel to
connect a stereo audio device. Adjust the Line In Volume Control knob on
the front panel to set level.
4. SET CHANNEL: Press the Power button on the front panel to turn on the
transmitter. Turn the Channel Selection Knob to the channel you chose.
NOTE: Transmitter & receiver MUST be set to the same channel.
5. MONITOR TRANSMISSION: For monitoring purposes, plug headphones
into the Monitoring Headphone Jack on the front panel. Adjust the head-
phone volume with the Monitoring Headphone Volume Control knob.
NOTE: If you experience ongoing interference with your wireless system, the selected frequency may be
incompatible with other systems in the area! Try different channels to find a clear frequency!
WIRELESS TRANSMITTER
Model: AL-TX
MICROPHONE INPUT JACK
ANTENNA SOCKET STEREO/MONO SWITCH
RCA INPUT JACK
DC INPUT JACK
CHANNEL DISPLAY LED
CHANNEL SELECTION KNOB
MONITORING HEADPHONE JACK
PEAK INDICATOR
MONITORING HEADPHONE VOLUME CONTROL
MIC VOLUME CONTROLPOWER
LINE IN VOLUME CONTROL
-
 1
1
-
 2
2
-
 3
3
-
 4
4


Anchor WB-6000 Owner's manual
- Category
- Power plug adapters
- Type
- Owner's manual
Ask a question and I''ll find the answer in the document
Finding information in a document is now easier with AI
Related papers
-
Anchor Assistive Listening 8000 Owner's manual
-
-
-
-
-
-
-
-
-
Other documents
-
Anchor Audio AL-BP User manual
-
 SHENZHEN YUXINXIN ELECTRONICS ZRH2012010603A User manual
-
Anchor Audio Speaker AN-130 User manual
-
 FMUser ST-2815FM User manual
-
Panasonic RP-WF820EB-K Datasheet
-
 ALDS SOUND BUDDY S92 User manual
-
 Country Home Products Wireless Microphone Systems User manual
-
LightSpeed Technologies Delta X10 User manual
-
Anchor Audio MEGA-DP DUAL/HH/HH Specification
-
Gemini UF-I264L User manual


