Page is loading ...

© Copyright 2007, DB Industries, Inc.
WARNING: This product is part of a personal fall arrest or restraint system. The user must follow the
manufacturer’s instructions for each component of the system. These instructions must be provided to the
user of this equipment. The user must read and understand these instructions before using this equipment.
Manufacturer’s instructions must be followed for proper use and maintenance of this equipment. Alterations or
misuse of this equipment, or failure to follow these instructions, may result in serious injury or death.
IMPORTANT: If you have questions on the use, care, or suitability of this equipment for your application,
contact DBI/SALA.
IMPORTANT: Record the product identication information from the ID label in the inspection and maintenance
log in section 9.0 of this manual.
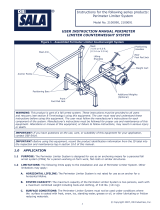
Figure 1 - U-bolt Roof Anchor Kit
UseR INsTRUcTION MANUAl
U-bOlT ROOf ANchOR
This manual is intended to be used as part of an
employee training program as required by OSHA.
Instructions for the following series products:
U-BOLT ROOF ANCHORS
(See back page for specic model numbers.)

2
DescRIPTION
2103670: Stainless steel U-bolt and anchor clamp, designed to be attached to a wood
member (truss, rafter, cord, etc.) up to 2 x 8 inches. U-bolt includes a ring for connection of
a personal fall arrest or restraint system. See Figure 1.
2103671: Same as 2103670, sized for 2 x 10 or 2 x 12-inch wood member.
1.0 APPlIcATIONs
1.1 PURPOSE: DBI/SALA’s U-bolt roof anchor is designed to be used as a permanently attached anchorage
connector on wood frame structures. This anchorage connector is to be used as part of a personal fall arrest
or restraint system. Do not attach a lifeline between two or more roof anchors. Do not hang, lift, or support
tools or equipment from the roof anchor. Do not attach guylines for antennae, phone lines, etc.
A. FALL ARREST: The roof anchor is used as part of a personal fall arrest system. Personal fall arrest
systems typically include a full body harness and a connecting subsystem (energy absorbing lanyard).
The maximum permissible free fall is six feet.
B. RESTRAINT: The roof anchor is used as part of a restraint system. Restraint systems typically include a
full body harness and a lanyard or restraint line to prevent the user from reaching a fall hazard (leading
edge roof work). No vertical free fall is permitted.
1.2 LIMITATIONS: Consider the following application limitations before using this equipment:
A. ROOF STRUCTURE: These roof anchors are intended to be installed on wood members (truss, rafter,
cord, etc.) from 2 x 4 inches to 2 x 12 inches. The roof structure must be capable of meeting the
anchorage strength requirements specified in section 2.3. Do not use these roof anchors on members or
materials (including steel) other than those specified in this manual.
B. CAPACITY: These roof anchors are designed for use by persons with a combined weight (person,
clothing, tools, etc.) of no more than 310 lbs. No more than one person may be connected to a single
roof anchor.
C. FREE FALL: Personal fall arrest systems used with these roof anchors must be rigged to limit the
free fall to six feet (according to ANSI Z359.1). See subsystem manufacturer’s instructions for more
information.
D. FALL CLEARANCE: Ensure that adequate clearance exists in your fall path to prevent striking an object.
The amount of clearance required is dependent on the type of connecting subsystem (energy absorbing
lanyard, self retracting lifeline, etc.) and the anchorage location. See subsystem manufacturer’s
instructions for more information.
E. ENVIRONMENTAL HAZARDS: Use of this equipment in areas where environmental hazards are
present may require additional precautions to reduce the possibility of injury to the user or damage
to the equipment. Hazards may include, but are not limited to; high heat, caustic chemicals, corrosive
environments, high voltage power lines, explosive or toxic gases, moving machinery, or sharp edges.
F. TRAINING: This equipment is intended to be used by persons trained in its correct application and use.
1.3 APPLICABLE STANDARDS: Refer to national standards, including ANSI Z359.1, and local state,
and federal (OSHA) requirements for more information on personal fall arrest systems and associated
components.
2.0 sYsTeM ReQUIReMeNTs
2.1 COMPATIBILITY OF CONNECTORS: DBI/SALA equipment is designed for use with DBI/SALA approved
components and subsystems only. Substitutions or replacements made with non-approved components
or subsystems may jeopardize compatibility of equipment and may effect the safety and reliability of the
complete system.
COMPATIBILITY: Connectors are considered to be compatible with connecting elements when they
have been designed to work together in such a way that their sizes and shapes do not cause their gate
mechanisms to inadvertently open regardless of how they become oriented.

3
Contact DBI/SALA if you have any questions about compatibility.
Connectors ( hooks, carabiners, and D-rings) must be capable of supporting at least 5,000 lbs. (22.2kN).
Connectors must be compatible with the anchorage or other system components. Do not use equipment
that is not compatible. Non-compatible connectors may unintentionally disengage. See Figure 2. Connectors
must be compatible in size, shape, and strength. Self locking snap hooks and carabiners are required by
ANSI Z359.1 and OSHA.
2.2 MAKING CONNECTIONS: Only use self-locking snap hooks and carabiners with this equipment. Only use
connectors that are suitable to each application. Ensure all connections are compatible in size, shape and
strength. Do not use equipment that is not compatible. Ensure all connectors are fully closed and locked.
DBI/SALA connectors (snap hooks and carabiners) are designed to be used only as specied in each
product’s user’s instructions. See Figure 3 for inappropriate connections. DBI/SALA snap hooks and
carabiners should not be connected:
A. To a D-ring to which
another connector is
attached.
B. In a manner that would
result in a load on the
gate.
C. In a false engagement,
where features that
protrude from the
snap hook or carabiner
catch on the anchor
and without visual
confirmation seems to
be fully engaged to the
anchor point.
D. To each other.
E. Directly to webbing or rope lanyard or tie-back (unless the manufacturer’s instructions for both the
lanyard and connector specifically allows such a connection).
3. The GATe OPeNs AllOWING
The sNAPhOOk TO slIP Off.
2. The GATe PResses
AGAINsT The
cONNecTING RING.
If the connecting element that a snaphook (shown) or carabiner attaches to is undersized or irregular in shape, a
situation could occur where the connecting element applies a force to the gate of the snaphook or carabiner. This
force may cause the gate (of either a self-locking or a non-locking snaphook) to open, allowing the snaphook or
carabiner to disengage from the connecting point.
Small ring or other
noncompatibly
shaped element
1. fORce Is APPlIeD TO
The sNAPhOOk.
Figure 2 - Unintentional Disengagement (Rollout)
Figure 3 - Inappropriate Connections

4
F. To any object which is shaped or dimensioned such that the snap hook or carabiner will not close and
lock, or that roll out could occur.
2.3 ANCHORAGE STRENGTH: The anchorage strength required is dependent upon the application:
A. FALL ARREST: The roof anchor must be attached to a roof member capable of sustaining static loads
in the directions permitted by the personal fall arrest system of at least: 3,600 lbs. with certification of
a qualified person, or 5,000 lbs. without certification. See ANSI Z359.1 for certification definition. When
more than one roof anchor is attached to a roof member, the strengths stated above must be met at
each roof anchor location independently.
FROM OSHA 1910.500 AND 1910.66: Anchorages used for attachment of personal fall arrest systems
shall be independent of any anchorage being used to support or suspend platforms, and capable
of supporting at least 5,000 lbs. per user attached, or be designed, installed, and used as part of a
complete PFAS which maintains a safety factor of at least two, and is under the supervision of a qualified
person.
B. RESTRAINT: The roof anchor must be attached to a roof member capable of sustaining static loads in
the directions permitted by the restraint system of at least 3,000 lbs. When more than one roof anchor
is attached to a roof member, the strengths stated above must be met at each roof anchor location
independently.
3.0 OPeRATION AND Use
WARNING: Do not alter or intentionally misuse this equipment. Consult with DBI/SALA if using this equipment
with components or subsystems other than those described in this manual. Some subsystems and component
combinations may interfere with the operation of this equipment.
WARNING: Do not use this system if you are unable to tolerate the impact from a fall arrest. Age and tness
can seriously affect your ability to withstand a fall. Pregnant women and minors must not use this equipment.
3.1 BEFORE EACH USE of this equipment, carefully inspect it according to steps listed in section 5.0 of this
manual.
3.2 PLAN your fall arrest or restraint system before using this equipment. Consider all factors that will affect
your safety during use of this equipment. Consider the following points when planning your system:
A. ANCHORAGE: Select a rigid anchorage point that is capable of sustaining the loads specified in section
2.3. Locate the roof anchor according to section 3.3. For fall arrest applications, select anchorage
locations that will minimize free fall and swing fall hazards. For restraint applications, locate the
anchorages such that no vertical free fall is possible.
B. FREE FALL: To avoid increased free fall distance, do not work above the anchorage level. Rig personal
fall arrest systems so that the free fall is limited to six feet (ANSI Z359.1). Rig restraint systems such
that no vertical free fall is possible.
C. FALL ARREST FORCES: The personal fall
arrest system must limit fall arrest forces
to 1,800 lbs. when used with a full body
harness. Do not use a body belt for fall
arrest applications.
D. SWING FALLS: See Figure 4. Swing falls
occur when the anchorage point is not
directly above the point where a fall occurs.
The force of striking an object in a swing
fall may cause serious injury. Minimize
swing falls by working as directly below the
anchorage point as possible. Do not permit a
swing fall if injury could occur.
E. WORK ZONE: See Figure 5. Do not extend
your work zone more than 30 degrees from
Figure 4 - Swing Fall

5
Figure 5 - Work Zone
the anchorage point. It is acceptable to captivate a lifeline to an anchorage close to the work area with a
carabiner. Do not captivate the lifeline of a self retracting lifeline.
F. FALL CLEARANCE: Ensure sufficient clearance exists in your fall path to prevent striking an object.
The clearance required is dependent upon the connecting subsystem (energy absorbing lanyard
or self retracting lifeline). See connecting subsystem manufacturer’s instructions for fall clearance
requirements.
G. SHARP EDGES: Avoid working where your lifeline will be in contact with, or abrade against, unprotected
sharp edges.
H. RESCUE: The employer must have a rescue plan and the ability to implement it.
I. AFTER A FALL: Components which have been subjected to fall arrest forces must be removed from
service and destroyed.
J. GENERAL USE CONSIDERATIONS: Avoid working where your lifeline may cross or tangle with that of
another worker. Do not allow your lifeline to pass under your arms or between your feet.
3.3 INSTALLATION REQUIREMENTS:
A. ROOF ANCHOR SITE PLAN: See Figure 6. Before starting construction of the roof, establish a site plan
for locations of the roof anchors. Following are guidelines to be used when locating roof anchors:
• Roof anchors must be located at least 12 inches below the roof peak, measured along the roof
surface, and at least six feet from any exposed roof edge. On small roof areas, locate the roof anchor
as far from the roof edge as possible.
• Install the site label in a visible location near the system access point.
• Do not install roof anchors on unsupported roof structures, such as eaves or gable overhangs.
• Do not install roof anchors on fascia boards.

6
• Install roof anchors at eight feet intervals along the roof peak.
• Hip roofs require a roof anchor on each hip face.
• On long, low pitched roofs, multiple roof anchors should be installed along the gable ends (six feet
from the edge) to reduce swing fall hazards.
B. ROOF FRAMING:
• Roof members to which the roof anchors are attached must be in good condition. Roof members
must be free of splits, cracks, large knots, or other defects that may weaken the roof member. Roof
anchors must be located at least six inches away from knots that exceed one inch diameter. The roof
members must be capable of supporting the loads specied in section 2.3.
• When installing a roof anchor
to a 2 x 4 roof member, the roof
member must be reinforced with
a 2 x 4 splint at least 18 inches
long. See Figure 7. The splint must
be xed in place with a brace to
prevent movement along the roof
member.
• If roof anchors are intended to
be used before the roof sheathing
is installed, the roof member must
be adequately braced. See Figure 8
for one method of bracing the roof
members.
C. ROOF ANCHOR INSTALLATION:
Establish the roof anchor site plan as
specified in section 3.3. A. At times,
during new construction, it is possible
to install the roof anchors onto the
roof members before they are put into
place, allowing use of the roof anchors
during much of the roofing process.
Figure 6 - Roof Anchor Site Plan
Figure 7 - Roof Anchor Installation

7
• Toinstalltheroofanchorontoaroofmemberwithoutroofsheathing:See Figure 9. Slide
the U-bolt legs over the roof member
with the attachment ring on the roof
surface side. Install the anchor clamp,
lock washers, and nuts onto the U-bolt
legs. Tighten the inside nuts down to
embed the teeth into the roof member.
The teeth may not fully embed into the
roof member. Do not overtighten. Lock
the roof anchor in place by tightening the
outside nuts. Cut a 1/2 x 3 1/4-inch slot
in the roof sheathing centered over the
roof member at the roof anchor location.
• Toinstalltheroofanchoronto
a roof member with roof sheathing
in place: See Figure 9 or 10. Access
to the underside of the roof sheathing
is required. Remove any roof covering
(shingles, felt, etc.) where the roof anchor
is to be installed. If the roof sheathing
is 3/4-inch thick or more, cut a 1/2 x
3 1/4-inch slot in the roof sheathing
centered over the roof member at the
roof anchor location. See Figure 9. If the
roof sheathing is less than 3/4-inch, install the roof anchor by drilling two 1/2-inch diameter holes
through the sheathing, straddling the roof member. See Figure 10. Do not drill through or damage
the roof member. Insert the U-bolt legs into the drilled holes or slot. Install the anchor clamp, lock
washers, and nuts onto the U-bolt legs. Tighten the inside nuts down to embed the teeth into the
roof member. The teeth may not fully embed into the roof member and roof sheathing. Do not
overtighten. Lock the roof anchor in place by tightening the outside nuts.
Figure 8 - Bracing
Figure 9 - Roof Anchor Installation

8
• Toinstallashing:Carefully slide the
ashing over the attachment ring of the
roof anchor. The ashing may be stiff in
cold weather, use caution when installing to
prevent tearing of the ashing. Shingle over
the top of the ashing. Caulk around the
ashing as shown in Figures 9 and 10.
• Toinstallthecap:After the roof anchor
is installed, slide the cap onto the roof
anchor, making sure the cable tie ring on
the cap is facing the hole in the ashing.
See Figure 11. The cap should t securely
around the ashing ange. Attach the cable
tie through the hole in the ashing and the
cable tie ring on the cap. Leave enough
slack in the cable tie to allow the cap to be
removed from the anchor.
• Although the U-bolt roof anchor is
typically designed for use on a wood frame
structure, the anchor can also be imbedded
into concrete and used as a permanent
anchorage point. The concrete must support
the anchorage strength requirements
specied in section 2.3. See Figure 12.
D. PAINTING: The exposed roof anchor may be
painted to match the roof color.
E. SITE LABEL: Install the site label in a
permanent and prominent location.
3.4 CONNECTING TO THE ROOF ANCHOR: Connect
to the roof anchor with a self locking hook or
carabiner only. Do not use a knot to connect a
lifeline or lanyard to the roof anchor. Ensure all
connections are fully closed and locked. See Figure
13 for proper connection of typical fall arrest or
restraint equipment to the roof anchor. When using
an energy absorbing lanyard, connect the energy
absorber pack end to your harness. When using a
self retracting lifeline, ensure the device positioned
so that the retraction is not hindered. Do not allow
the lanyard or lifeline to abrade against unprotected
sharp edges or surfaces. Ensure all connections
are compatible in size, shape, and strength. Do not
connect more than one lanyard or lifeline to a single
roof anchor member.
4.0 TRAINING
4.1 TRAINING: The user and the user’s employer,
must be trained in the correct use and care of this
equipment. Both parties must be aware of the
operating characteristics, application limits, and the
consequences of improper use of this equipment.
IMPORTANT: Training must be conducted without
exposing the trainee to a fall hazard. Training should be
repeated on a periodic basis.
Figure 11 - Roof Anchor Installation
Figure 10 - Roof Anchor Installation
Figure 12 - Installation into Concrete Anchorage

9
5.0 INsPecTION
5.1 FREQUENCY:
• BeforeEachUseinspect according to steps listed in section 5.2.
• ThisEquipment must be inspected according to steps listed in section 5.2 by a competent
person, other than the user, at least annually. Record the results of each inspection in the inspection
and maintenance log in section 9.0.
WARNING: If this equipment has been subjected to fall arrest forces remove from service and destroy.
IMPORTANT: Extreme working conditions (harsh environments, prolonged use, etc.) may require increasing the
frequency of inspections
5.2 INsPecTION sTePs:
Step 1. Inspect roof anchor for cracks, dents, bends, corrosion, or deformities. The roof anchor must be
perpendicular to the roof surface.
Step 2. Inspect roof condition. The roof must support the required roof anchor loads. Do not use a roof
anchor connected to deteriorated wood.
Step 3. Ensure roof anchor is securely attached to the roof member. Tighten roof anchors as required.
Step 4. Inspect ashing and caulking for deterioration or leakage.
Step 5. Labels must be present and fully legible. Replace any missing or illegible labels.
Step 6. Inspect each system component and subsystem according to manufacturer’s instructions.
Step 7. Record the inspection date and results in the inspection and maintenance log in section 9.0.
5.3 If inspection reveals an unsafe or defective condition, remove roof anchor from service and destroy, or
contact an authorized service center for repair.
NOTe: Only DBI/SALA or an authorized service center may make repairs to this equipment.
Figure 13 - Making Connections

10
6.0 MAINTeNANce AND seRVIcING
6.1 No scheduled maintenance is required for this equipment. If you have questions about the condition of your
roof anchor, contact DBI/SALA.
6.2 All maintenance and servicing must be completed by an authorized service center.
7.0 sPecIfIcATIONs
MATERIAL: Stainless steel
MINIMUM BREAKING STRENGTH: 5,000 lbs.
WEIGHT: 2103670: 1.5 lbs.; 2103671: 1.75 lbs.
SIZE: 2103670: 3/8 x 3 x 13.875 inches; 2103671: 3/8 x 3 x 17.75 inches
CAPACITY: 310 lbs., one person
8.0 lAbelING
8.1 The following labels must be present and fully legible:

11
INSPECTION DATE INSPECTION ITEMS
NOTED
CORRECTIVE ACTION MAINTENANCE
PERFORMED
Approved by:
Approved by:
Approved by:
Approved by:
Approved by:
Approved by:
Approved by:
Approved by:
Approved by:
Approved by:
Approved by:
Approved by:
Approved by:
Approved by:
Approved by:
Approved by:
Approved by:
Approved by:
Approved by:
9.0 INsPecTION AND MAINTeNANce lOG
DATE OF MANUFACTURE
MODEL NUMBER
DATE OF PURCHASE

USA Canada
3833 SALA Way 260 Export Boulevard
Red Wing, MN 55066-5005 Mississauga, Ontario L5S 1Y9
Toll Free: 800-328-6146 Toll Free: 800-387-7484
Phone: (651) 388-8282 Phone: (905) 795-9333
Fax: (651) 388-5065 Fax: (905) 795-8777
www.capitalsafety.com www.capitalsafety.com
This instruction manual is available for download at www.capitalsafety.com.
I S O
9 0 0 1
Certicate No. FM 39709
Form: 5902113
Rev: H
This instruction applies to the following models:
2101720
2103670
2103671
2104170
2104171
Additional model numbers may appear on the next printing of these instructions
/