Page is loading ...

06-10-2011
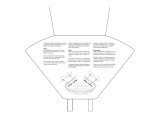
HAV-BC10
MANUAL (p. 2)
Bathroom Clock
ANLEITUNG (S. 4)
Badezimmeruhr
MODE D’EMPLOI (p. 6)
Horloge de salle de bain
GEBRUIKSAANWIJZING (p. 8)
Badkamerklok
MANUALE (p. 10)
Orologio da bagno
MANUAL DE USO (p. 12)
Reloj de cuarto de baño
HASZNÁLATI ÚTMUTATÓ (o. 14.)
Fürdőszobai óra
KÄYTTÖOHJE (s. 16)
Kylpyhuoneen kello
BRUKSANVISNING (s. 18)
Badrumsklocka
NÁVOD K POUŽITÍ (s. 20)
Koupelnové hodiny
MANUAL DE UTILIZARE (p. 21)
Ceas de baie
ΕΓΧΕΙΡΙΔΙΟ XPHΣHΣ (σελ. 23)
Ρολόι μπάνιου
BRUGERVEJLEDNING (s. 26)
Badeværelsesur
VEILEDNING (s. 27)
Baderomsklokke

2
ENGLISH
Bathroom Clock
Open the battery compartment by twisting the cover. Be careful to insert the battery (1.5 V AA - LR06
battery) with the correct polarity (+/-), since a battery inserted in the wrong polarity can cause damage
to the clockwork. Close the battery compartment again.
The clock automatically starts to receive the DCF signal. The time is pre-set to 12 o’clock. After the
batteries are inserted, the clock enters the quick adjustment mode, i.e. the dials move quickly and are
set to 4, 8 or 12 o’clock. A search for the DCF signal will now begin and after successful reception the
dials are automatically set to the correct time. This procedure can last for up to 15 minutes. The time is
automatically adjusted to daylight savings time or summer time.
Note:
The unit is automatically synchronized every day.
Do not place the unit in the vicinity of interfering sources, such as televisions, computers or similar
devices.
Avoid placing the unit next to or on metal plates.
Closed rooms such as airports, cellars, factories and rooms where reinforced concrete is used in the
walls are not recommended.
Do not start the time adjustment in a moving vehicle such as a car or train.
RESET
By pressing the RESET button the search for a radio signal is started manually.
Temperature
The surrounding temperature is displayed immediately after inserting the batteries.
The radio controlled bathroom clock can be used at a permanent ambient temperature between 0°C to
+ 40°C. The clock should be exposed to temperatures from -10°C to -1 °C and 41 °C to + 45°C for only
a short time. When the batteries are removed, the radio controlled bathroom clock can be stored at
0°C to + 40°C.
Mounting Using Suction Cups
The suction cups of your radio controlled bathroom clock are used for attachment to smooth surfaces
such as tiles (the tiles should be polished, the suction cups do not adhere to matt tiles), mirrors and
glass surfaces etc. Moisten the suction cups before attaching to improve the suction.
Note:
The suction cups adhere only to smooth surfaces.
Since the suction cups, similar to all other suction cups, can detach after a while, press them firmly
against the surface occasionally and check the adherence of the radio controlled bathroom clock.
Do not attach your radio controlled bathroom clock within the shower area, since the clock is protected
only against moisture. Intensive contact with water could lead to malfunction.
The surface where you want to mount your radio controlled bathroom clock must be free of dust and
grease. We recommend that the surface is cleaned with a cleansing agent.
Mount your radio controlled bathroom clock in a place where nothing could be damaged if the clock
detaches itself and falls. Please note that glass breakage is not covered by the warranty.
Avoid attaching one of the suction cups directly over a tile joint, since no vacuum will develop and the
suction cup will not hold.
Detaching the Suction Cups
When you want to detach the radio controlled bathroom clock from a surface, please lift the suction
cups at the edge, one by one. This enables air to enter underneath the suction cup and it will detach
from the surface.

3
Note:
Do not pull directly at the clock to detach it, as this may damage the unit or the surface.
Mounting using the suspension eye
If you cannot or do not want to mount your radio controlled bathroom clock using the suction cups, a
suspension eye is available at the rear. Suspend the clock using a nail or screw at a suitable place on
a wall.
Twist open the casing cover, take out the white stand and close the casing cover again. Insert the
stand into the opening beneath the casing cover.
SPECIFICATIONS:
Temperature range: -10°C to + 40°C
Temperature resolution: 1°C
Radio controlled clock: DCF77
Alkaline Batteries:
1 x New AA, LR06, 1.5 V alkaline batteries. Batteries are not included.
Safety precautions:
To reduce risk of electric shock, this product should ONLY be
opened by an authorized technician when service is
required. Disconnect the product from mains and other
equipment if a problem should occur. Do not expose the
product to water or moisture.
Maintenance:
Clean only with a dry cloth. Do not use cleaning solvents or abrasives.
Warranty:
No guarantee or liability can be accepted for any changes and modifications of the product or damage
caused due to incorrect use of this product.
General:
Designs and specifications are subject to change without notice.
All logos brands and product names are trademarks or registered trademarks of their respective
holders and are hereby recognized as such.
Keep this manual and packaging for future reference.
Attention:
This product is marked with this symbol. It means that used electrical and electronic products
should not be mixed with general household waste. There is a separate collections system for
these products.
/