Error Codes
The simplied error code reporting
system includes individual codes for
any applicable system fault.
+ –
The number of lit LEDs on the temperature
scale shows the type of error.
1 light Room Over Temperature Error
2 lights Reserved for Factory Use
3 lights Malfunction DOWN Button Error
4 lights Malfunction POWER Button Error
5 lights Malfunction UP Button Error
6 lights Low AC Voltage Error
7 lights Bad Connection / Low Water Error
8 lights Reserved for Factory Use
9 lights Reserved for Factory Use
10 lights Communication Error
MicroTouch Control and Steamhead Installation Instructions
Read warnings on page 2. For illustrative purposes only. Consult with qualied professional for steam room construction details.
THERMASOL.COM
I
800.776.0711
7 Operation
Taking a Steam Bath
On your ThermaSol MicroTouch Control, touch and
release the power icon twice to power on. To turn off
the steam unit touch and release the power icon once.
Power on is veried when the control face shows lit LEDs
and turns dark if power is off.
A steam session lasts 45 minutes and is loaded with
previously saved temperature set point.
Setting or Changing the Temperature Set Point
Set the temperature of your ThermaSol steam shower
by using the lit plus + or minus – symbols, which are
located immediately to the left and to the right of the
power icon. An arc array of lit squares will appear
from left to right.
Increasethetemperaturebytouching+symbol
until desired temperature is displayed by the blue LED
lights running clockwise to indicate an increase
in temperature. Press and hold the + symbol to change
the setting faster.
Reducethetemperaturebytouching–symbol
and the array of LEDs will begin to turn off. Press and
hold the – symbol to change the setting faster.
Be careful not to touch both the + and – buttons at the
same time.
Power Flush
ThermaSol’s internal diagnostic system will alert you
when a Power Flush cleaning is needed (Maintenance
mode) by LEDs running counterclockwise.
Start a Power Flush cleaning cycle
To start a power ush manually, press and hold the +
and – buttons for 5 seconds while the MicroTouch is
in the on state. To indicate that the unit is in power ush
mode, the array LEDs will ash in a clockwise direction.
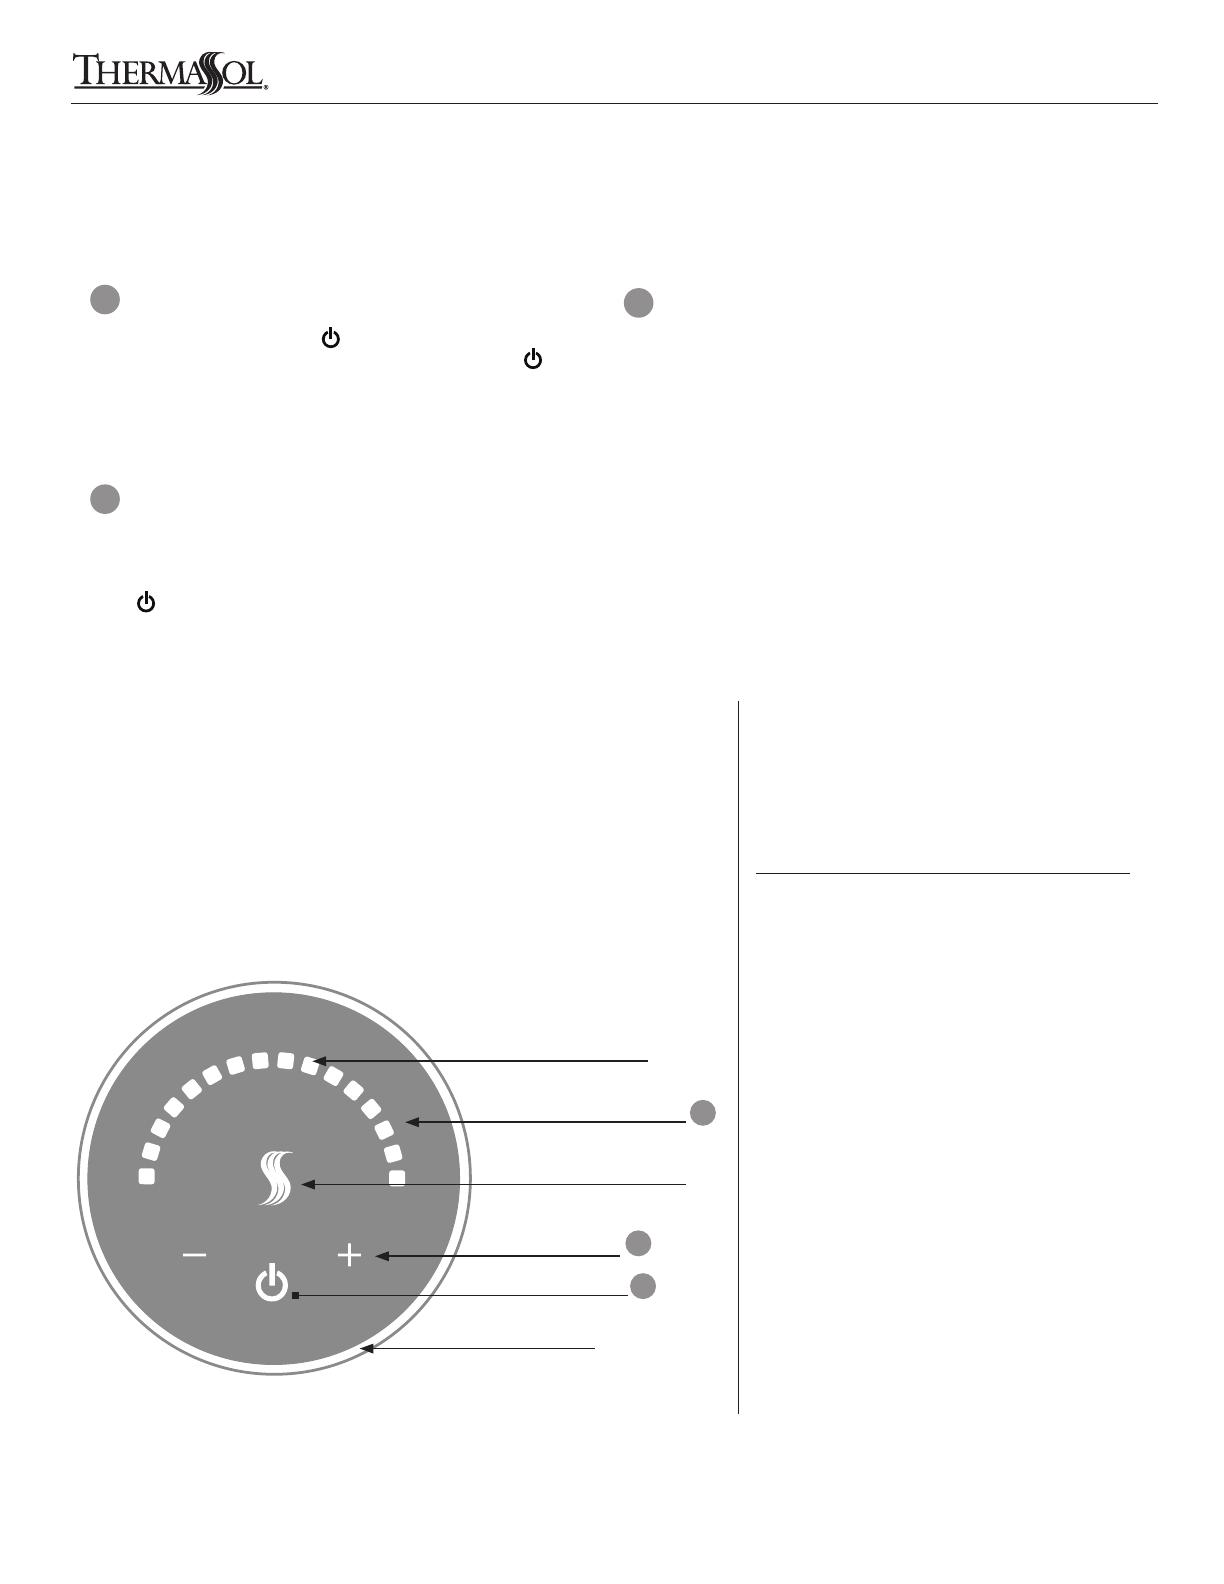
A
B
C
Solid Aluminum Body
Bright LED Display
Capacitive Touch Area
Built-in Infrared
Temperature Sensing (ITS)
Temperature
Adjustment +/-
Power On/Off
A
B
C
Maintenance mode indicated
by counter clockwise LEDs
LEDs will blink to show an error
8


