Page is loading ...

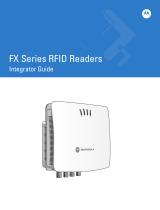
FX7400 SERIES
RFID READER
QUICK START GUIDE
© 2011 Motorola Solutions, Inc. All rights reserved.
Motorola reserves the right to make changes to any product to improve reliability,
function, or design.
Motorola does not assume any product liability arising out of, or in connection with, the
application or use of any product, circuit, or application described herein.
No license is granted, either expressly or by implication, estoppel, or otherwise under
any patent right or patent, covering or relating to any combination, system, apparatus,
machine, material, method, or process in which Motorola products might be used. An
implied license exists only for equipment, circuits, and subsystems contained in
Motorola products.
MOTOROLA, MOTO, MOTOROLA SOLUTIONS and the Stylized M Logo are
trademarks or registered trademarks of Motorola Trademark Holdings, LLC and are
used under license. All other trademarks are the property of their respective owners.
Motorola Solutions, Inc.
One Motorola Plaza
Holtsville, N.Y. 11742-1300
http://www.motorolasolutions.com
Warranty
For the complete Motorola hardware product warranty statement, go to:
http://www.motorola.com/enterprisemobility/warranty
Motorola Solutions, Inc.
One Motorola Plaza
Holtsville, New York 11742, USA
1-800-927-9626
http://www.motorolasolutions.com
MOTOROLA, MOTO, MOTOROLA SOLUTIONS and the Stylized M Logo
are trademarks or registered trademarks of Motorola Trademark Holdings,
LLC and are used under license. All other trademarks are the property of
their respective owners.
© 2011 Motorola Solutions, Inc. All rights reserved.
72-154246-01 Revision A — July 2011
Introduction
FX7400 Series readers provide real time, seamless tag processing
for EPC Class1 Gen2 compliant tags. This Quick Start Guide
provides information about installing and connecting the reader. For
more information refer to the FX Series RFID Readers Integrator
Guide, available at http://supportcentral.motorola.com
Reader Installation
1. Unpack the reader.
2. Set up the reader and tags on a desktop.
3. Connect the antenna to antenna Port 1.
4. Connect the Ethernet cable to the Ethernet port.
Connecting the reader to a subnet that supports DHCP is
recommended. This installation procedure is not guaranteed to
work if DHCP is disabled in the reader and if the reader is
connected directly to a PC.
5. Connect the AC power supply to a power outlet and connect to
the power port.
The green power LED remains lit after successful installation.
NOTE This step is not required for networks supporting
Power-over-Ethernet (POE).
Port 1 Port 2 Port 3 Port 4
Antenna Port 1
GPIO 24 VD
Power
10/100BaseT Ethernet Port
(with POE)

Connecting to the Reader
To connect via host name:
1. Open a browser. Recommended browsers are IE6, IE7, IE8, or
Mozilla 3.
2. Enter the host name, provided on a label on the reader, in the
browser (e.g., http://fx7400cd3b0d) and press Enter.
The User Login window appears and the reader is ready.
Additional Information
Following are links to additional information and software:
•
Product Manuals:
http://www.motorolasolutions.com/supportcentral/fx7400
This page includes the following guides:
- FX Series RFID Reader Integrator Guide
(p/n 72E-122490-xx)
- FX7400 Series RFID Reader Quick Start Guide
(p/n 72-154246-xx)
- FX7400 Series RFID Reader Regulatory Information
(p/n 72-125267-xx)
- ShowCase II User Guide (p/n 72E-122491-xx)
•
Data Sheet: http://www.motorola.com/FX7400
•
ShowCase II and other related software:
http://www.motorolasolutions.com/supportcentral/fx7400
Service Information
If you have a problem using the equipment, contact your facility’s
Technical or Systems Support. If there is a problem with the
equipment, they will contact Motorola Solutions Support at:
http://supportcentral.motorola.com
For the latest version of this guide go to:
http://supportcentral.motorola.com
NOTE Connect the reader to a network that supports host
name registration and lookup to ensure the network can
access the reader using the host name. For instance,
some networks can register hostnames through DHCP.
When first connecting to the reader, it is recommended
to keep DHCP enabled in both the PC and in the
reader, although it is not guaranteed that host name will
work all the time.
As an alternative to using the host name on the reader
label, construct it using the reader MAC address on the
bottom of the reader. To do this, enter the prefix
FX7400, followed by the last six characters of the MAC
address. For example, for a MAC address of
0023683BA63A, use the prefix FX7400, followed by
3BA63A. Enter http://FX74003BA63A in the browser
address bar to access the reader.
/

